Part 5: Plans
II. How to Create Test Executions?

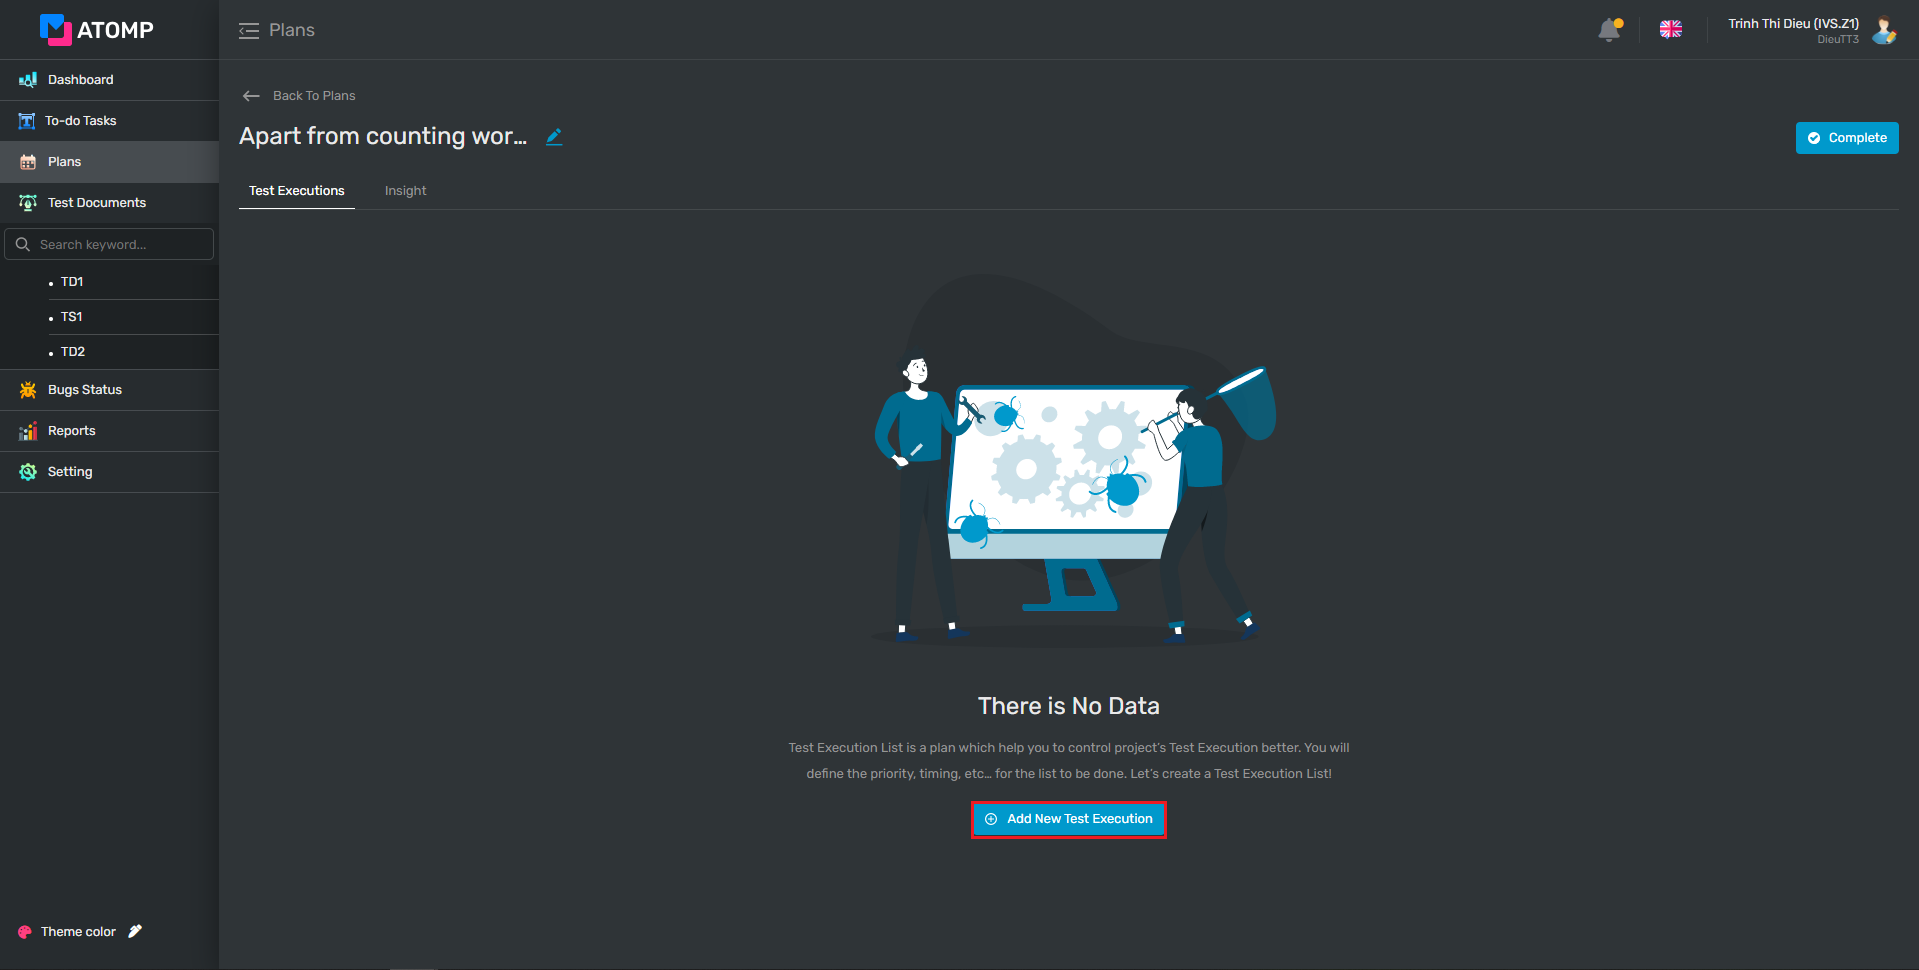
1. Create Test Executions
Test leader/PM can create test execution for each Plan by these 2 steps:
Step 1: Click on Add New Test Execution button.
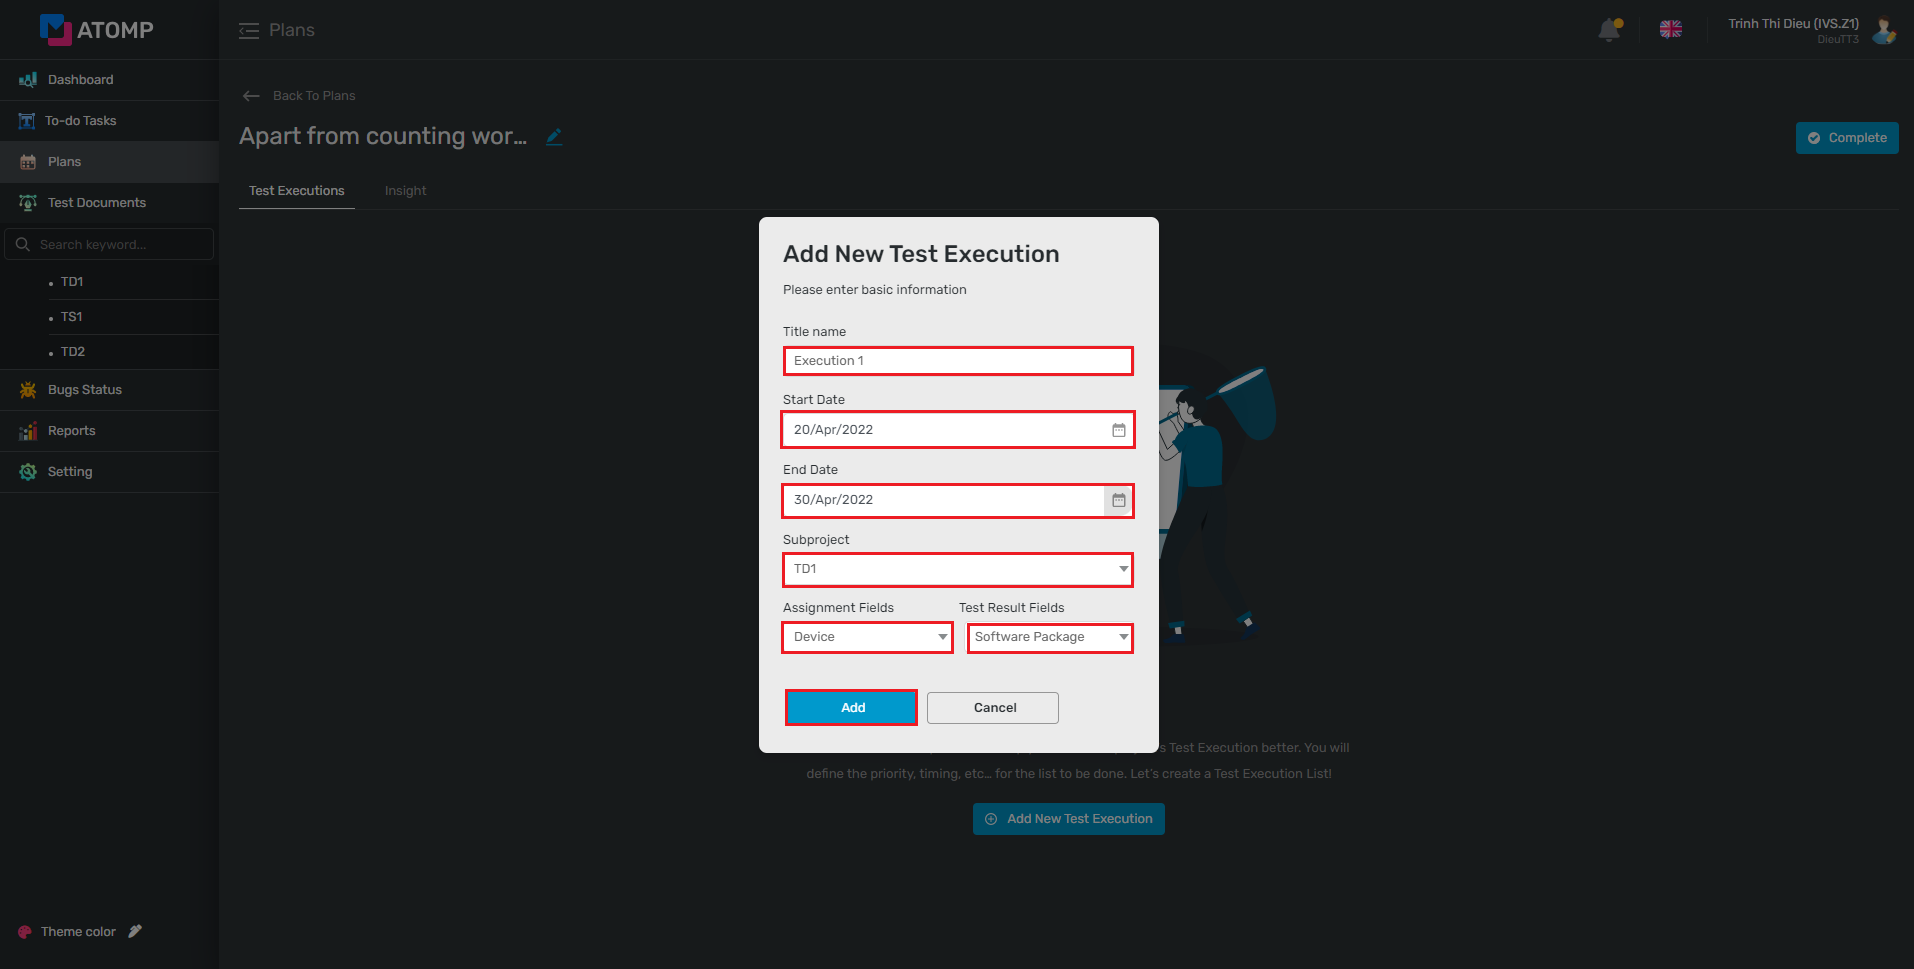
Step 2: Input test execution’s information (Title name, Start Date, End Date and Subproject).
+ Title name
+ Start Date, End Date: execution’s date (Start date of plan < or = Start date of test execution < or = End date of test execution)
+ Subproject: user chooses a subproject that PM created previously from the setting screen.
+ Assignment Field: User selects one or more assignment fields that PM created previously from the setting screen. The default value is Device.
+ Test Result Field: User selects one or more created test result fields from the setting screen. The default value is Software Package.
- The same for Create Plan, user can create one or more test executions.
- For plan with all test execution completed, you can change the status of the plan by clicking
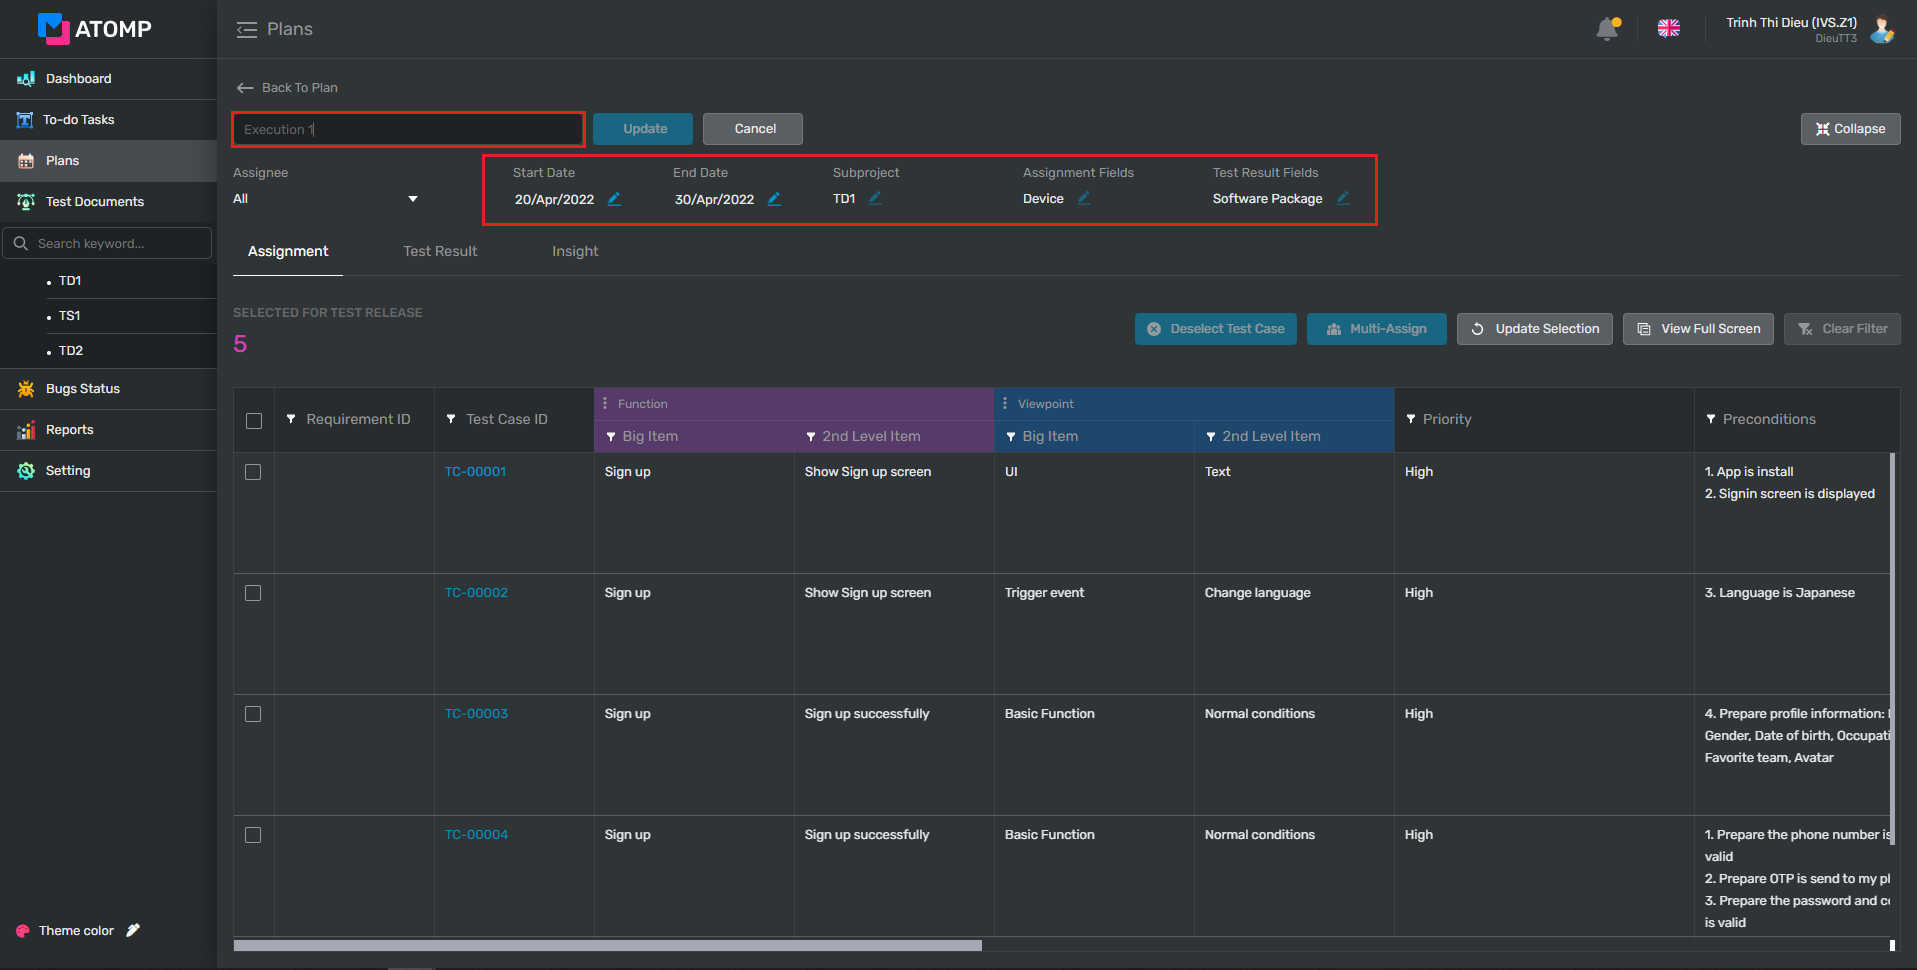
2. Edit Test Executions
When “Test Execution” is created, clicking on the icon  to edit the name, then click [Expand] button and clicking on the icon to edit Start Date and End Date.
(If there is no selected test case, you can edit the subproject).