C. Start using ATOMP with PC Web
Step 1: Add a new project (Tester 4.0)
1.1. Log in to: https://tester40.atomp.io/.
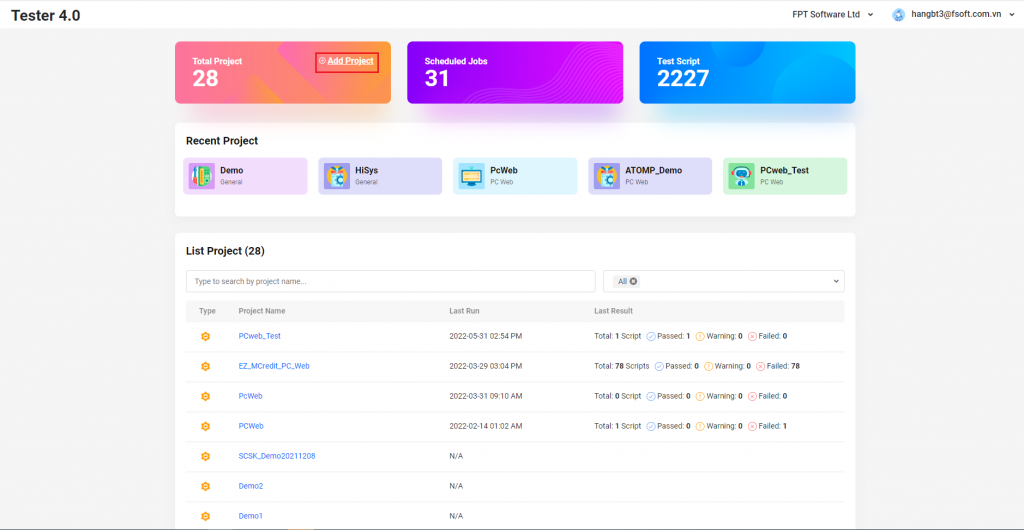
1.2. When the Dashboard is shown, click on “Add Project”.
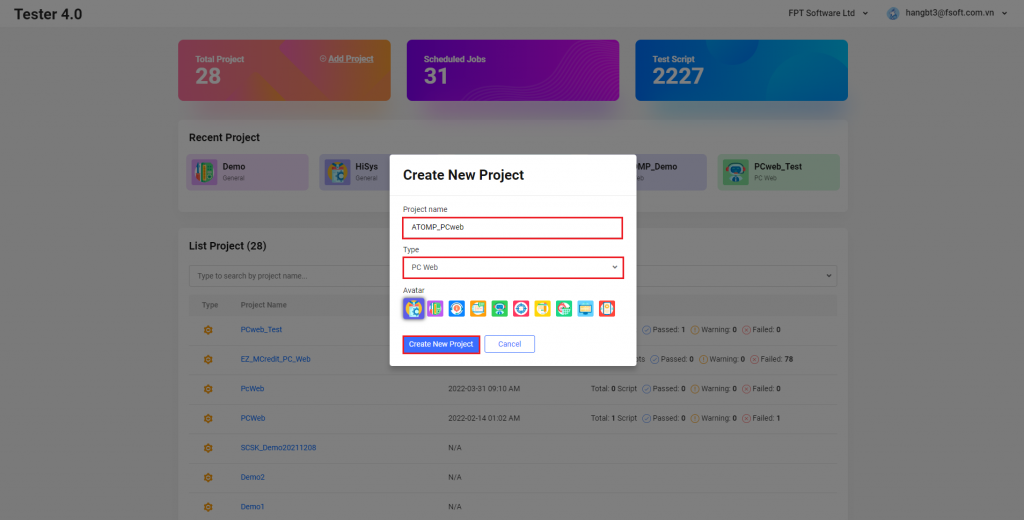
1.3. Pick a name and set a type for the new project (Type: PC Web).
1.4. Click on the [Create New Project] button to finish creating a new project.
Step 2: Install the Studio Web extension on your browser
- The ATOMP Studio Web extension has not been installed on your browser
2.1. Click on the [Manage Test Script] button from the “Project Detail” screen
2.2. From the “Manage Test Script” Screen, click on the [Create with ATOMP Studio] button
2.3. Inside the popup “ATOMP STUDIO WEB”, click on the [Download Studio Extension] button to download the extension file namely “studio-web-extension”
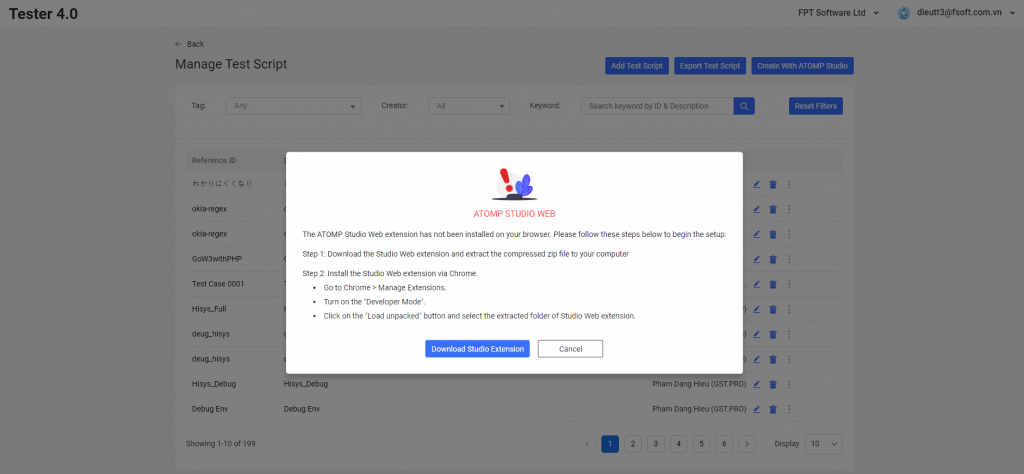
2.4. Download the Studio Web extension and extract the compressed zip file to your computer
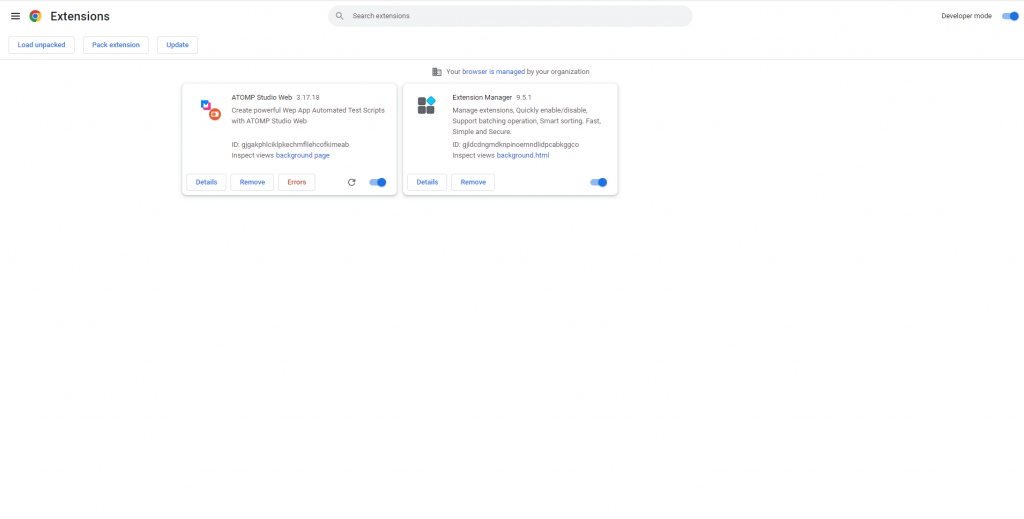
2.5. Install the Studio Web extension via Chrome.
- Go to Chrome > Manage Extensions.
- Turn on the “Developer Mode”.
- Click on the “Load unpacked” button and select the extracted folder of Studio Web extension.

- Update Studio Web extension to the latest version
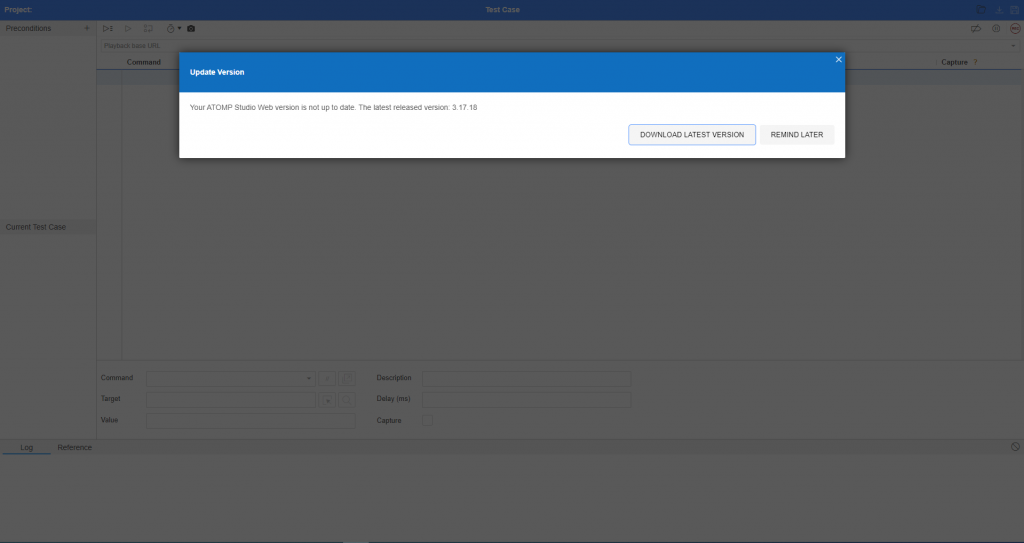
2.1. After clicking on the [Create With ATOMP Studio] button from the Manage Test Script screen, the popup “Update Version” will be displayed.
2.2. User can download the latest version by clicking on the [DOWNLOAD LATEST VERSION] button.
Step 3: Create a test script with ATOMP Studio Web.
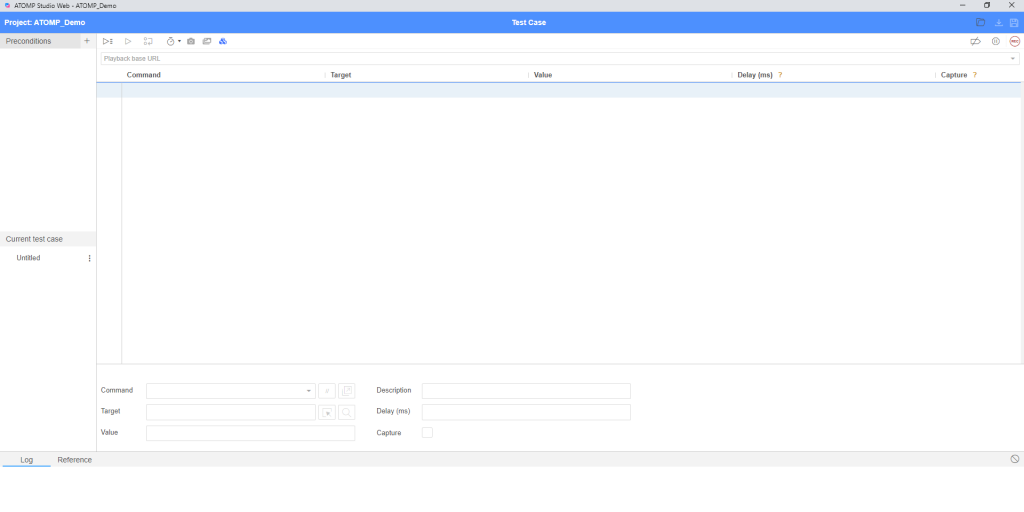
After opening the Studio Web extension, the Studio Web primary screen will be displayed. This screen shows all the commands/steps that will be executed inside your desired web app. Please refer to “Part 2: Create a Test script with Studio” for more details on how to create a test script.
Step 4: Run a test script with Tester 4.0.
After being created, a test script will be saved and displayed inside the “Manage test script” screen in Tester 4.0 where users can execute this script on. For details on how to execute a test script on Tester 4.0, please refer to “Part 3: Execute a Script with Tester 4.0”.
