Part 1: Introduction
ATOMP Tester 4.0: allows users to create test scripts and then execute the test automatically in multiple devices.
ATOMP Studio: Helps to generate test scripts automatically based on users’ interactions with the devices.
A. Start using ATOMP with Mobile app
I. Basic Overview
1. Add a new project (Tester 4.0)
1. 1. Login to: https://tester40.atomp.io/
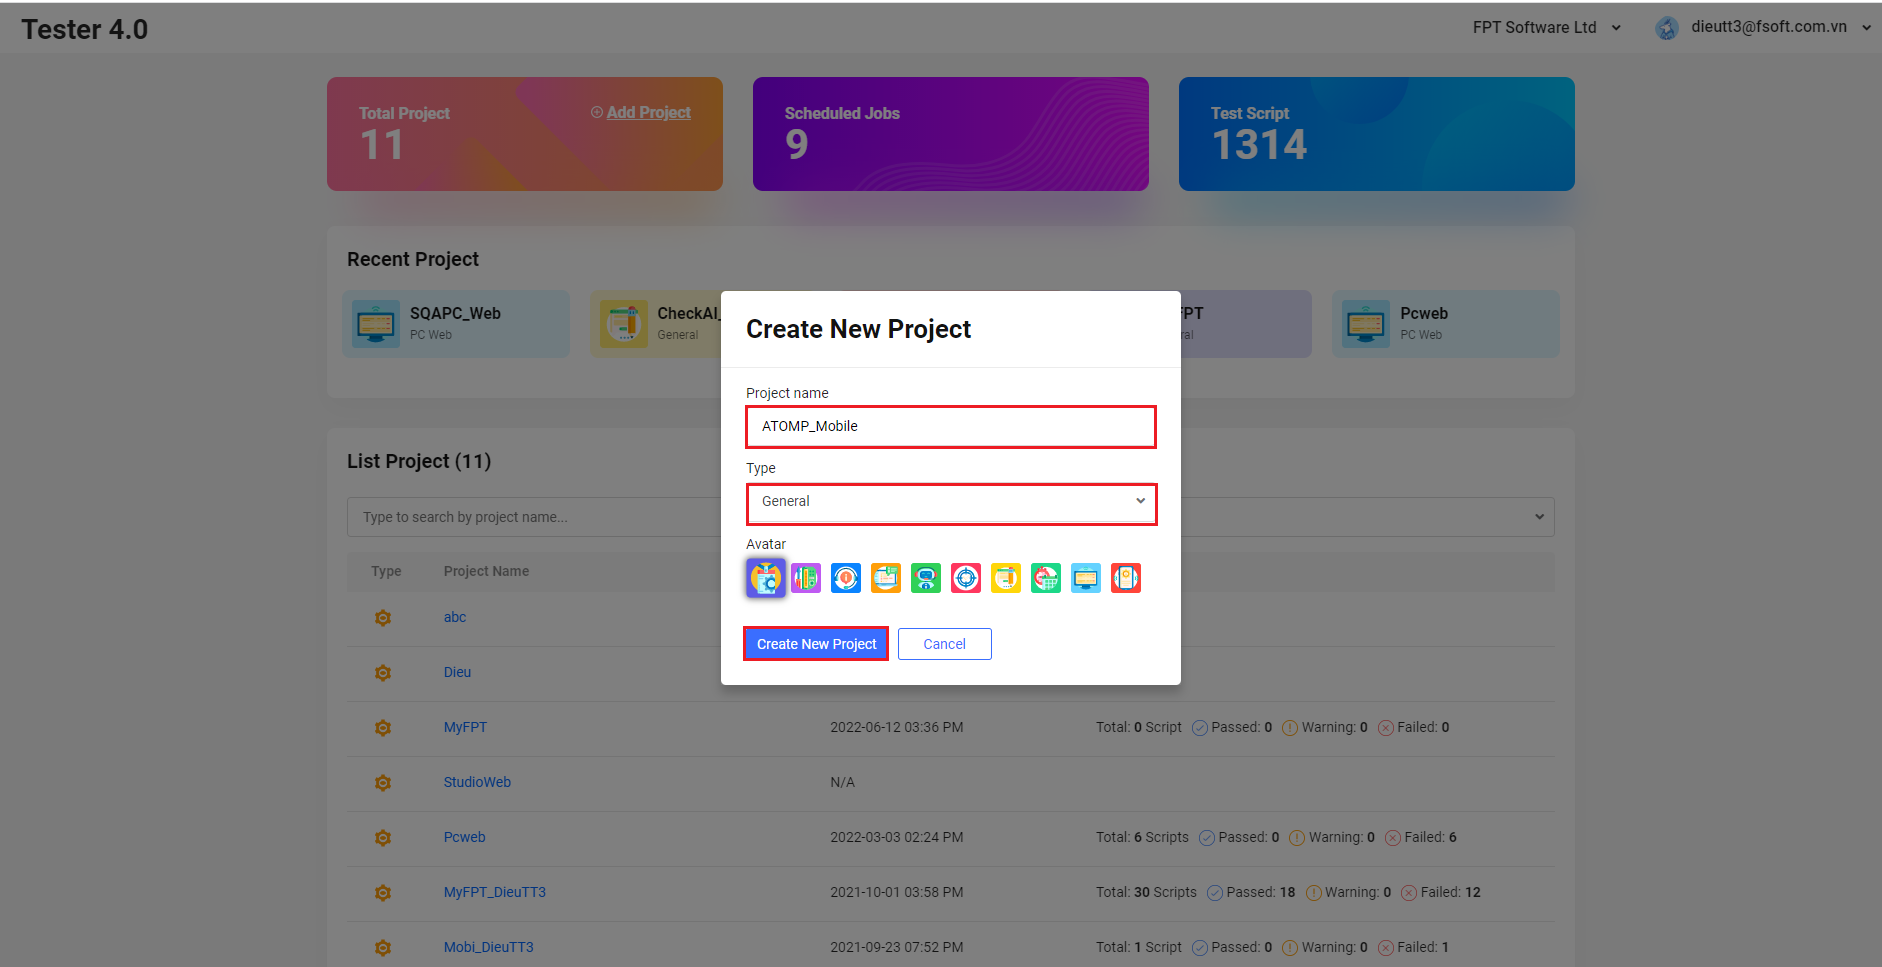
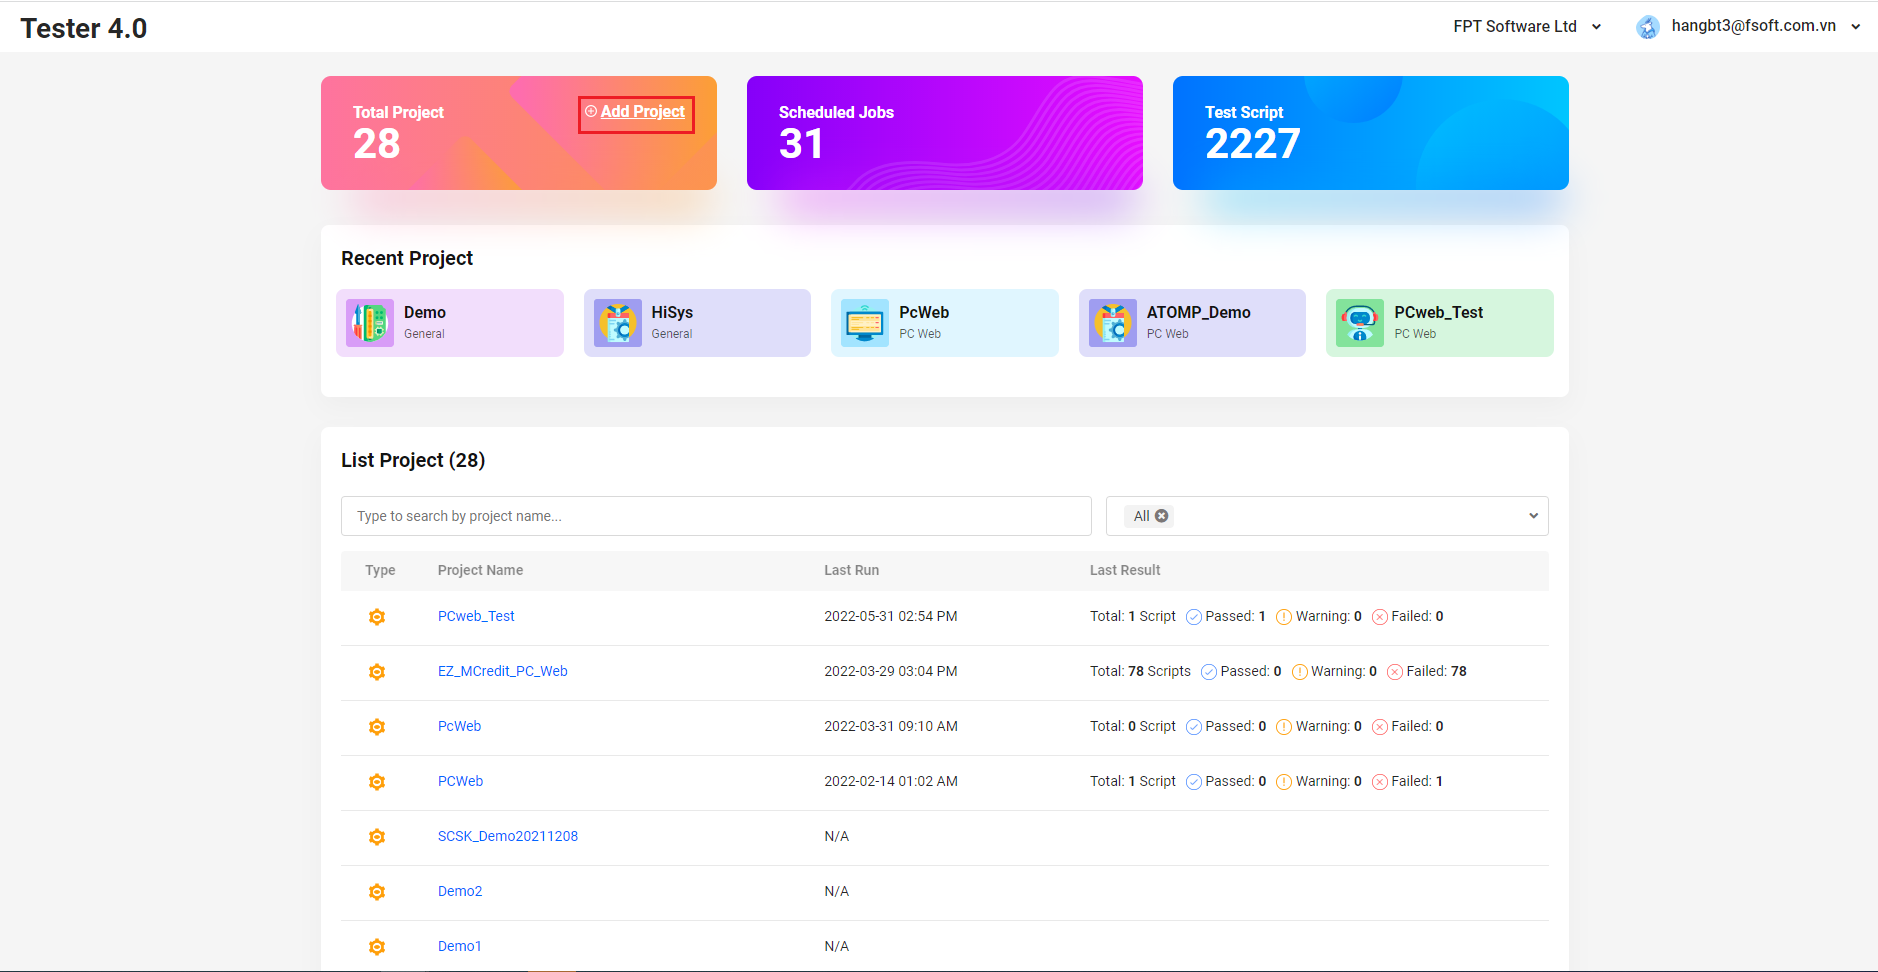
1.2. When the Dashboard is shown, click on “Add Project”.

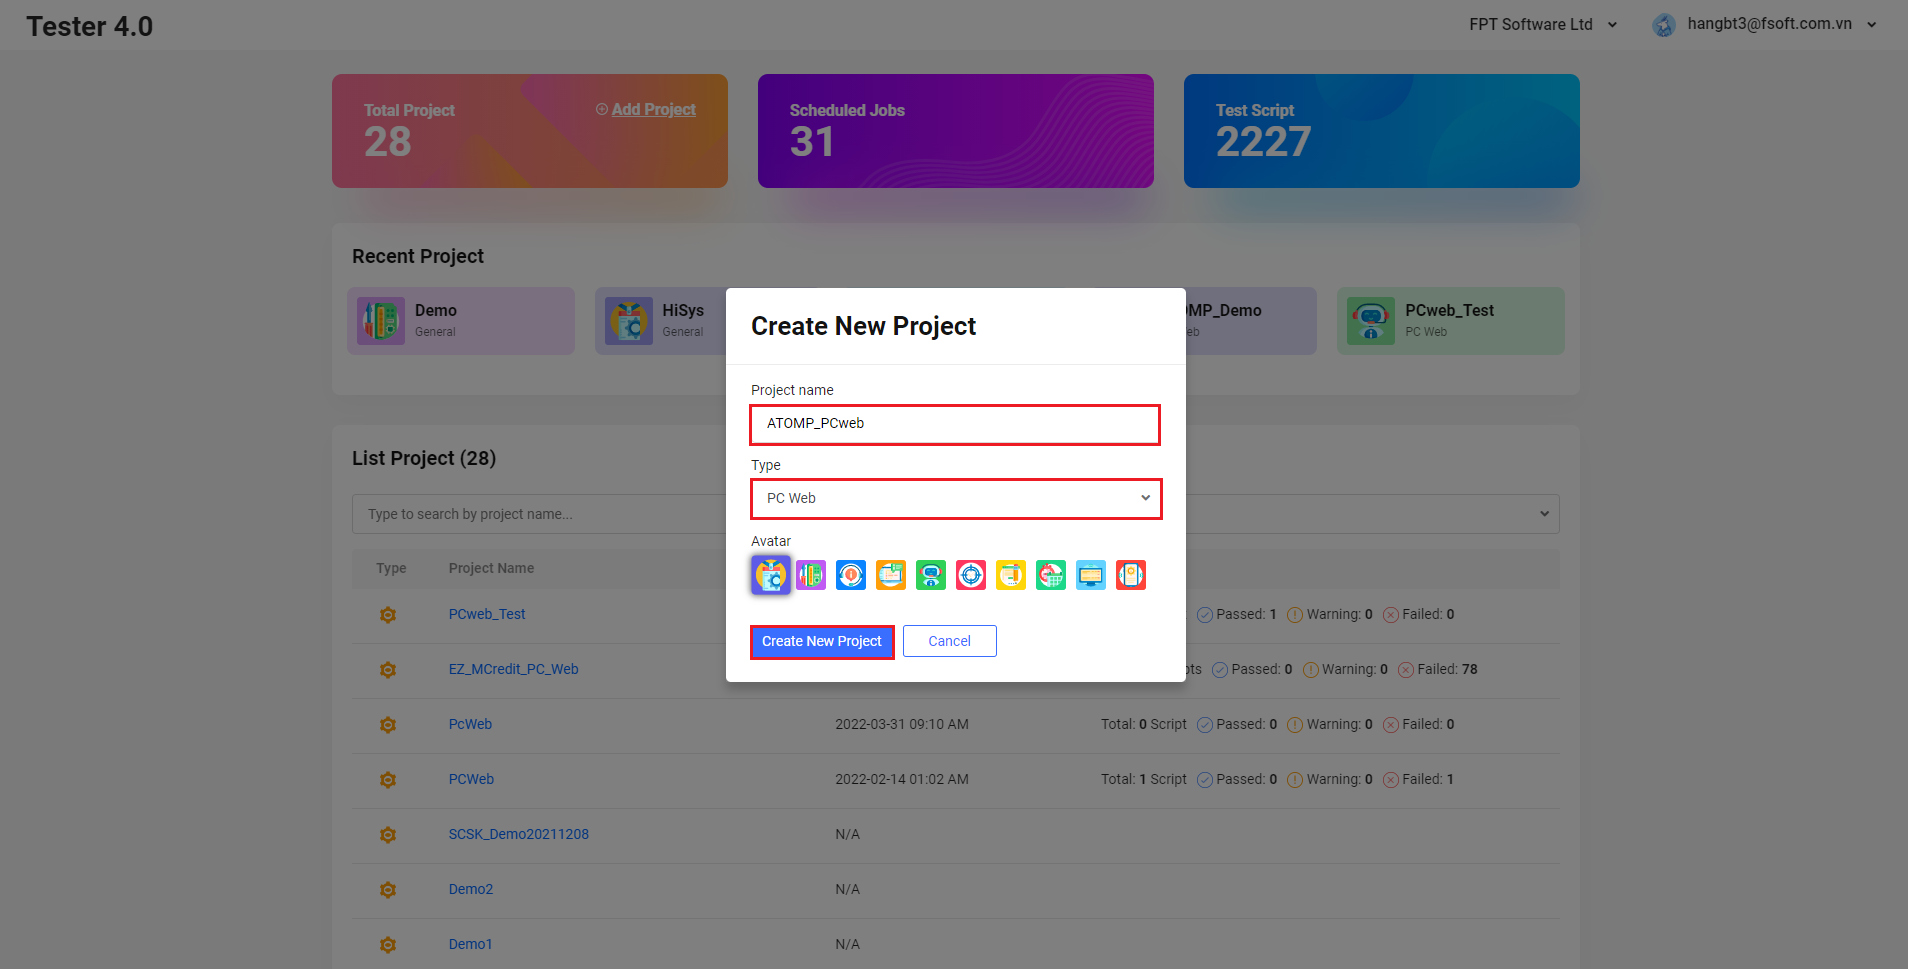
1.3. Pick a name and set a type for the new project. Set type General with Mobile, type PC WEB with PC
1.4. Click on the [Create New Project] button to finish creating a new project.
2. Project Settings
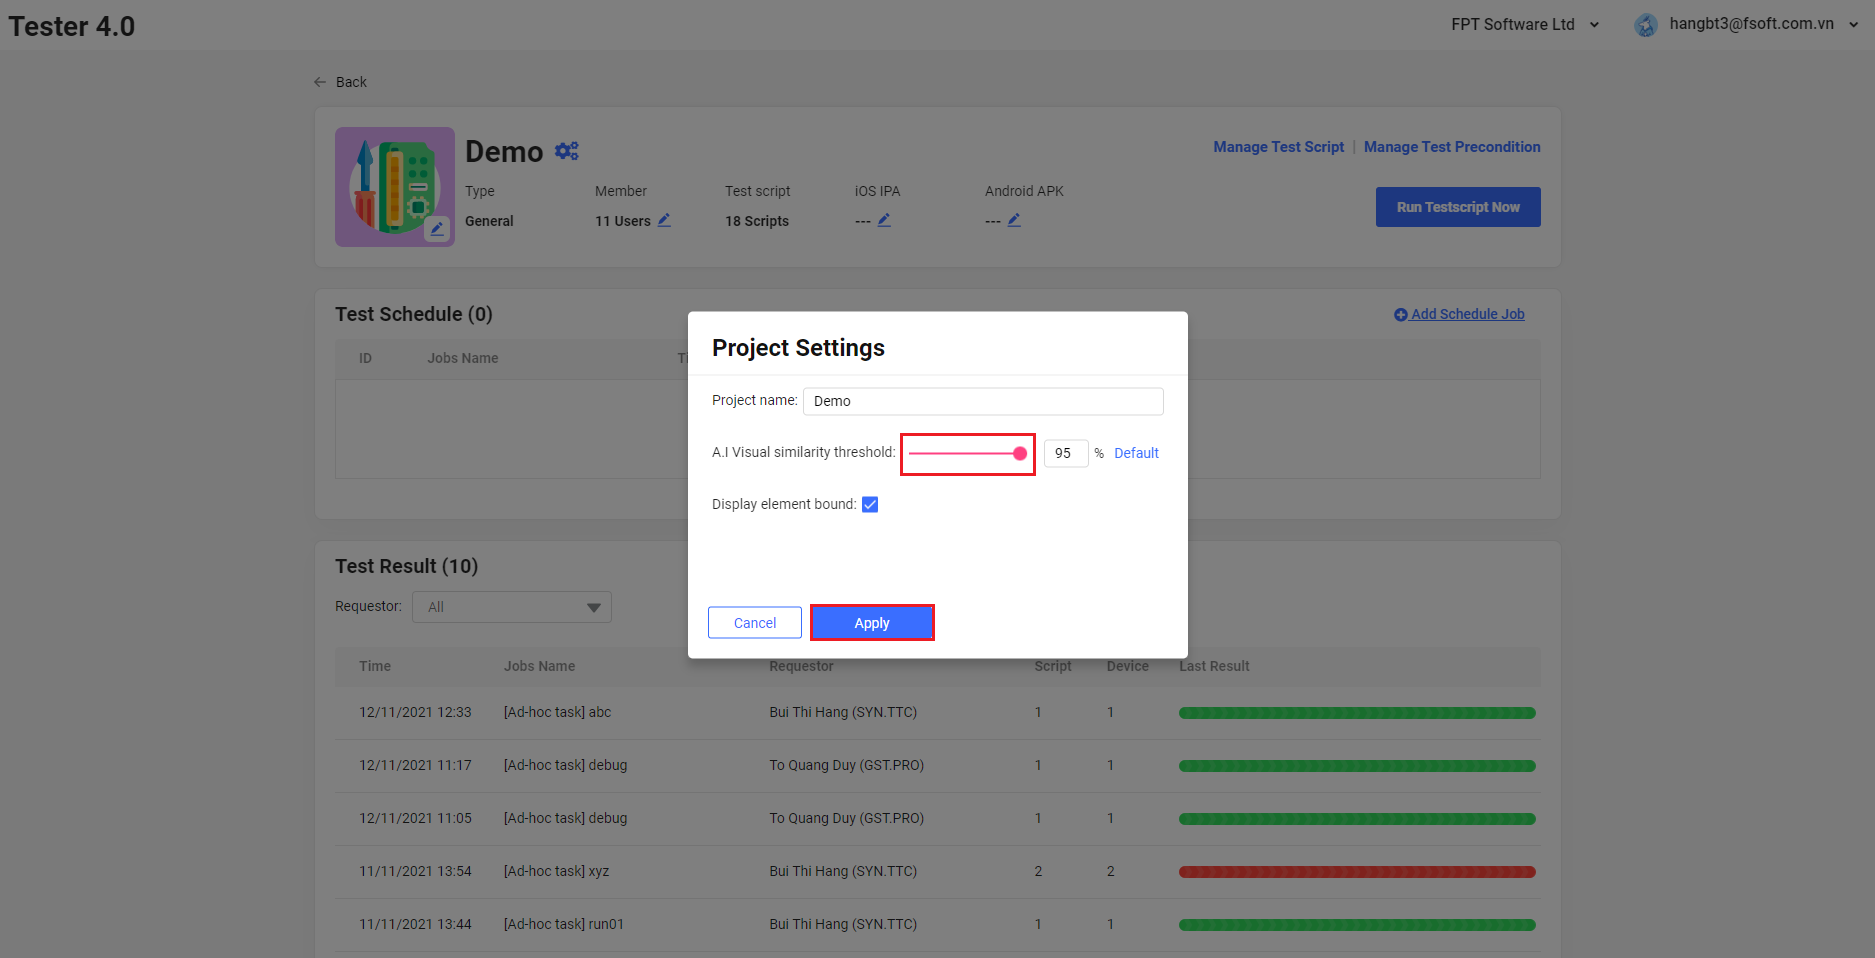
2.1. A.I Visual similarity threshold
AI when comparing 2 screen shots will give the same ratio of 2 images, the value runs from 0 to 100%. User can define a Threshold level so that if it is below this level, it is considered a problem.
At the moment, the Threshold default setting is 95%.
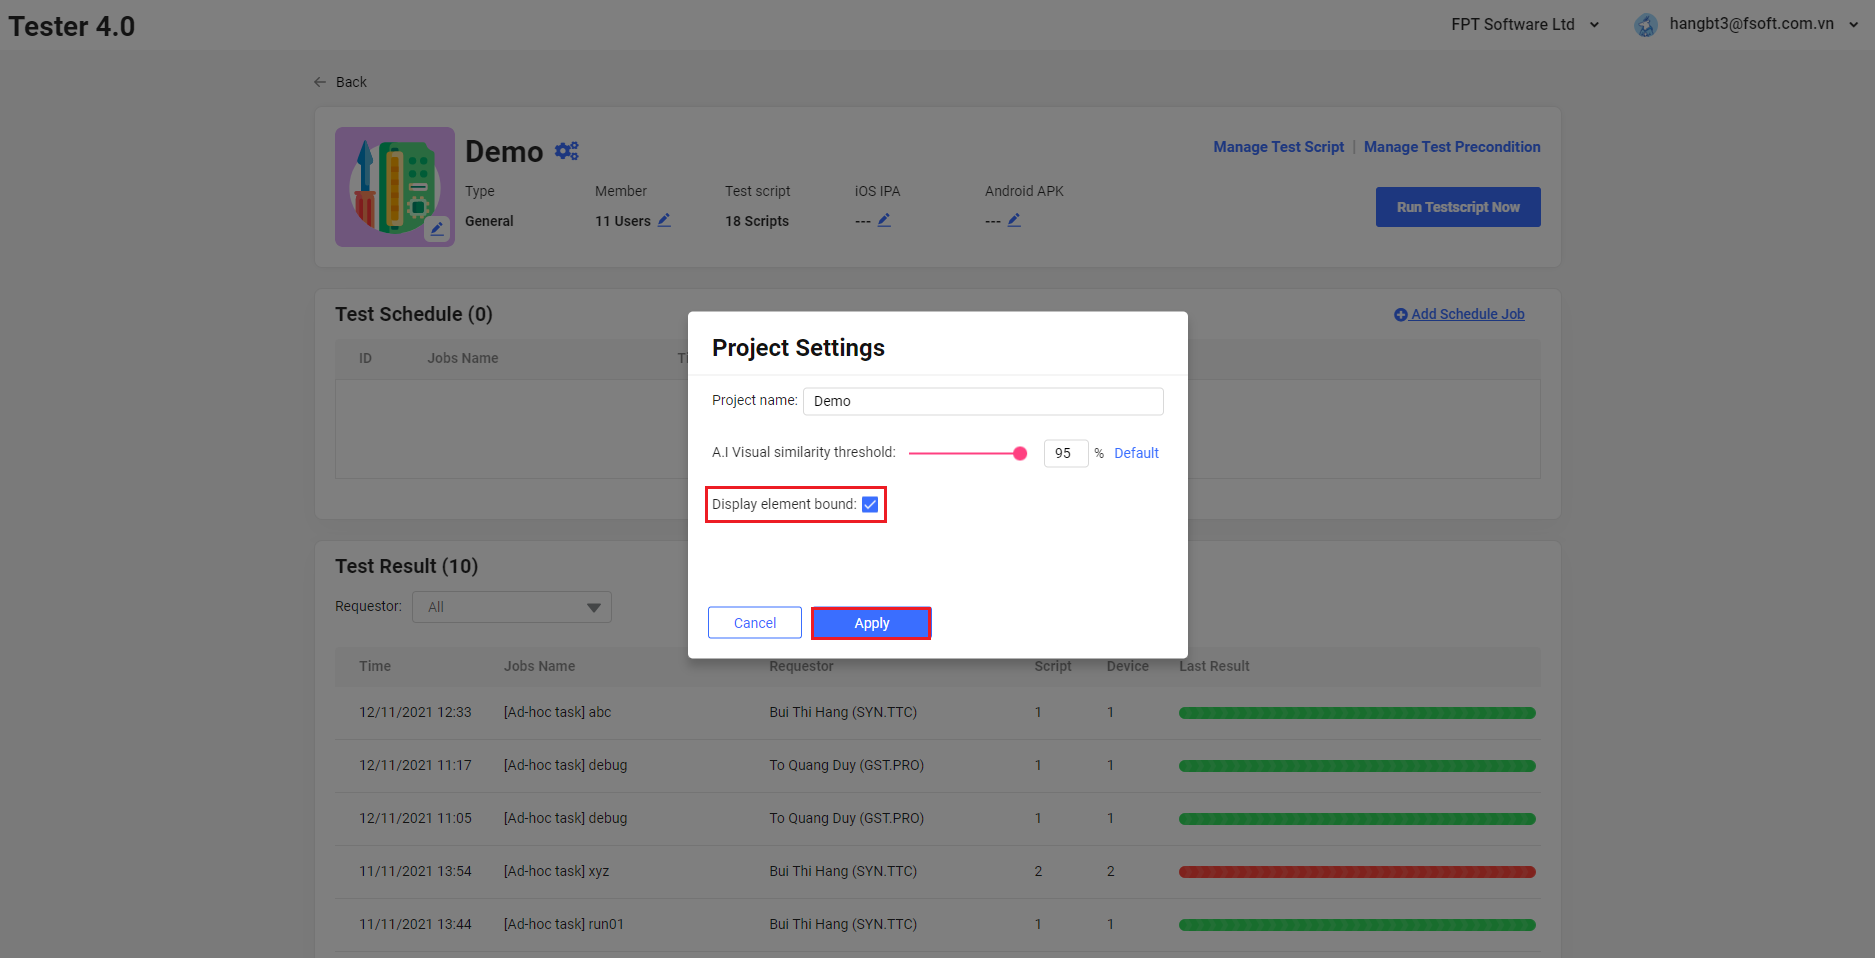
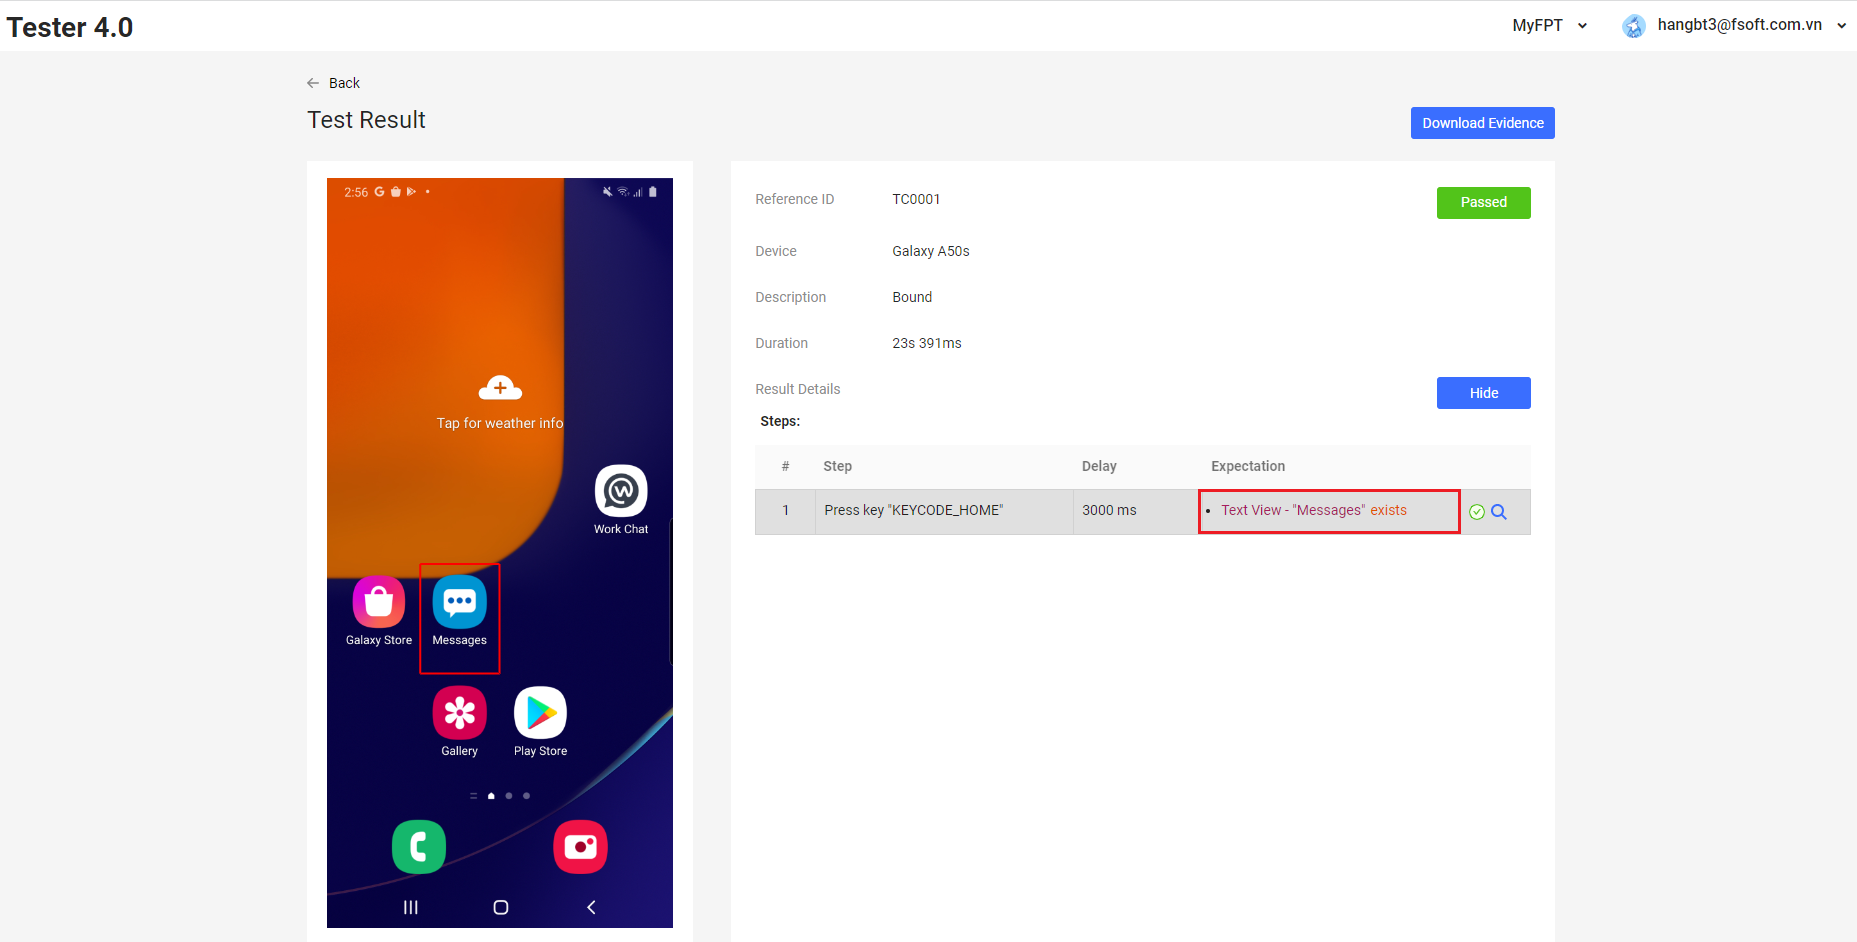
2.2. Display element bound
When ticking Display element bound, user can turn on the element bound of expectation function on the evidence.
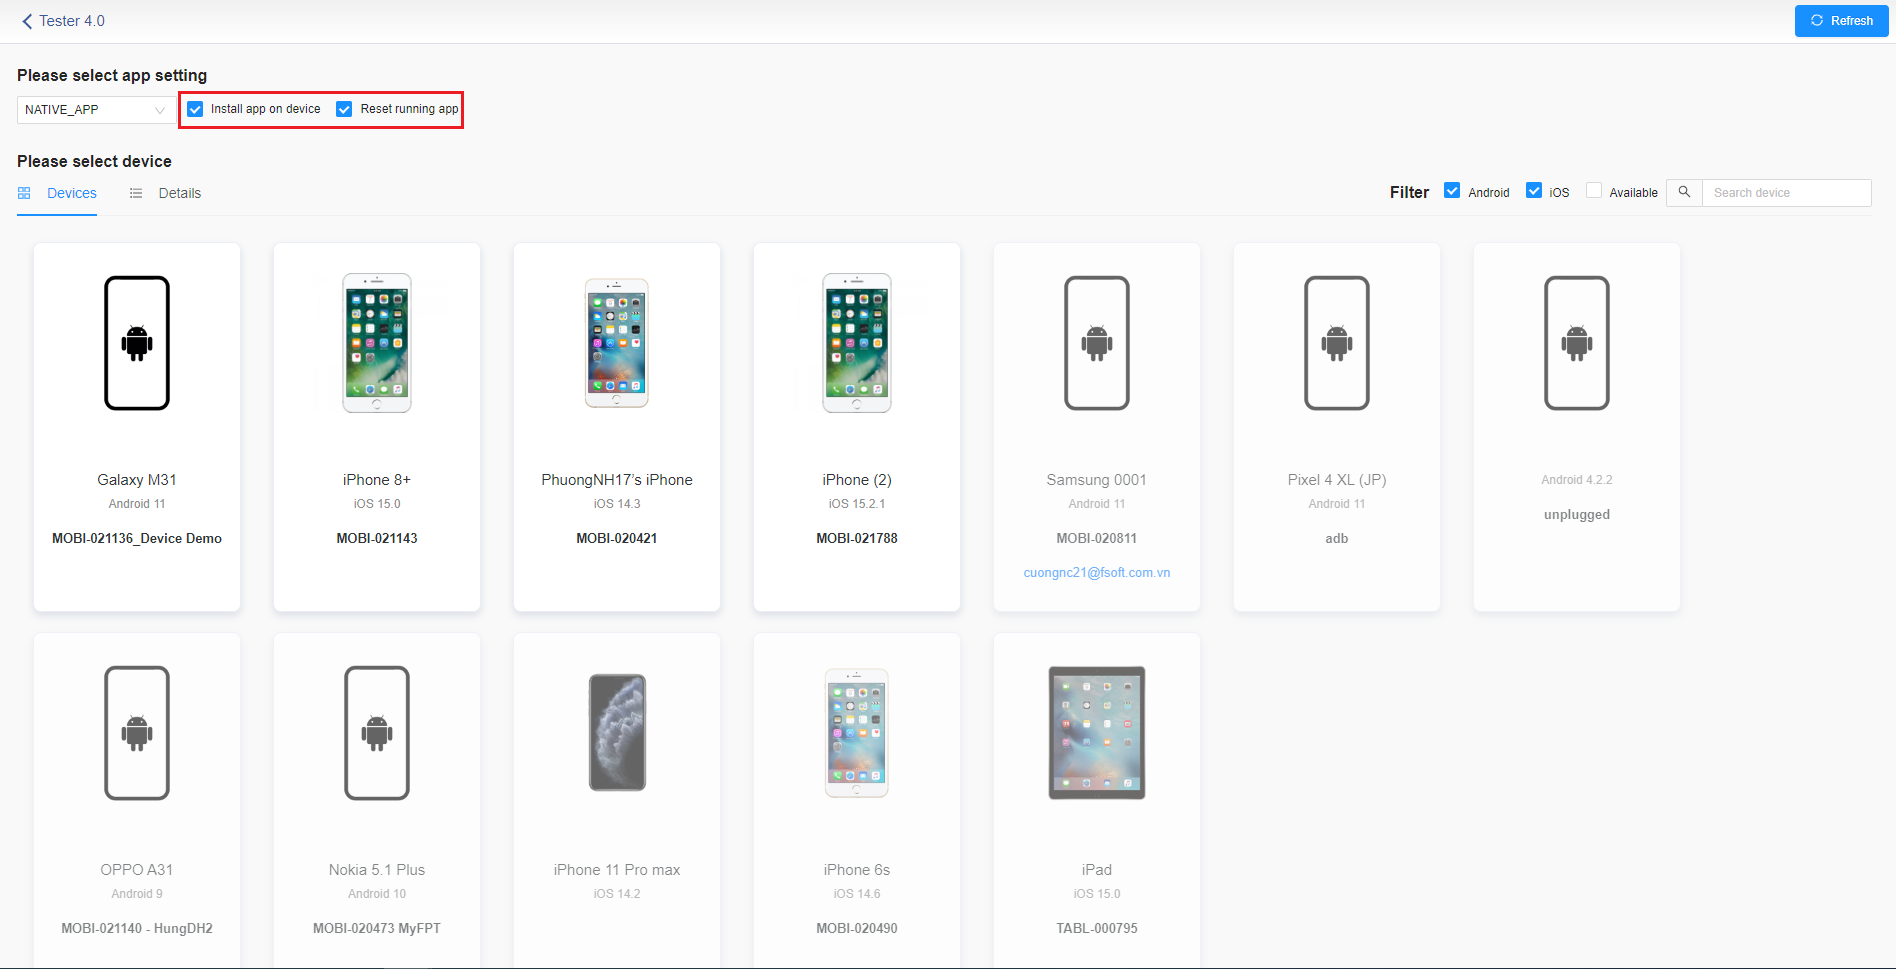
On select device screen, user can choose one or both:
- Install app on device: On Tester 4.0 screen, when user installs APK and IPA then clicks on this item, the application will install automatically on the device.
- Reset running app: When the user selects this item, the app tested will be reset to the Home screen.
B. Start using ATOMP with Mobile web
1. WEB_VIEW
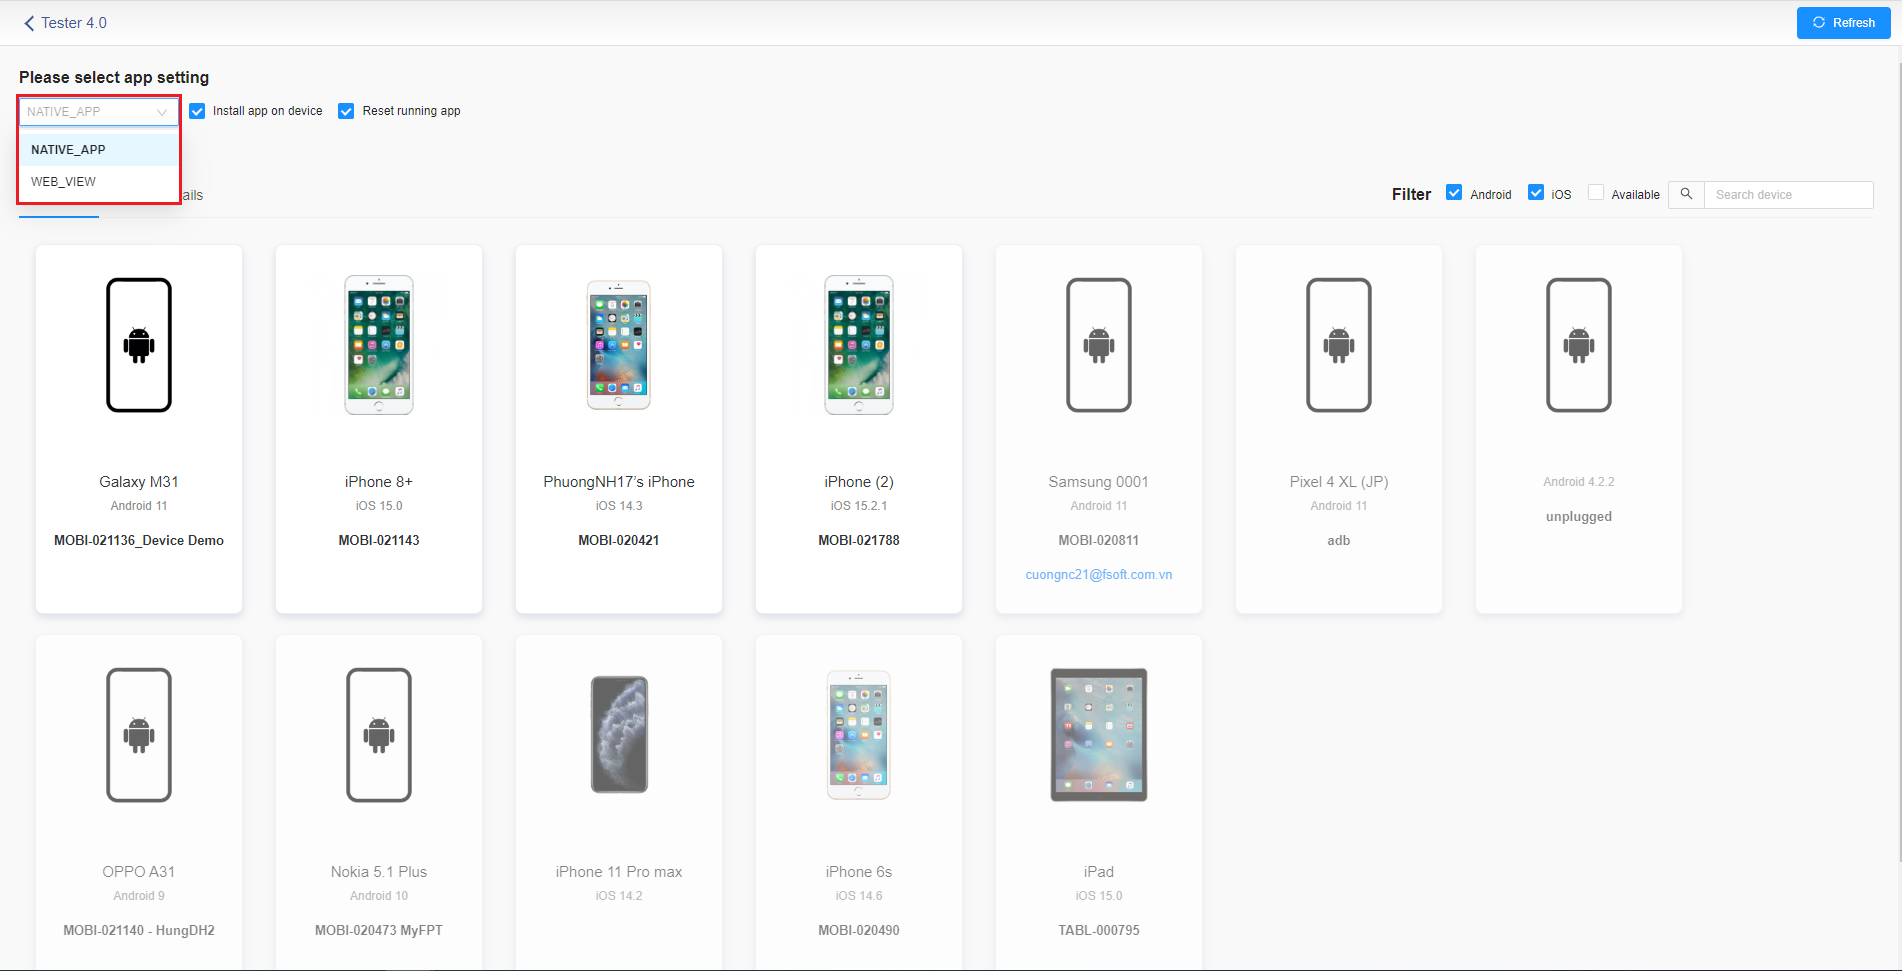
On select device screen, user can choose NATIVE_APP or WEB_VIEW to create test script.
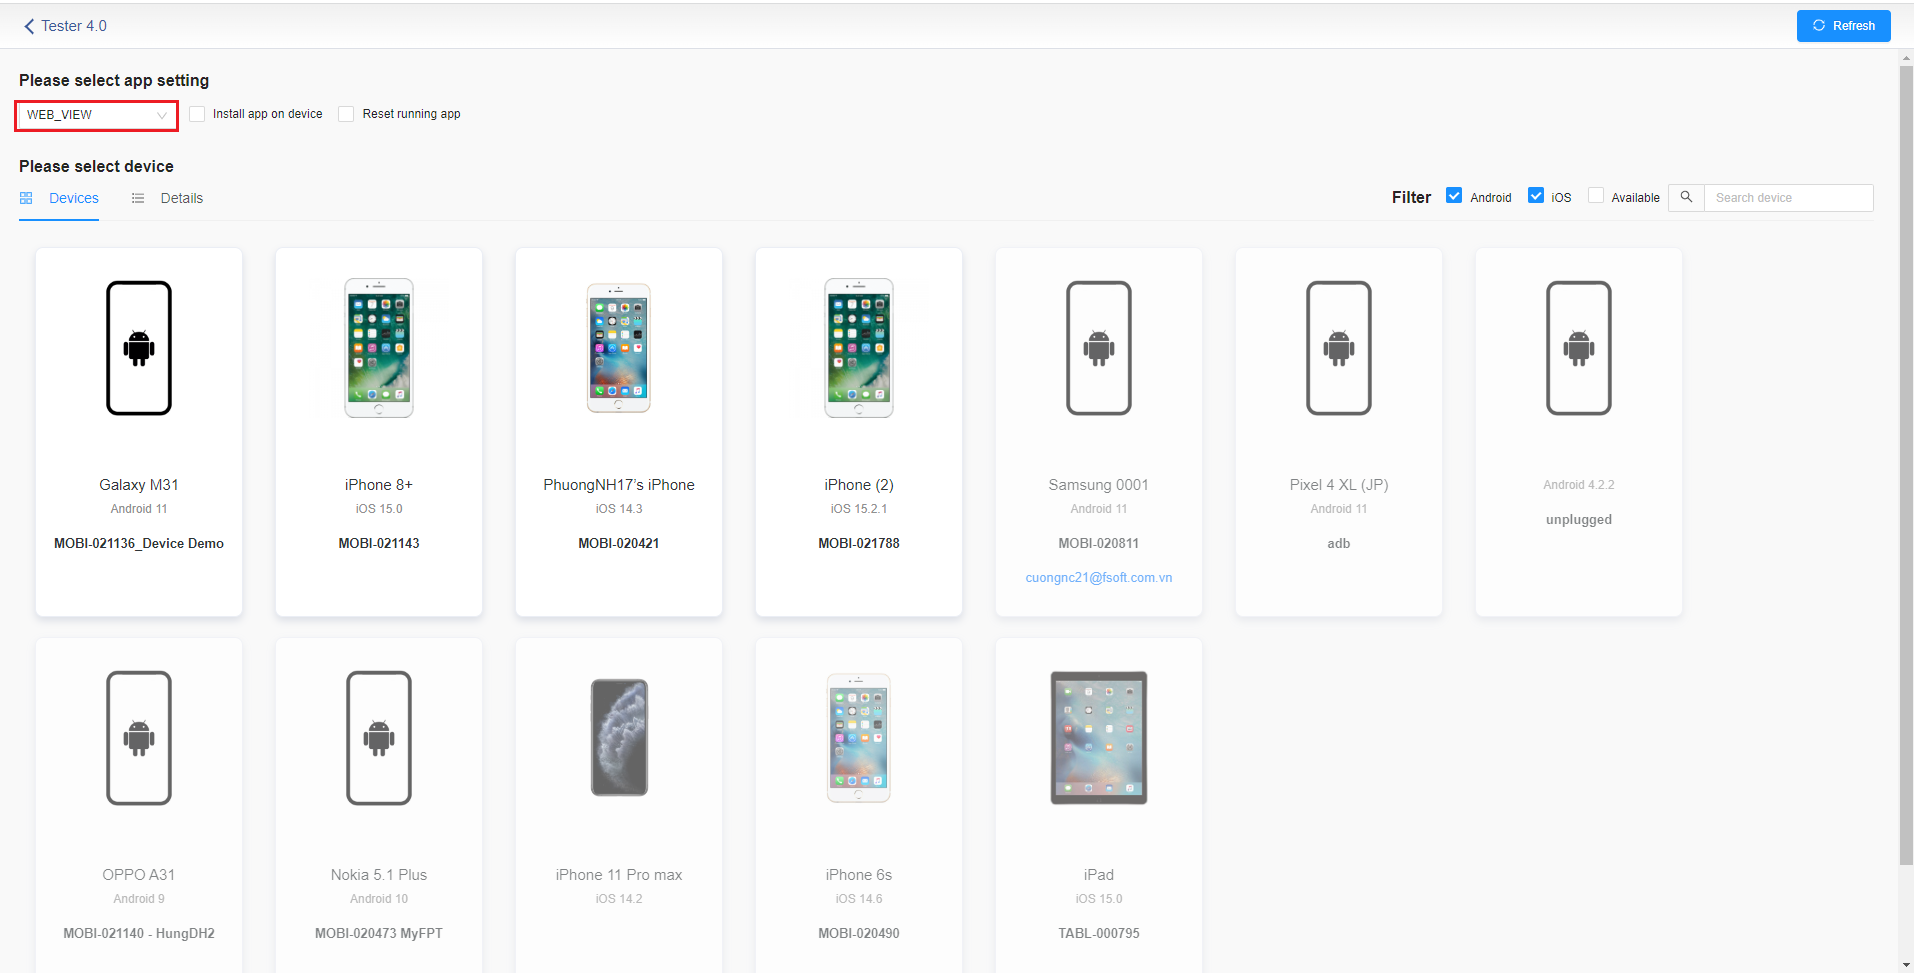
- WEB_VIEW for iOS: In the “Please select app setting” textbox select WEB_VIEW
After selecting the test type as WEB_VIEW then will select the corresponding device -> Studio screen shown with safari opened on streaming screen.
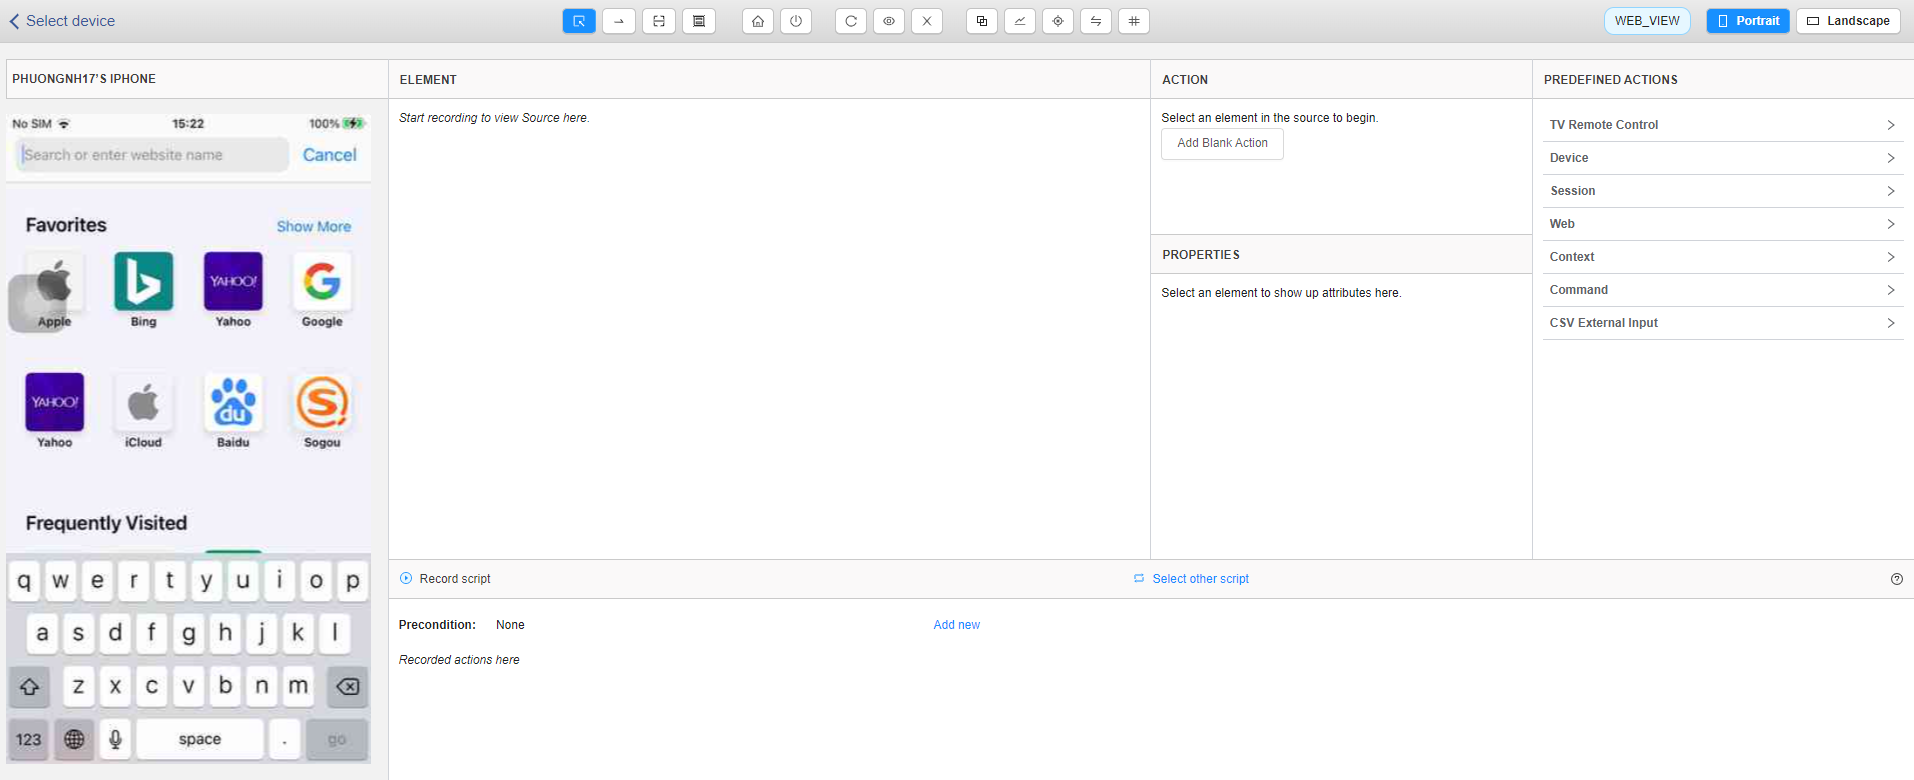
On Studio screen, user can open URL to test by click on Web -> Navigation -> Go to URL on the right side of the menu -> Popup Get URL is displayed -> User inputs URL on textbox then click on Execute Action button (To save the open URL step, the user must record before).
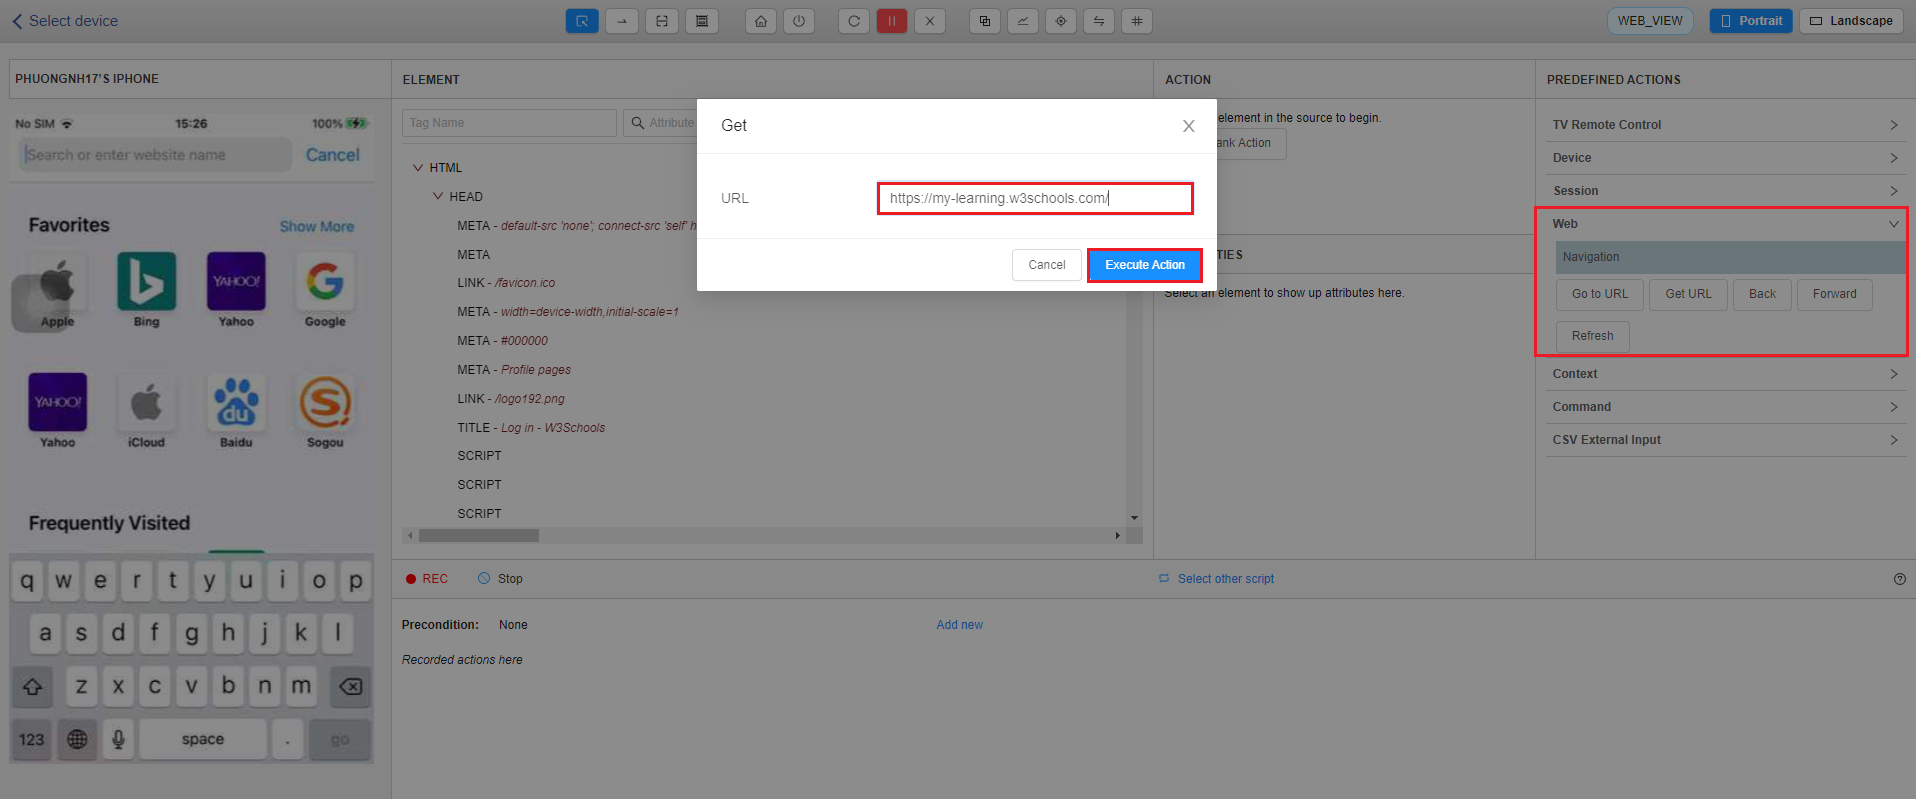
If the device does not switch to WEB_VIEW, the user goes to Device Farm and selects the correct device needed to switch to WEB_VIEW and enable item “Web Inspector”.
Launch App with iOS: On the script creation screen, click on the “Device” item from the right menu => Select the “App” item => Select the “Launch app” button => Popup “Launch app” will be displayed => Enter an id for the “Bundle Id” field and press the [Execute Action] button
- WEB_VIEW for Android: In the “Please select app setting” textbox, please select NATIVE_APP

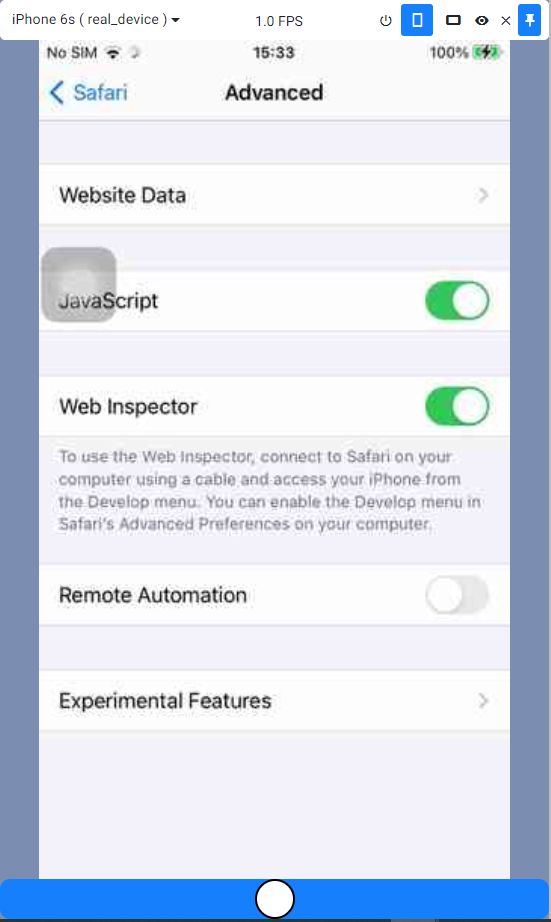
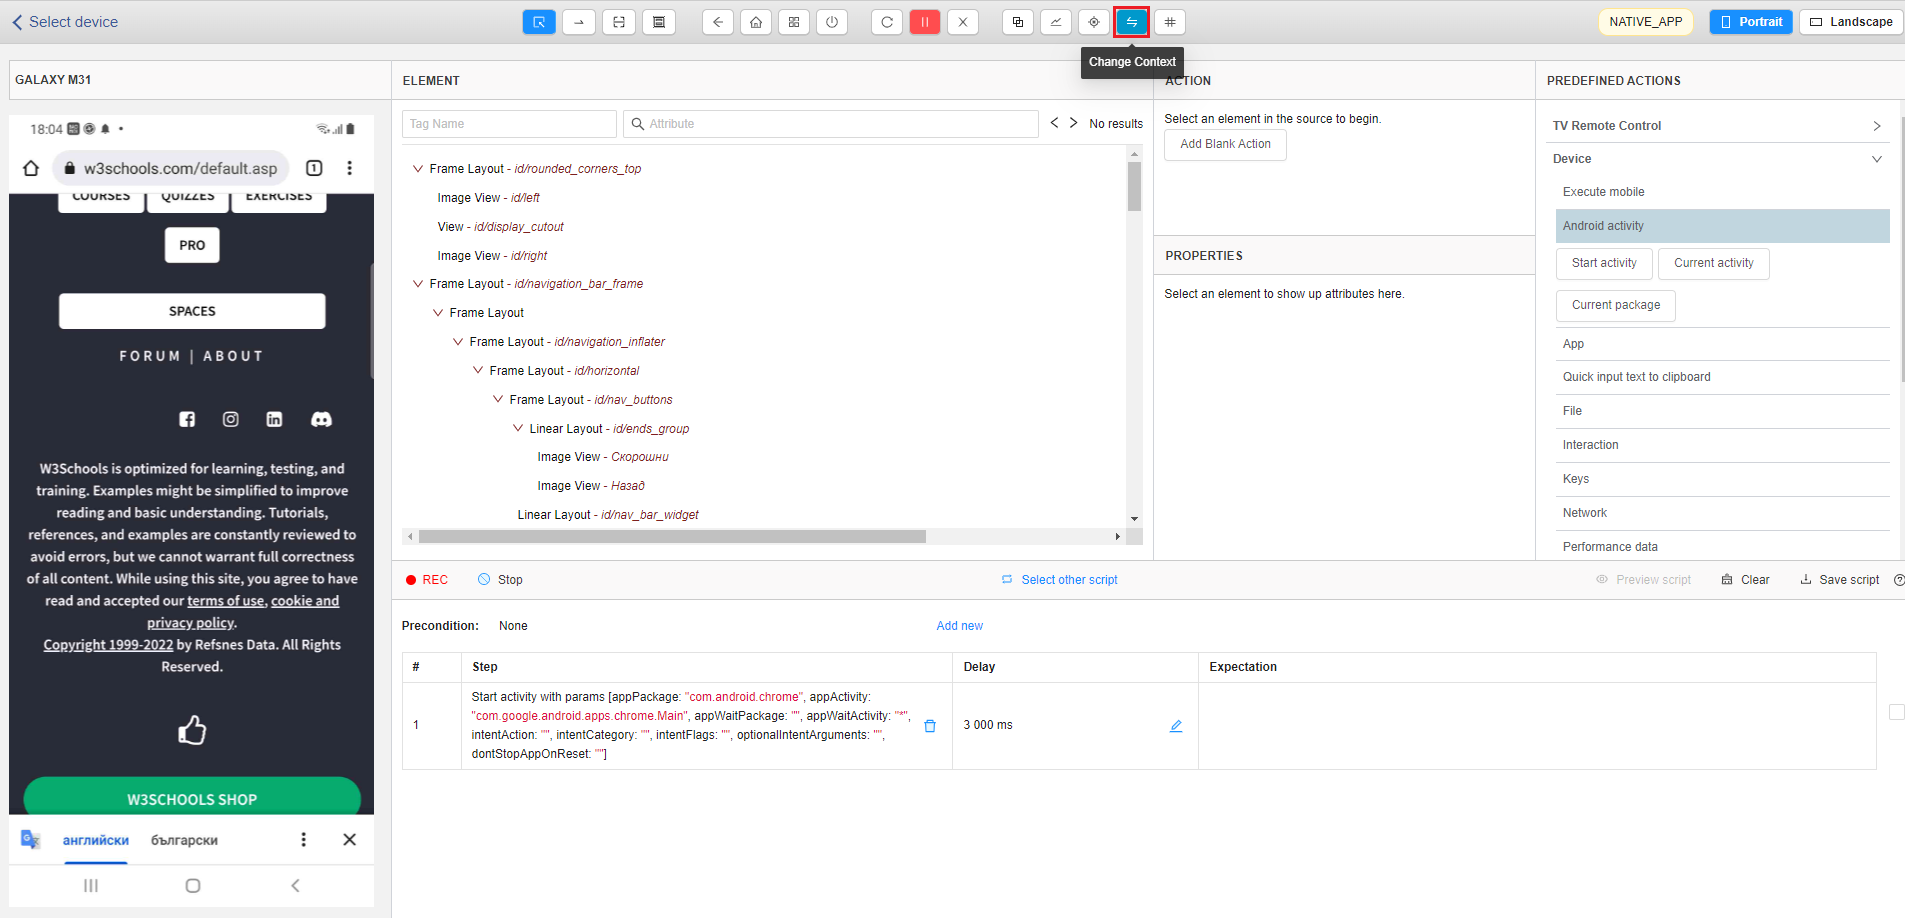
After selecting the test type as NATIVE_APP, user selects the corresponding device -> Studio screen is displayed with NATIVE_APP. To switch to WEB_VIEW,firstly the user will start Chrome by clicking on Device -> Android Activity -> Start Activity -> Popup Start Activity is displayed -> User input App package and App activity then click on Execute Action button (To save the opening URL Chrome step, the user must record before).
– App package: com.android.chrome
– App activity : com.google.android.apps.chrome.Main
=> The above is also how to launch app of the android device.
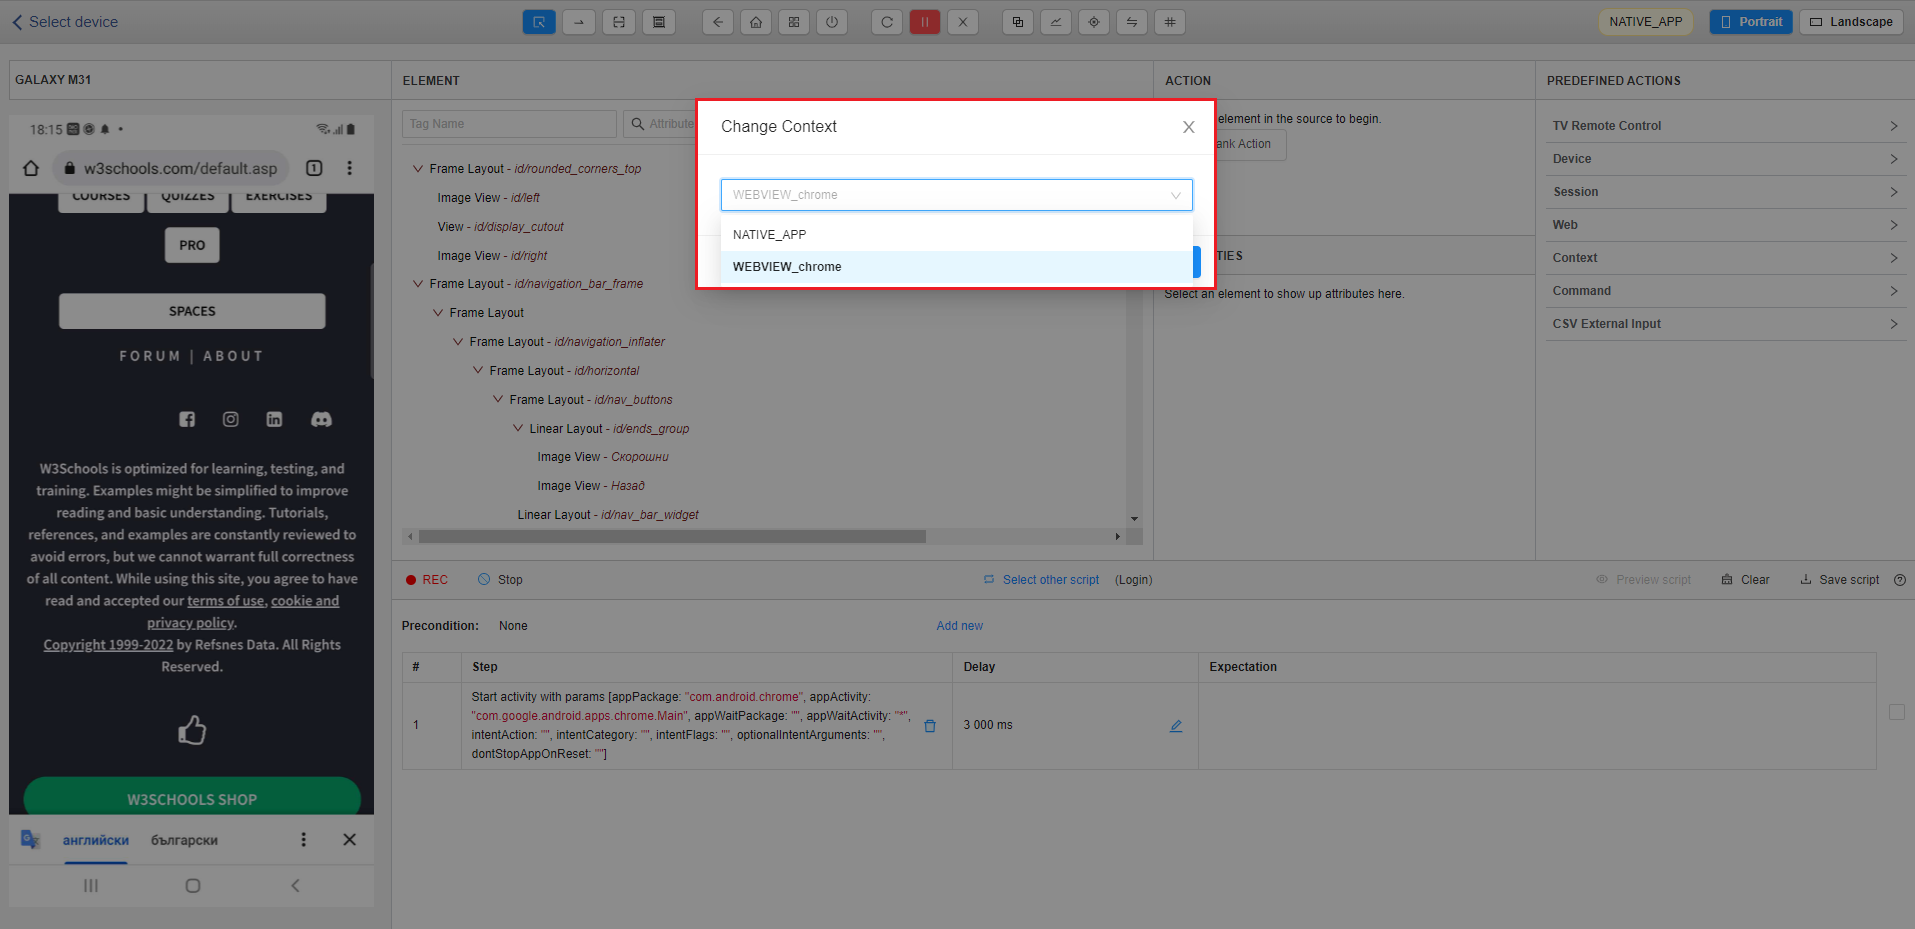
After opening Chrome, the user switches to WEB_VIEW by click item “Change Context” on Studio screen -> Popup Change Context is displayed -> User clicks on WEB_VIEW item to change.
3. Create test script with WEB_VIEW (iOS)
Step 1: Select device as WEB_VIEW
Step 2: Open URL which user need to test.

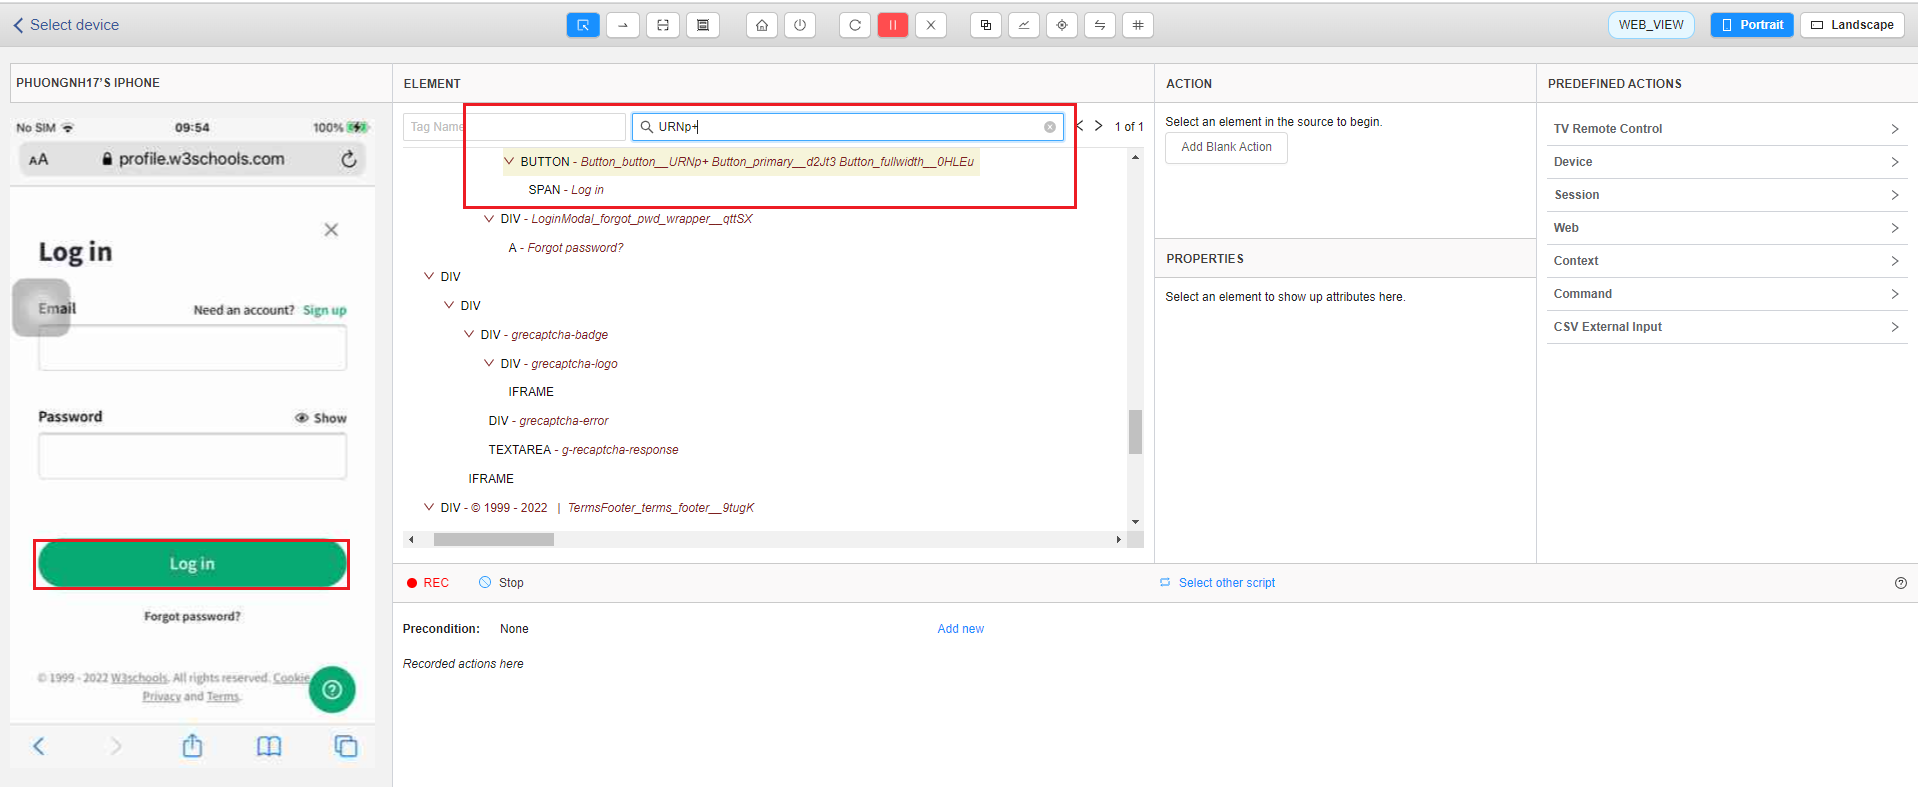
Step 3: When creating test scripts with WEB_VIEW, the streaming screen will not highlight the element like when creating test script in NATIVE_APP, but the user has to find the element in the source code or inspect the website and then search for the source in Studio.
Step 3.1: Input text into textbox Attribute to find element.
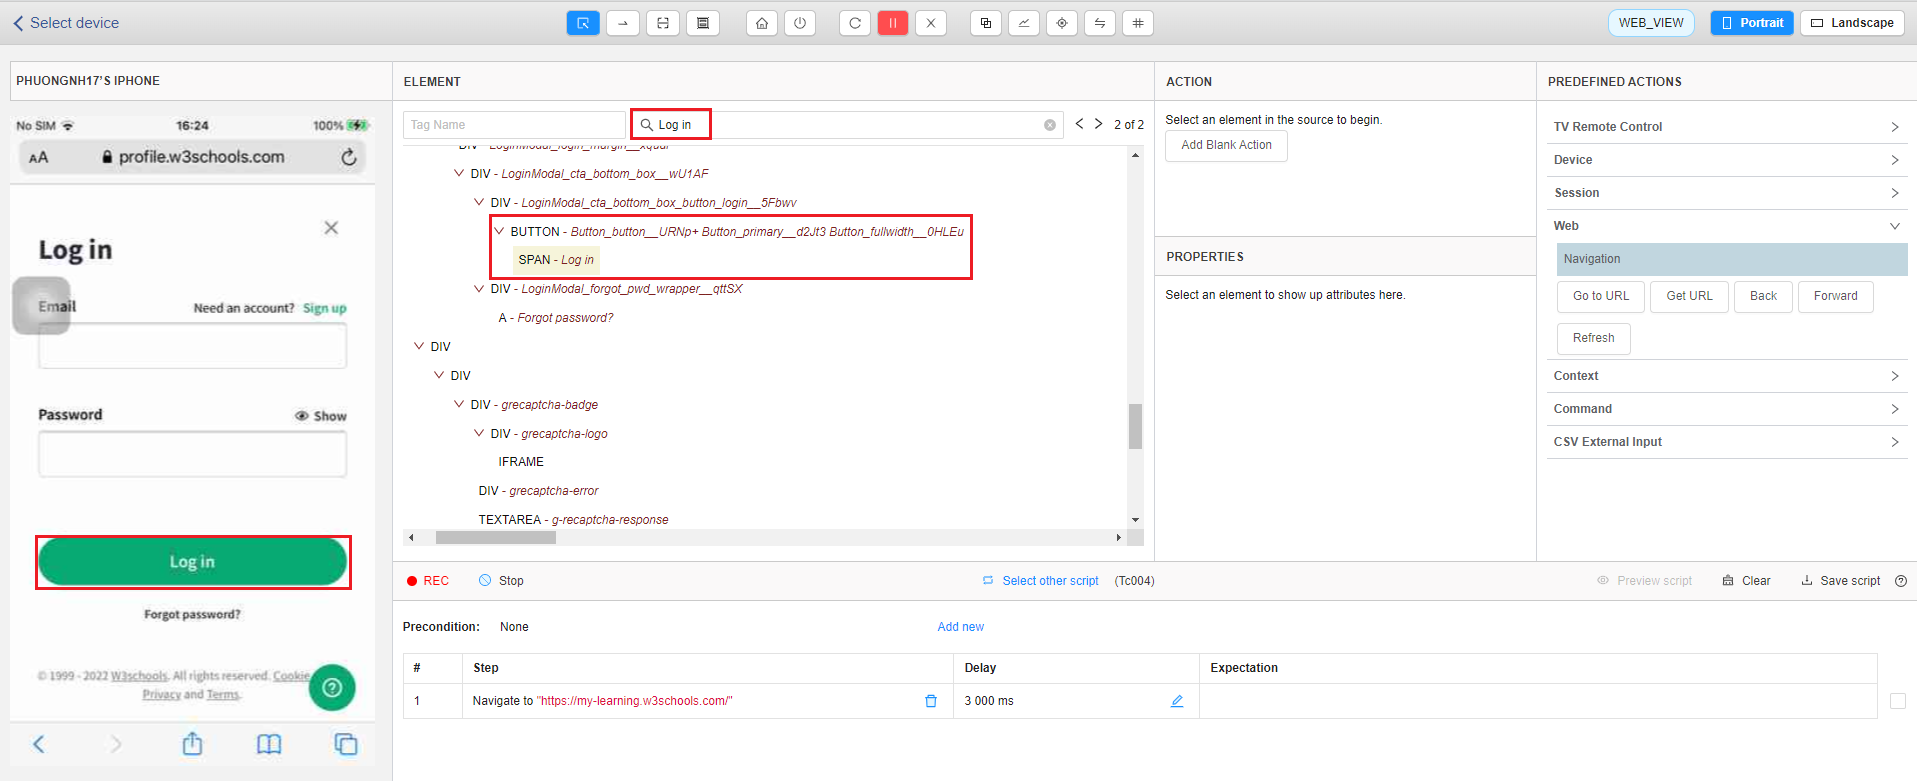
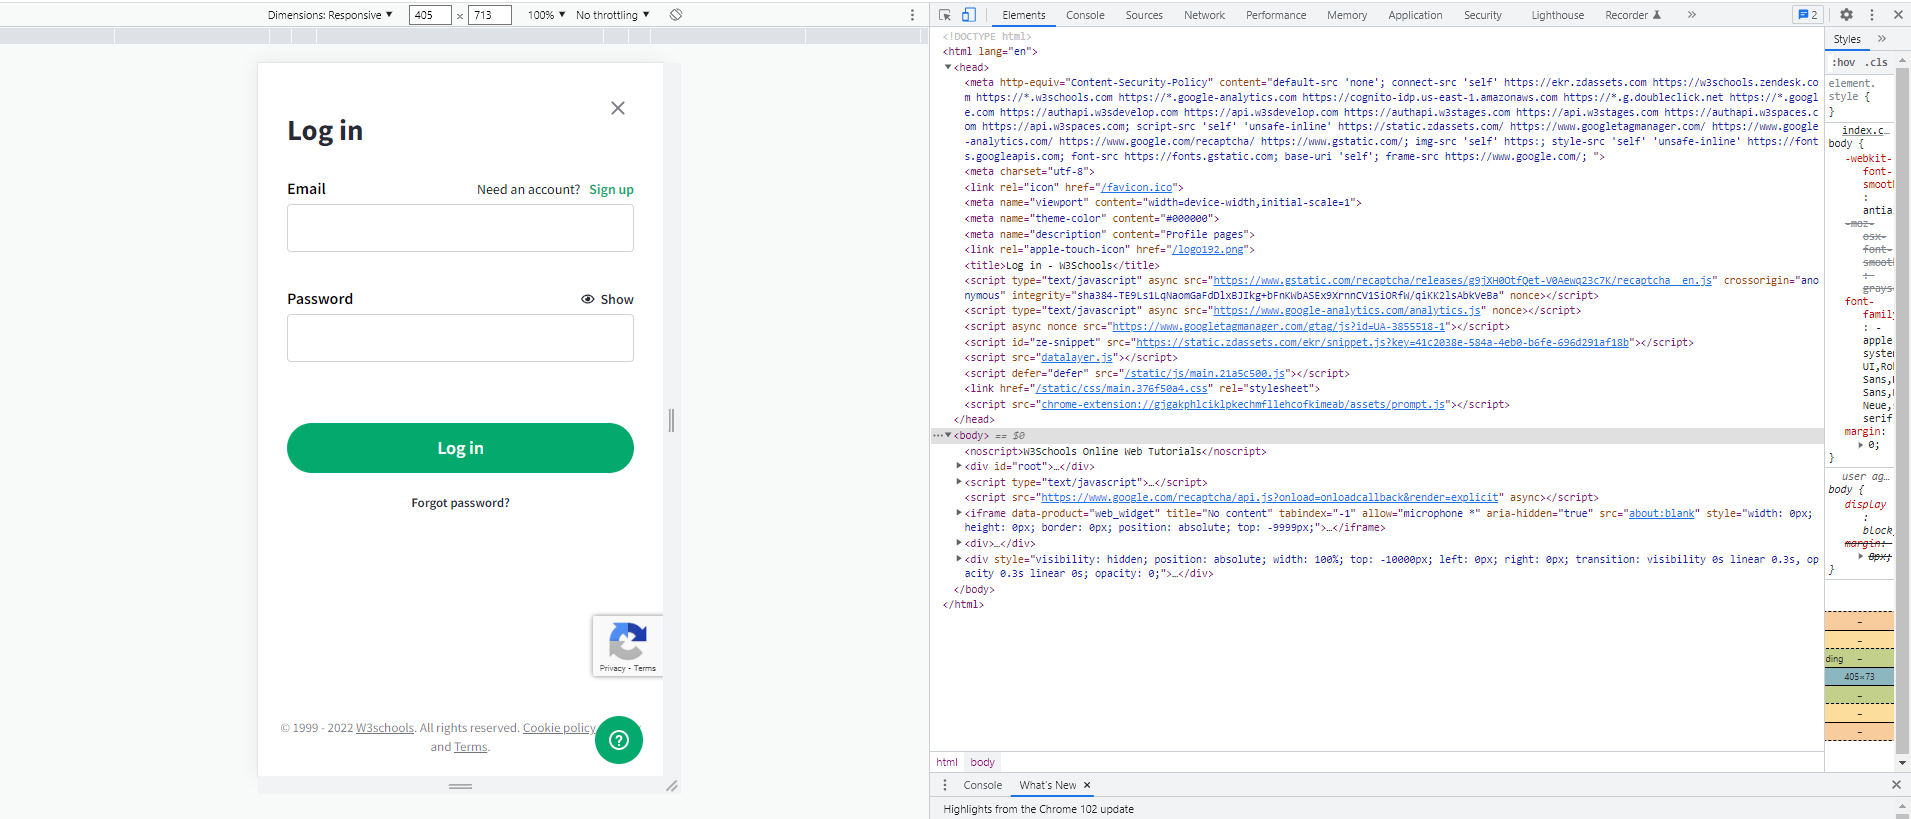
Step 3.2: Inspect on the tested web then user copies the ID or xpath of the element which you want to click.
Step 4: After the element is found, the user creates test script normally with actions in Studio. (Follow Part2. Create a Test script with Studio).

*** Creating test script on Android with WEB_VIEW is similar to creating on iOS
C. Start using ATOMP with PC Web
Step 1: Add a new project (Tester 4.0)
1.1. Log in to: https://tester40.atomp.io/.
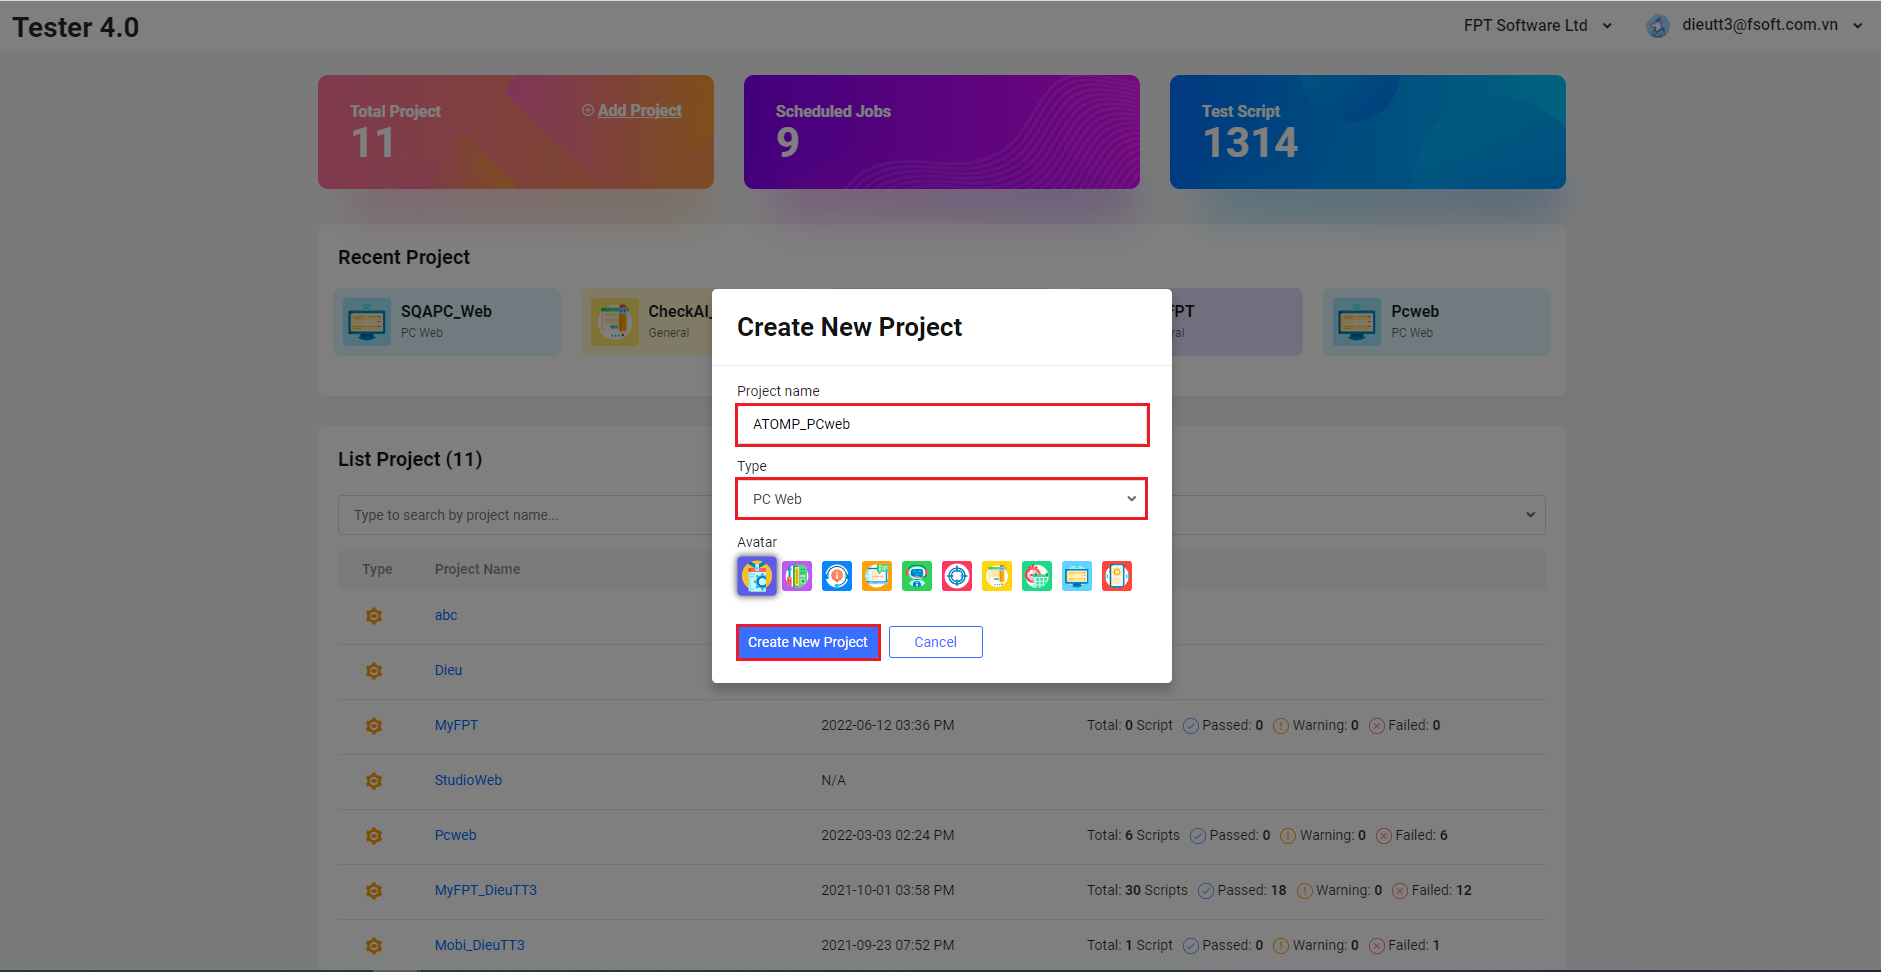
1.2. When the Dashboard is shown, click on “Add Project”.
1.3. Pick a name and set a type for the new project (Type: PC Web).
1.4. Click on the [Create New Project] button to finish creating a new project.
Step 2: Install the Studio Web extension on your browser
- The ATOMP Studio Web extension has not been installed on your browser
2.1. Click on the [Manage Test Script] button from the “Project Detail” screen
2.2. From the “Manage Test Script” Screen, click on the [Create with ATOMP Studio] button
2.3. Inside the popup “ATOMP STUDIO WEB”, click on the [Download Studio Extension] button to download the extension file namely “studio-web-extension”

2.4. Download the Studio Web extension and extract the compressed zip file to your computer
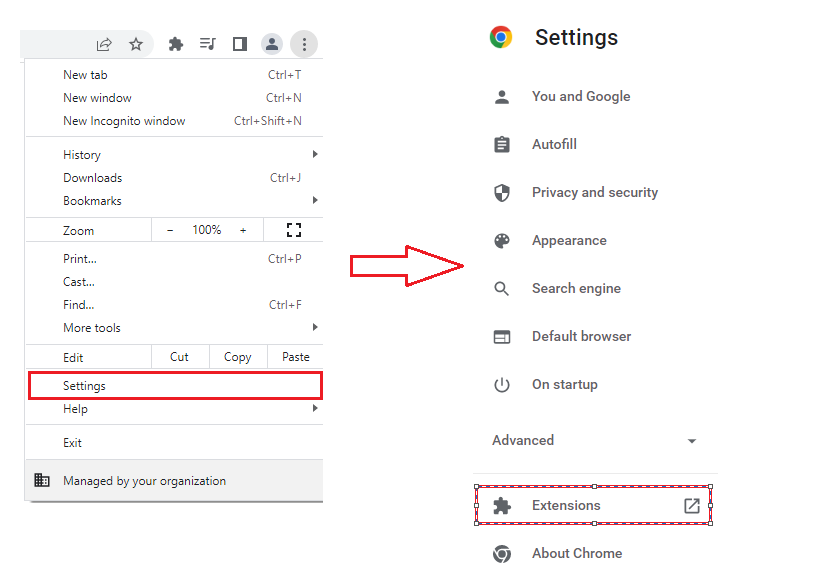
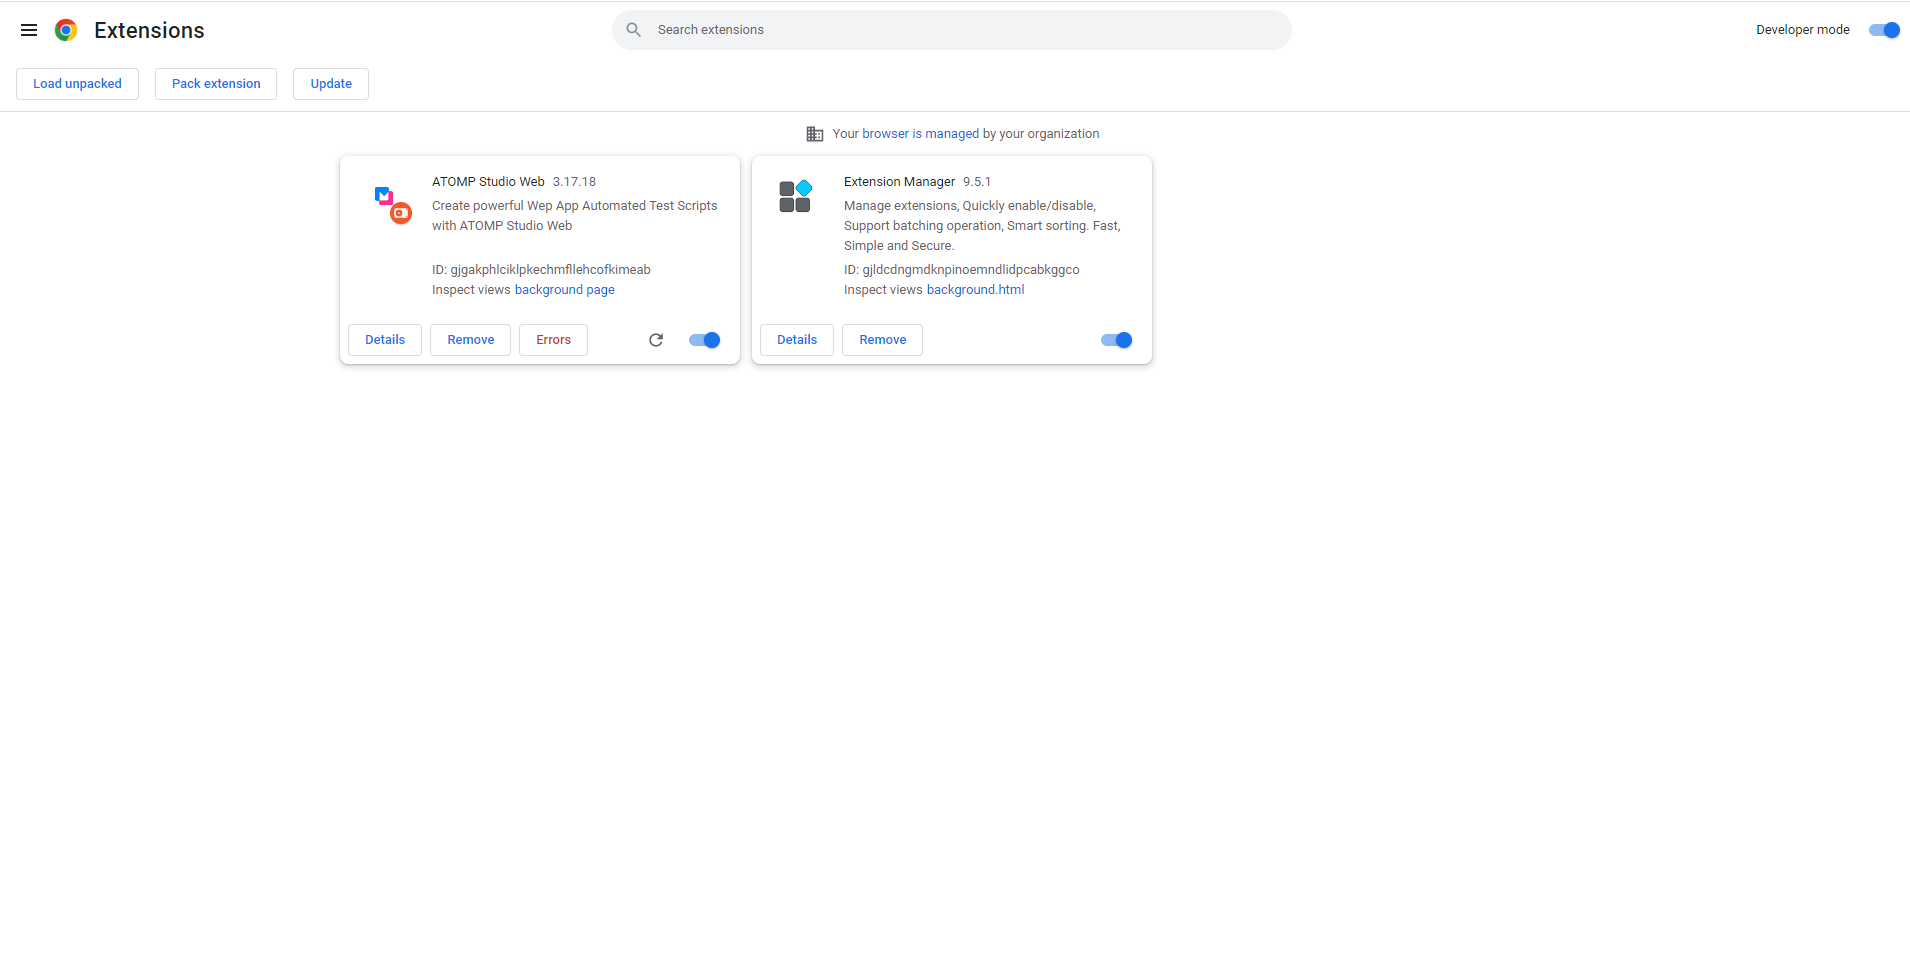
2.5. Install the Studio Web extension via Chrome.
- Go to Chrome > Manage Extensions.
- Turn on the “Developer Mode”.
- Click on the “Load unpacked” button and select the extracted folder of Studio Web extension.
- Update Studio Web extension to the latest version
2.1. After clicking on the [Create With ATOMP Studio] button from the Manage Test Script screen, the popup “Update Version” will be displayed.
2.2. User can download the latest version by clicking on the [DOWNLOAD LATEST VERSION] button.

Step 3: Create a test script with ATOMP Studio Web.
After opening the Studio Web extension, the Studio Web primary screen will be displayed. This screen shows all the commands/steps that will be executed inside your desired web app. Please refer to “Part 2: Create a Test script with Studio” for more details on how to create a test script.

Step 4: Run a test script with Tester 4.0.
After being created, a test script will be saved and displayed inside the “Manage test script” screen in Tester 4.0 which users can execute this script on. For details on how to execute a test script on Tester 4.0, please refer to “Part 3: Execute a Script with Tester 4.0”.