A. Create a test script with Mobile
II. Create a new test script
The script creation screen is displayed by step: Click on the [Manage Test Script] item => Click [Create with ATOMP Studio] => Select any device.
1. Upload a CSV file (if necessary)
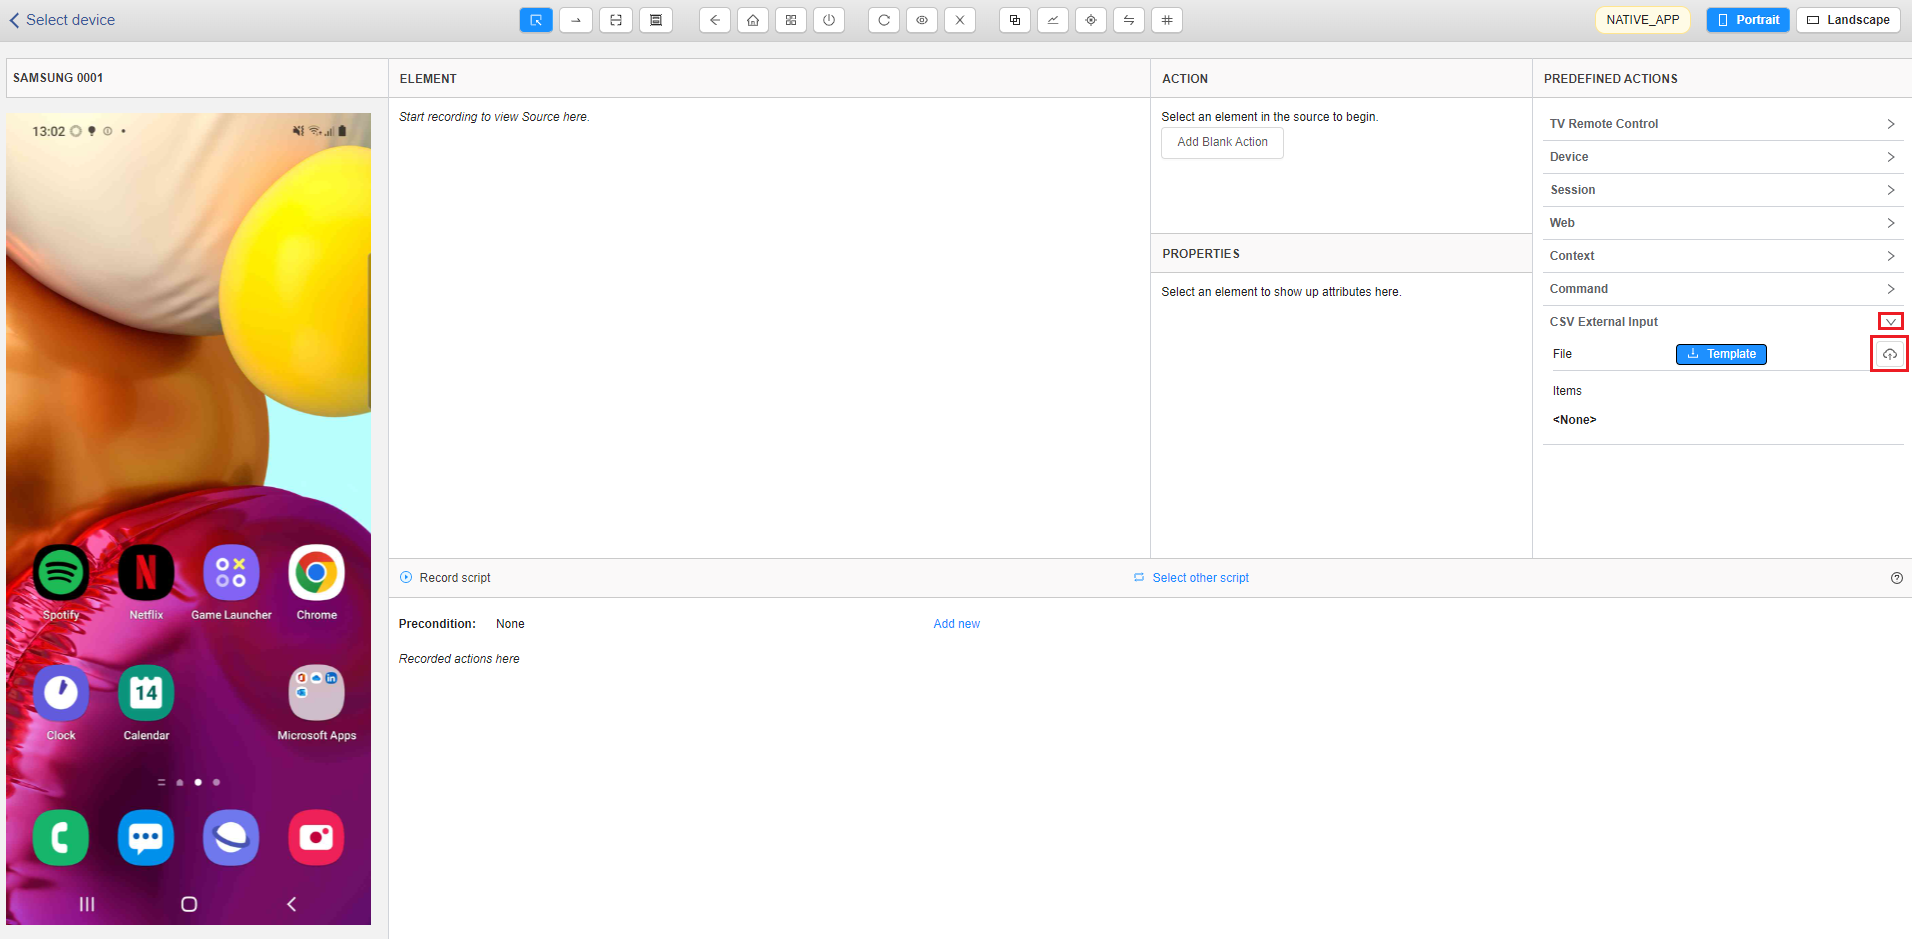
Users can upload a CSV file containing two columns of data (key/value pairs) and use those pairs as variables inside ATOMP Studio.
From the “Predefined Actions” tab, click on “Expand” at “CSV External Input”, then click “Upload” to upload a CSV file.
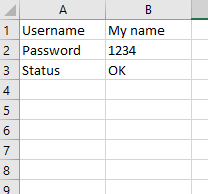
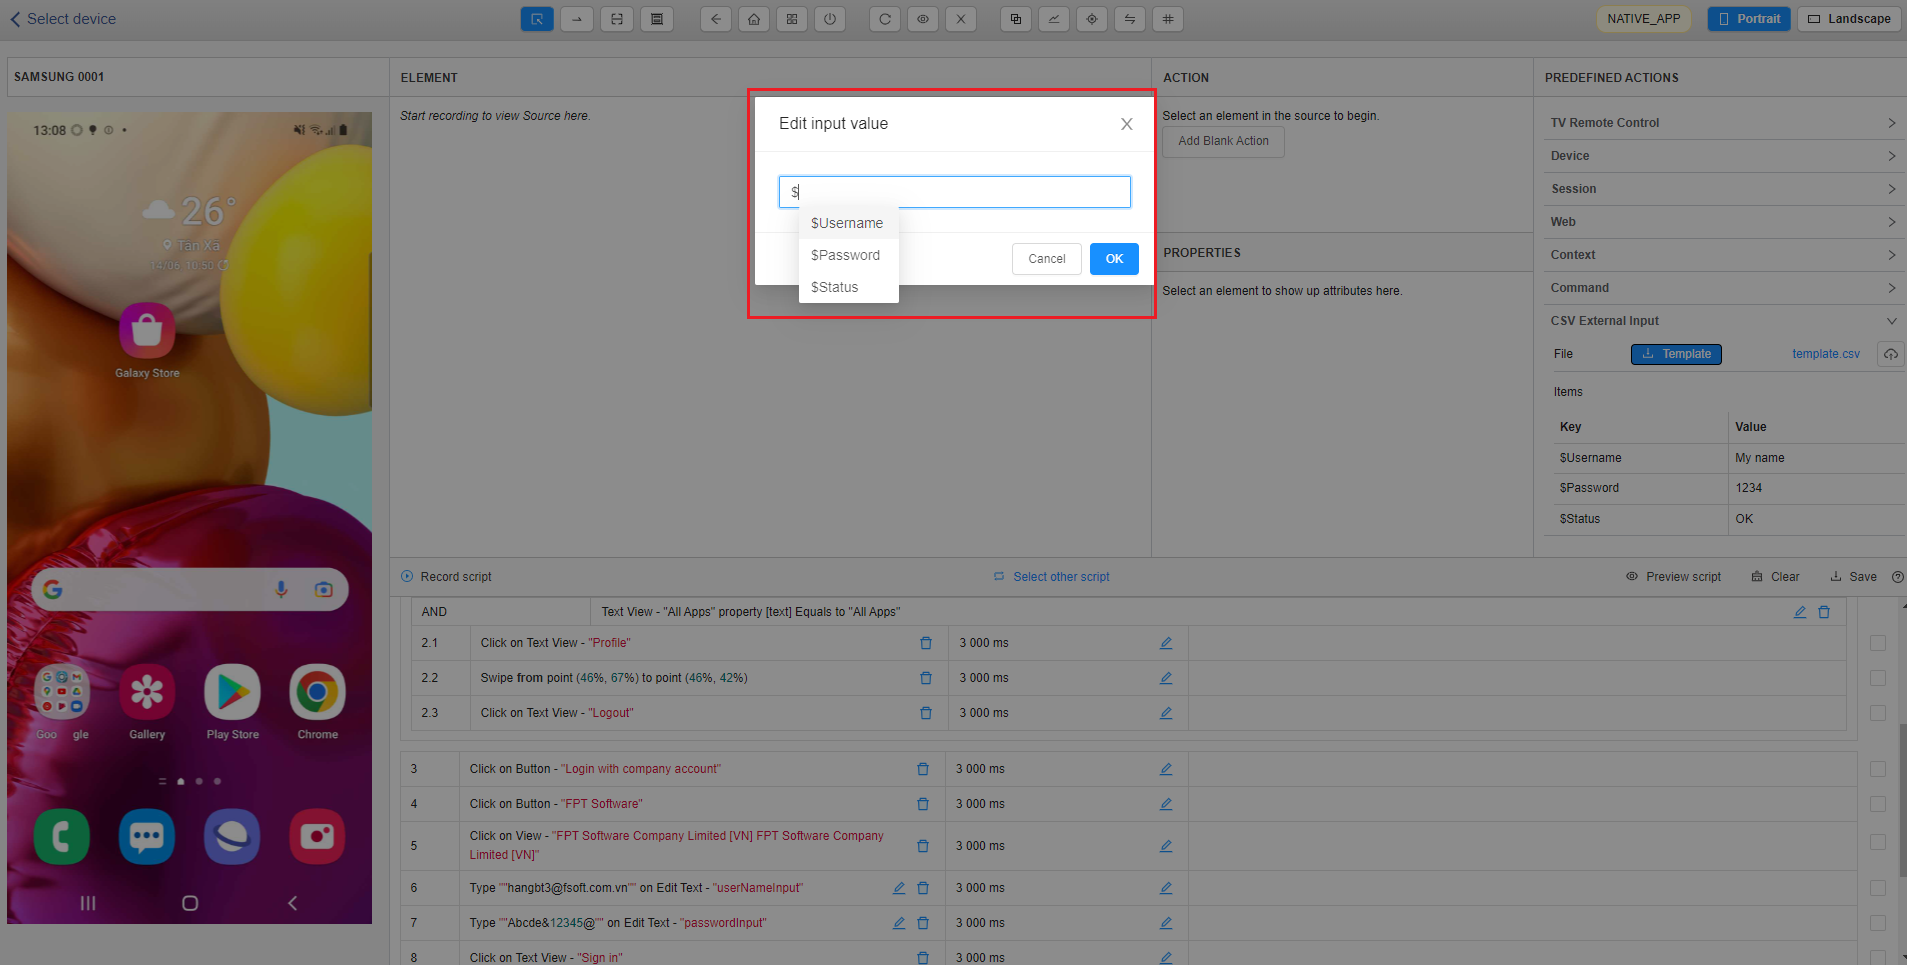
A CSV file has the following format (Column A: Variable Name, Column B: Value)
After uploading the CSV file, users can use those variables in any textbox while creating test script by typing “$+variable name”.
2. Switch to the [Recording] mode
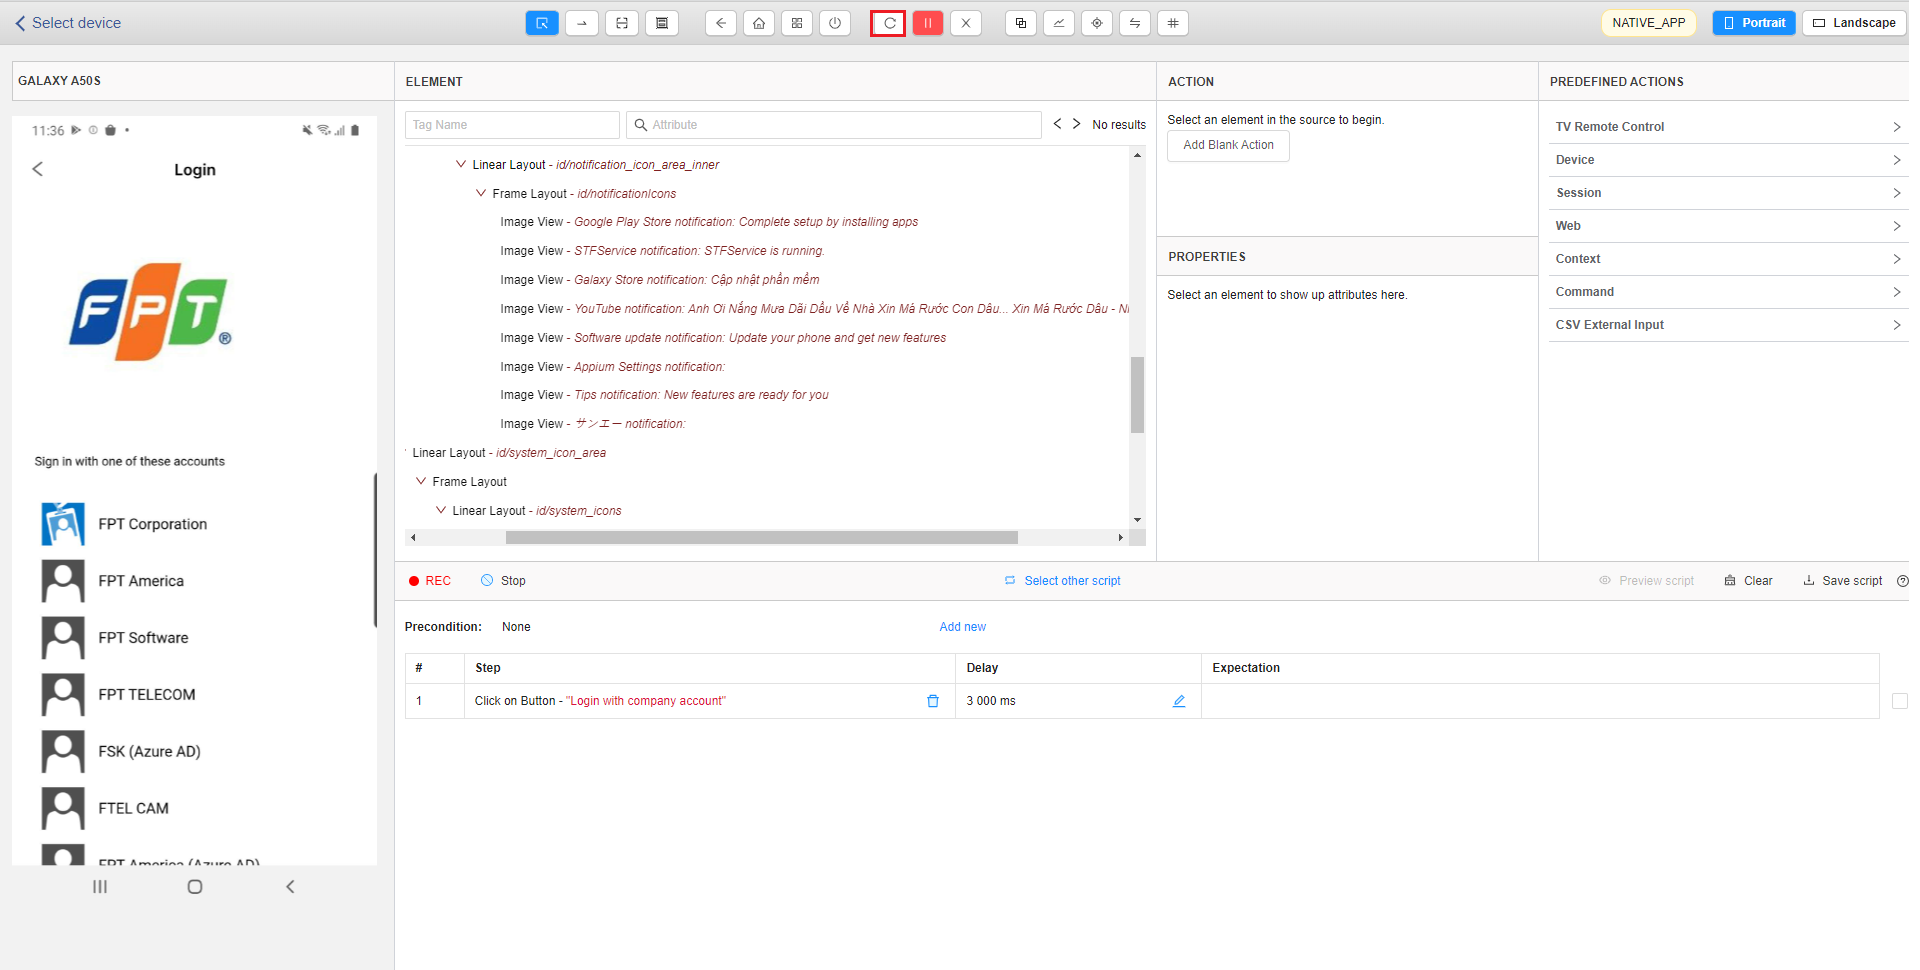
To start creating a test script, you need to switch to the [Recording] mode by clicking on the button [Record script] or the Eye icon  => below is a sample of the Recording mode.
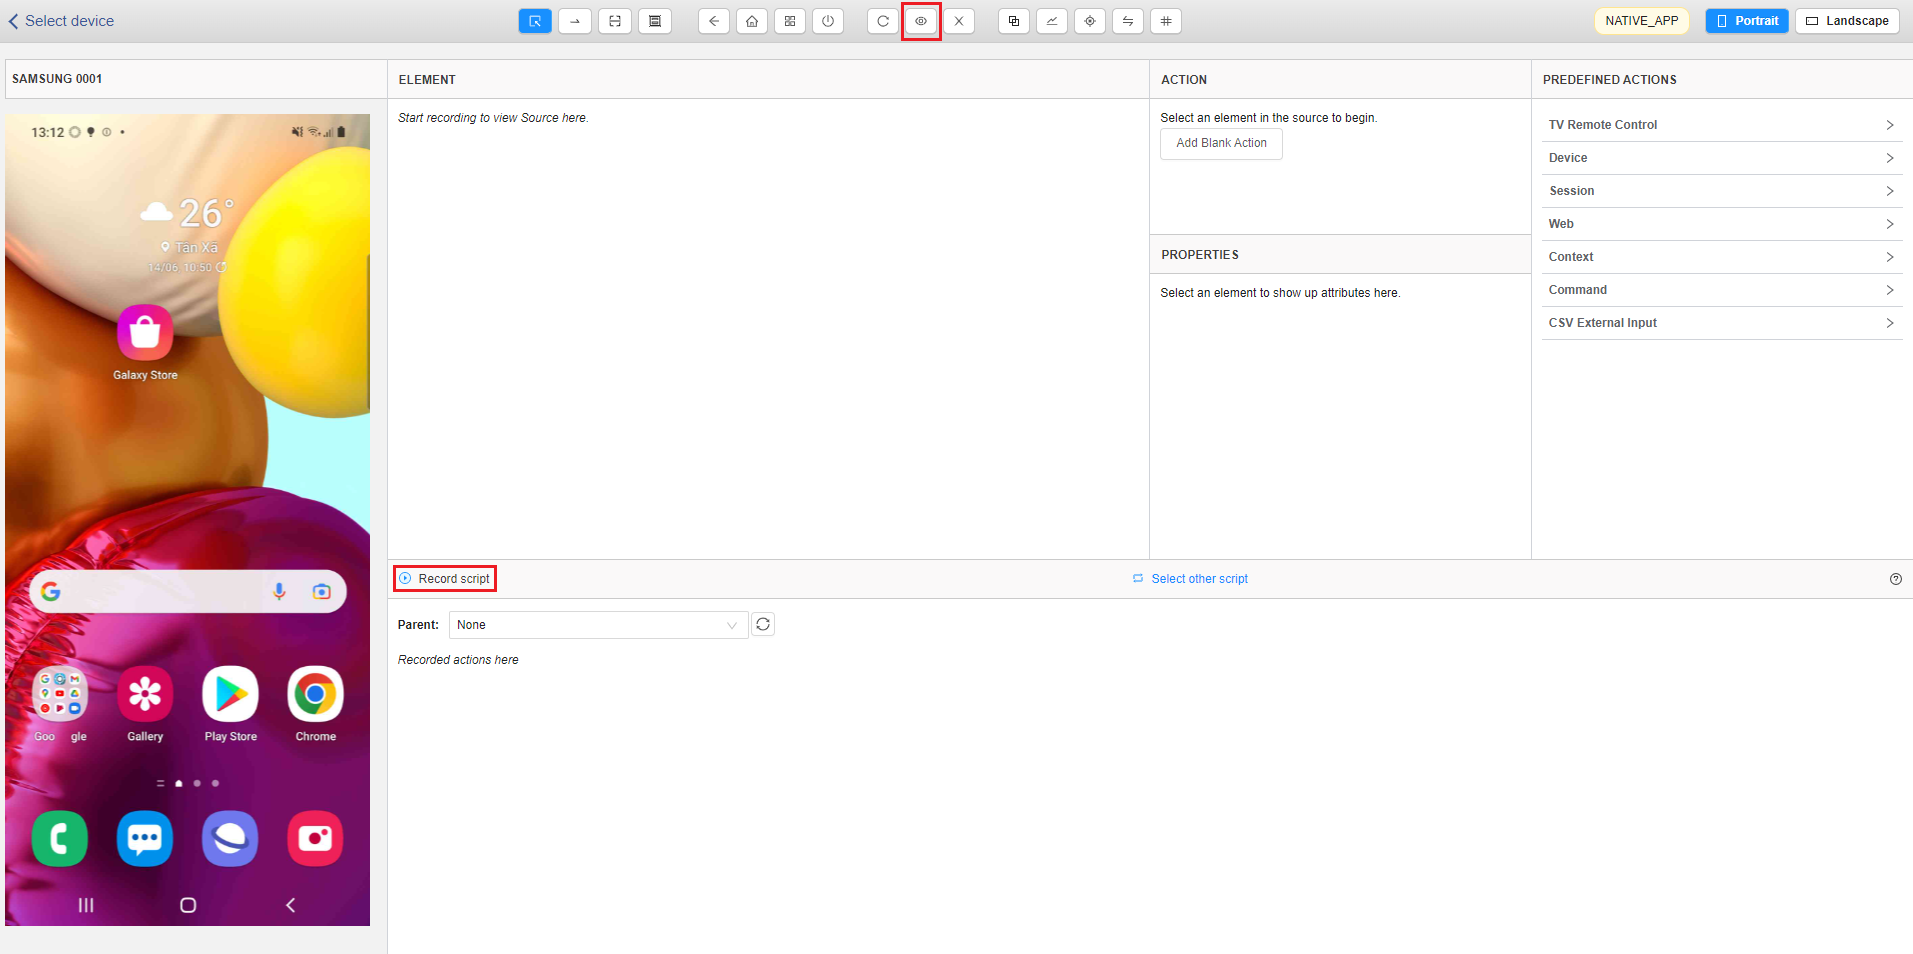
Users can select a screen element (icon, button, text, etc…) to execute some actions.

3. Select Precondition(s)
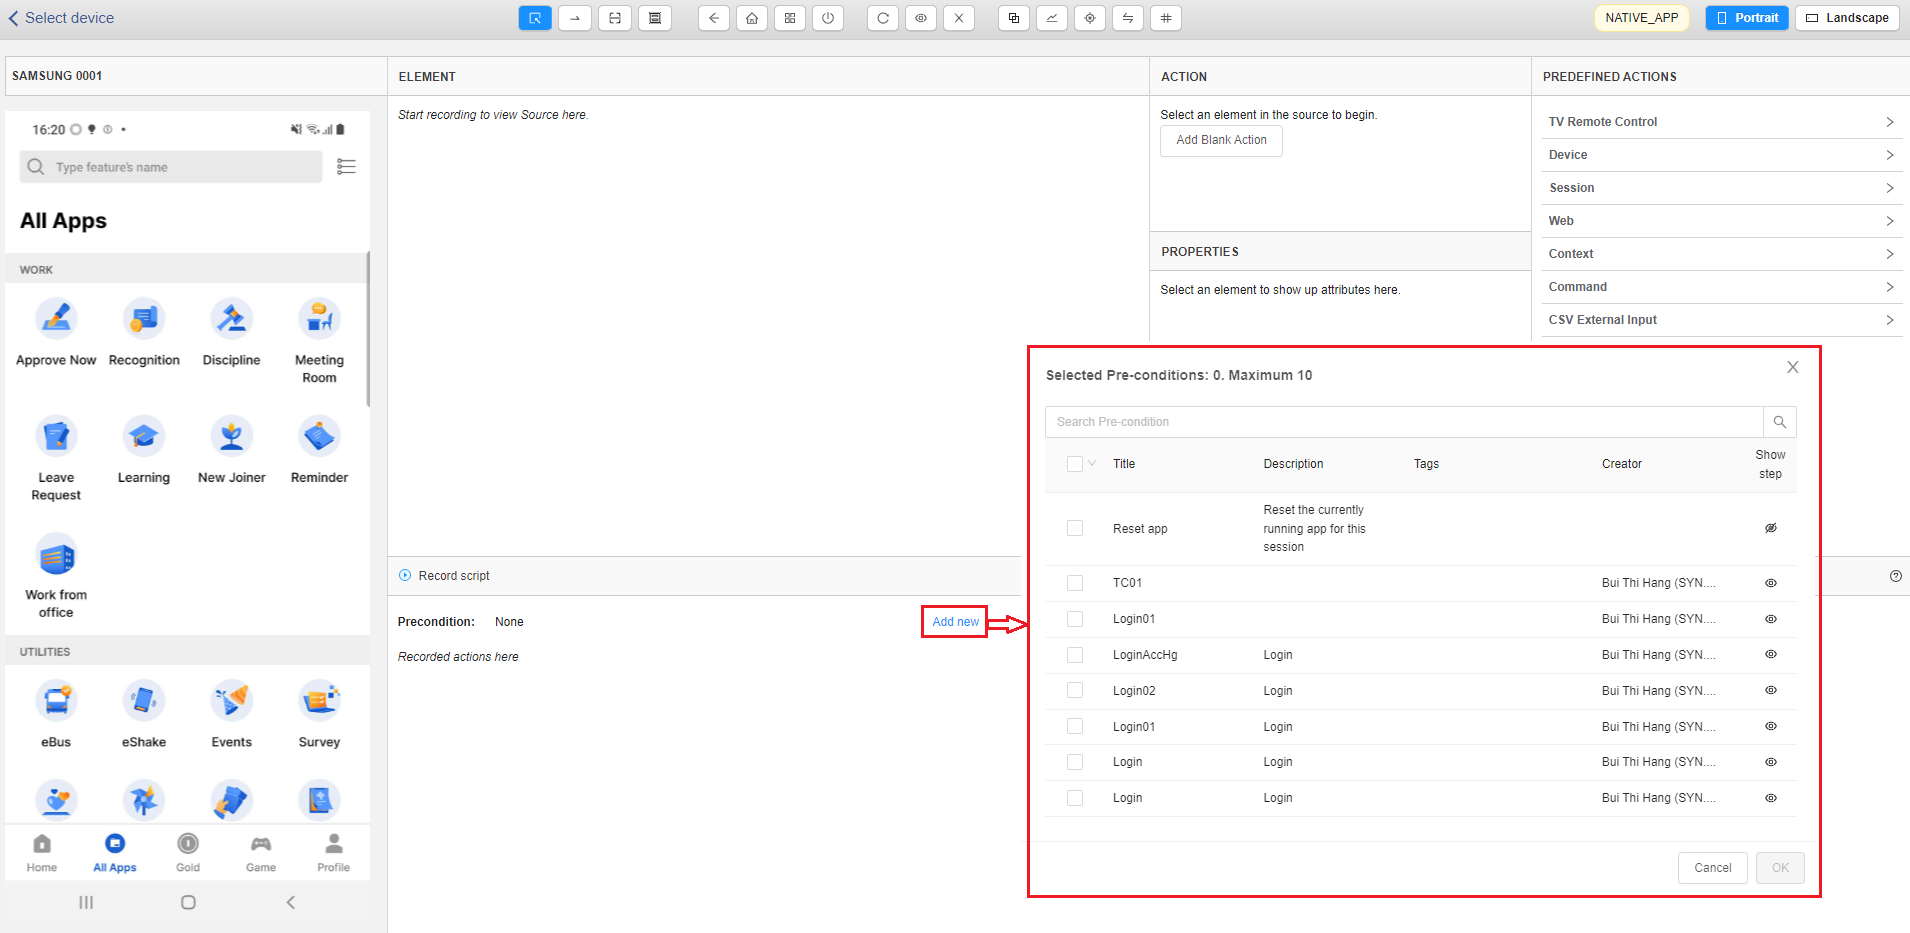
Step 1: On the script creation screen, click on the [Add new] button.
Step 2: Select one or more preconditions from the precondition list of the project.
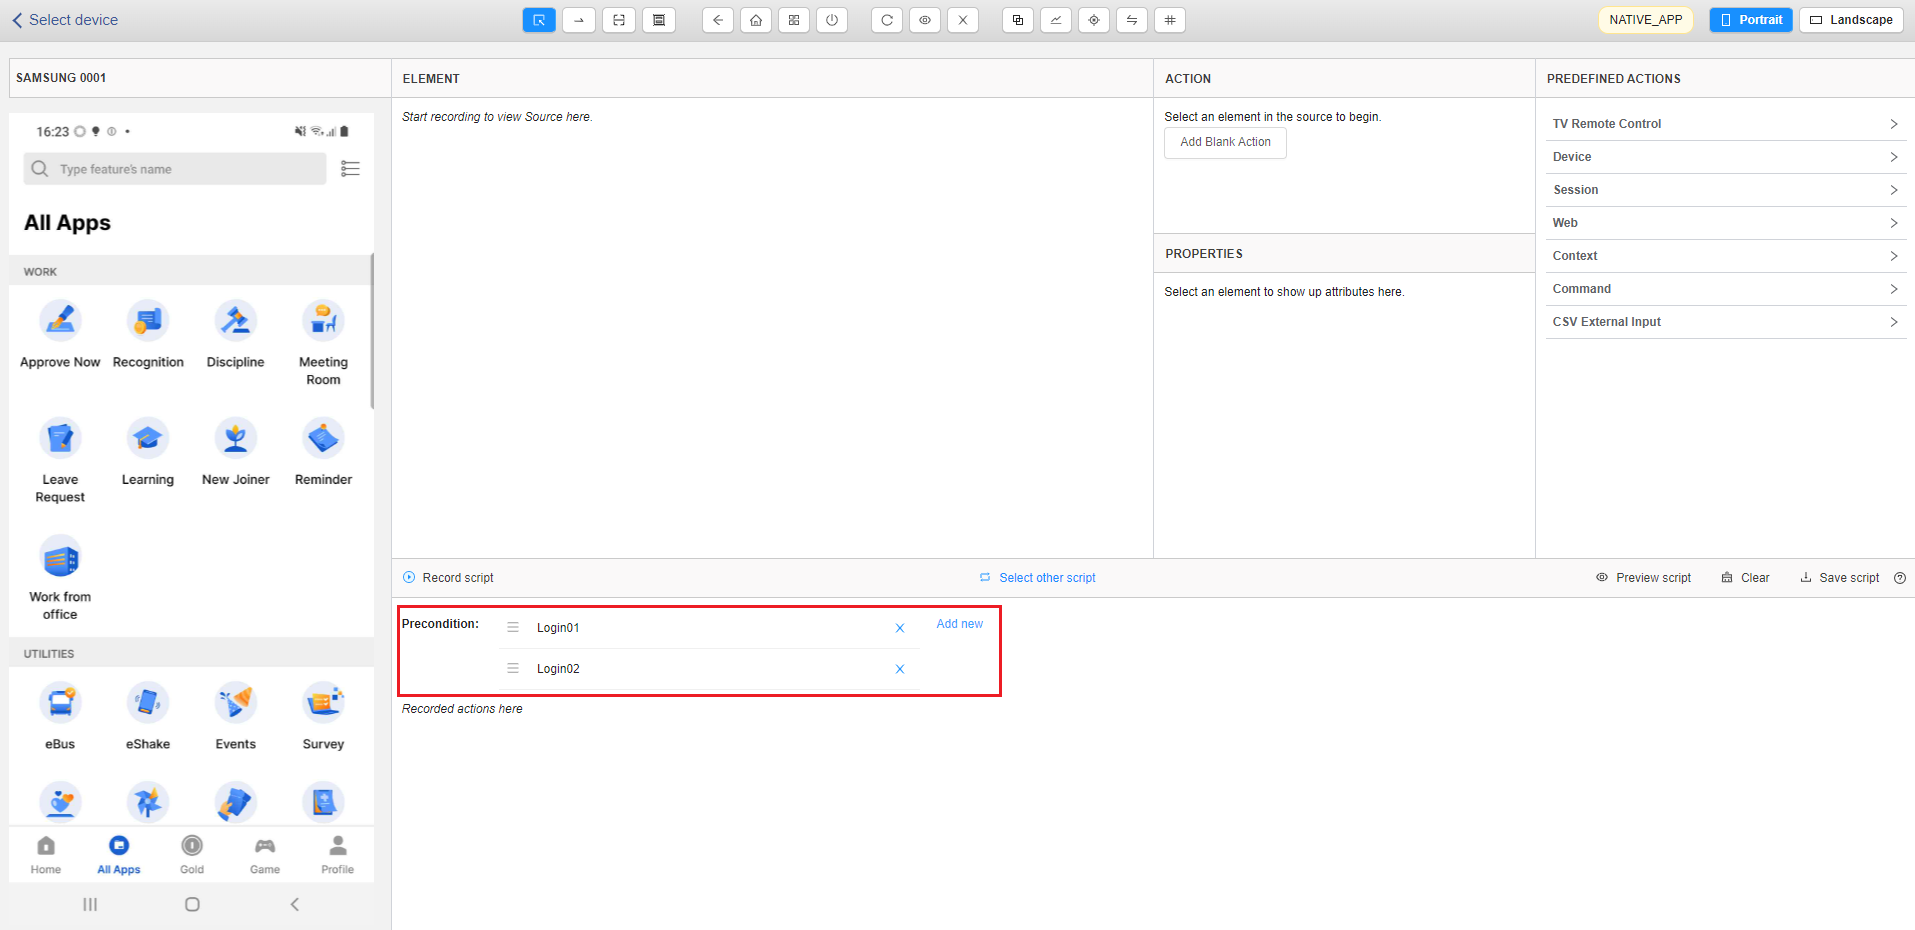
When the script is running, these selected preconditions will run from top to bottom. List of selected preconditions will be displayed as below:
4. Create Test Steps
Step 1: Switch to the “Select Element” mode (by clicking on the icon ).
).
Step 2: Select an element on the streaming screen.
Step 3: Select an action you want to take with the element selected in step 2.
- If the selected element is an icon or a button, the available actions are (Tap, Double Tap, Long Press).
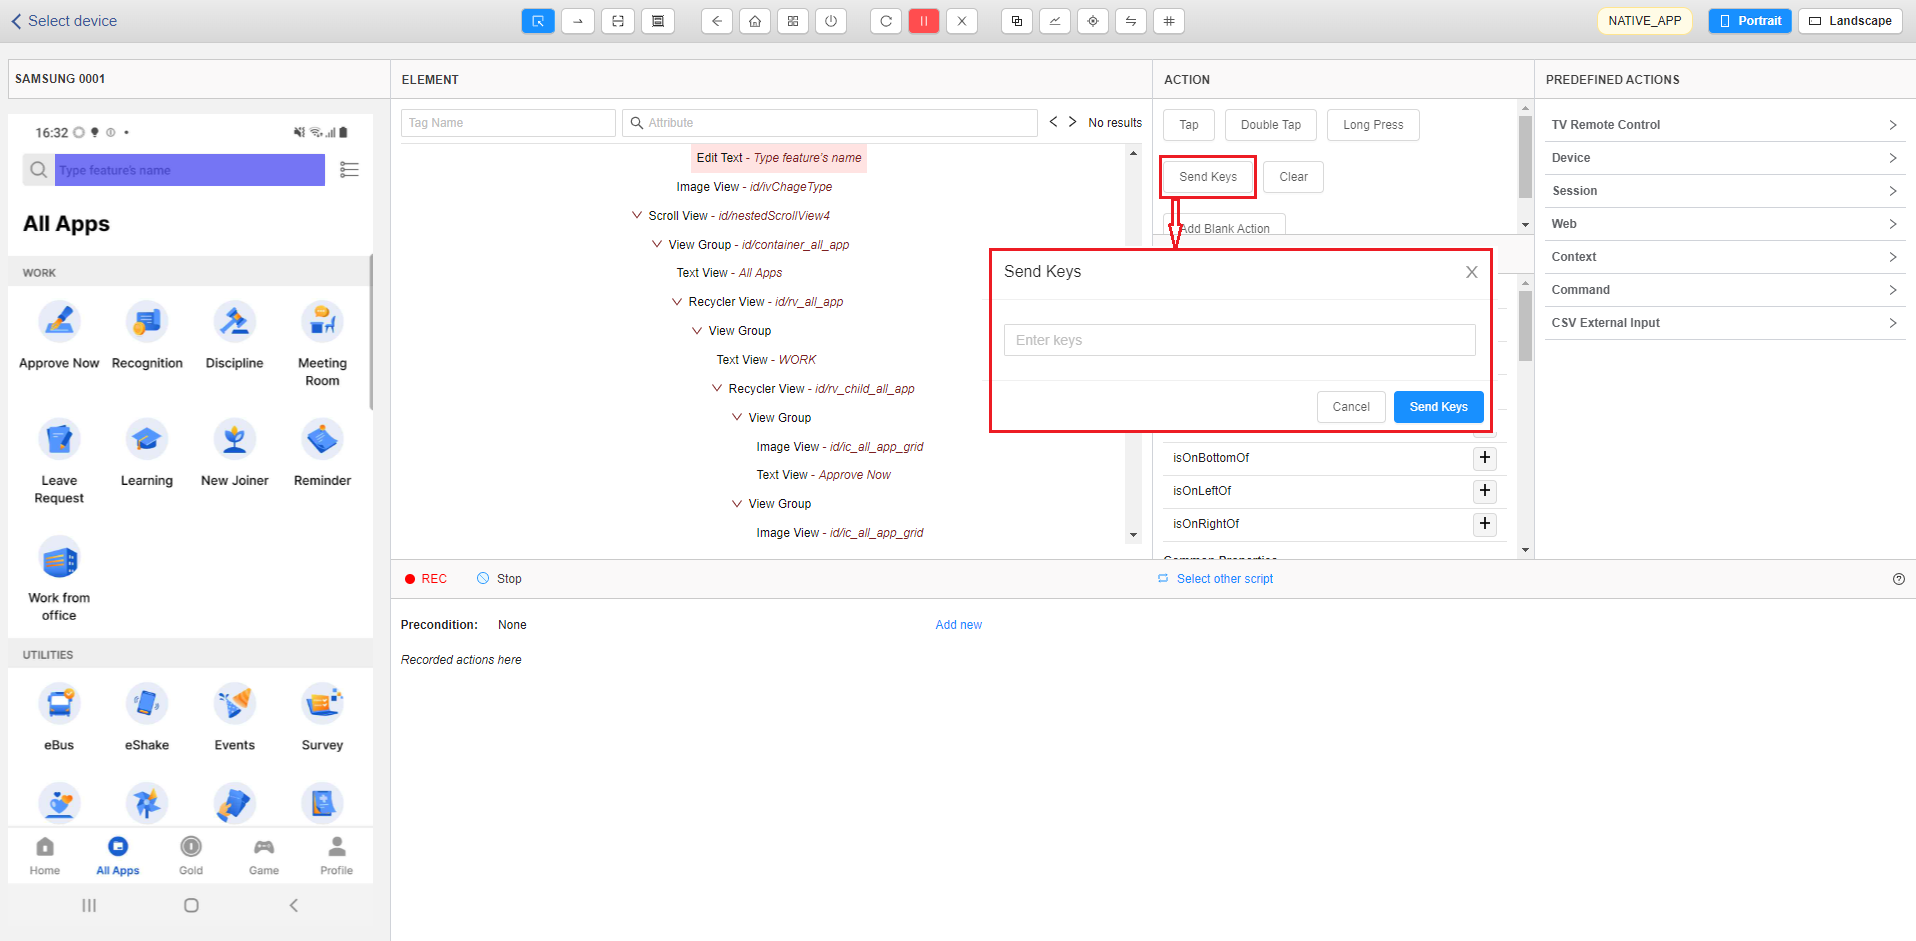
- If the selected element is a Text Input box, click on the [Send Keys] button to input text to the element.
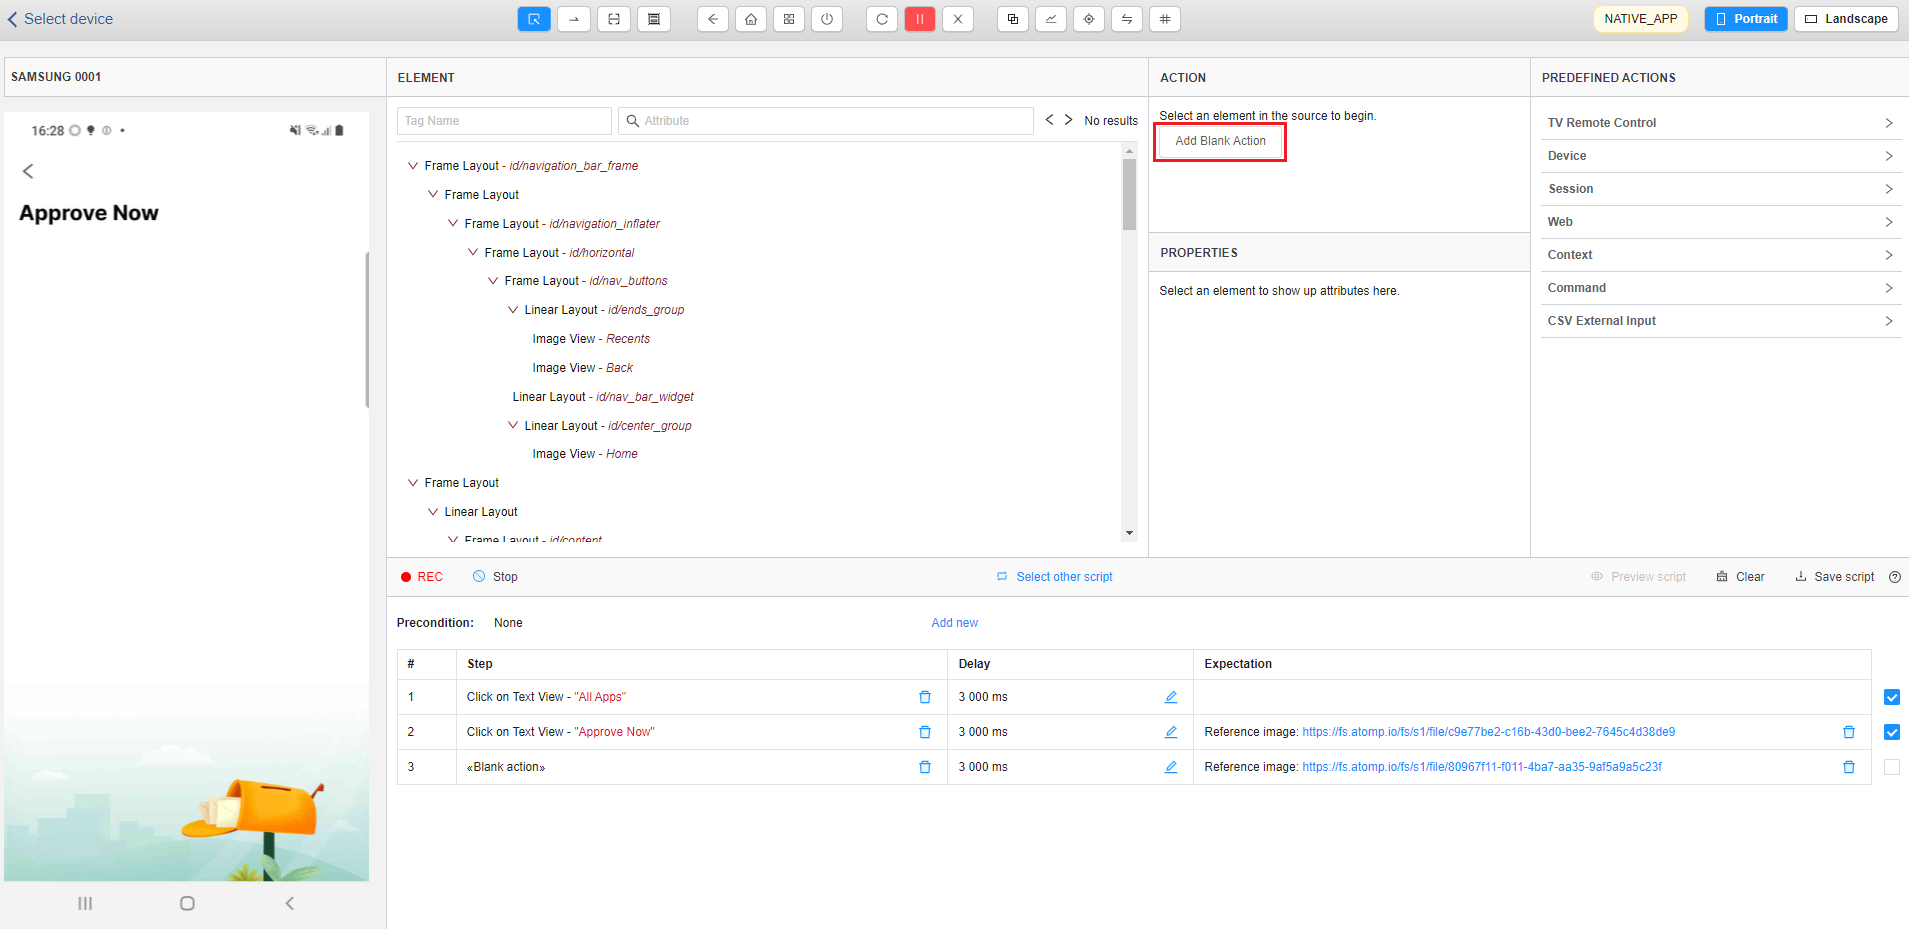
- If you want check 2 images by AI when having automatic action to change screen, click on the [Add Blank Action] button to create a blank action, when this step is run, the automation script will not perform any action on the device.
Step 4: If the action is [Send Keys] -> a popup will be shown for users to input characters.
=> After executing 1 action, the tool automatically generates a test script for that action and displays as a step (refer to the picture below).

If you want to delete the text on the filled textbox, you select the element that needs deleting text then select Clear action.
Step 5: If the action is [Swipe], you need to switch to the “Swipe By Coordinates” mode (by clicking on the icon  ). Then users select 2 points in the middle of the screen to scroll.

=> After executing 1 action, the tool automatically generates a test script for that action and displays as a step (refer to the picture above).
If users want to perform other actions (Tap, Double tap, send keys,..), users need to switch to the “Select Element” mode.
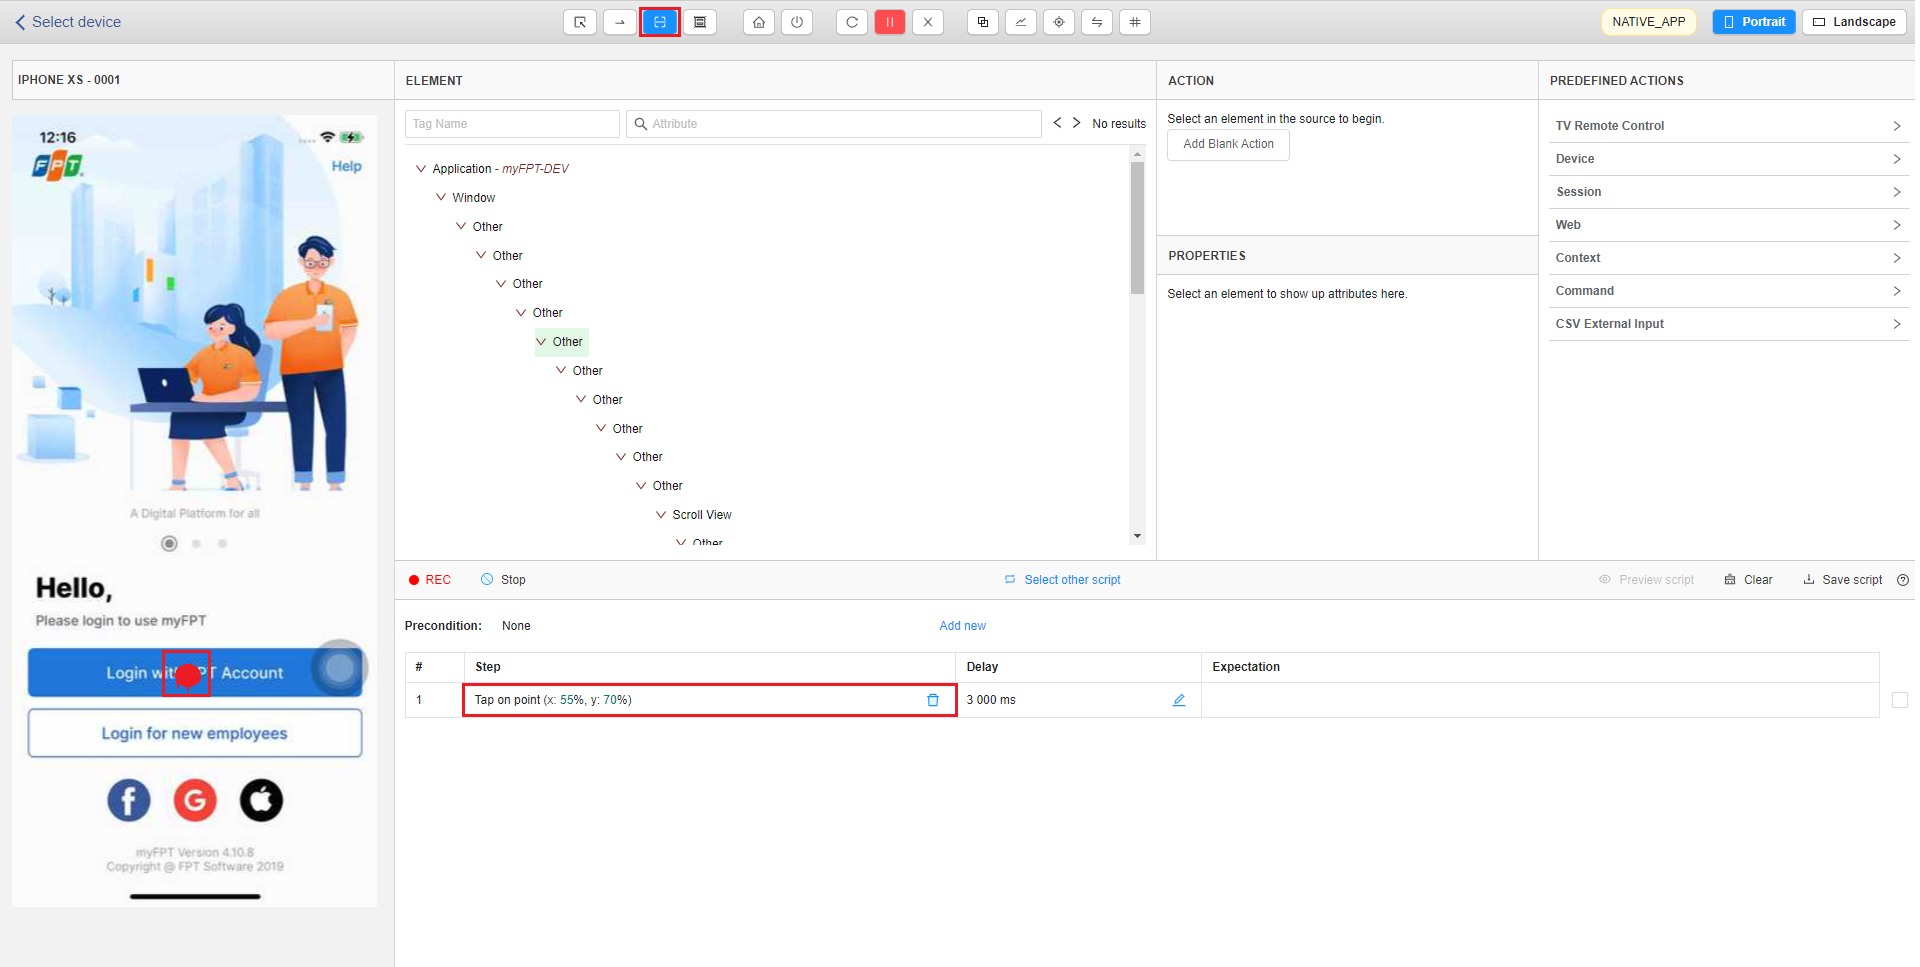
Step 6: If you want to click on a point on the streaming screen, you switch to the “Tap by Coordinates” mode (by clicking on the icon  ). Users click on the point on the streaming screen, then the tool generates automatically a test step for that action and displays as below.
If users want to perform other actions (Tap, Double tap, send keys,..), users need to switch to the “Select Element” mode.
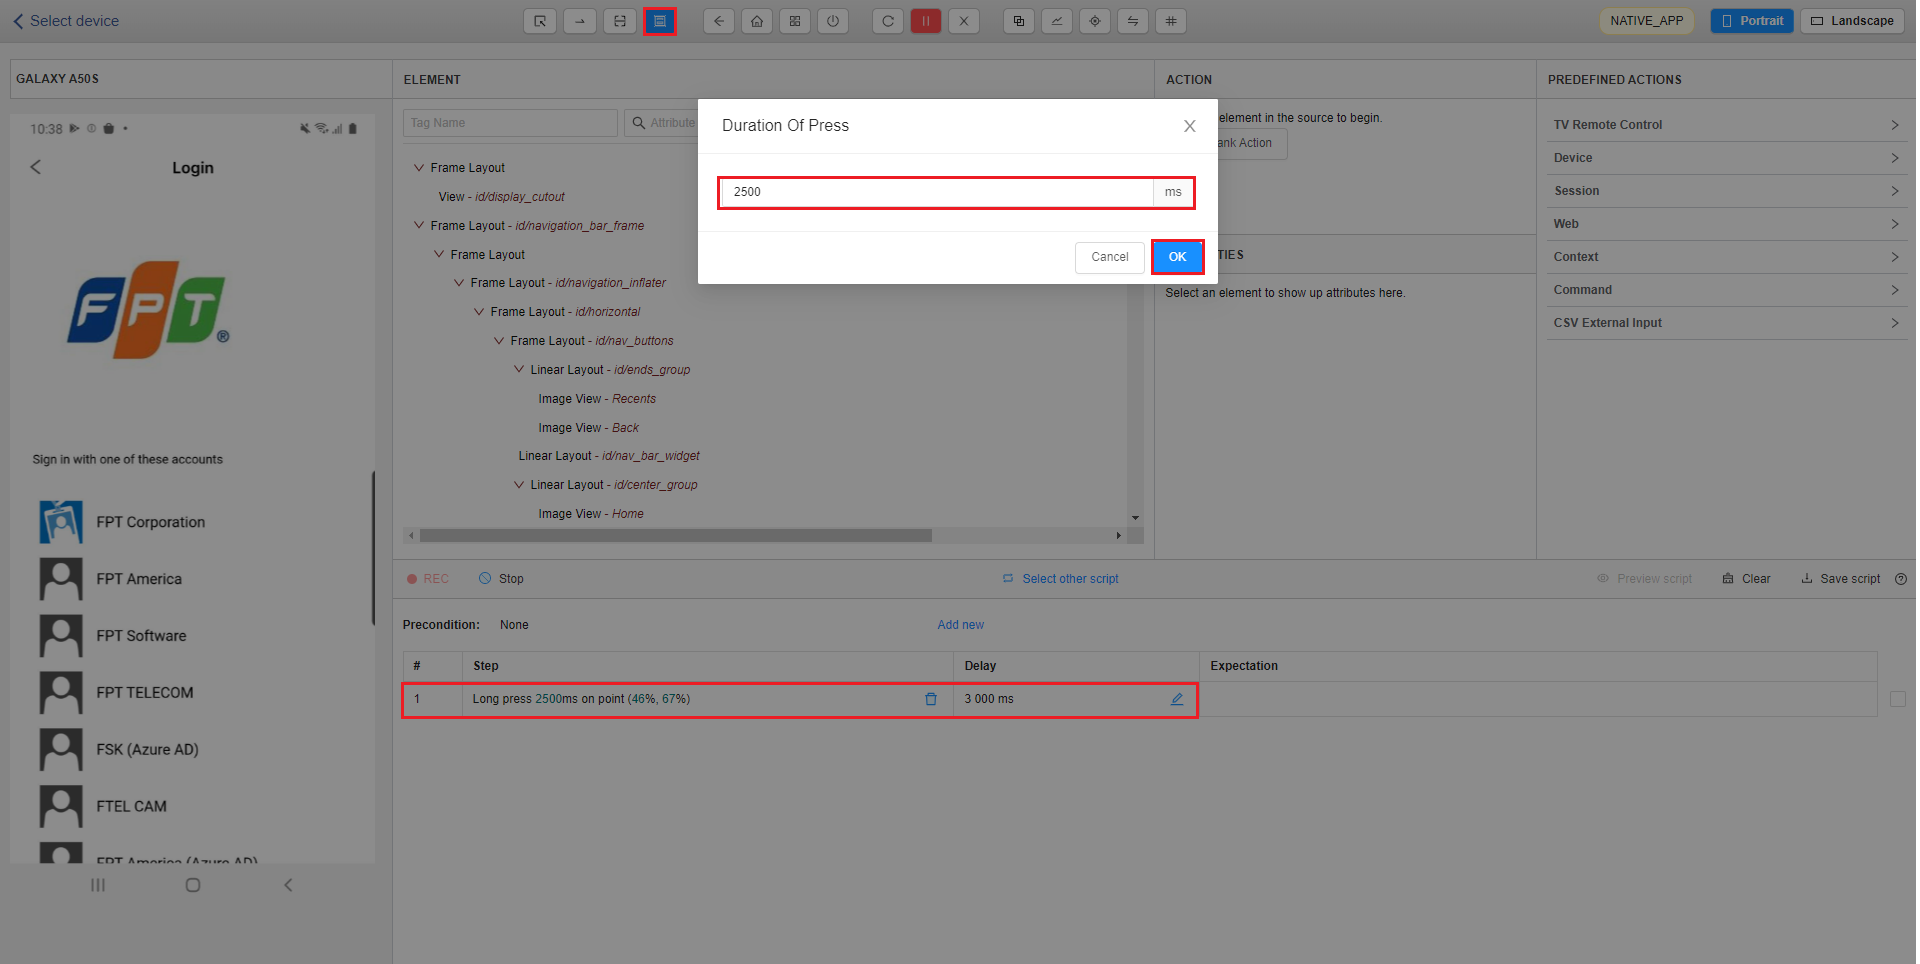
Step 7: To long press on a point on the screen, you switch to the “Long Press By Coordinates” mode (by clicking on the icon ). The Duration of Press pop up is displayed, users set a time interval for this action, then click OK button. Users click on the point on the streaming screen, then the tool generates automatically a test step for that action and displays as below.
Step 8: When you can’t select the desired element on the streaming screen, you need to click on the icon  to refresh source code. Then the source code has matched the element on the screen, users select element and perform action normally.
5. Create an Expectation
Step 1: Select an element that you need to check on the Streaming screen
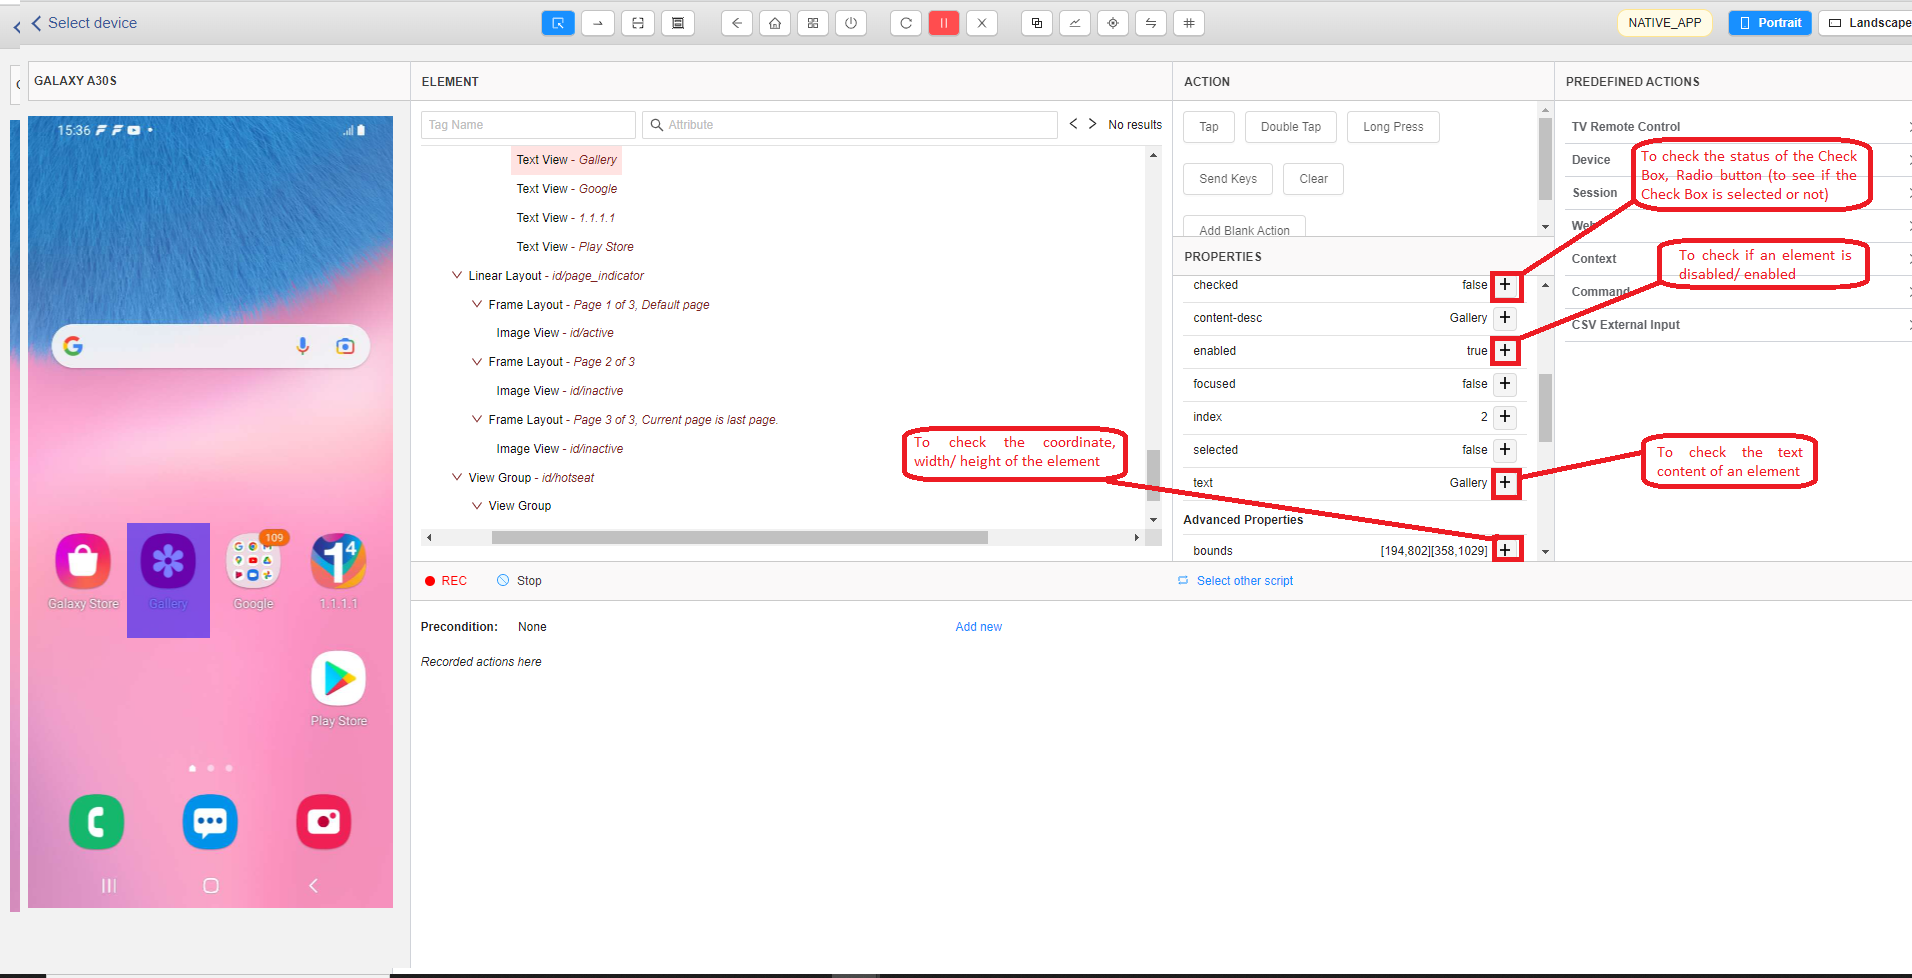
Step 2: The PROPERTIES box will show the properties of the selected element –> choose a property to create an expectation that you want.
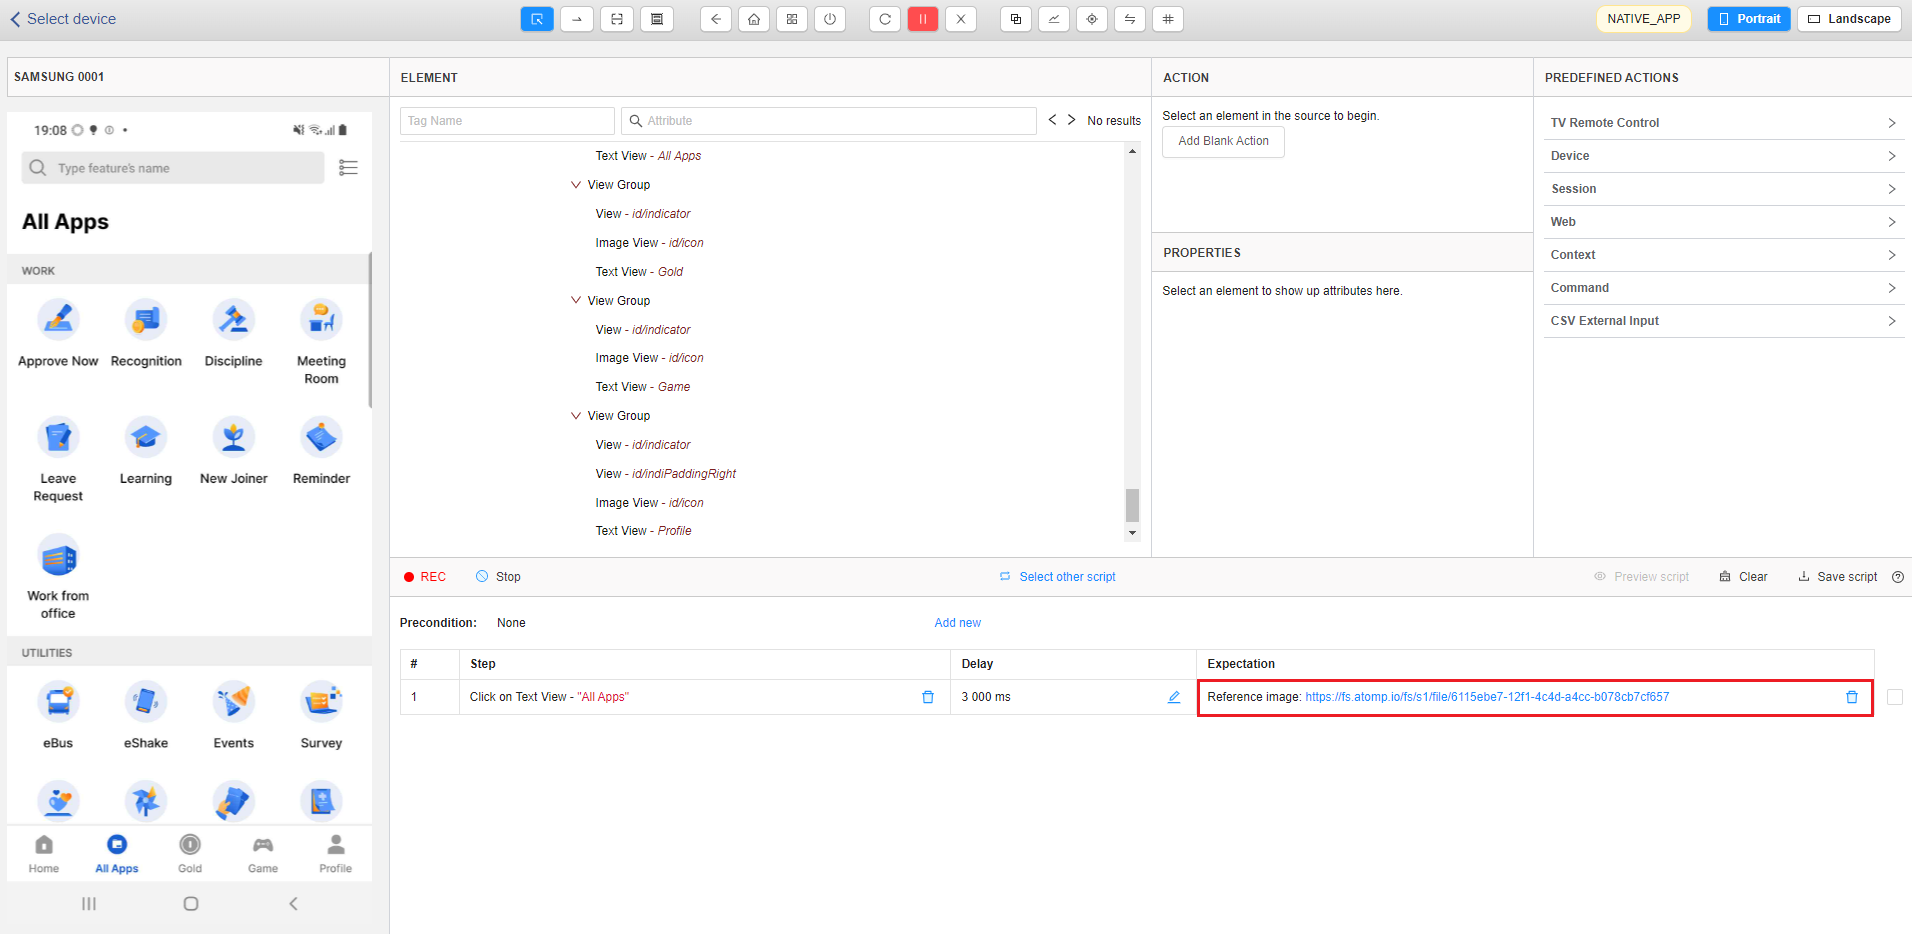
- If you want to check the UI of the screen, select the icon camera inside the “Expectation” column to capture screen as reference for future comparison.
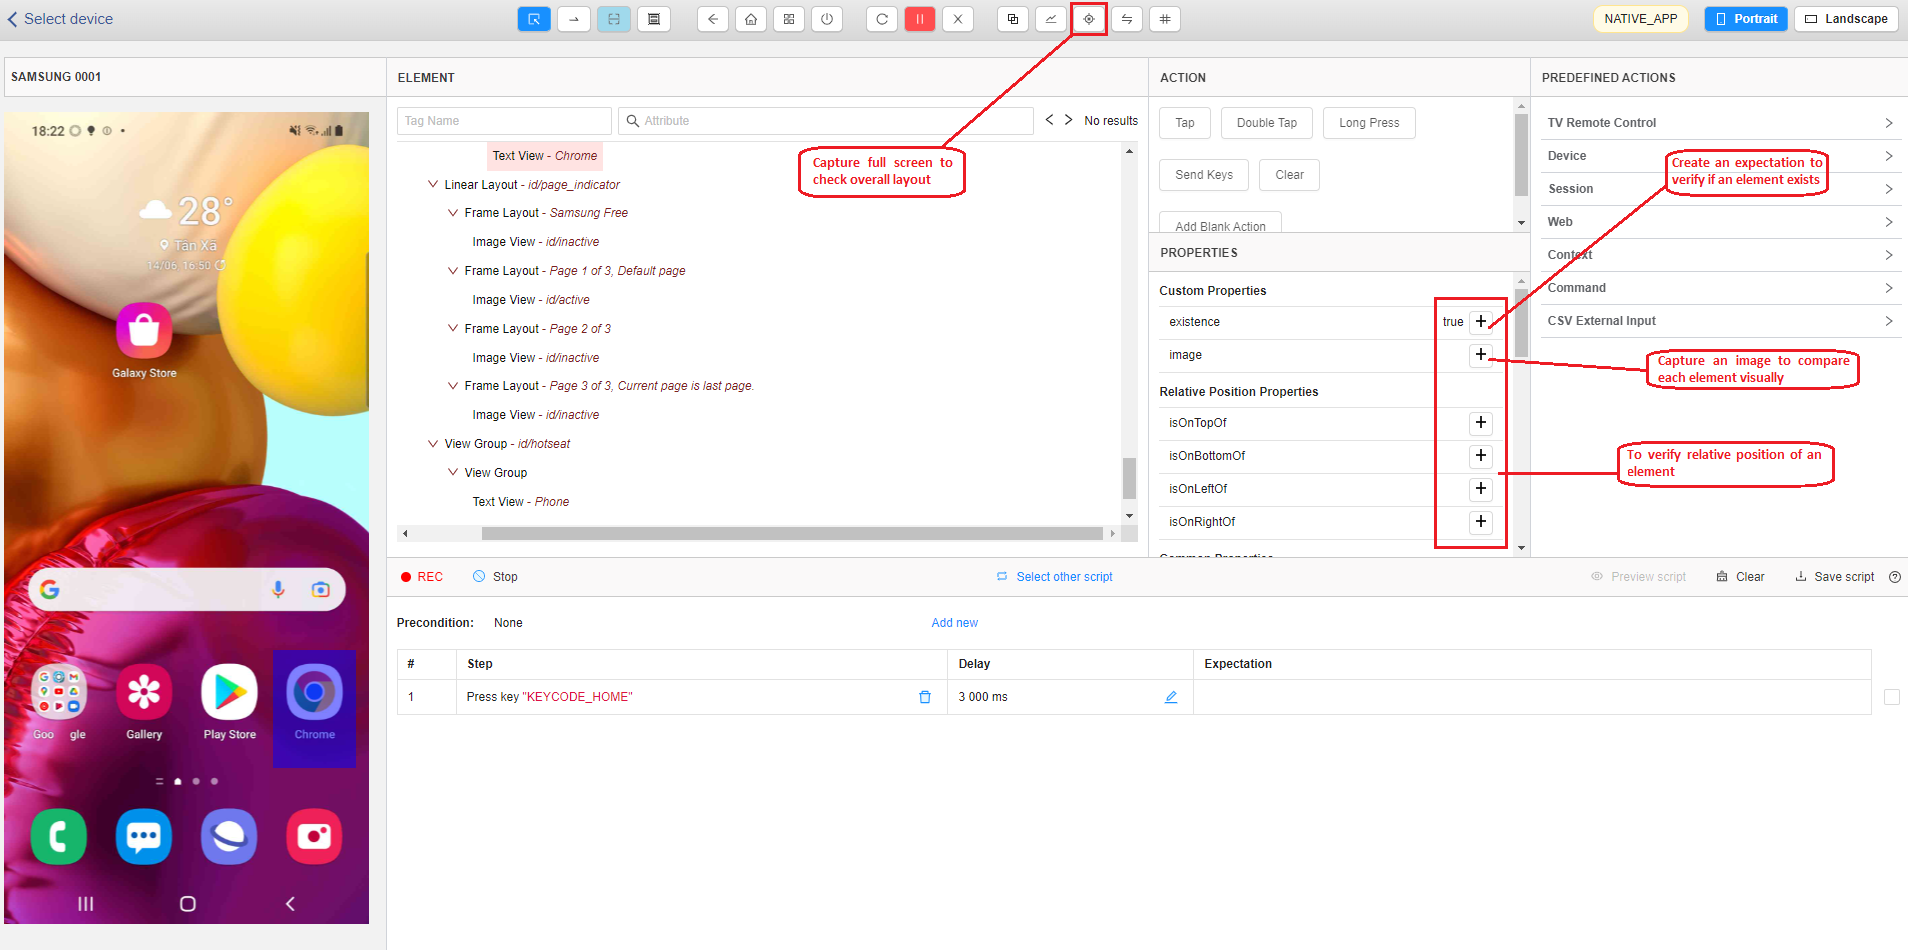
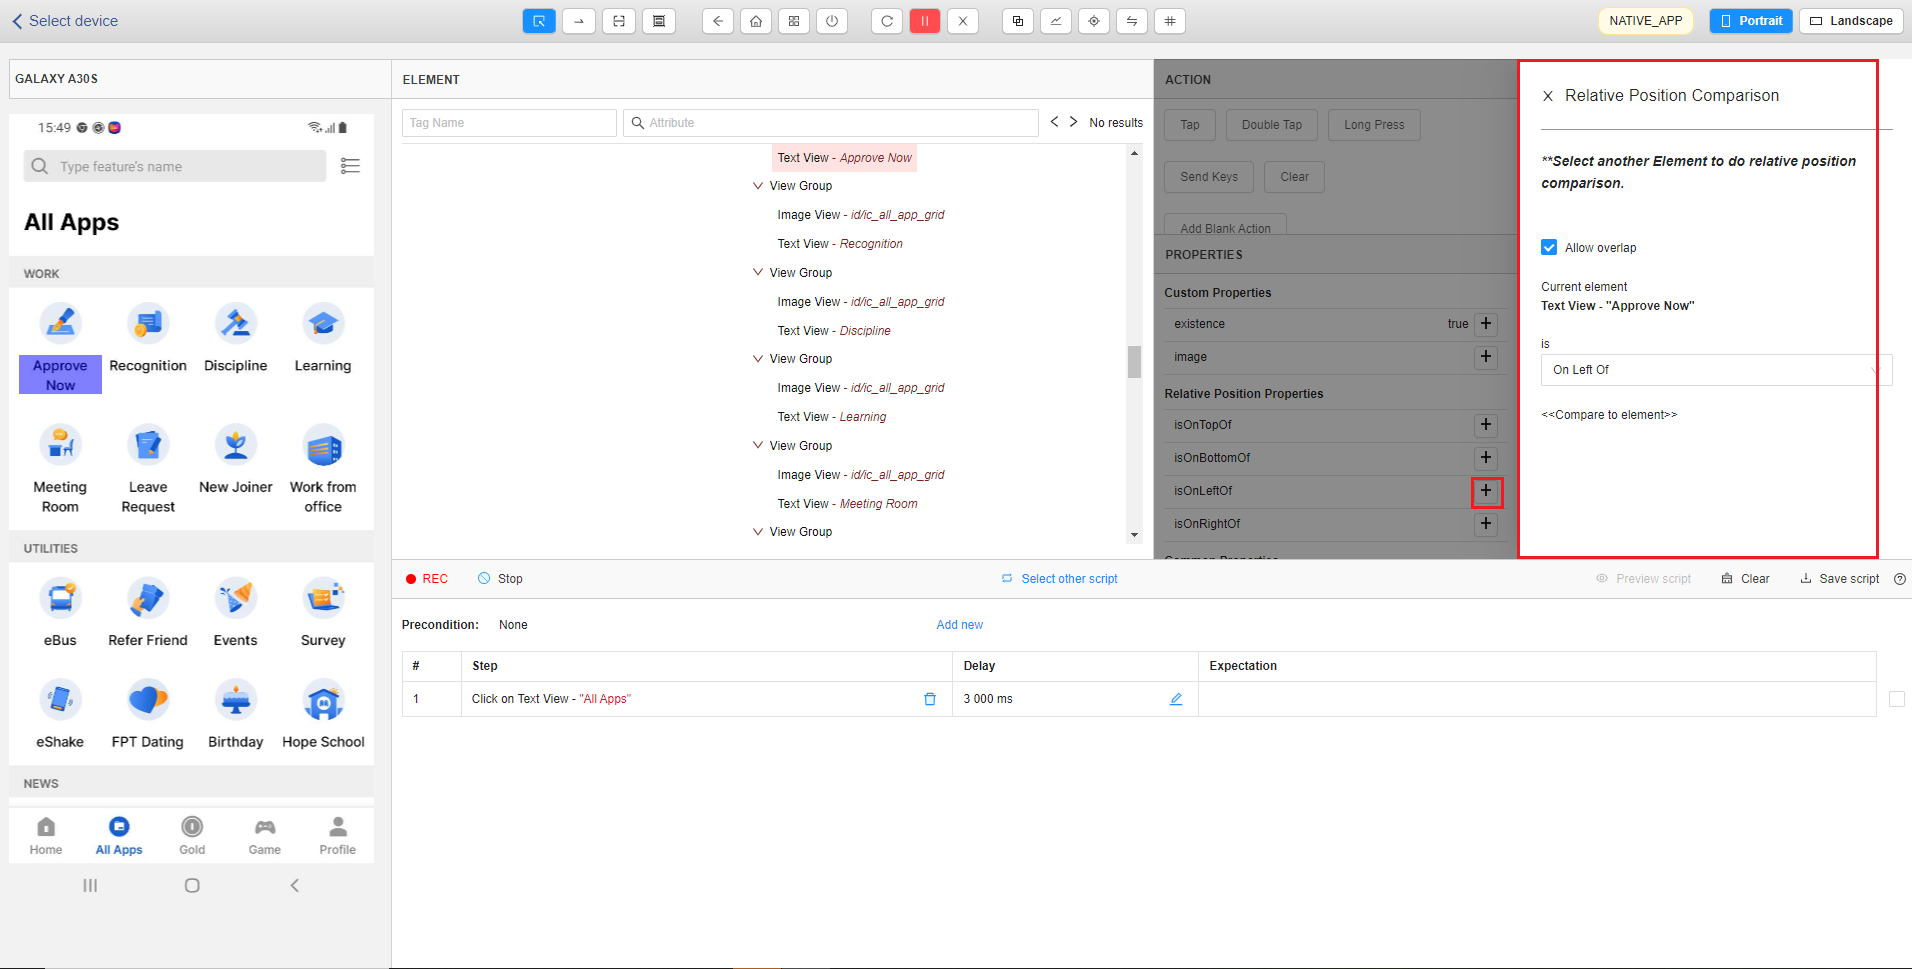
- To verify relative position of an element, you choose one of properties: isOnTopOf, isOnBottomOf, isOnLeftOf, isOnRightOf.
For example: On the All apps screen, you need to verify that the [Approve Now] text is on left of the [Recognition] text. Please follow the steps as below:
– Select the [Approve Now] element on the streaming screen.
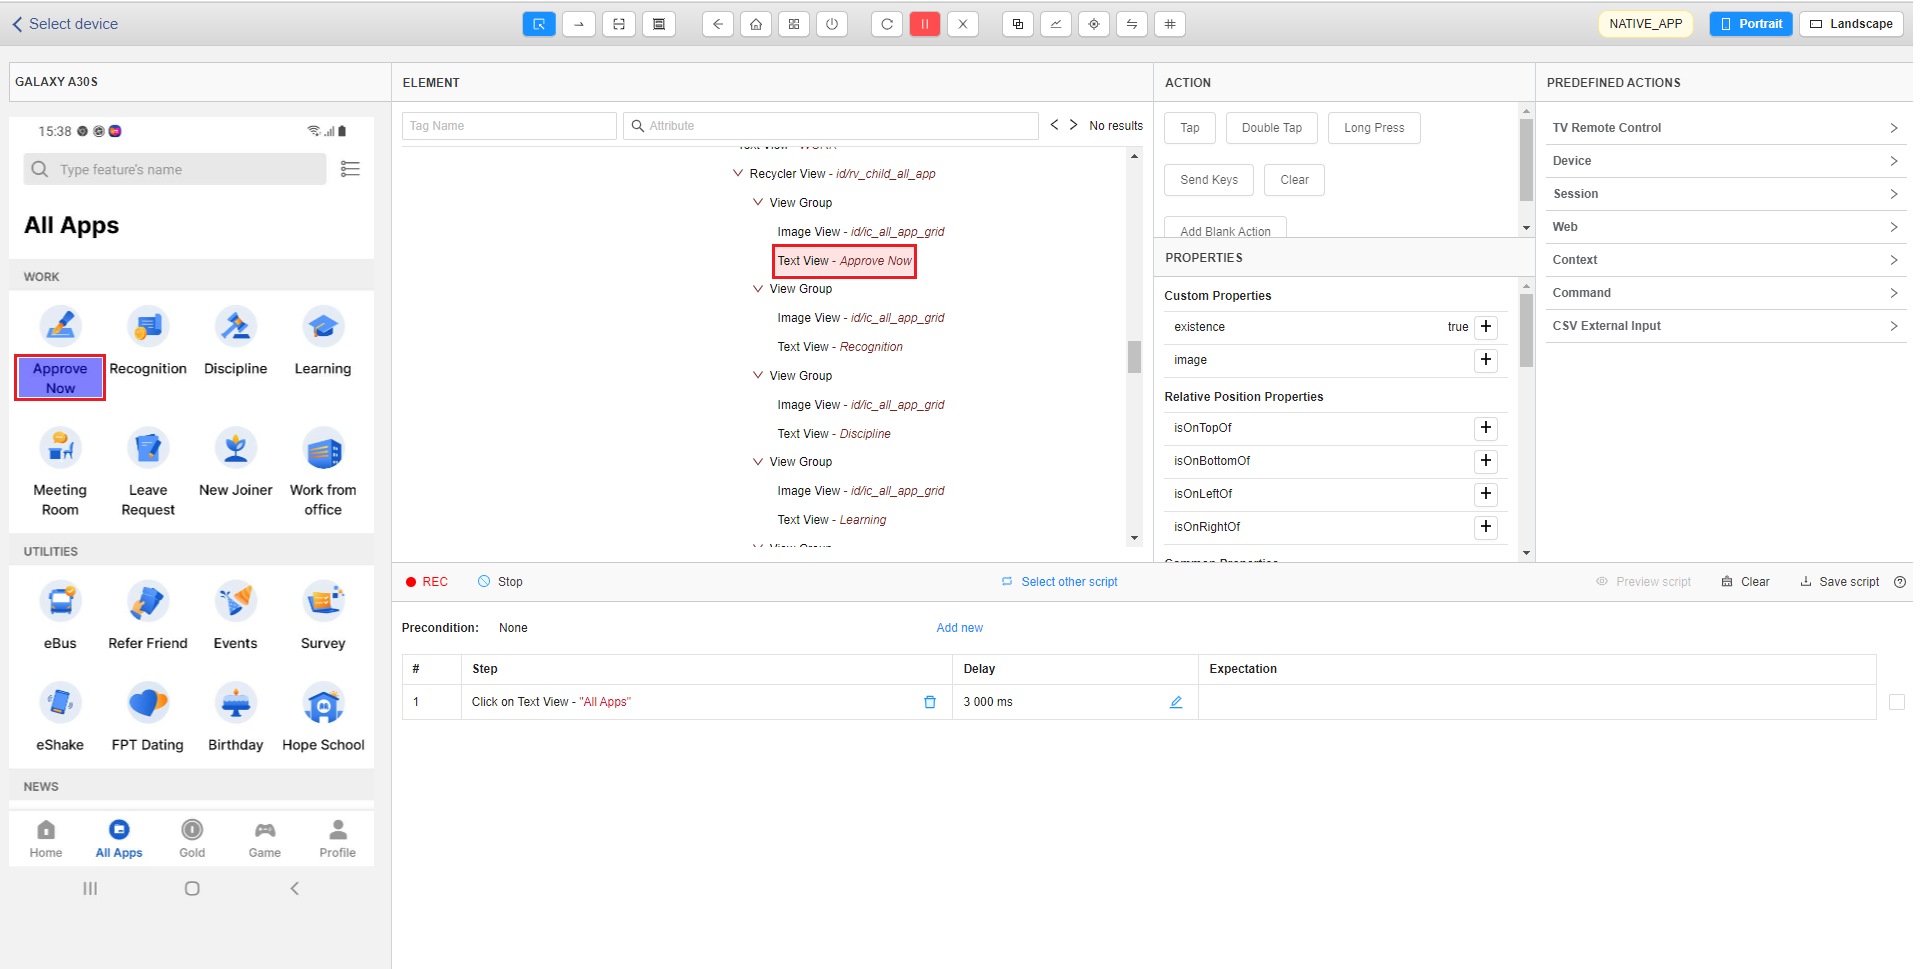
– Click on the [+] button next to the [isOnLeftOf] property. Then popup Relative Position Comparison is displayed.
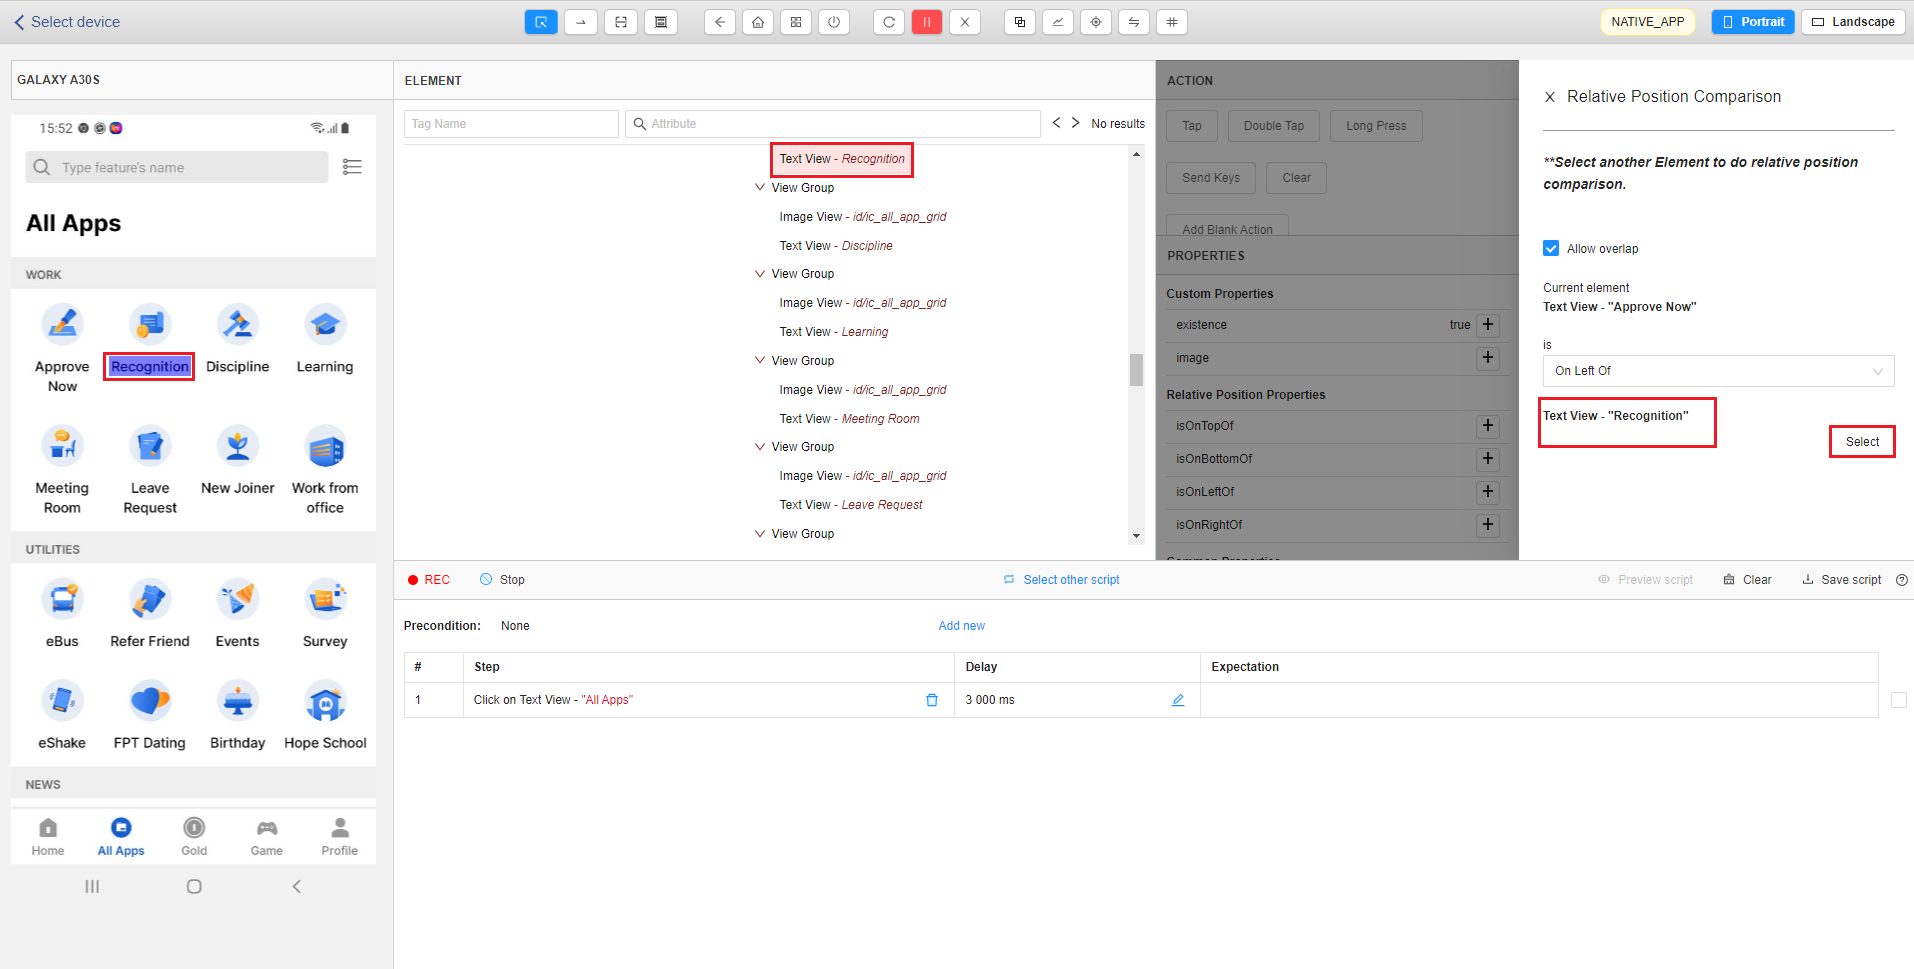
– Users select the [Recognition] element on the streaming screen, the [Recognition] element will be displayed on the pop up. Then users click on the [Select] button.
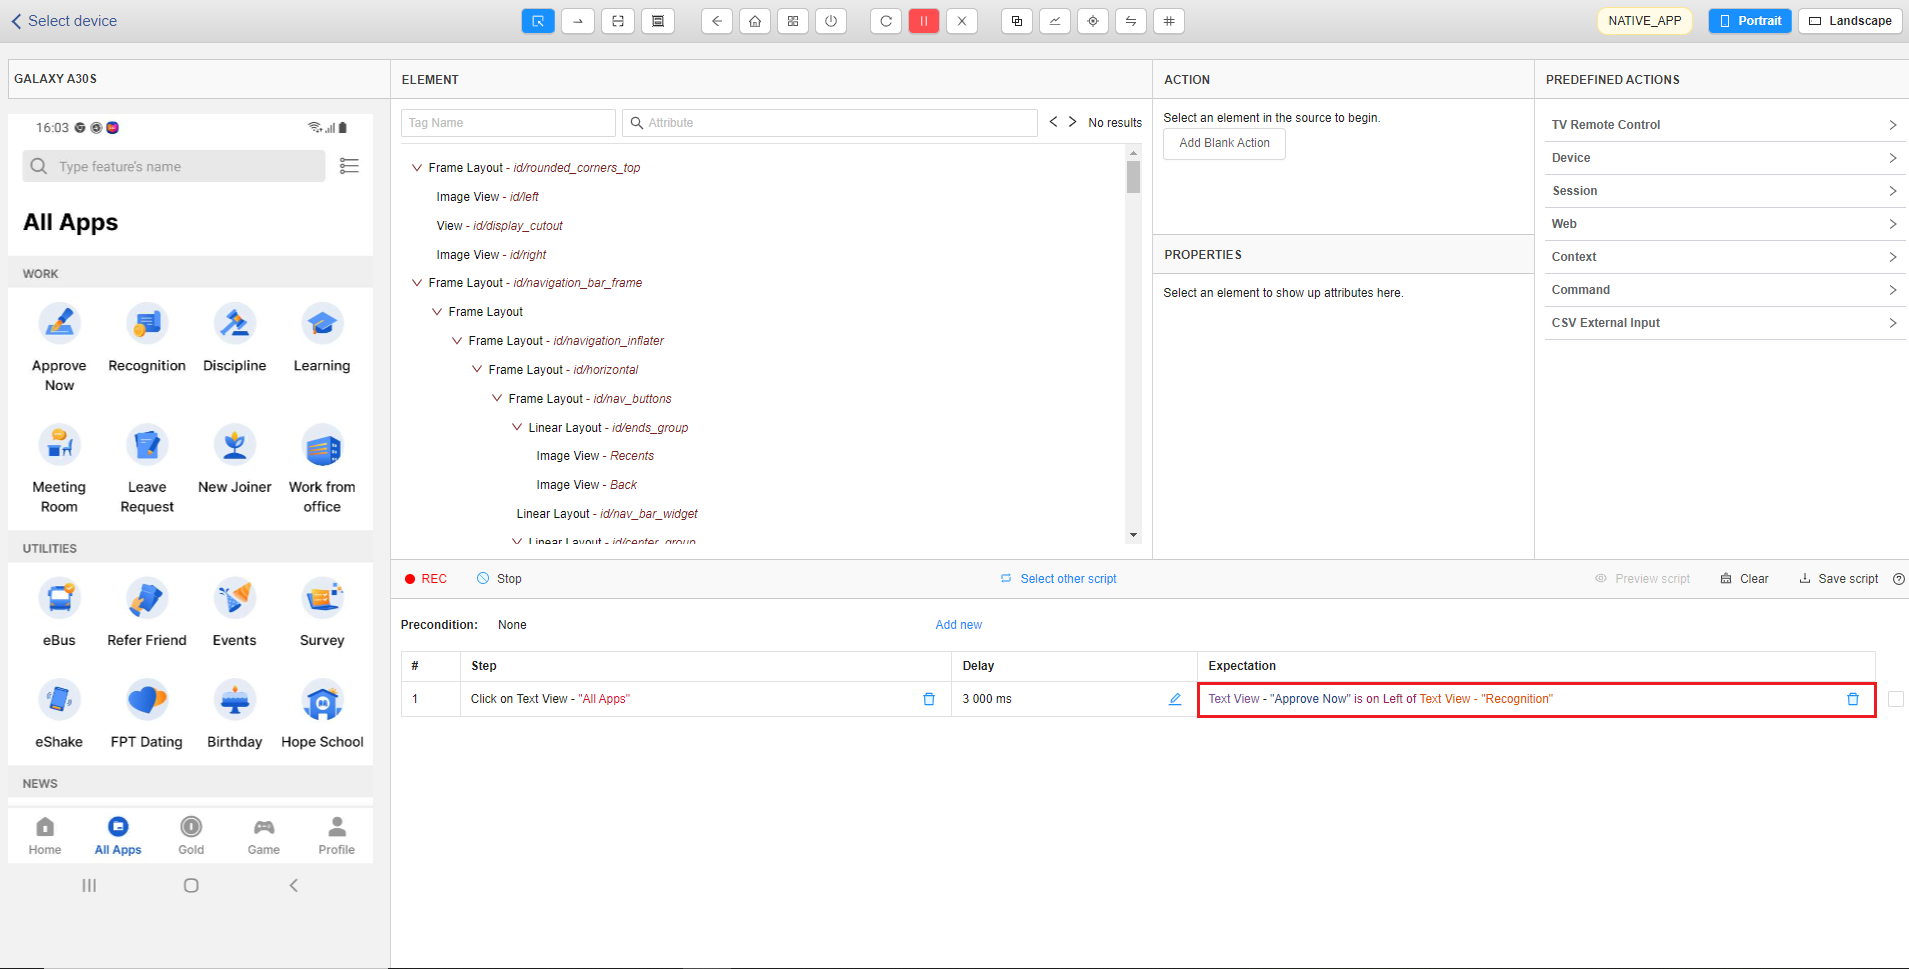
– Finally, the expectation will be added to script as picture:
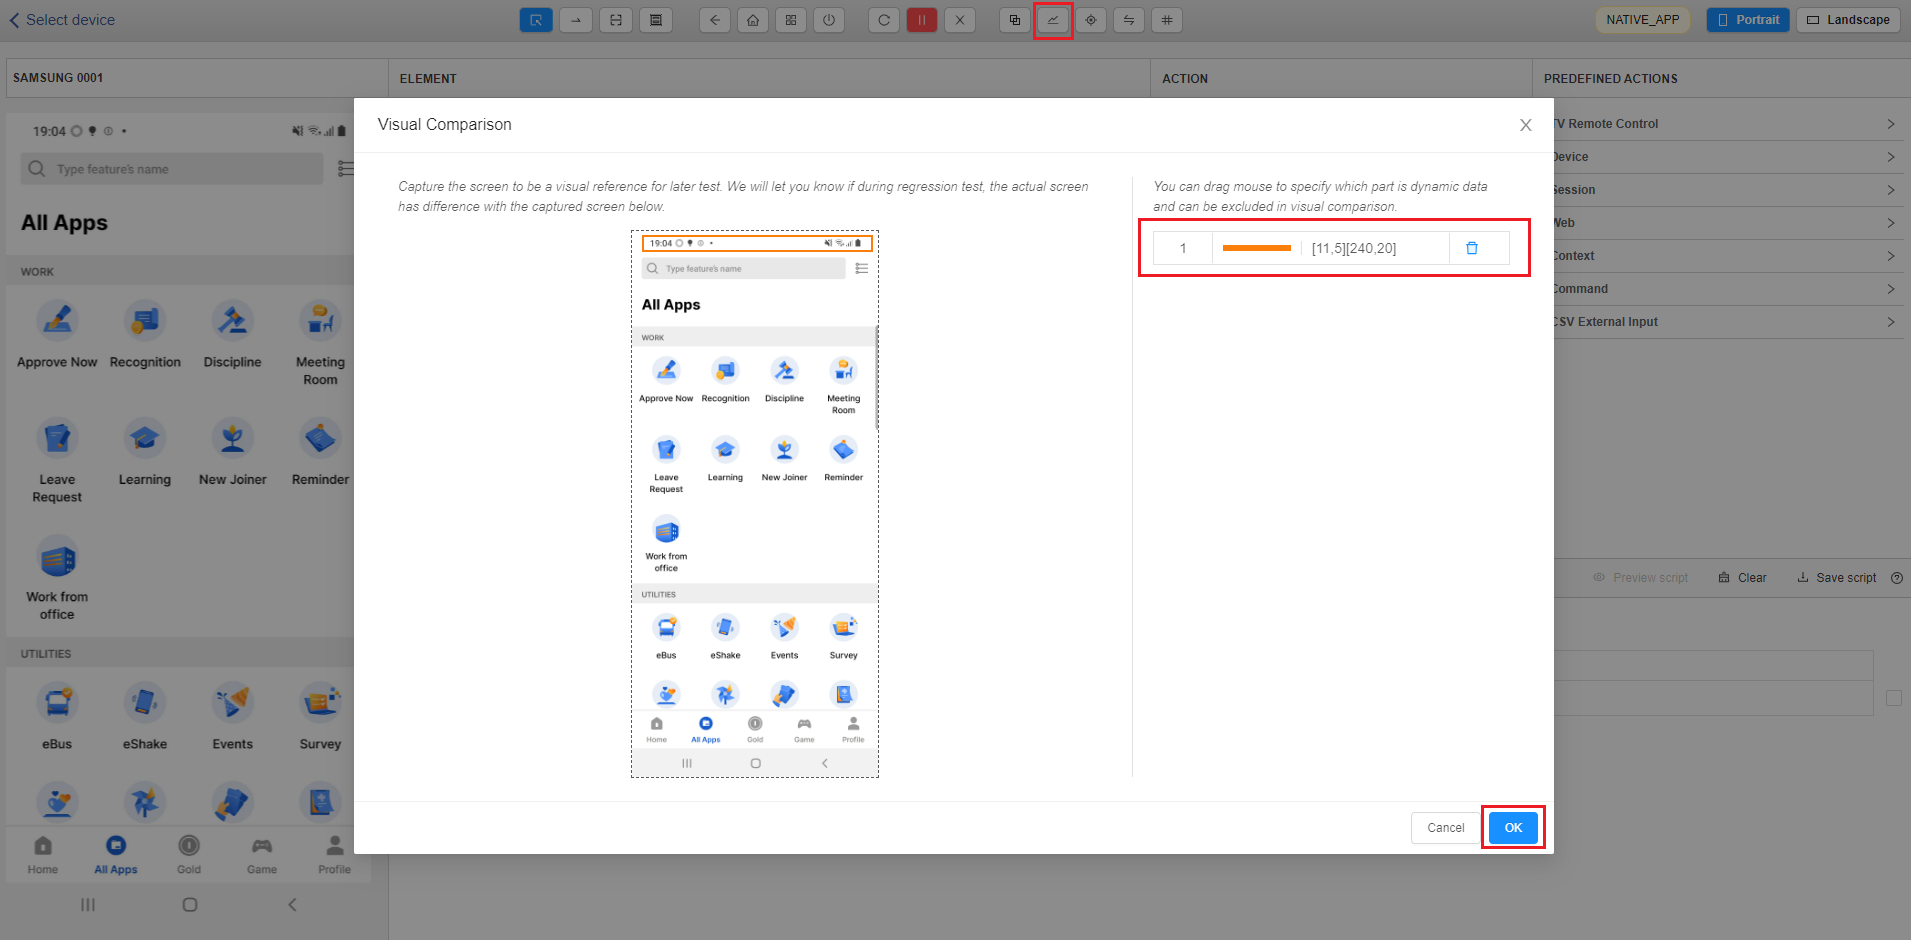
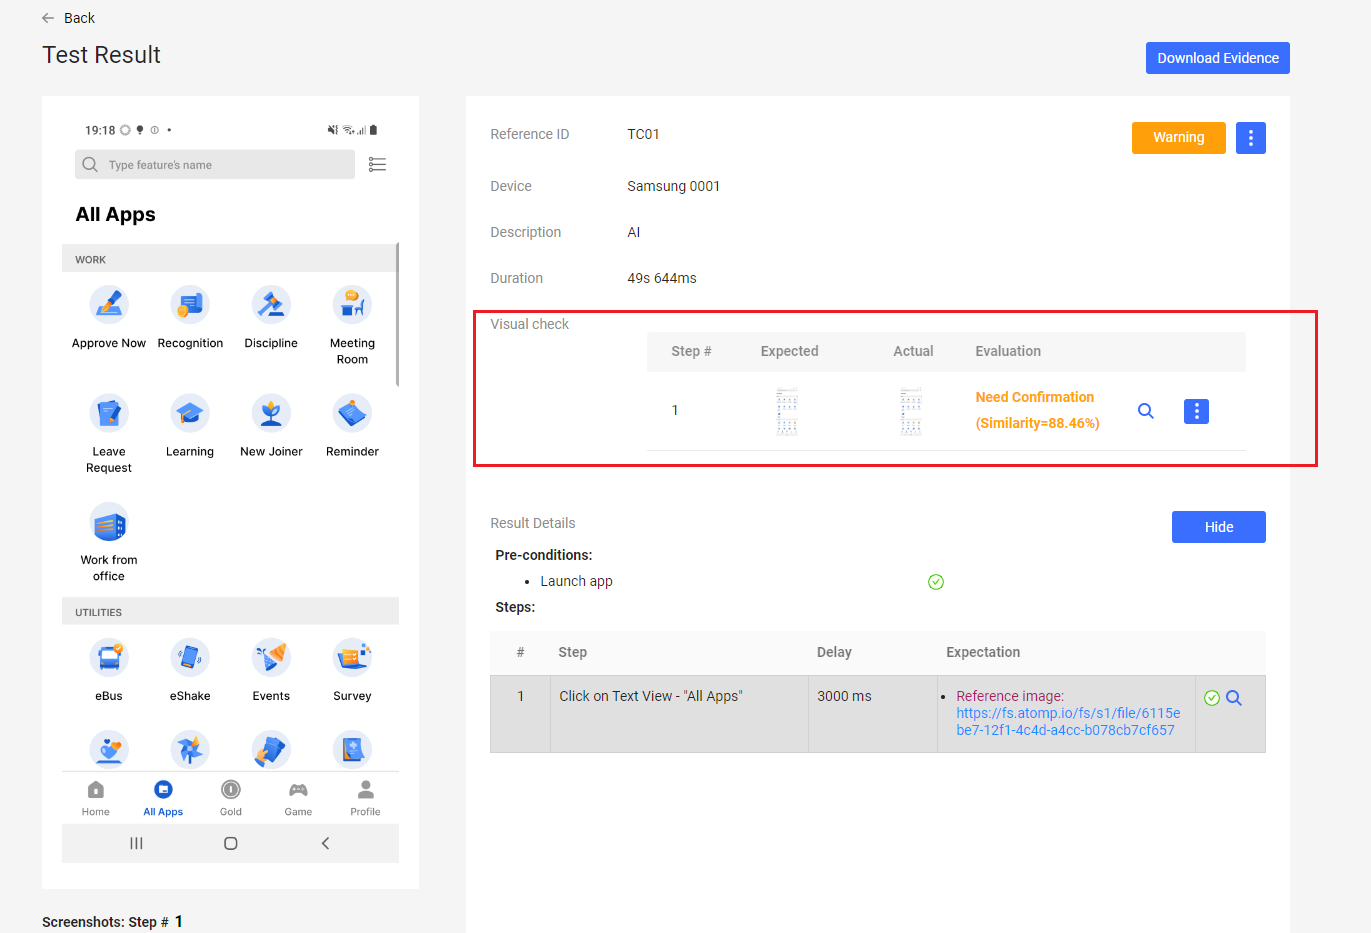
- If you want to use AI Visual check, select icon to add AI Visual check expectation to compare visual images which help you increase accuracy and reduce effort for testing. AI Visual check will capture the screen to be a visual reference for later test and let you know if during regression test, the actual screen has difference with the captured screen.
1. You can drag mouse to specify which part is dynamic data and can be excluded in visual comparison. After that, you click on “OK” button to save Expectation or click on icon  to delete selected data area.
2. You can also click the link reference image in Expectation to view again or edit chosen data by following part (1). Click on icon if you want to delete AI Visual check expectation.
User can view evidence at Tester40 [Test Result] page.
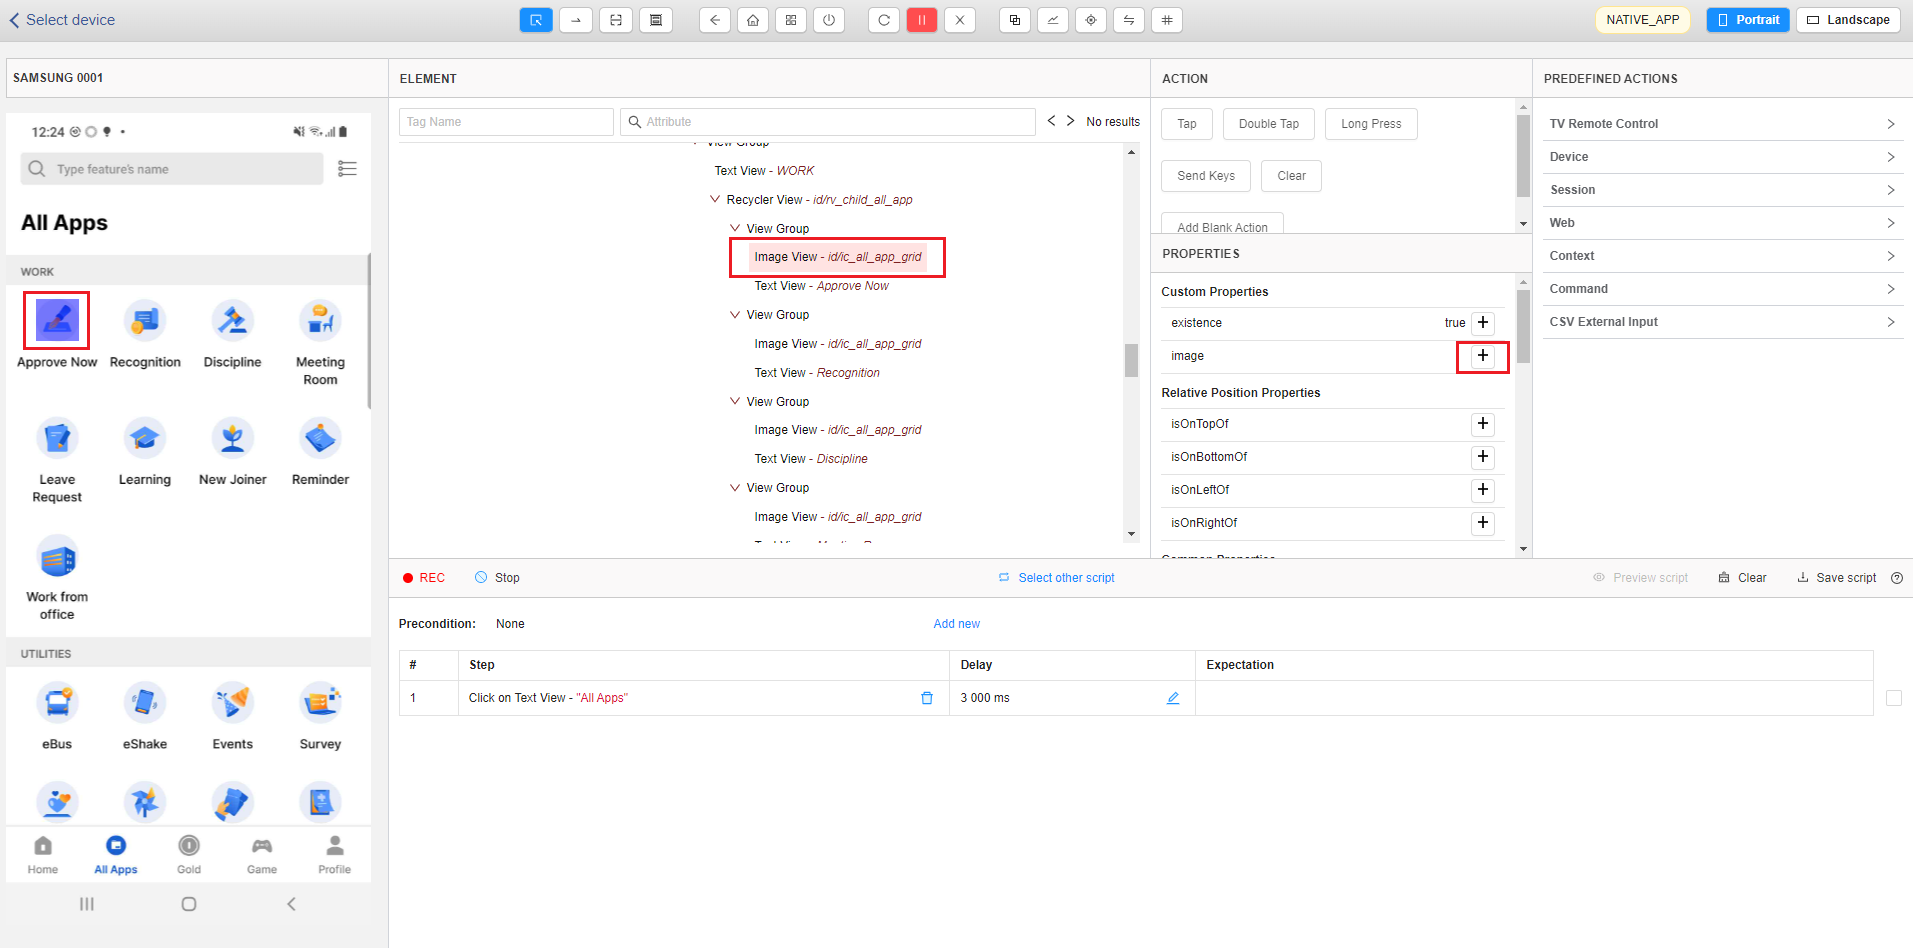
The system also supports comparing images of element when confirming exepectation. Please follow these steps:
- Click on an element on the streaming screen => Click on [+] button besides text [Image] in Custom Properties.
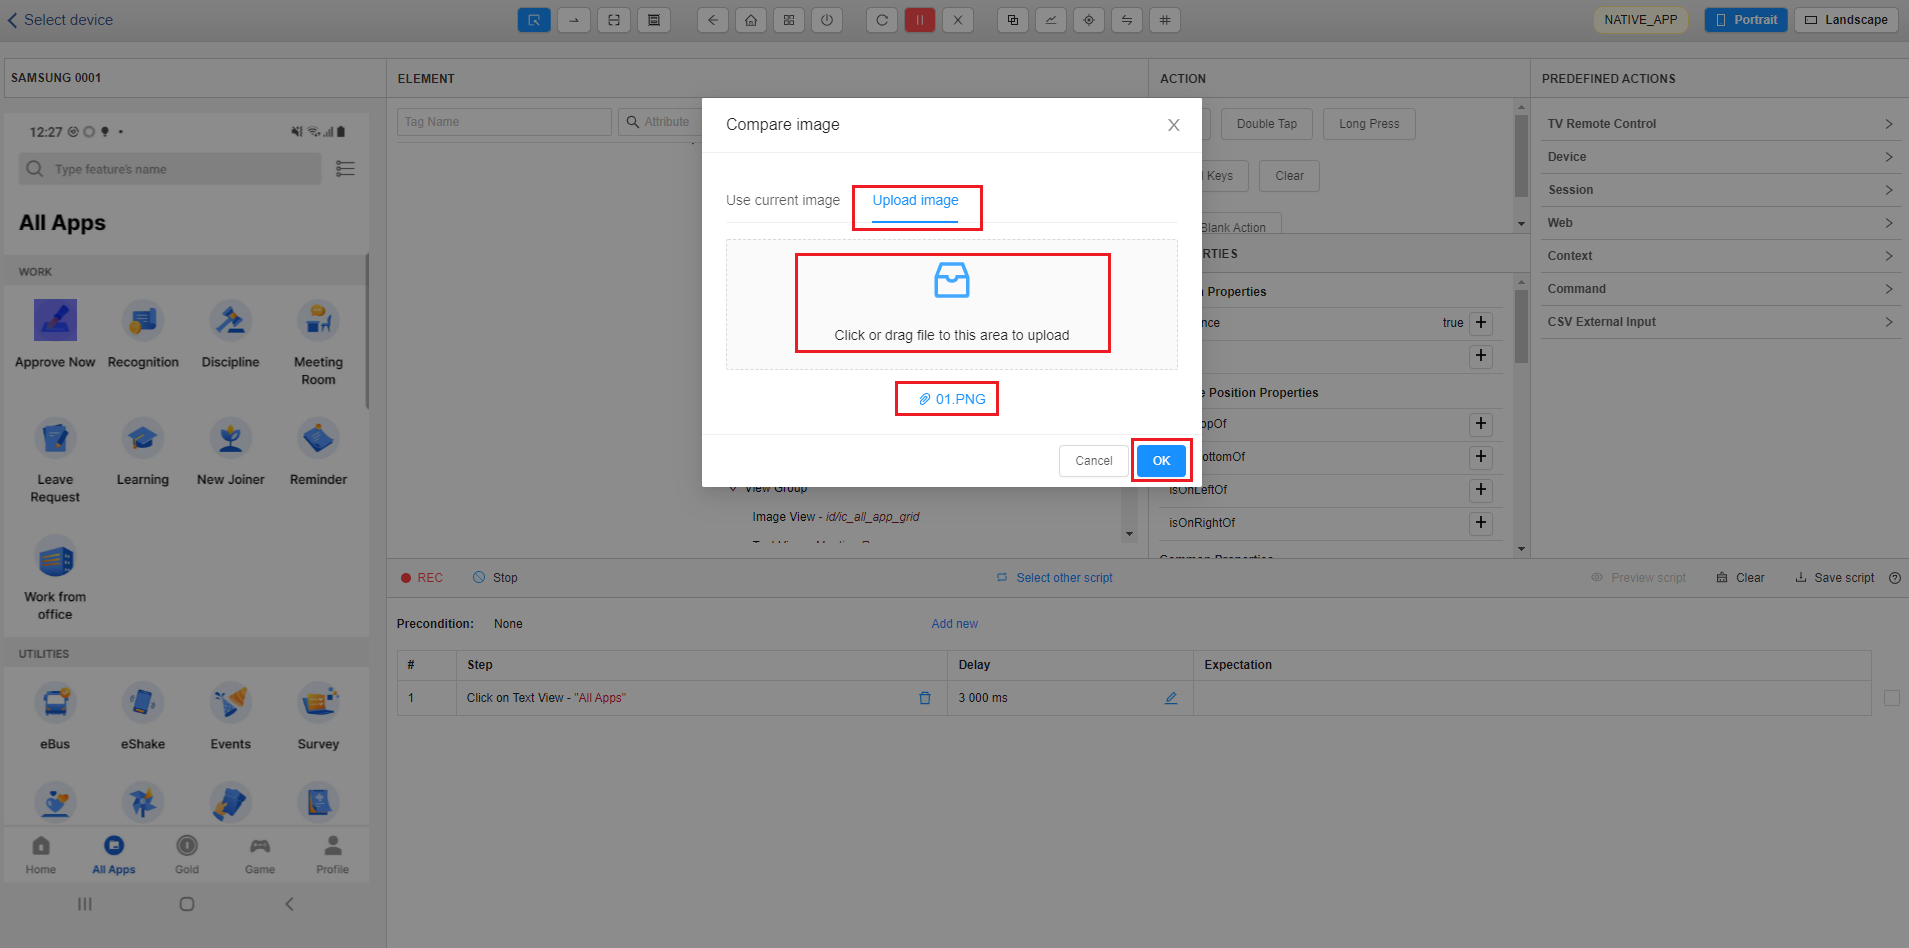
Then [Compare image] pop up display. Popup has 2 options:
– Upload image: Allowing uploading an existing image or an image cutted from an xd file (JPG, JPEG, PNG format).
– Use curent image: Allowing to automatically capture the current screenshot, then based on the element position, automatically crop the image of that element.
Option 1: Upload image
Firstly, users must click on tab Upload image then select image file and press OK. After selecting image, photo is uploaded to ATOM Storage. If there is an existing image, the new uploaded image will replace the old one. ==> After uploading, the added expectation <Element> displays the same as <filename of the uploaded image>.
Option 2: Use current image
Click on button to use current element’s image as reference then click on [OK] button, image is used as expectation.

6. Feature IF – THEN – ELSE
Step 1: Add [IF] block
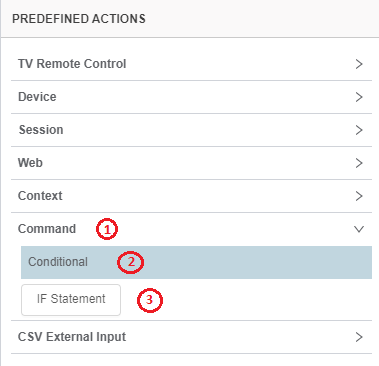
- On the [PREDEFINED ACTIONS] tab, click on [Command] menu to expand it
- Expand [Conditional] sub-menu
- Click on [IF Statement] to add IF block to script.
After that, new block will appear on Recorded Script section.
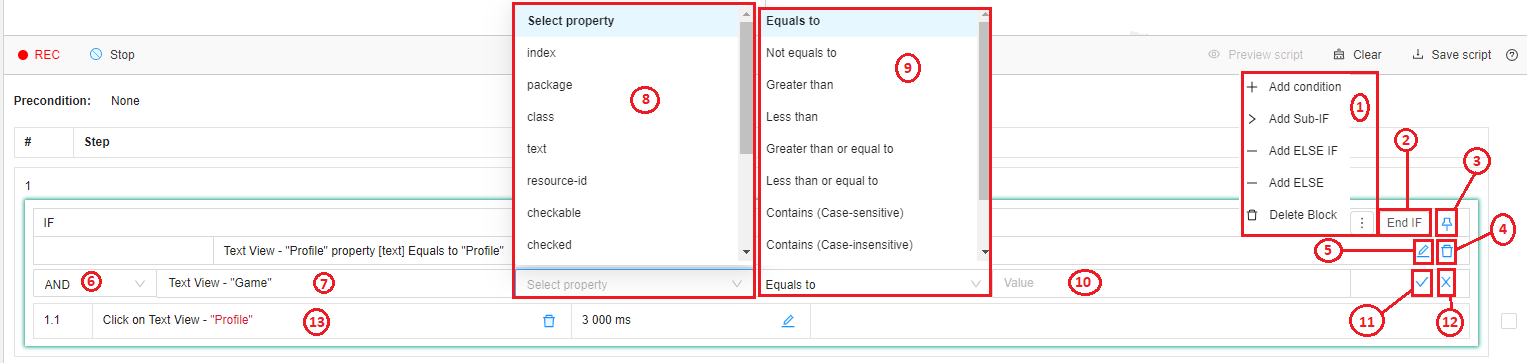
1) Hover on  to open menu
- Click on “Add condition” add a new condition to current [IF] block, it will open input form as above.
- Click on “Add Sub-IF” to add a [Sub-IF] block to current block
- Click on “Add ELSE IF” to add [ELSE IF] block after current [IF] block
- Click on “Add ELSE” to add [ELSE] block after current [IF] block
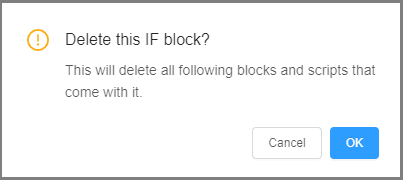
- Click on “Delete Block” to delete current block. If deleting a [IF] block will delete all [ELSE IF] and [ELSE] blocks that come with it. User must confirm before action to be executed.
2) Click on  to stop working on current block.
3) Click on  to stop working on current block,
  to work on a block (pin – unpin block).
4) Delete a condition.
5) Edit condition.
6) Logical operator (uses when block has 2 more conditions).
7) Element to do comparison operation.
8) Property of element (must be specified in order to save condition).

9) Operator.
10) Value to compare (default is element’s property value).
11) Click to save condition.
12) Click to cancel input condition.
13) Block action (will be executed if condition is met).
Some cases when working with IF – THEN – ELSE function.
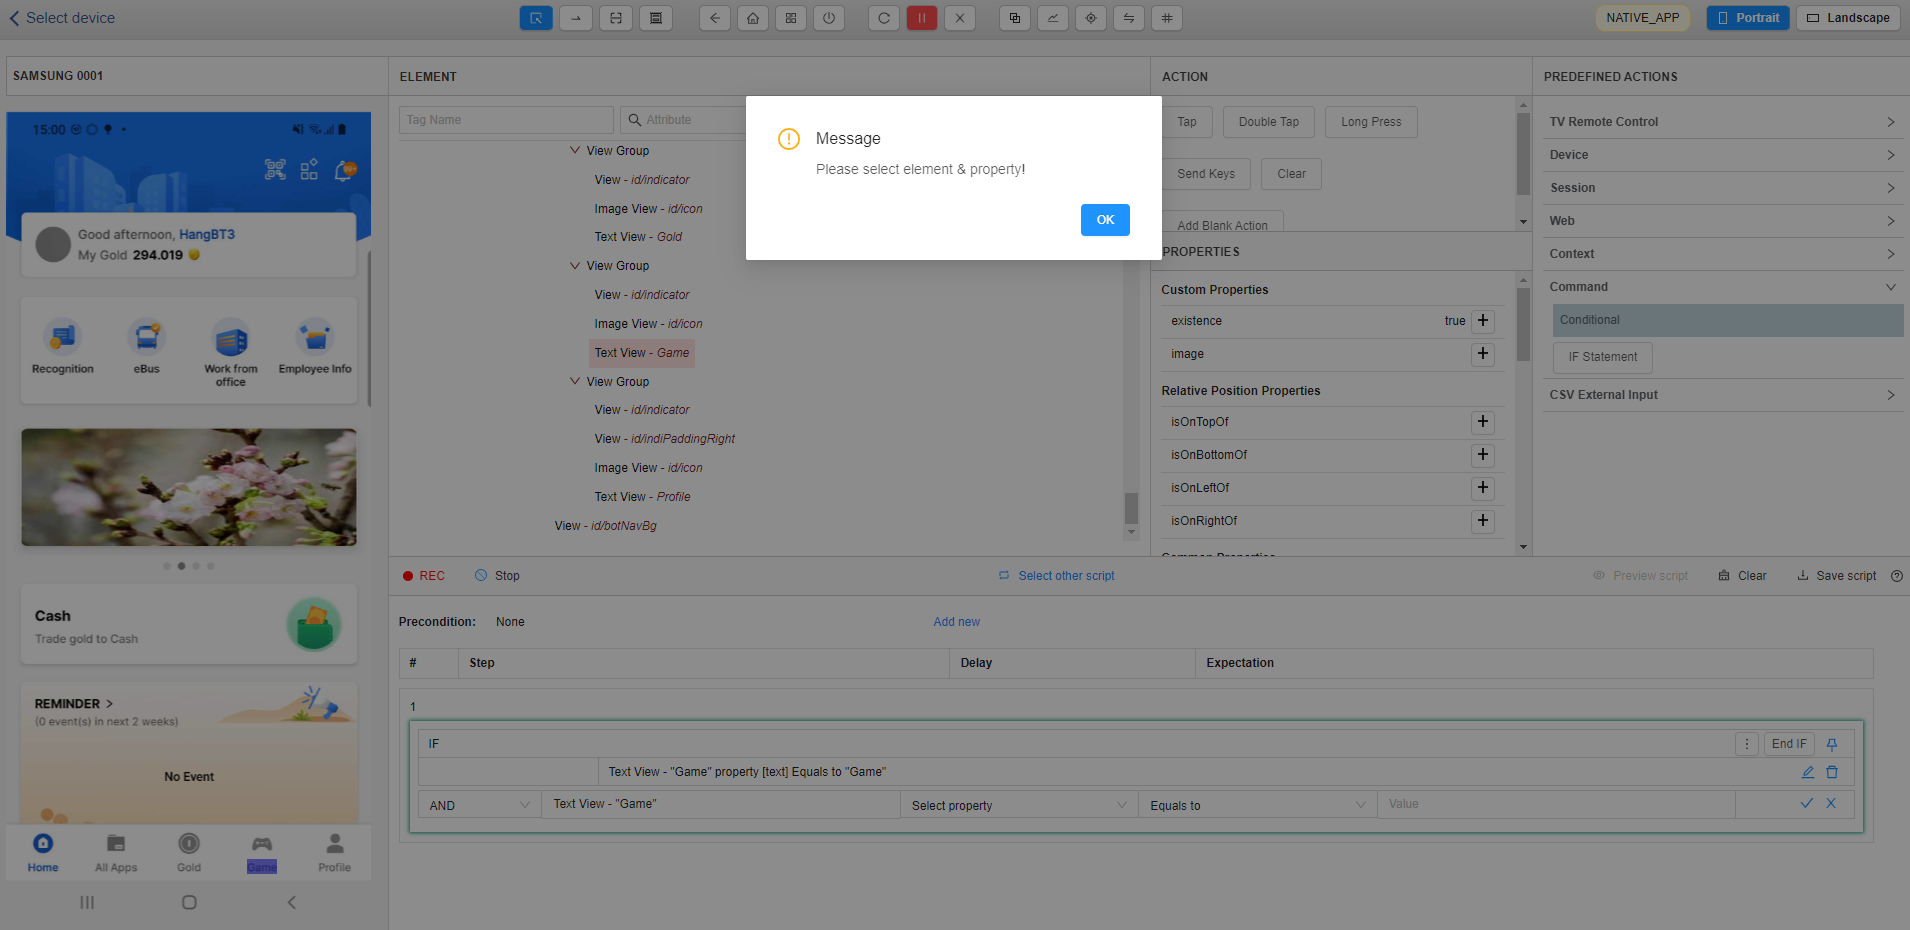
- When adding condition without selecting element or property to do comparison operation, a message will appear like bellow and condition will not be saved until user specify element & property.
- When deleting all [IF] – [ELSE IF] block condition, a notification will appear with below content to inform user that block condition is empty.

- When working on [IF] – [ELSE IF] block which does not contain any condition, script will not be recorded and a notification with below content will appear.

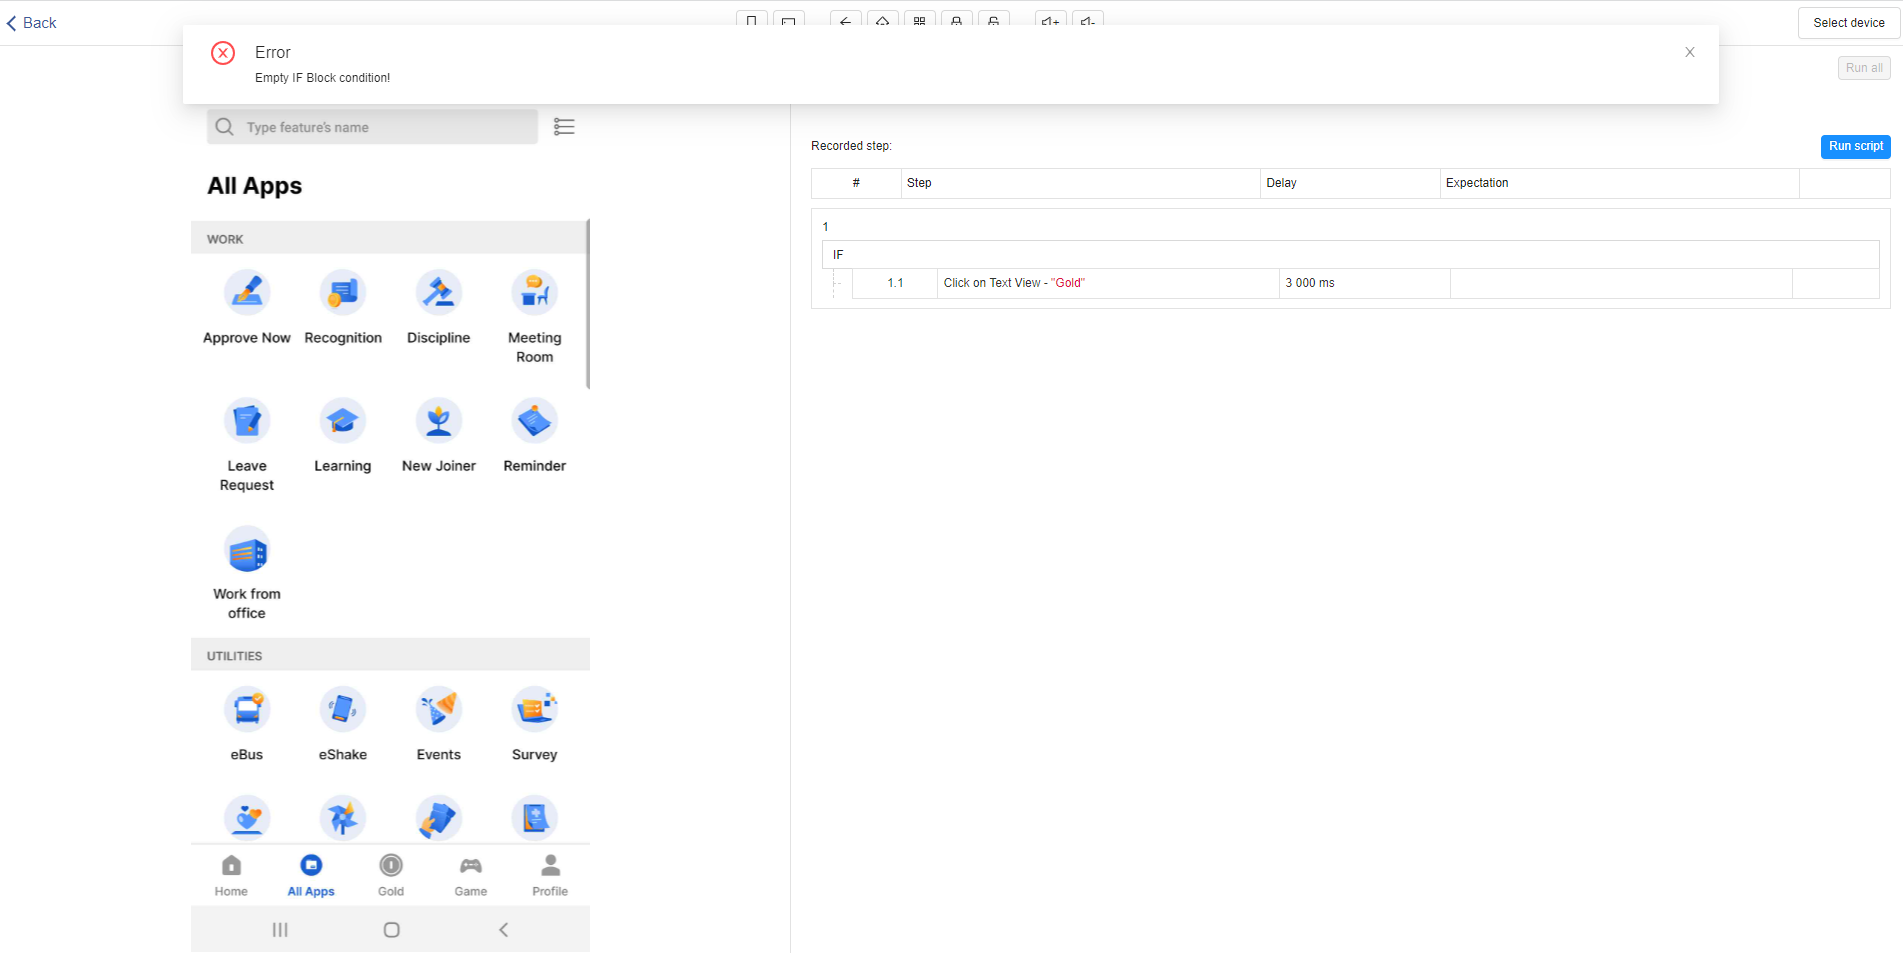
- When trying to save script with an empty condition [IF] – [ELSE IF] block, script will not be saved and notify an error message like below.

Preview Script with IF – THEN – ELSE function.

- All [IF], [ELSE IF], [ELSE] block which condition(s) does not meet will be ignore & show error message like above.
- When previewing script with empty condition [IF] – [ELSE IF] block, script will break at block which condition is empty.
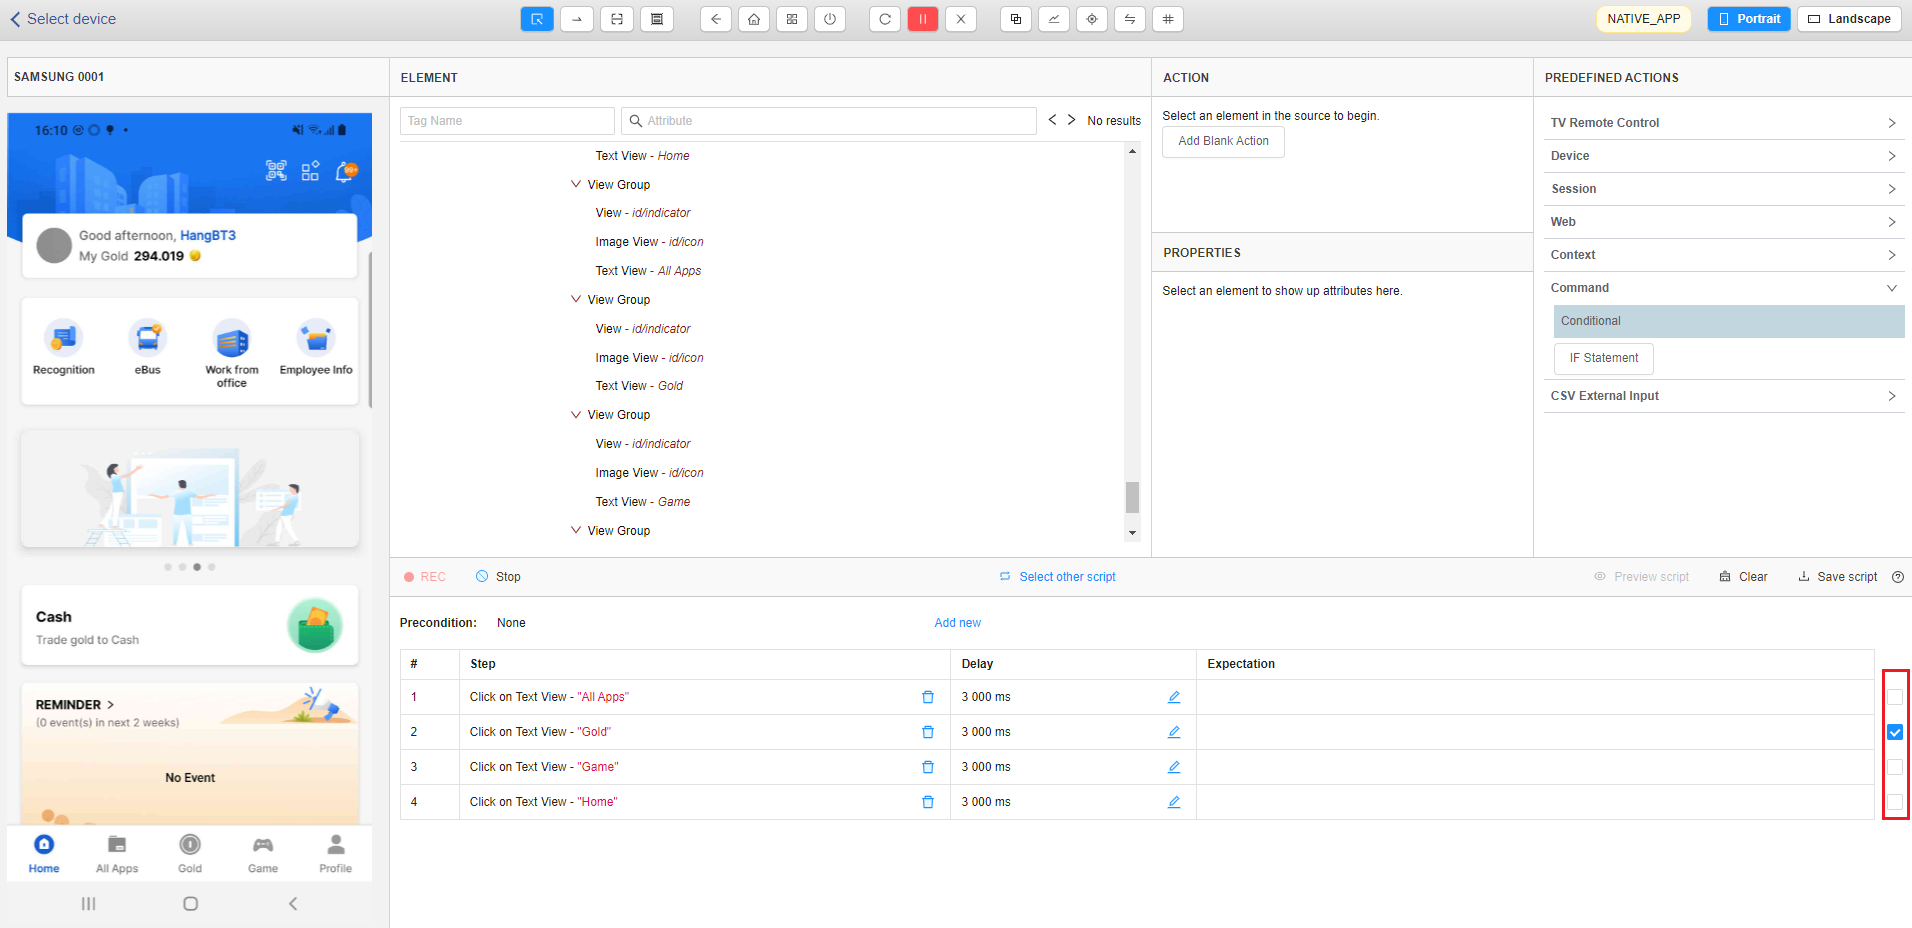
7. Feature Select Step to take evidence on Tester 4.0
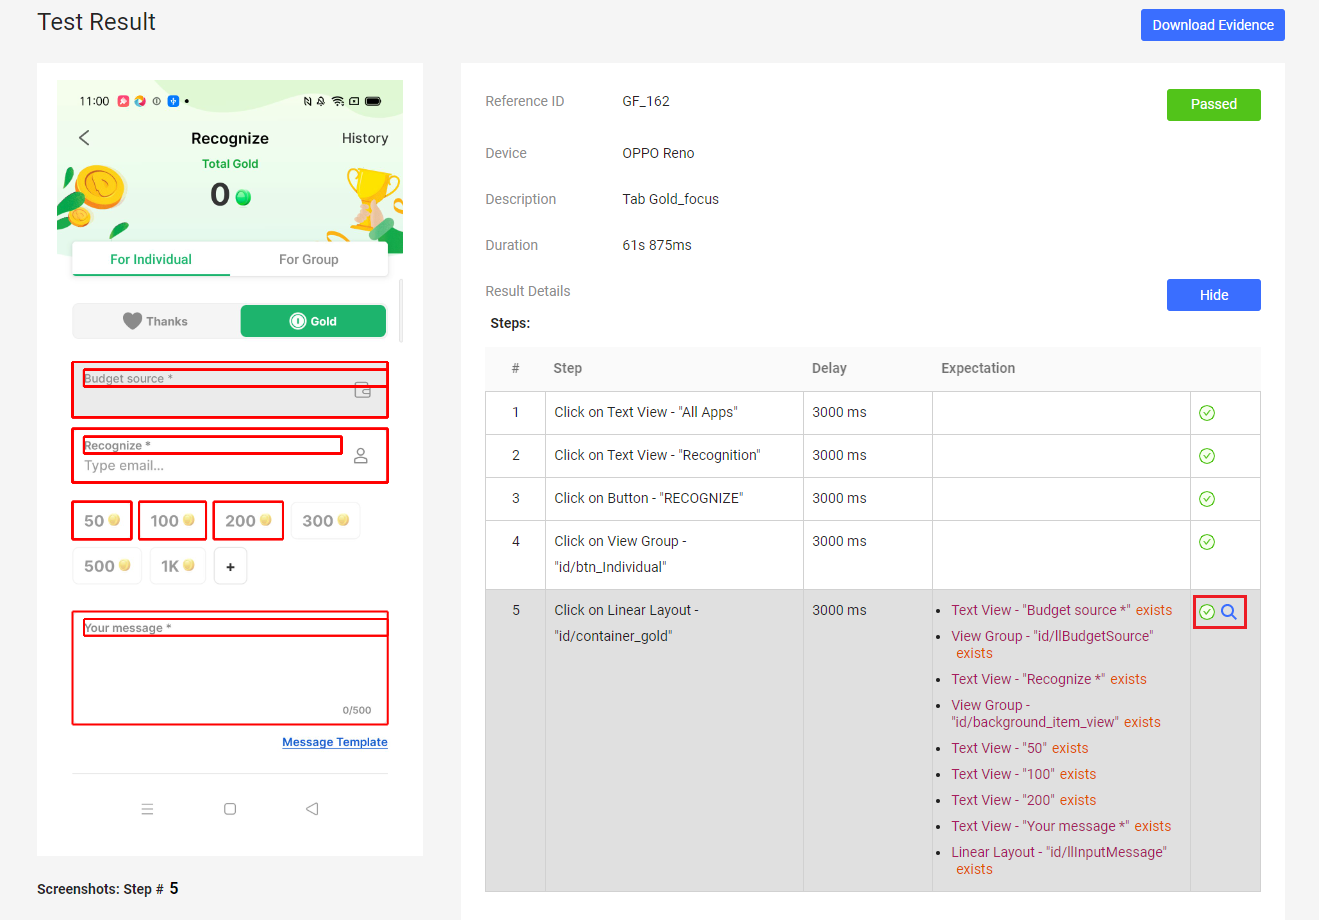
Step 1: Tick on checkbox in the last column of test script which step you want to take evidence when running on Tester4.0.
Step 2: After running sprint done, you click “Download evidence” button to get the evidence ticked in step 1.
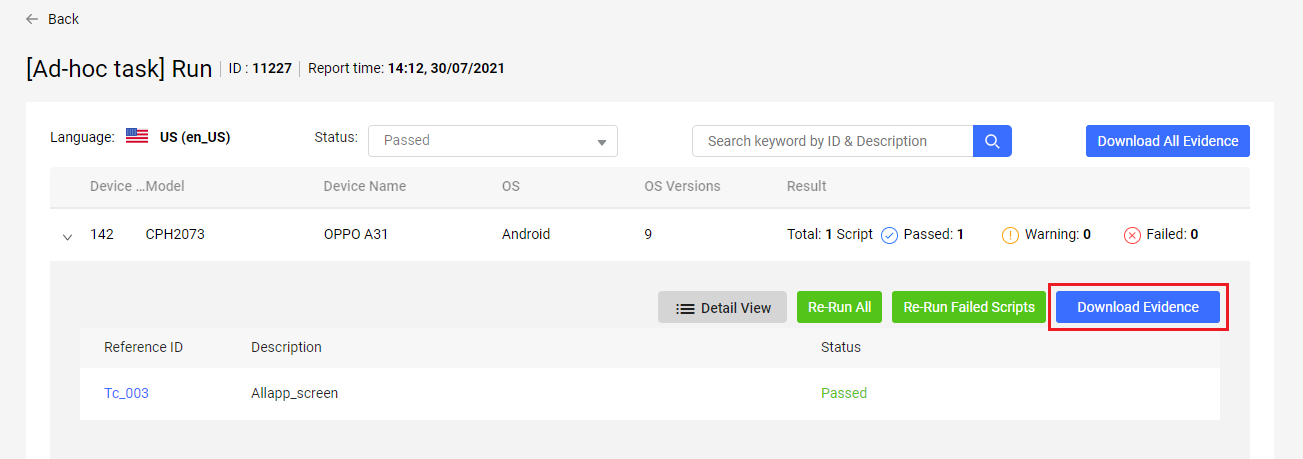
User can view evidence at Tester40 [Test Result] page.
8. Feature clone script
Step 1:
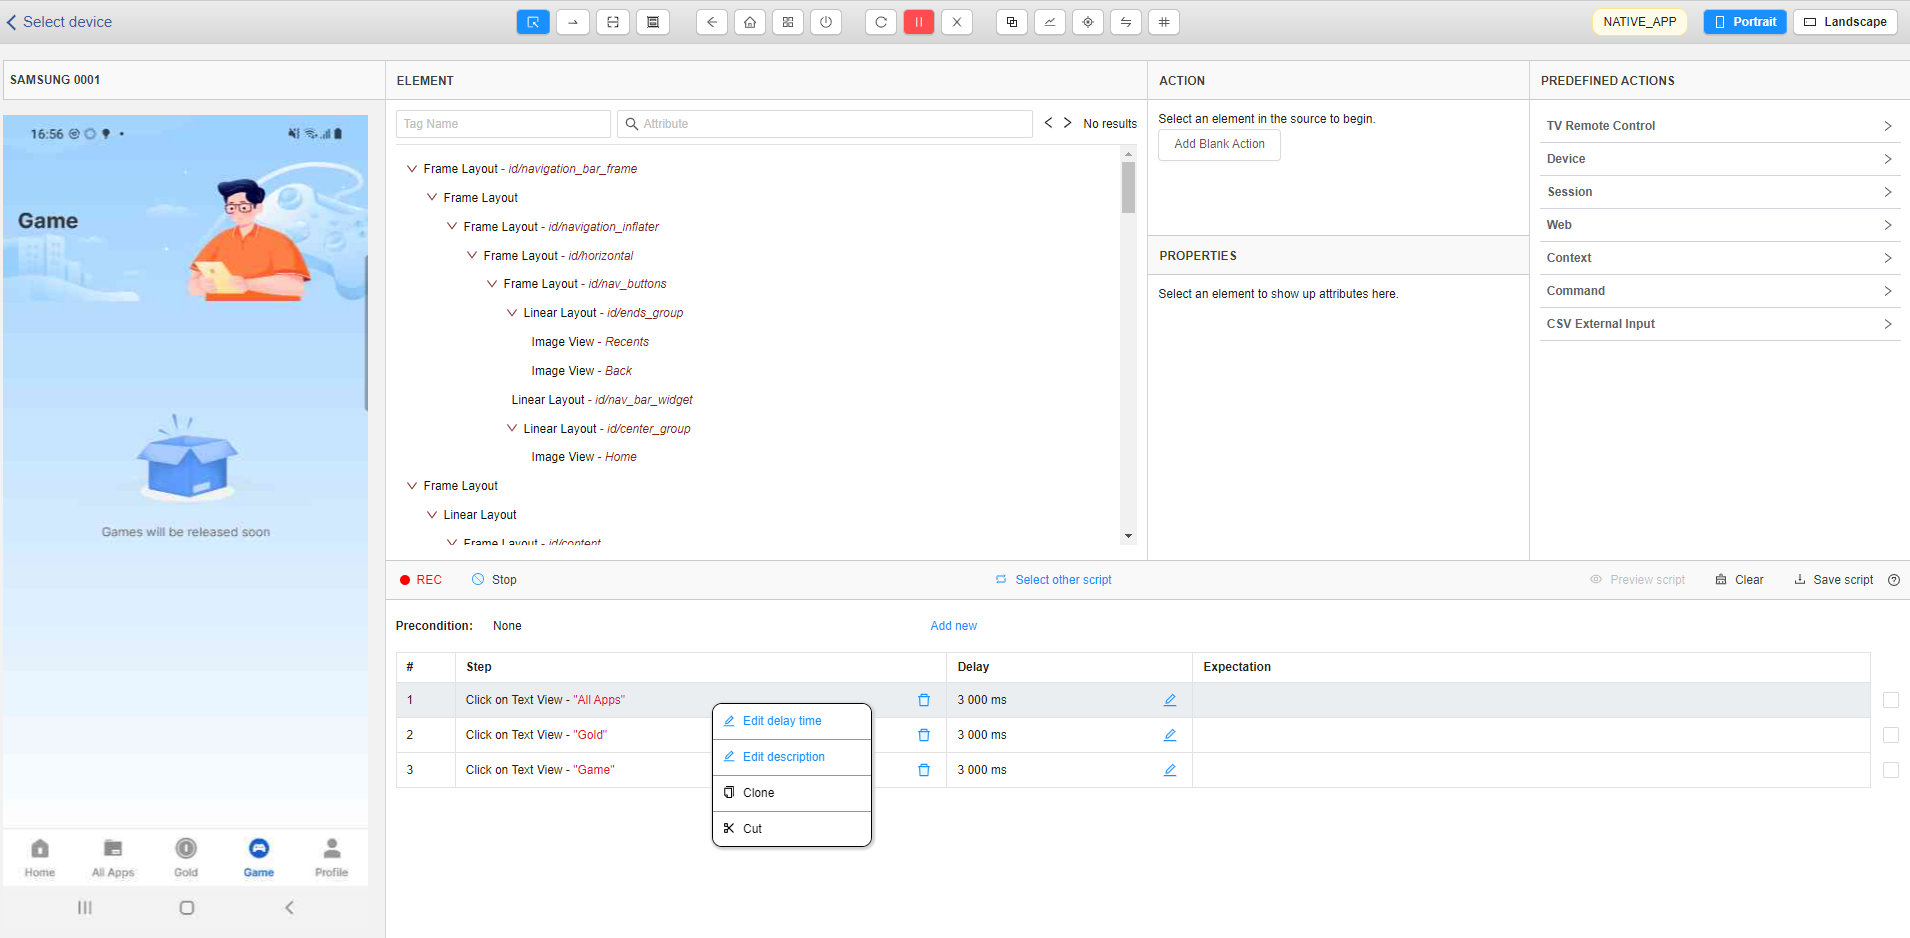
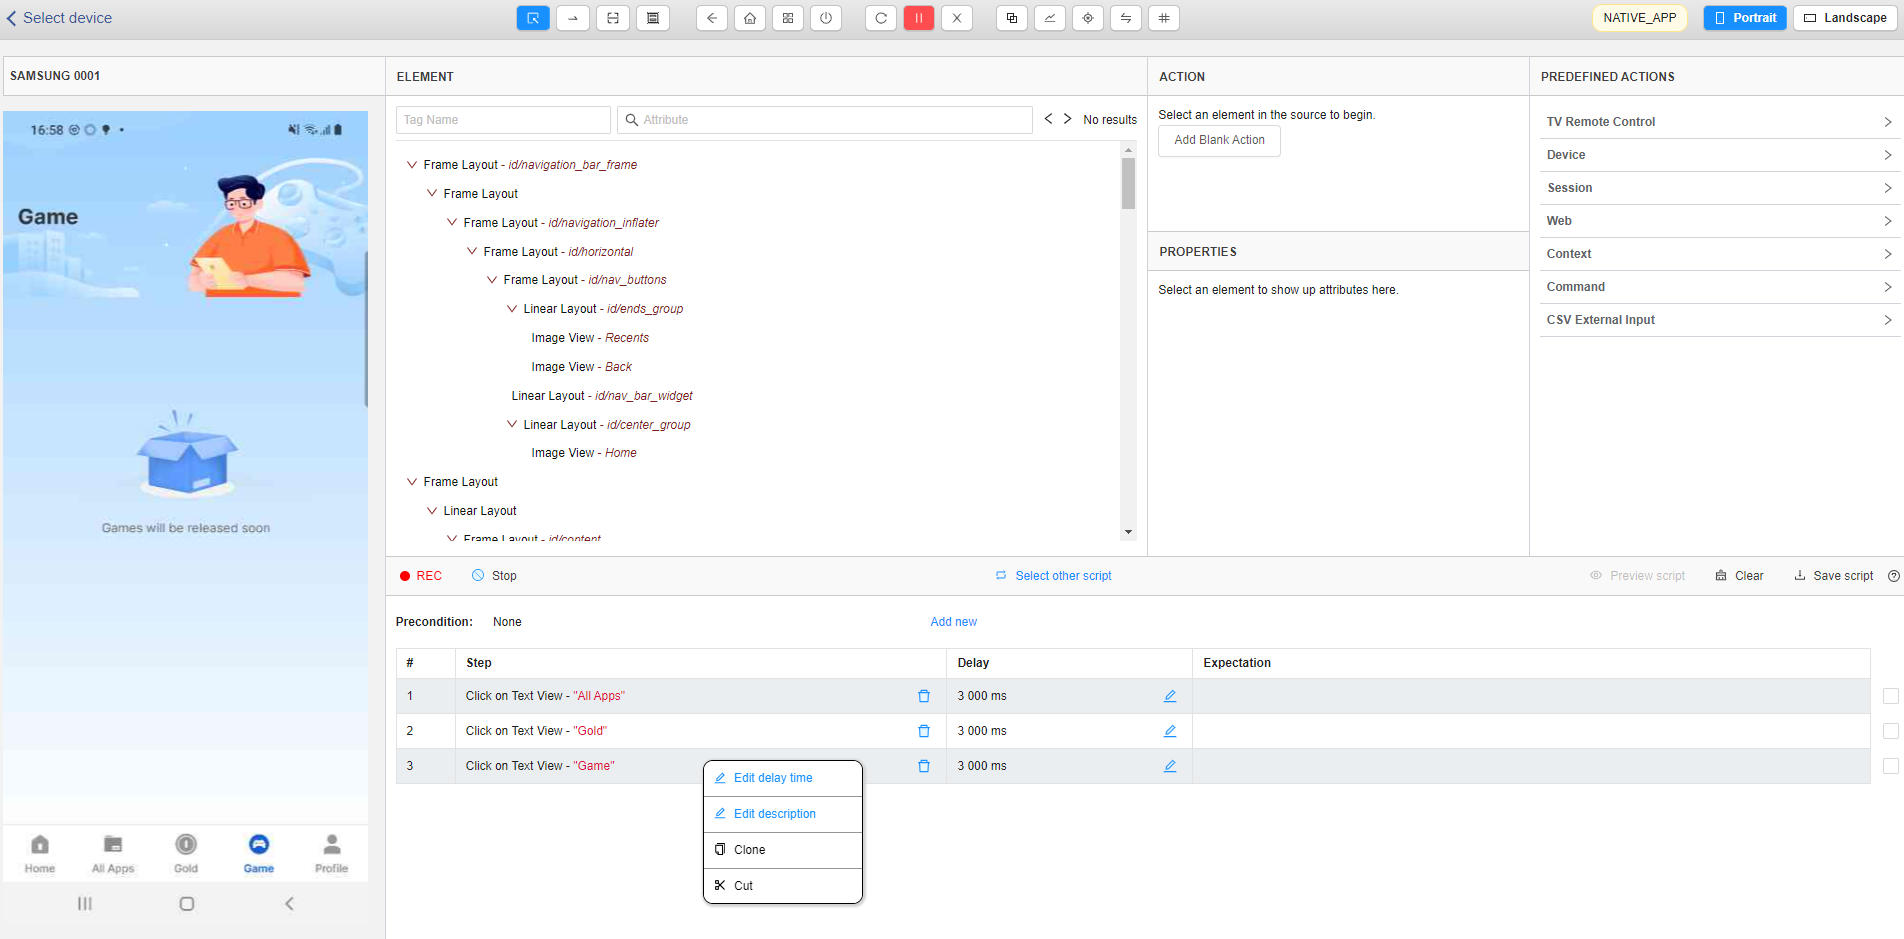
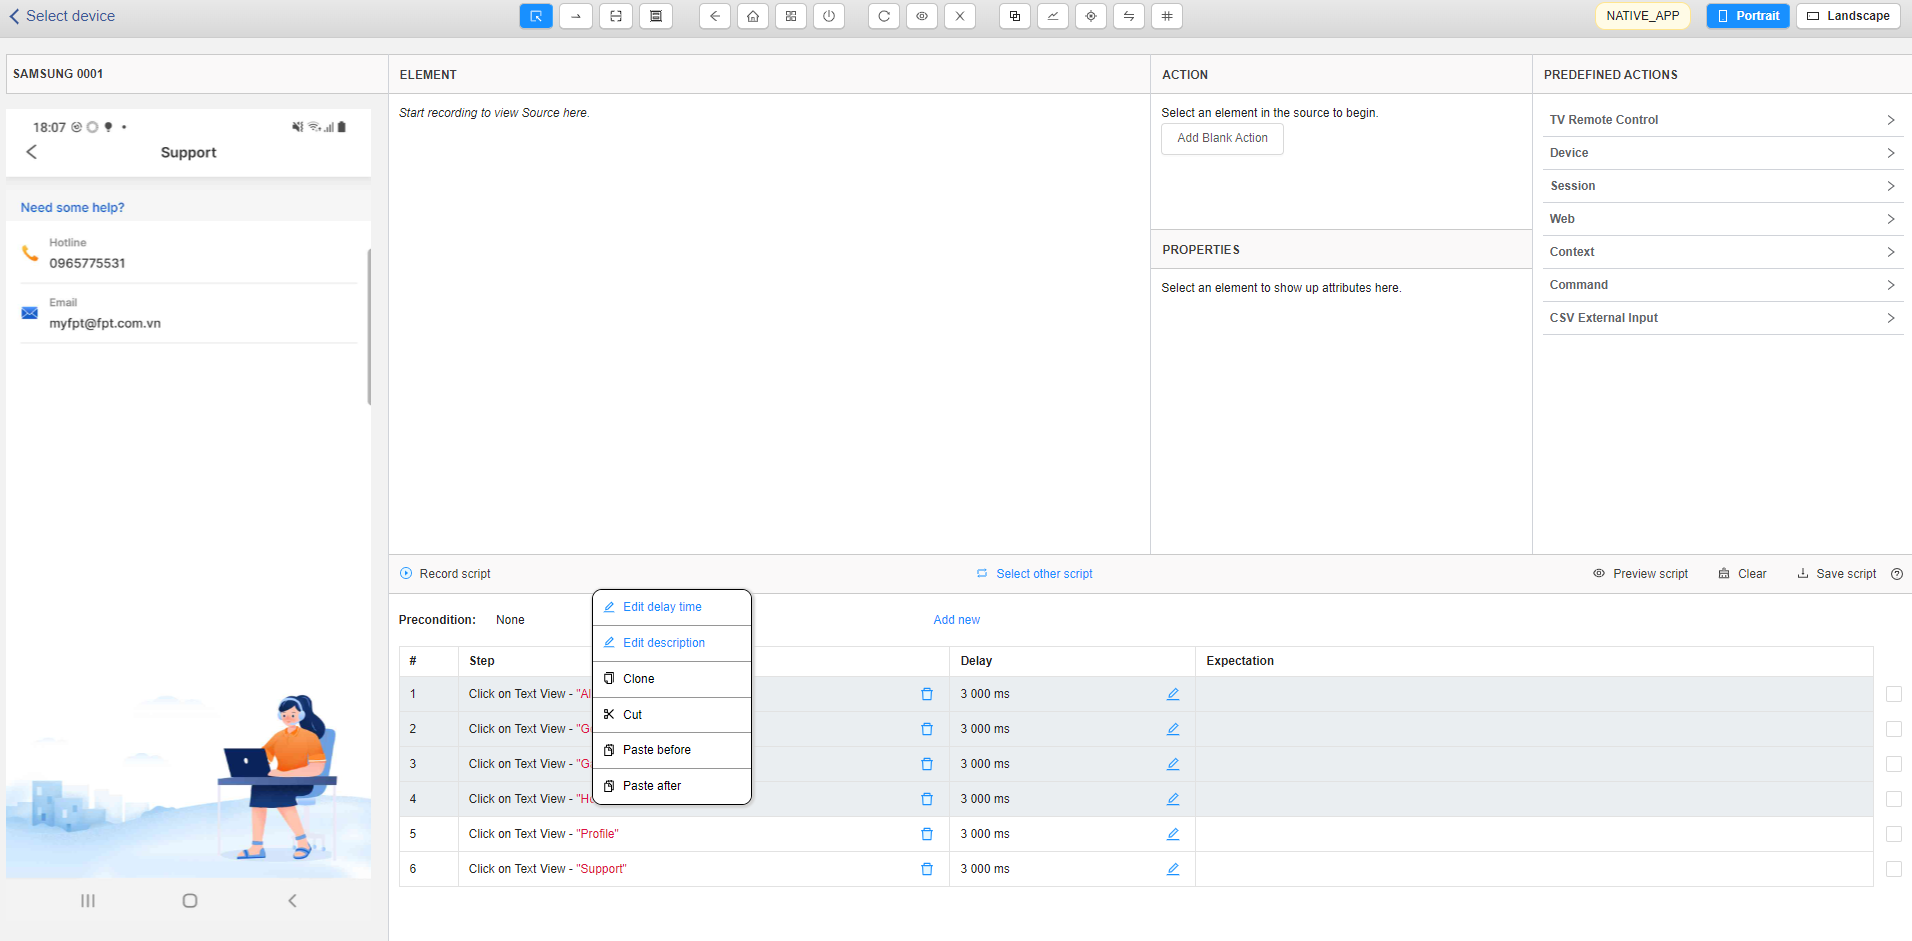
- Clone one test step: Click on one test step which you want to clone => Right mouse and choose “Clone”.
- Clone some test steps:
If the test steps are continuous: Click on the first or the last test step and mouse hover all test steps which you want to clone => Right mouse and choose “Clone”.
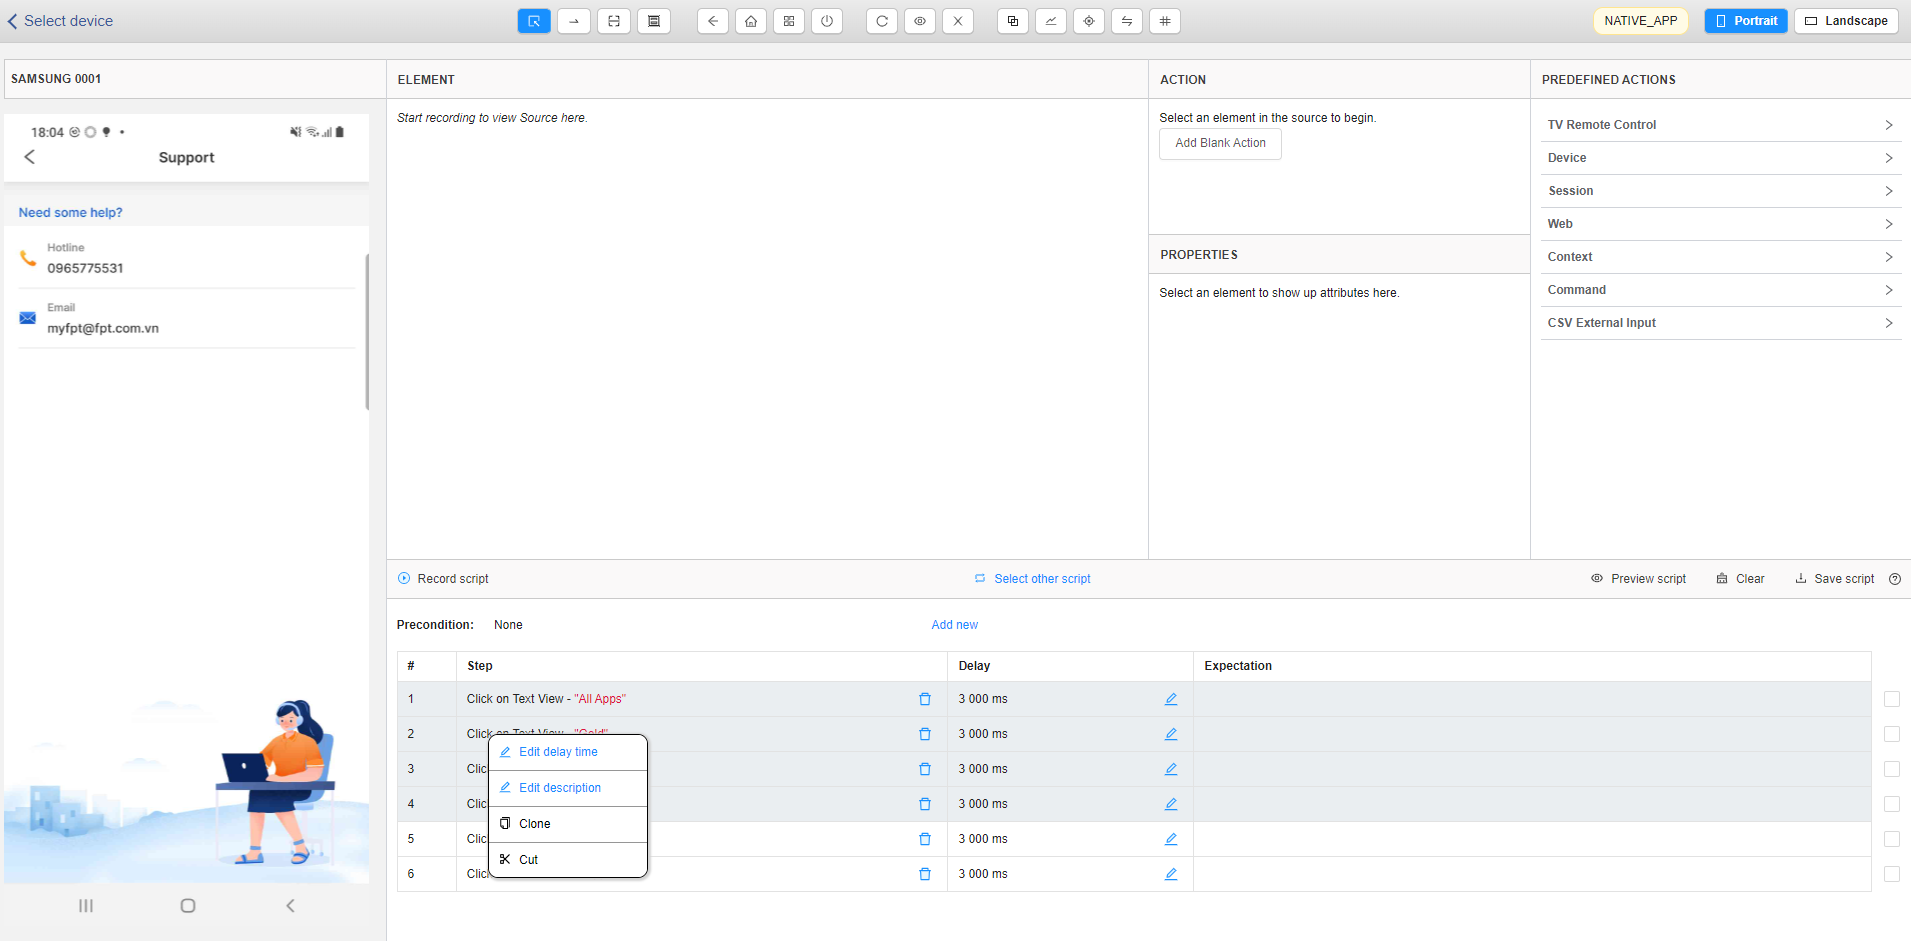
If the test steps are not continuous: Click on any test steps and hold Ctrl and click on other test steps => Right mouse and choose “Clone”.
Step 2:
- Choose one step to clone before or clone after
Click on one test step what you want to clone after or before that => Right mouse and choose “Paste before” or “Paste after”.

Choose some step to clone before or clone after.
If the test steps are continuous: Click on the first or the last test step and mouse hover all test steps which you want to clone => Right mouse and choose “Paste before” or “Paste after”.
If the test steps are not continuous: Click on any test steps and hold Ctrl and click on other test steps => Right mouse and choose “Paste before” or “Paste after”.

9. Preview Script
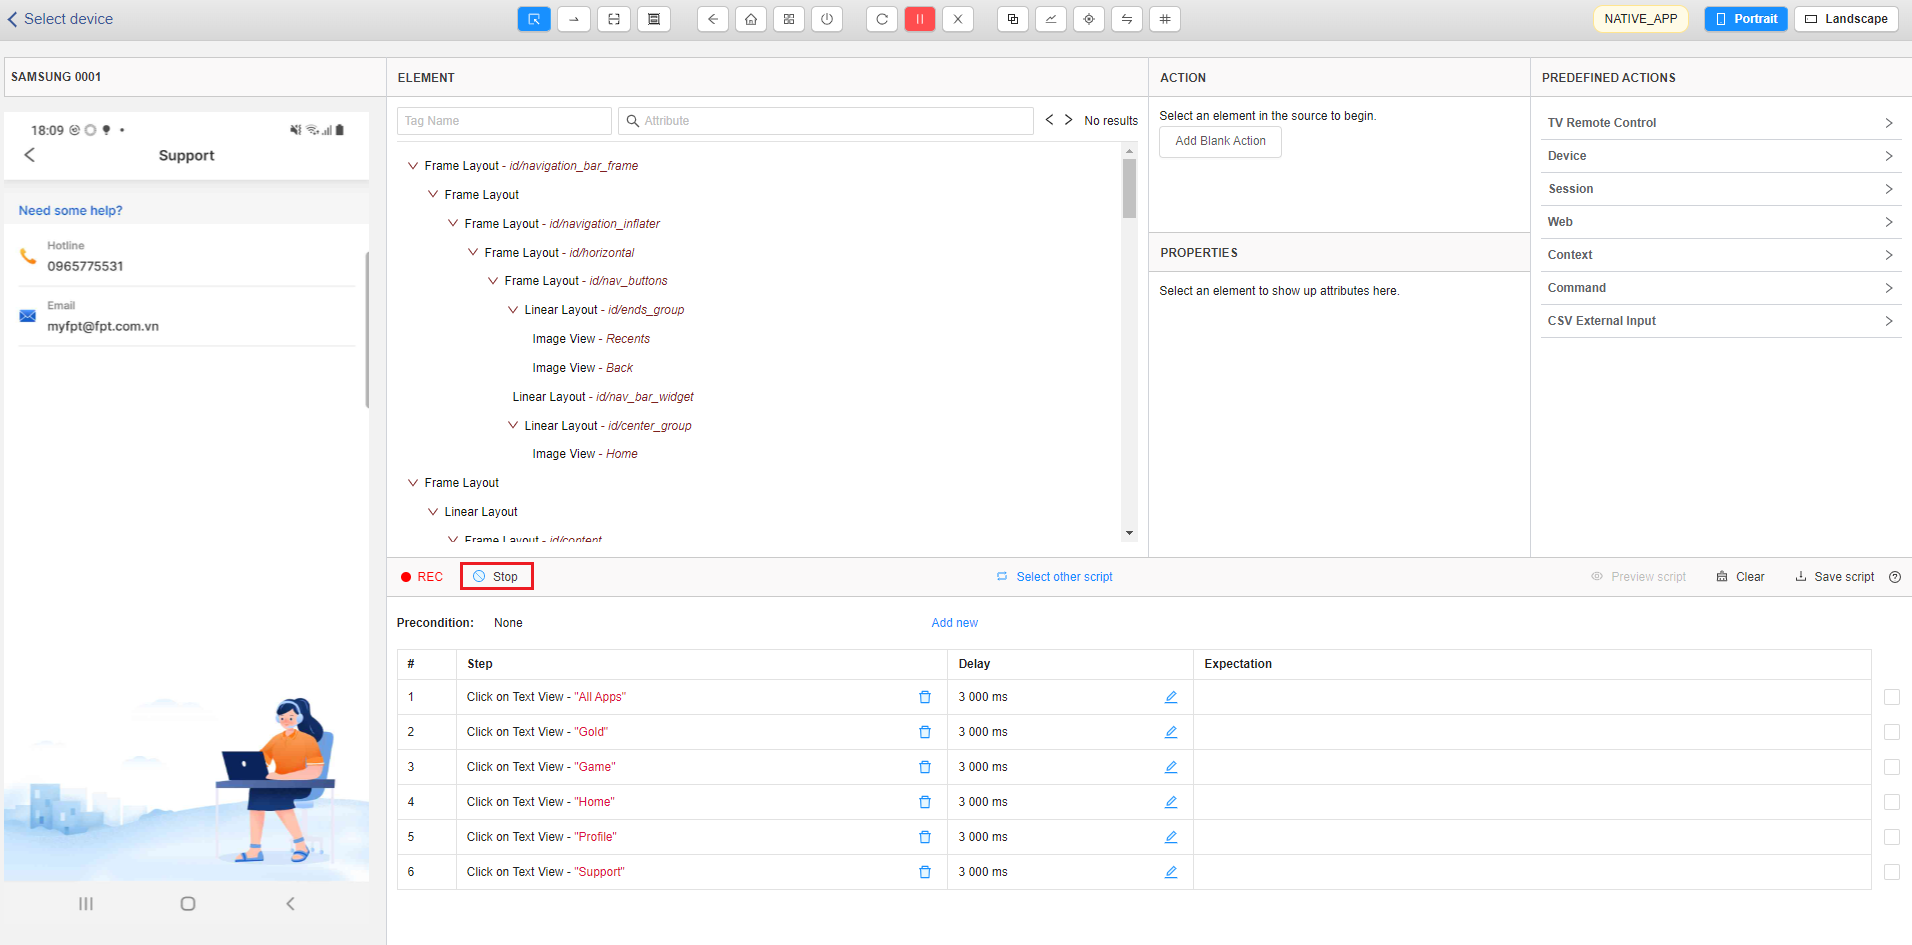
Step 1: Click the [Stop] button to finish recording the test script.
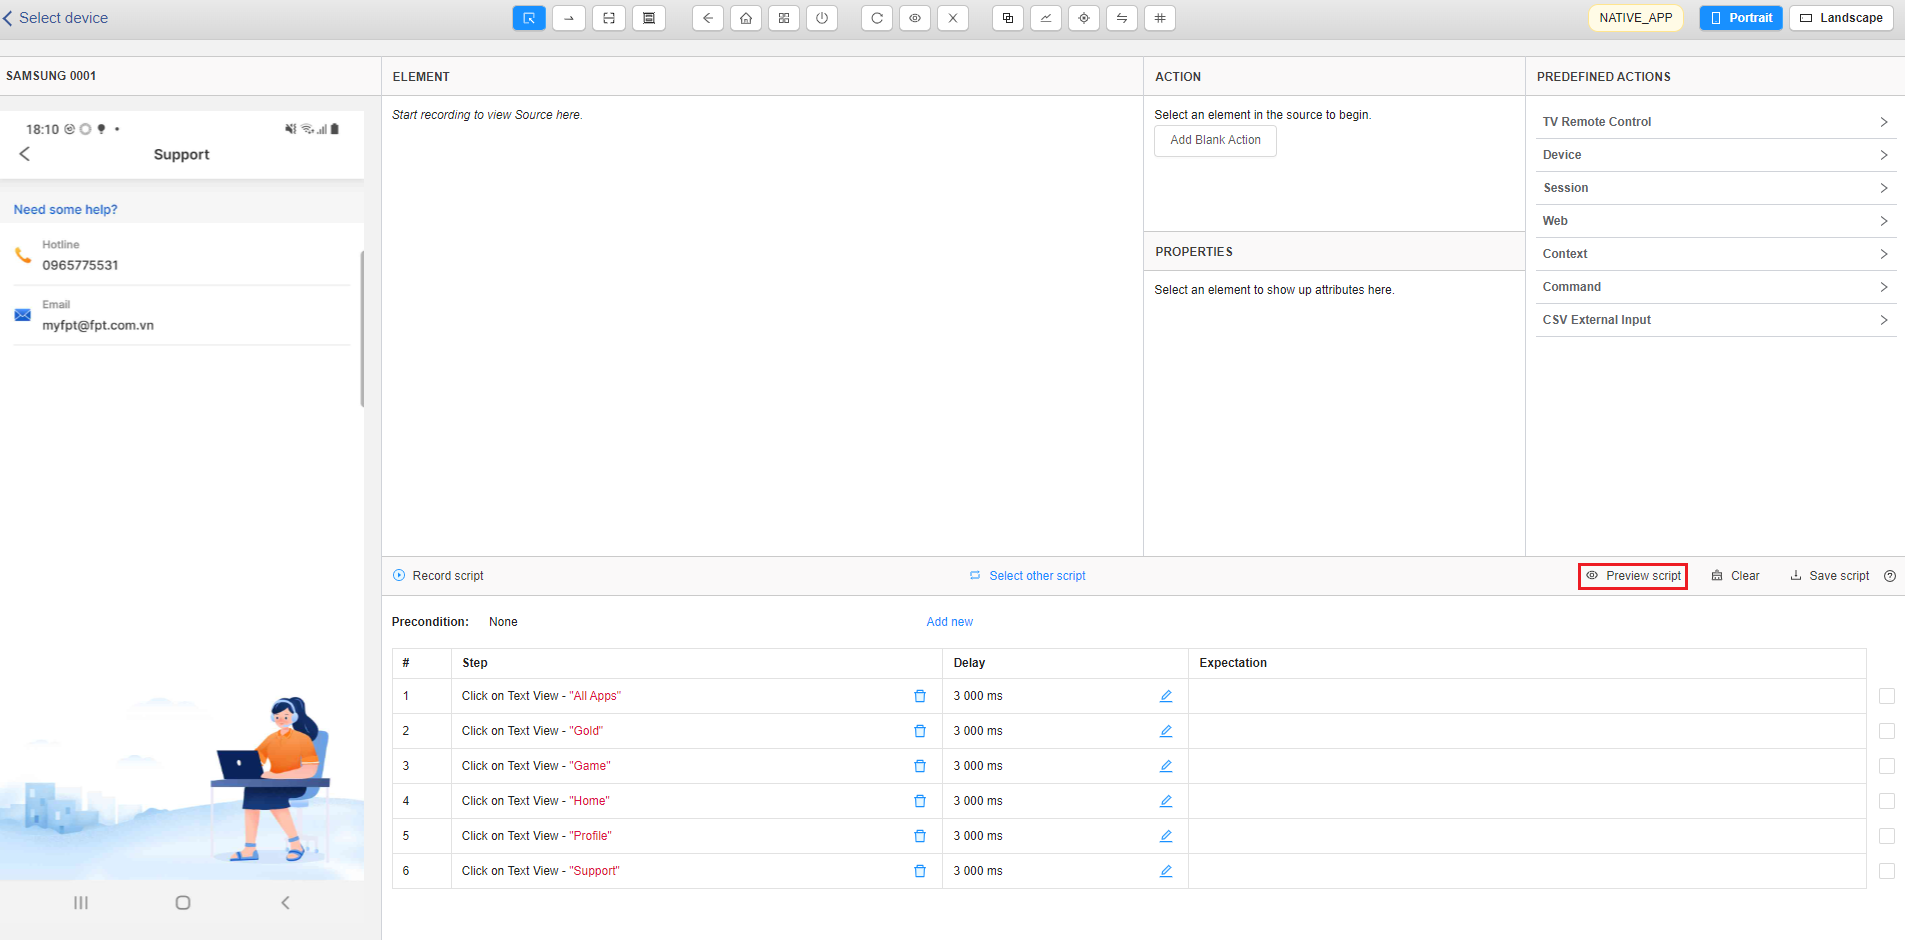
Step 2: You can preview the created script from any available device by clicking on the [Preview script] button.
From this screen, users can preview the script from another device by clicking on the [Select device] button => Select device screen will be displayed. (The device selected for creating the script will be selected as default for preview).
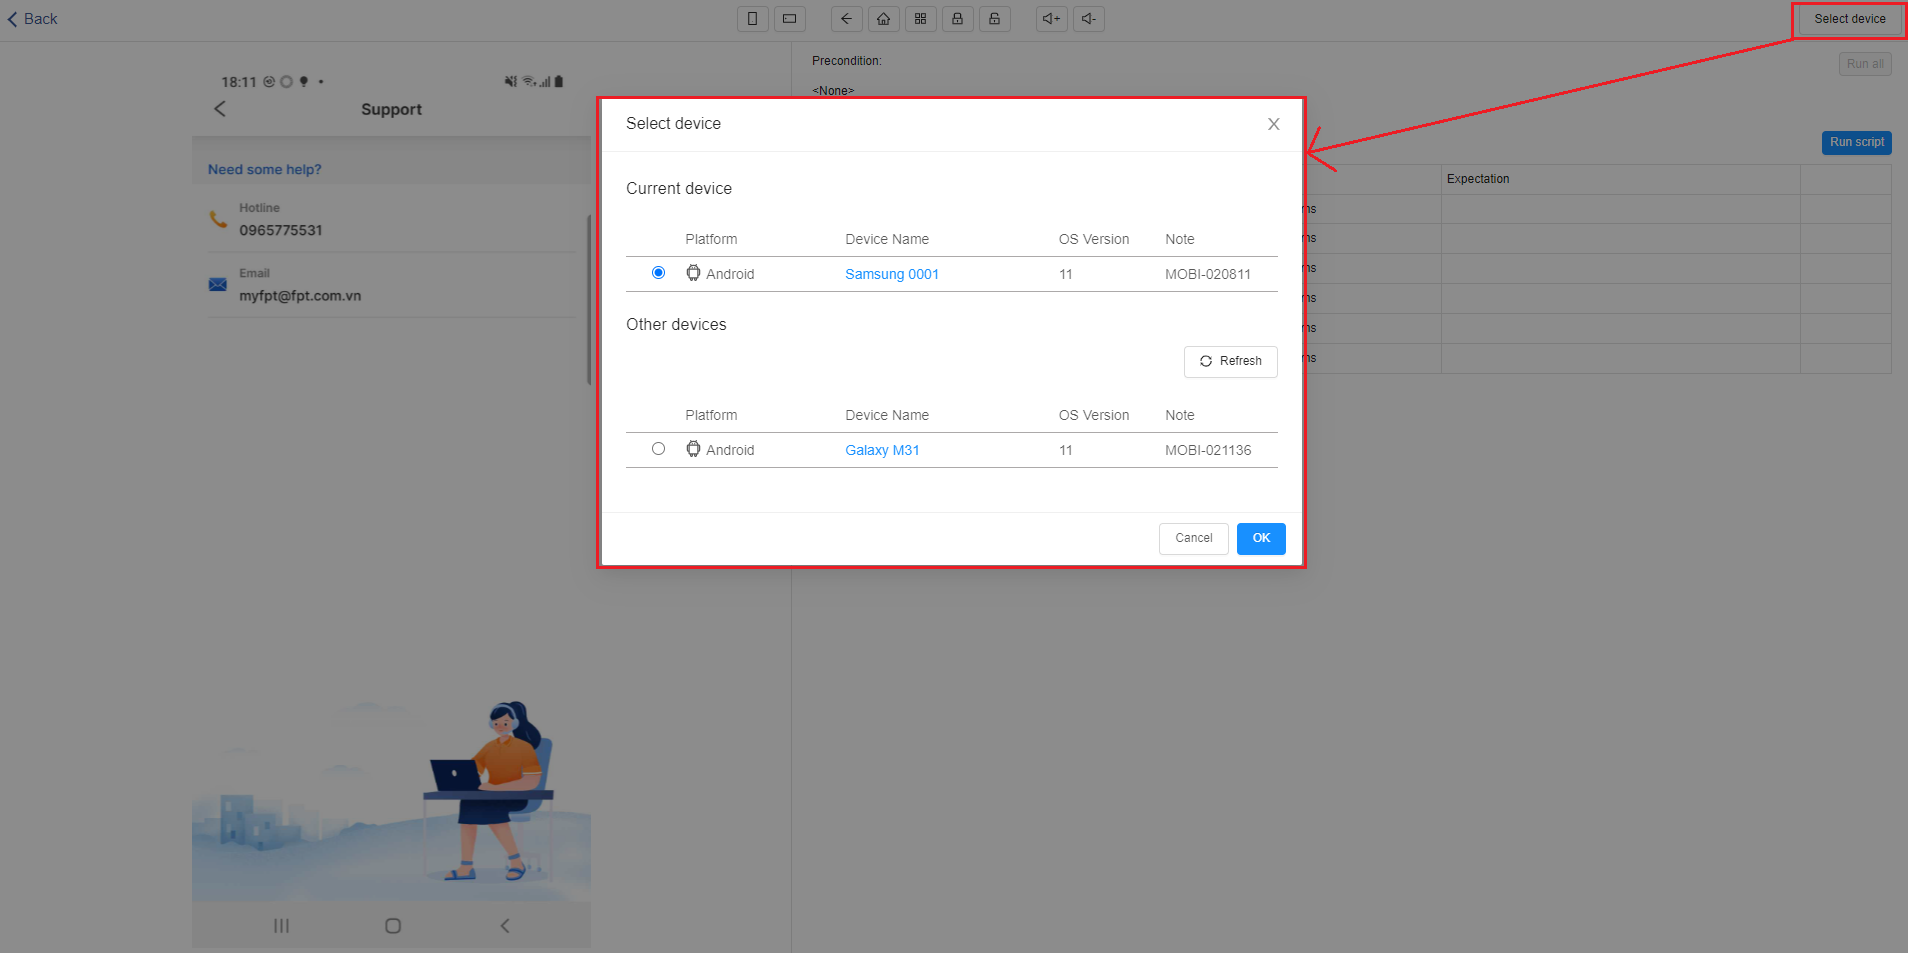
-> After selecting device, click the  button to start previewing the script.
10. Save a script
Step 1: Click on the [Save script] button -> A dialog will be displayed.
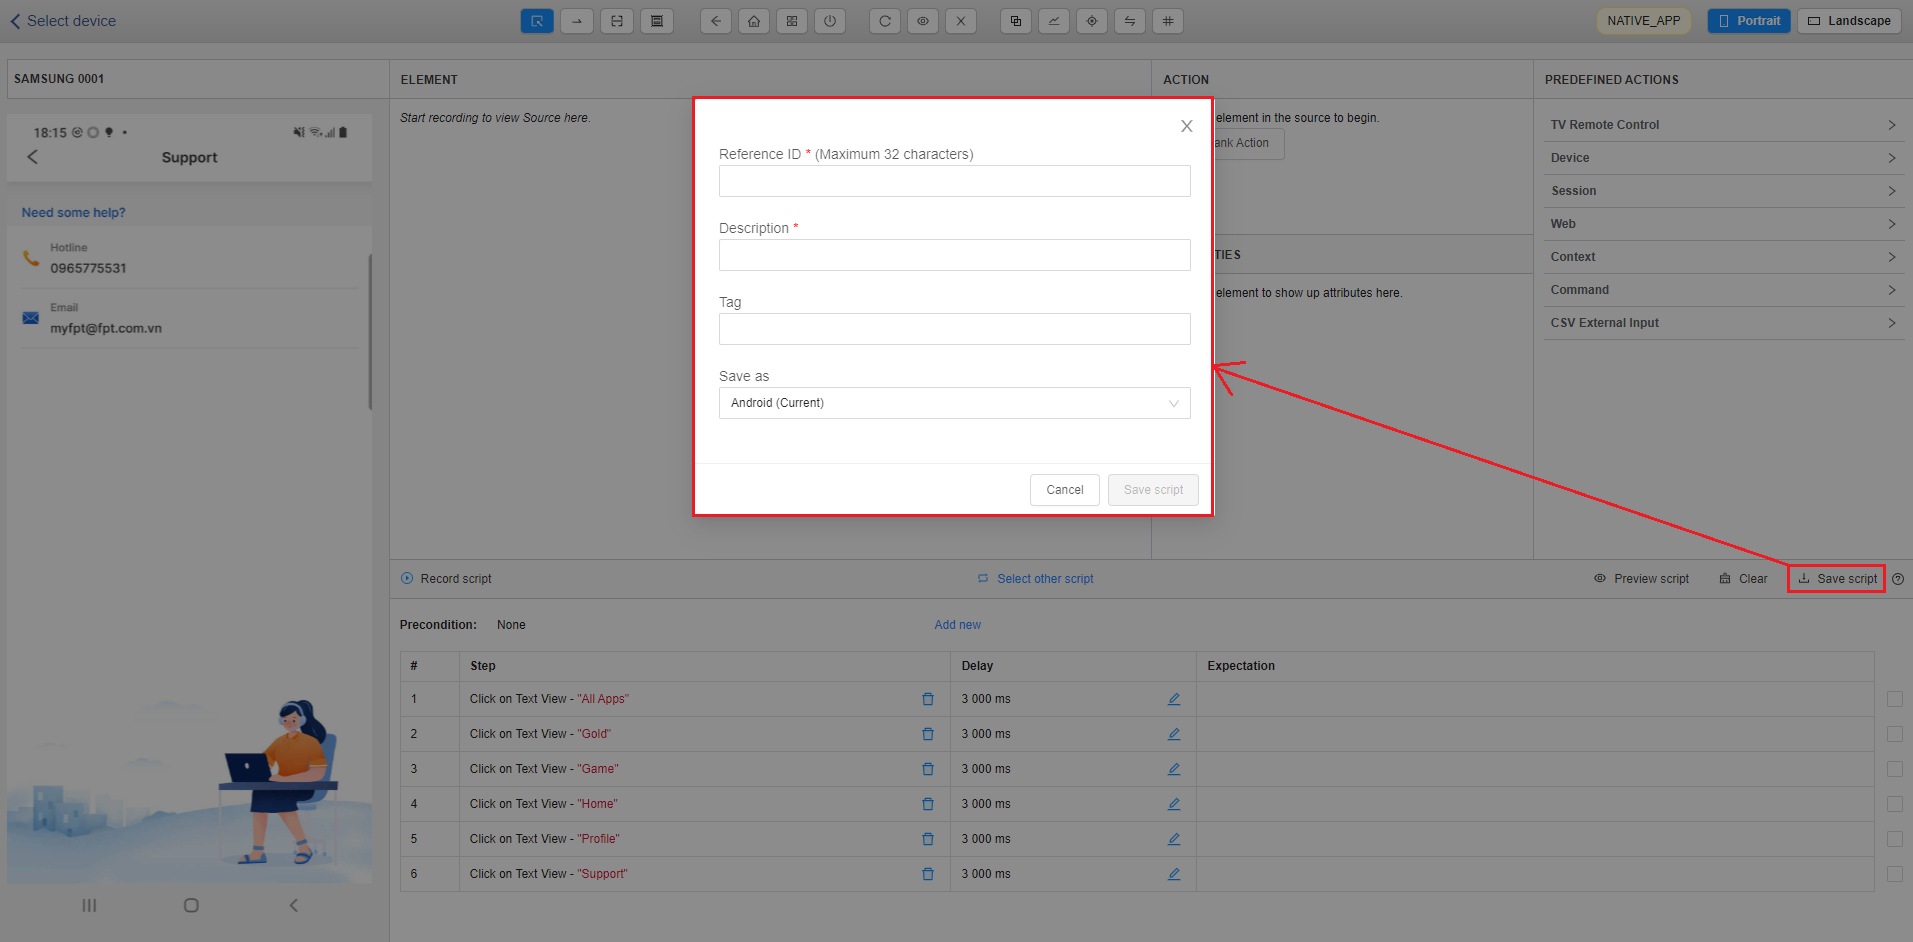
Step 2: Input the reference ID and description for the script.
Step 3: Click on the [Save Test Script] button.
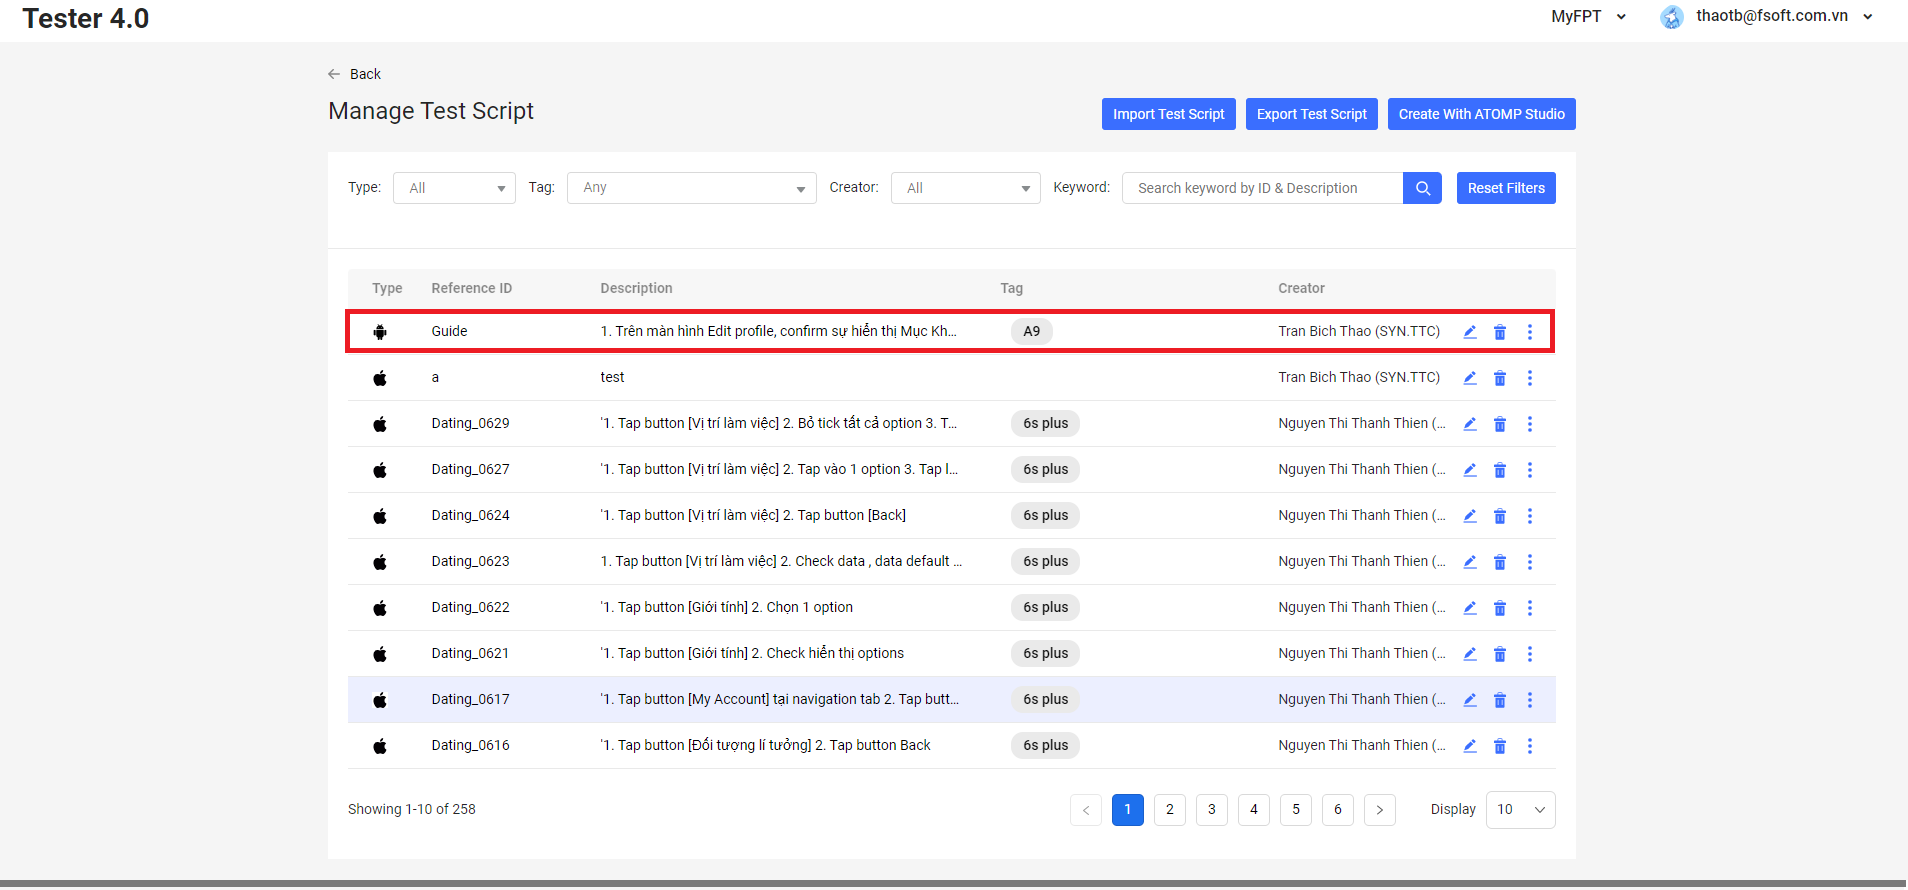
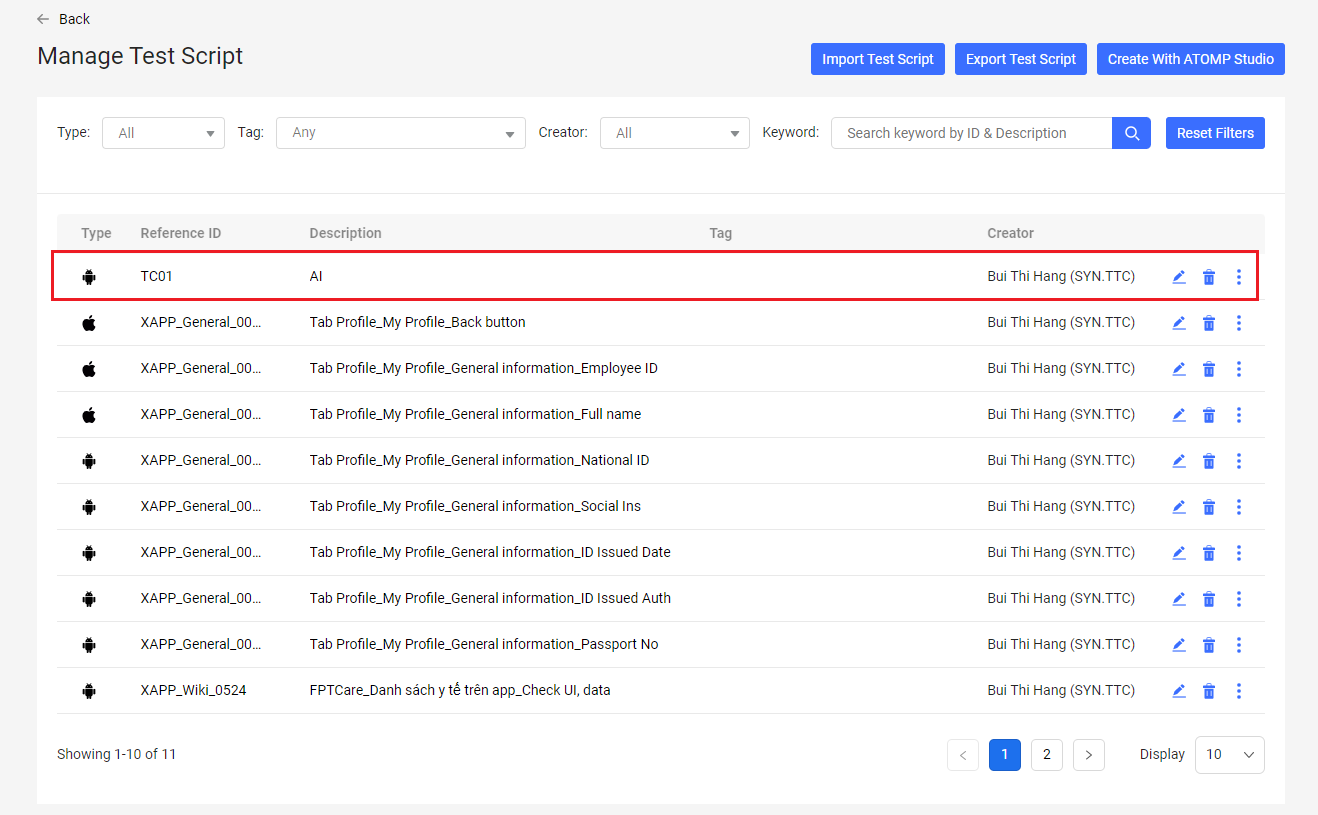
After a test script is saved, it can be found in the screen “Manage Test script” in Tester 4.0.
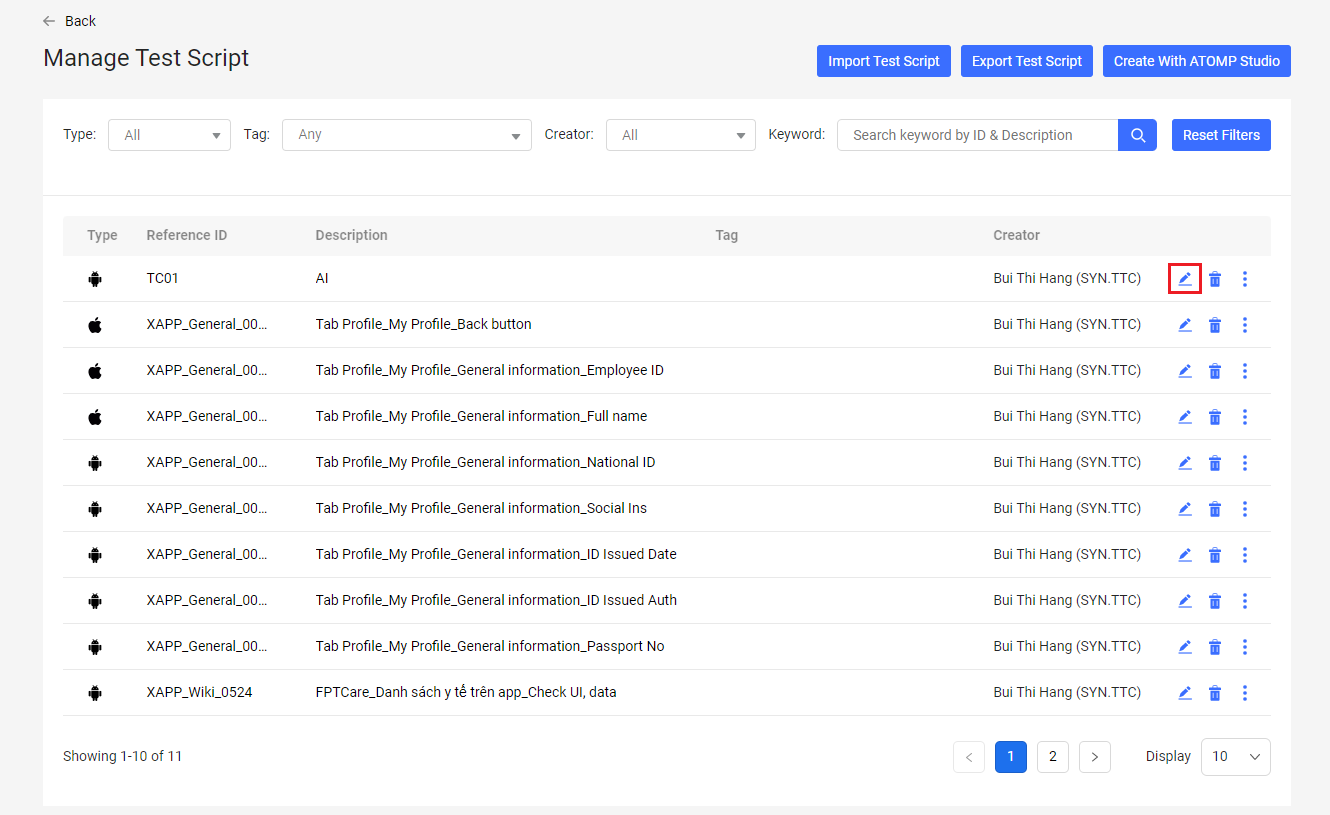
11. Edit a script
Users can edit the created script by following these steps:
Step 1: From the “Manage Test Script” screen, select the “Edit” icon from the script you want to edit => Select device screen will be displayed => Perform a device selection just like creating a normal script.
Step 2: After the device is selected => The script creation screen will be displayed, and the users can edit the script normally => Then the users can save the script by 2 methods:
- Save to the existing script.
- Save as a new script.

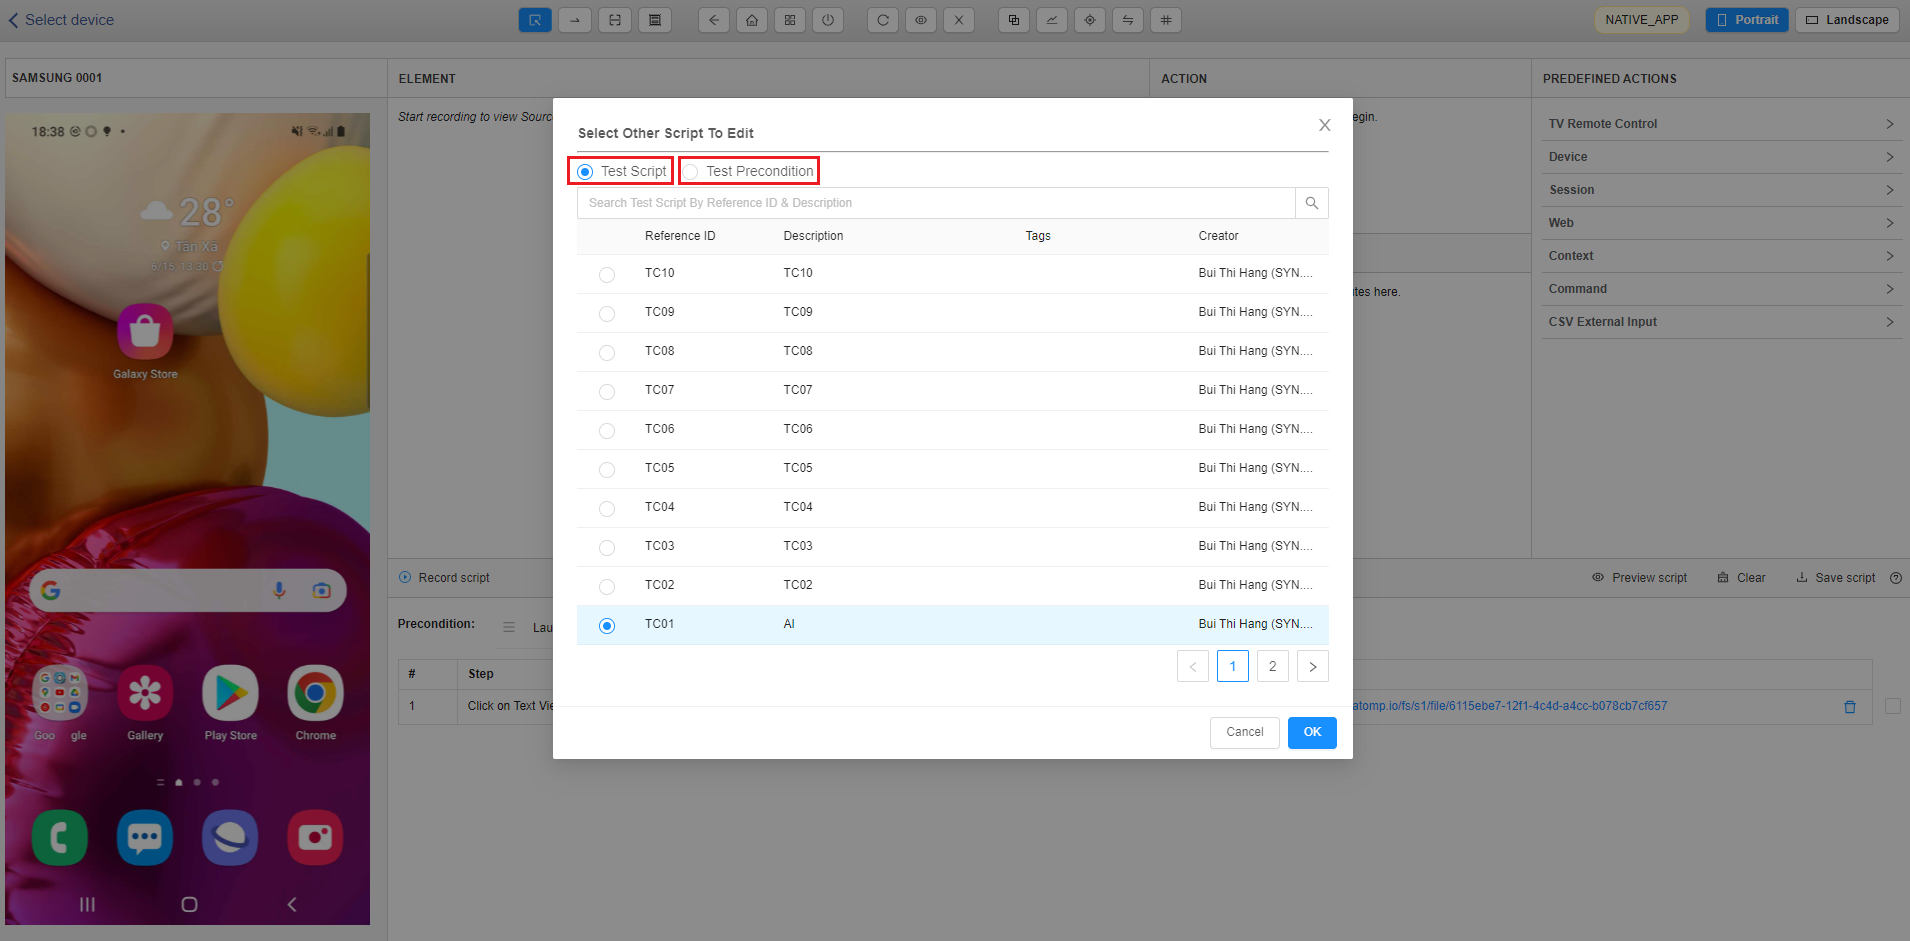
12. Select other script
On the “Create script with ATOMP Studio” screen, users can also easily choose from the created script list to edit by following these steps:
Step 1: From the “Create script with ATOMP Studio” screen, select the “Select other script”.
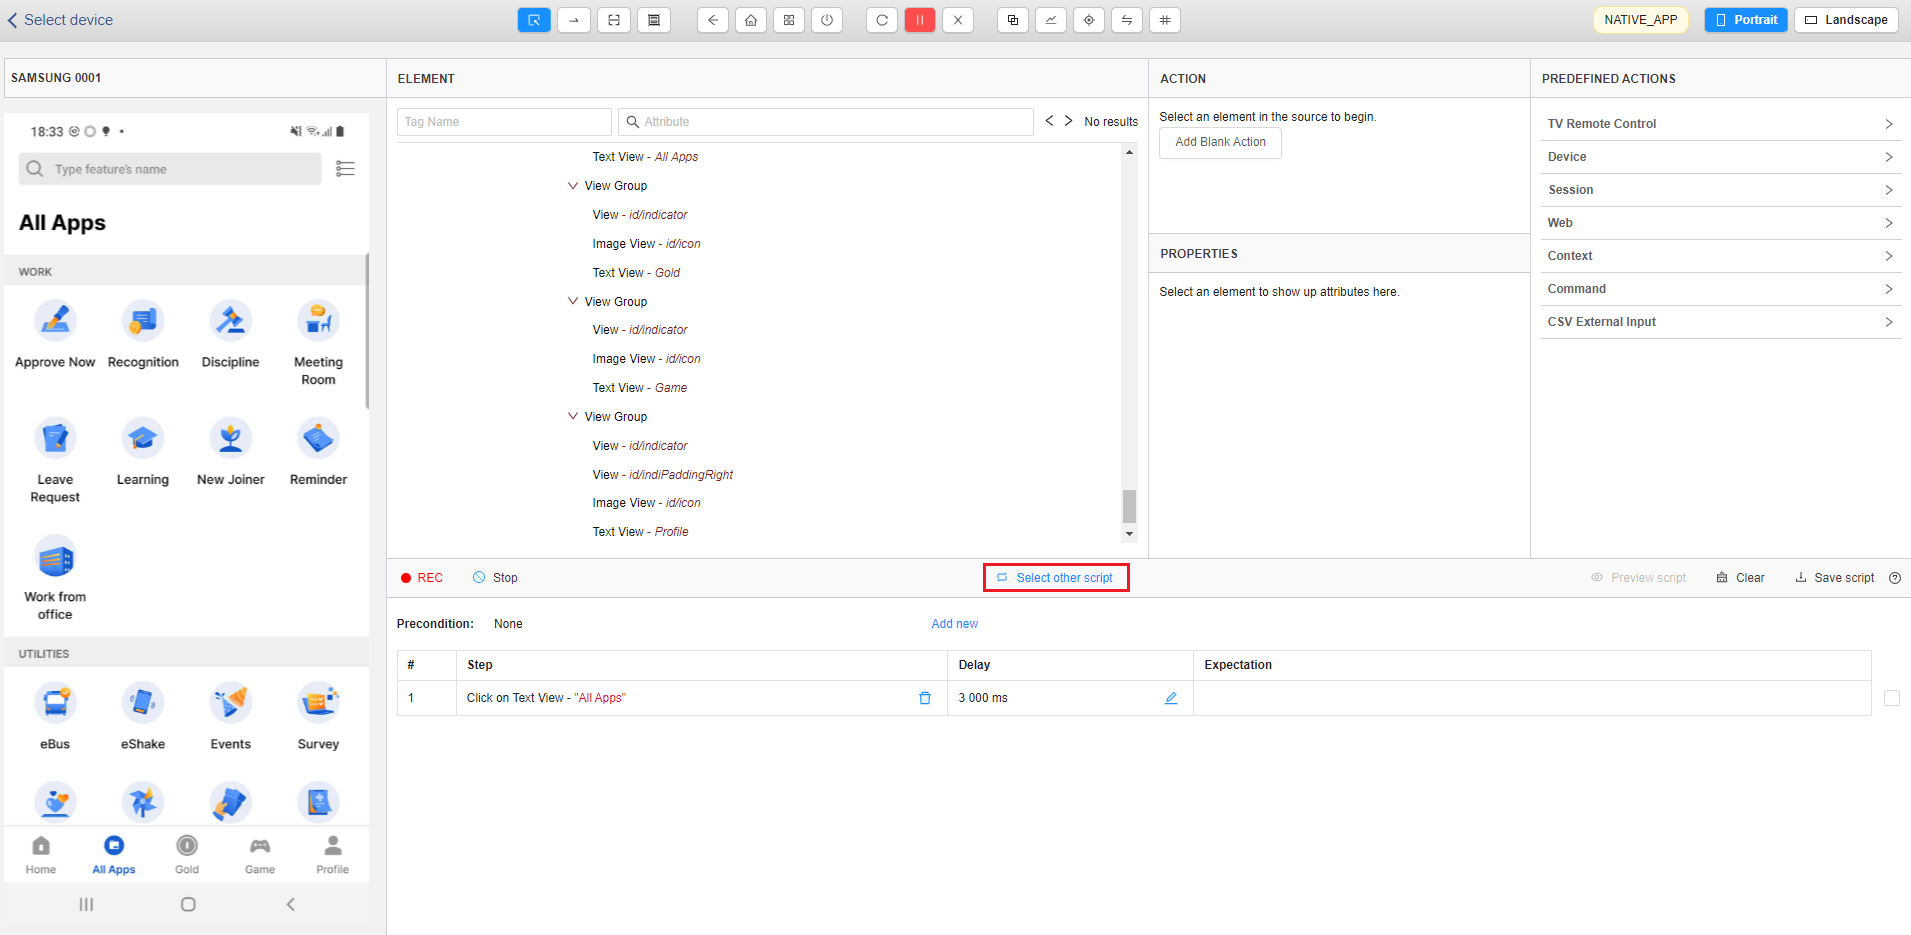
Step 2: The created script list will be displayed, and the users can choose “Test script” or “Test precondition” to choose the script you want to edit.
13. Clone script
Users can clone the created script by following these steps:
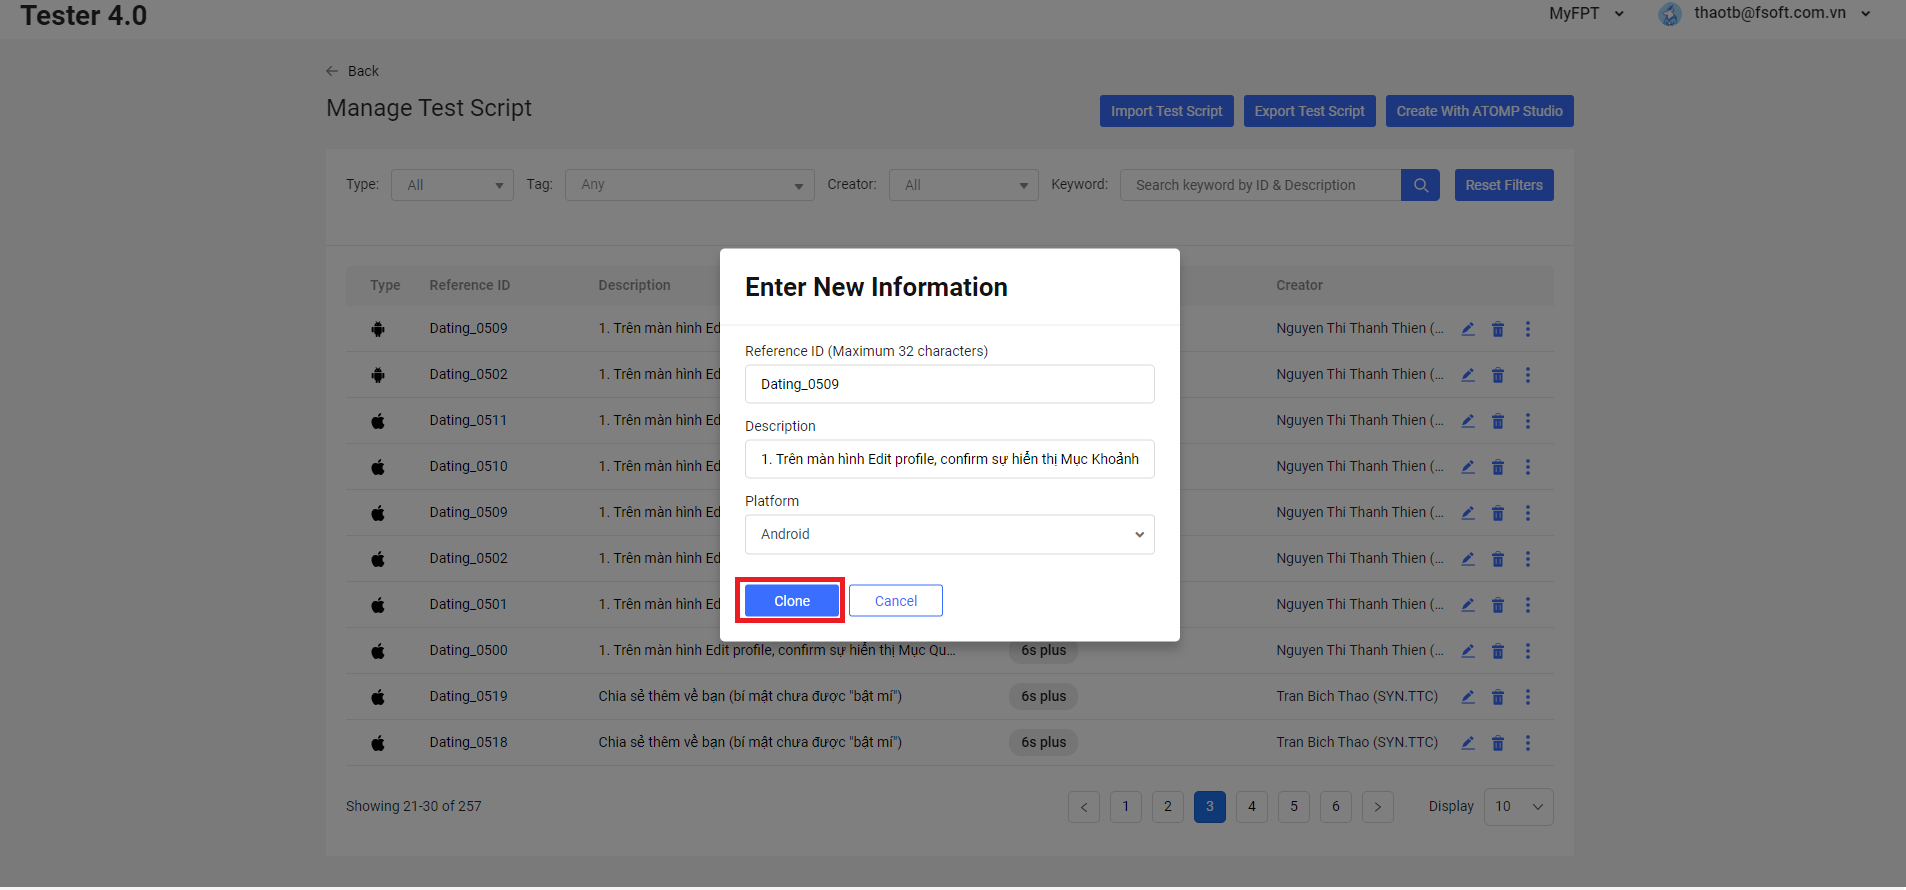
Step 1: From the “Manage Test Script” screen, select the “Options” icon from the script you want to clone => Choose “Clone” button
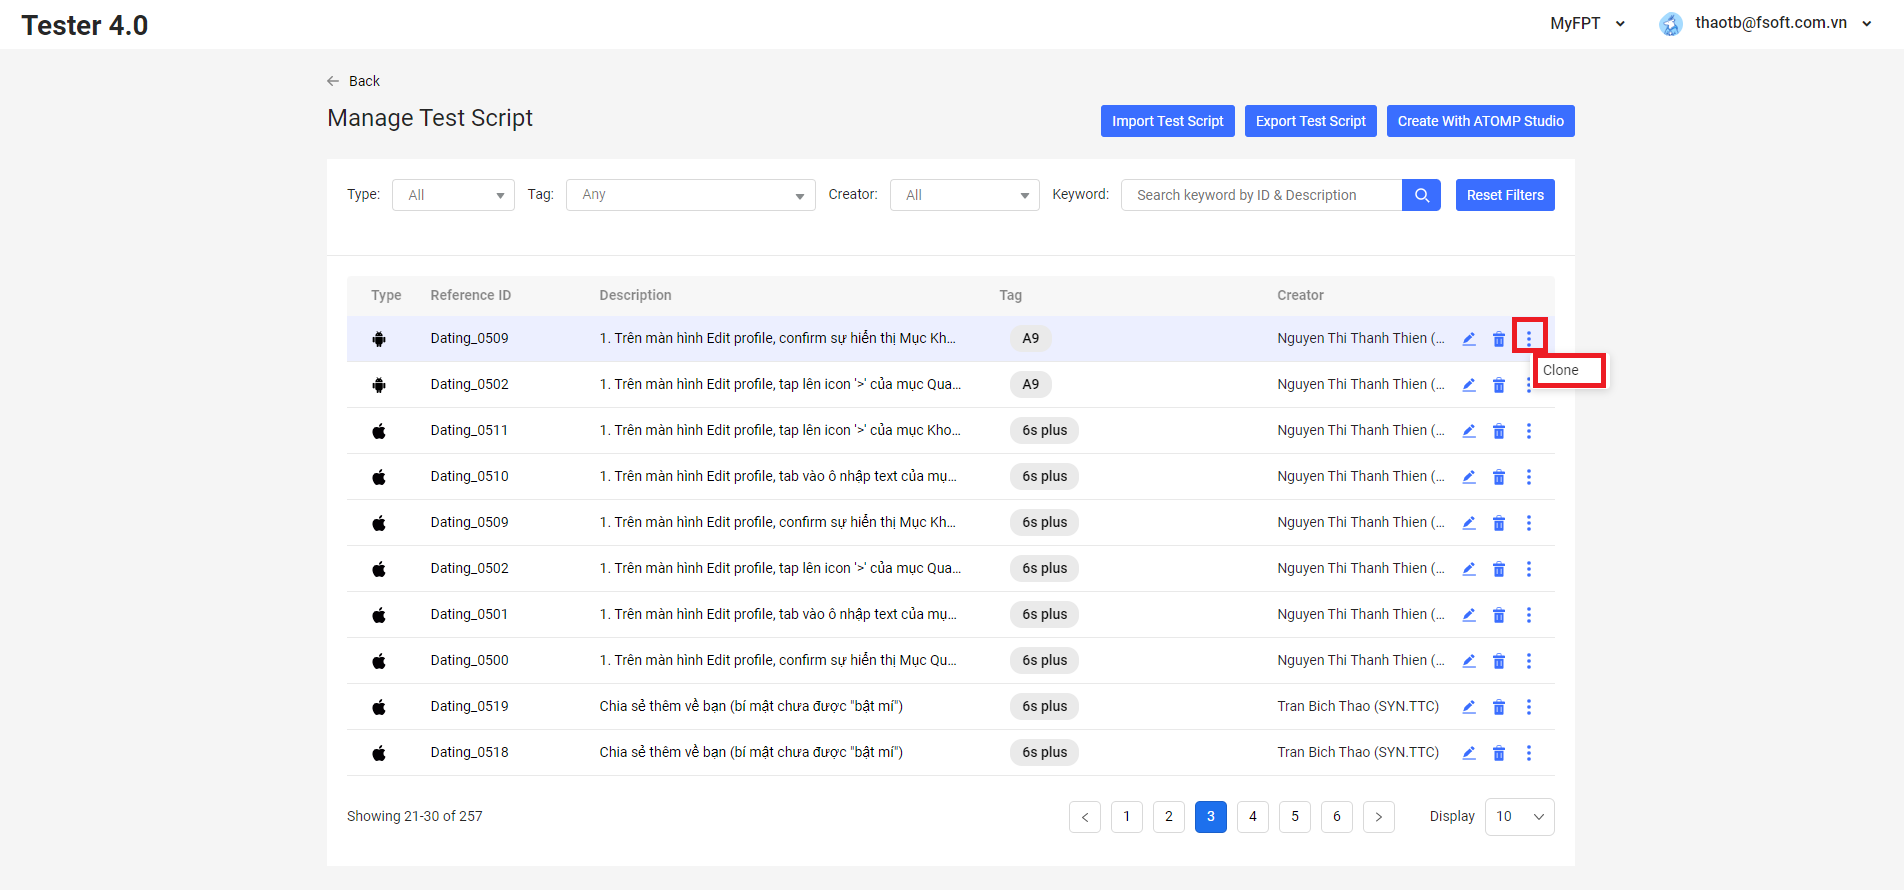
Step 2: Enter New Information => Choose “Clone” button, then script will be saved in Manage Test Script.