[Precondition]
- Open Migii Toeic.
- Log in application Migii Toeic successfully.
[Steps]
- Open Exam screen.
- Click [Start] button in [Test 1] section.
[Expected]
- Verify [Test 1] text.
- Screen is displayed as design.
Create Test precondition
➢ Install Migii Toeic application on device.
Install app via Device Farm http:/devicefarm.atomp.io/ by:
- With Android, go to the Play Store to download the app.
- With iOS, go to the App Store to download the app (with ATOMP’s Apple ID account already logged in, in case the App Store requires entering a pass to download the app, please contact us for it)
➢ Create Test Precondition Script Login application successfully
User can create preconditions to use for multiple scripts with the same precondition. Open app Migii Toeic to http://tester40.atomp.io/ -> Select project -> Select Manage Test Precondition -> Select Add Precondition button -> Select device -> Click Record script.
- With Android Device
To open the app in Studio correctly and quickly, users will use Start Activity command (Device -> Android Activity command (Device -> Android activity -> Start Activity). In this command, you have to fill in 2 information: App package and App Activity.
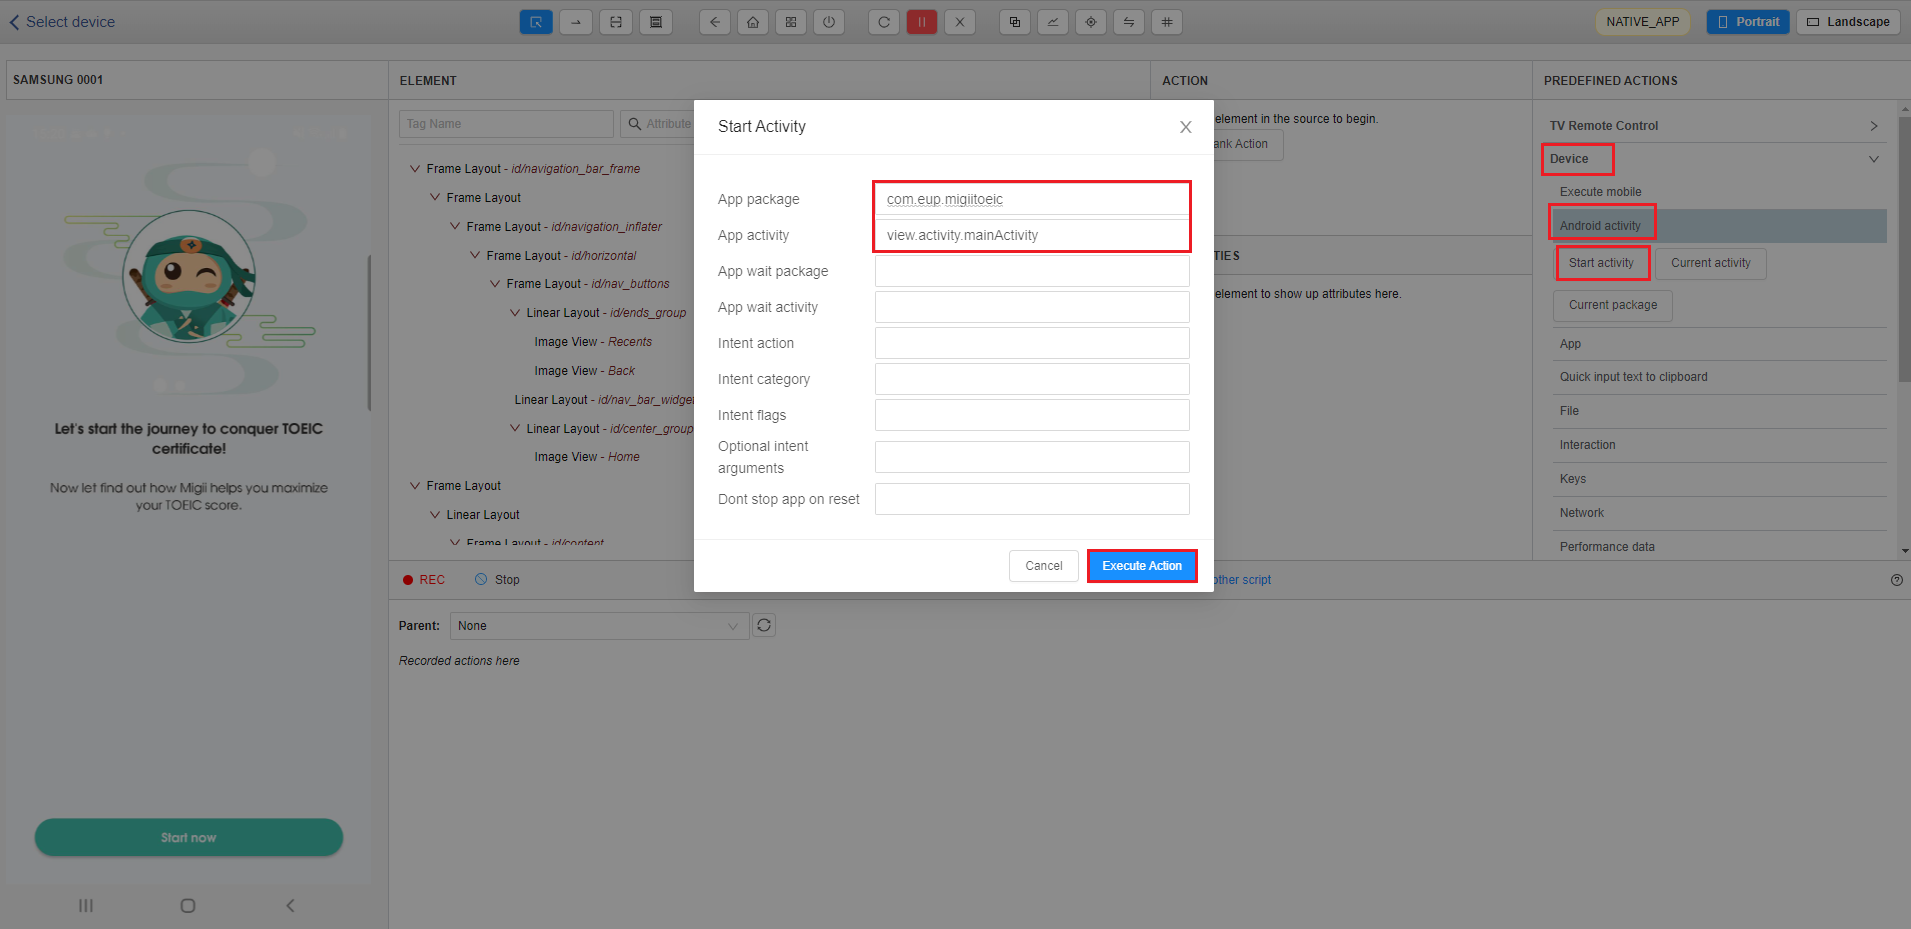
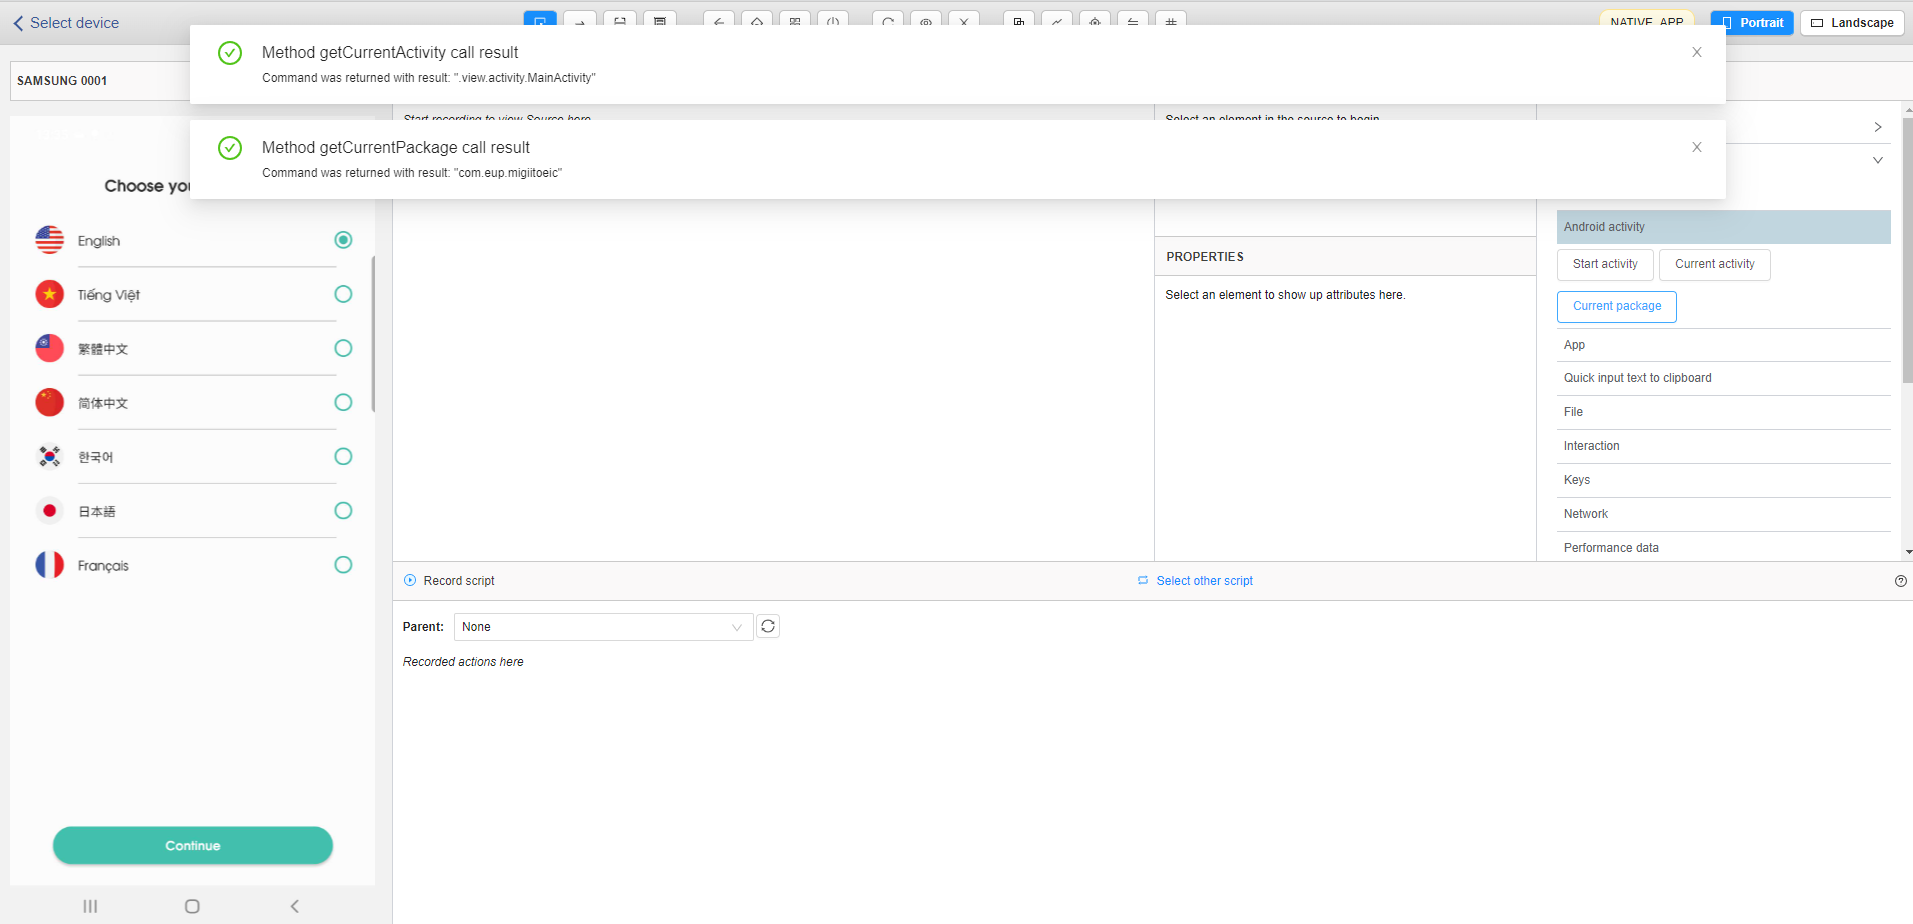
To get the App package and app activity, you will open the app on the device and in the Predefined Actions section select Device -> Android activity. Here there are 2 items: Current activity and Current package, the users will select these 2 items and copy 2 information in quotation marks.
- With iOS device
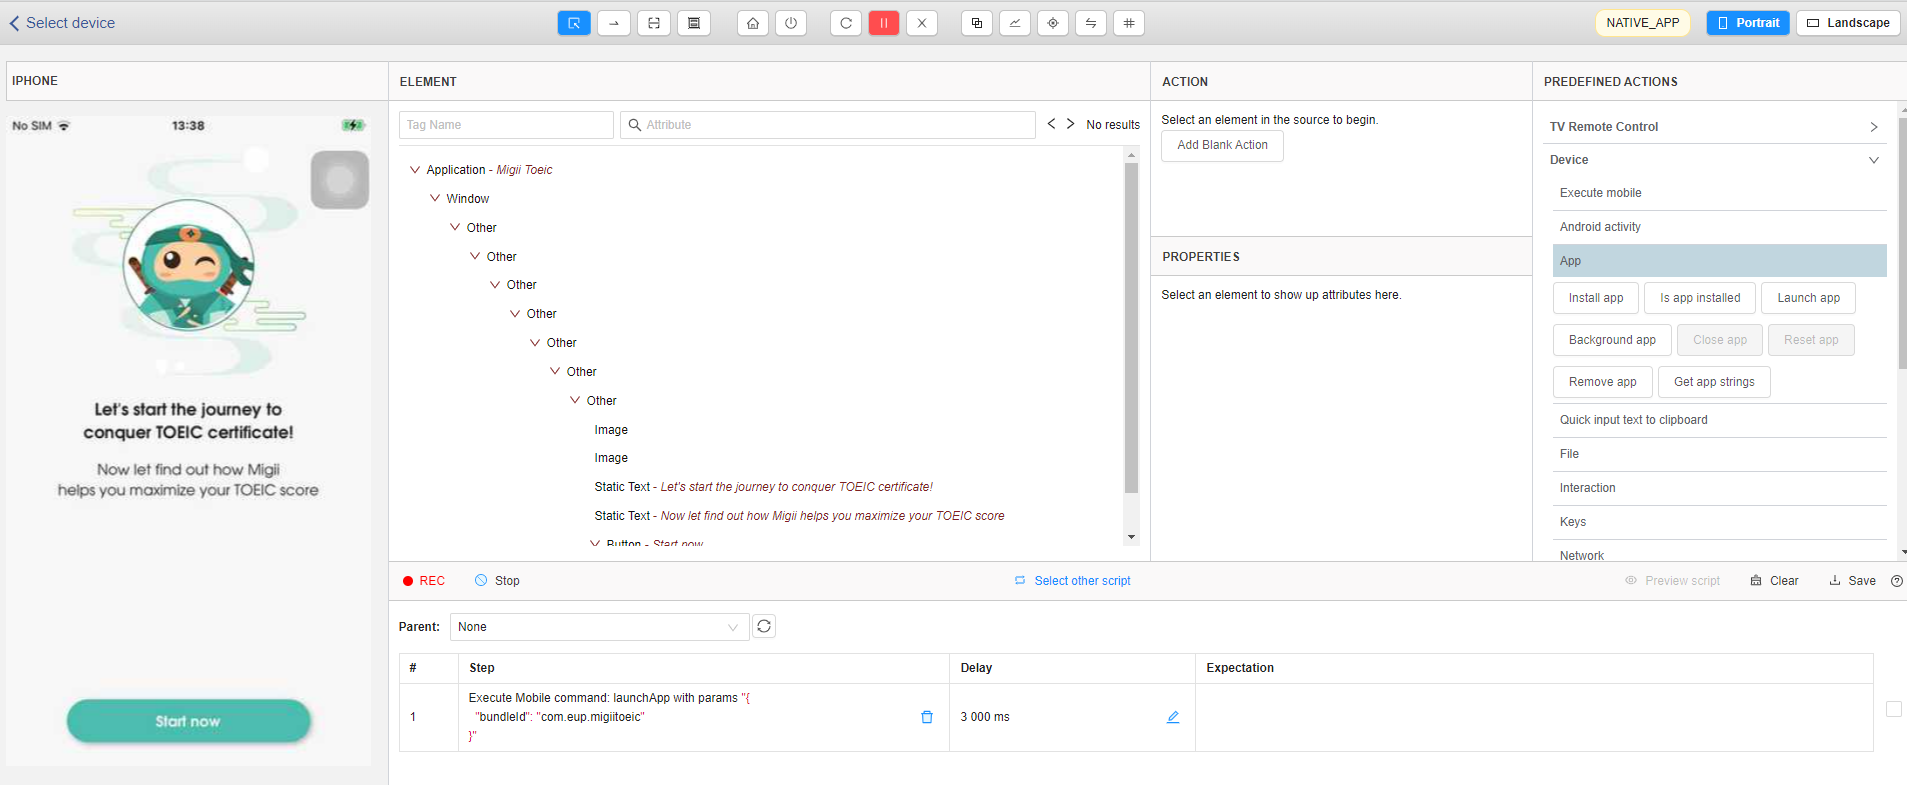
After getting the Bundle ID of the app (Bundle ID was provided by developer). -> Users back to the Studio screen to open the app and create the script. At the Studio screen, select the Device item -> select App -> select Launch app and past the copied Bundle ID in Device Farm -> select the Execute Action button to open the app (Note: recording before this step is done to the system to save the action to open this app.)
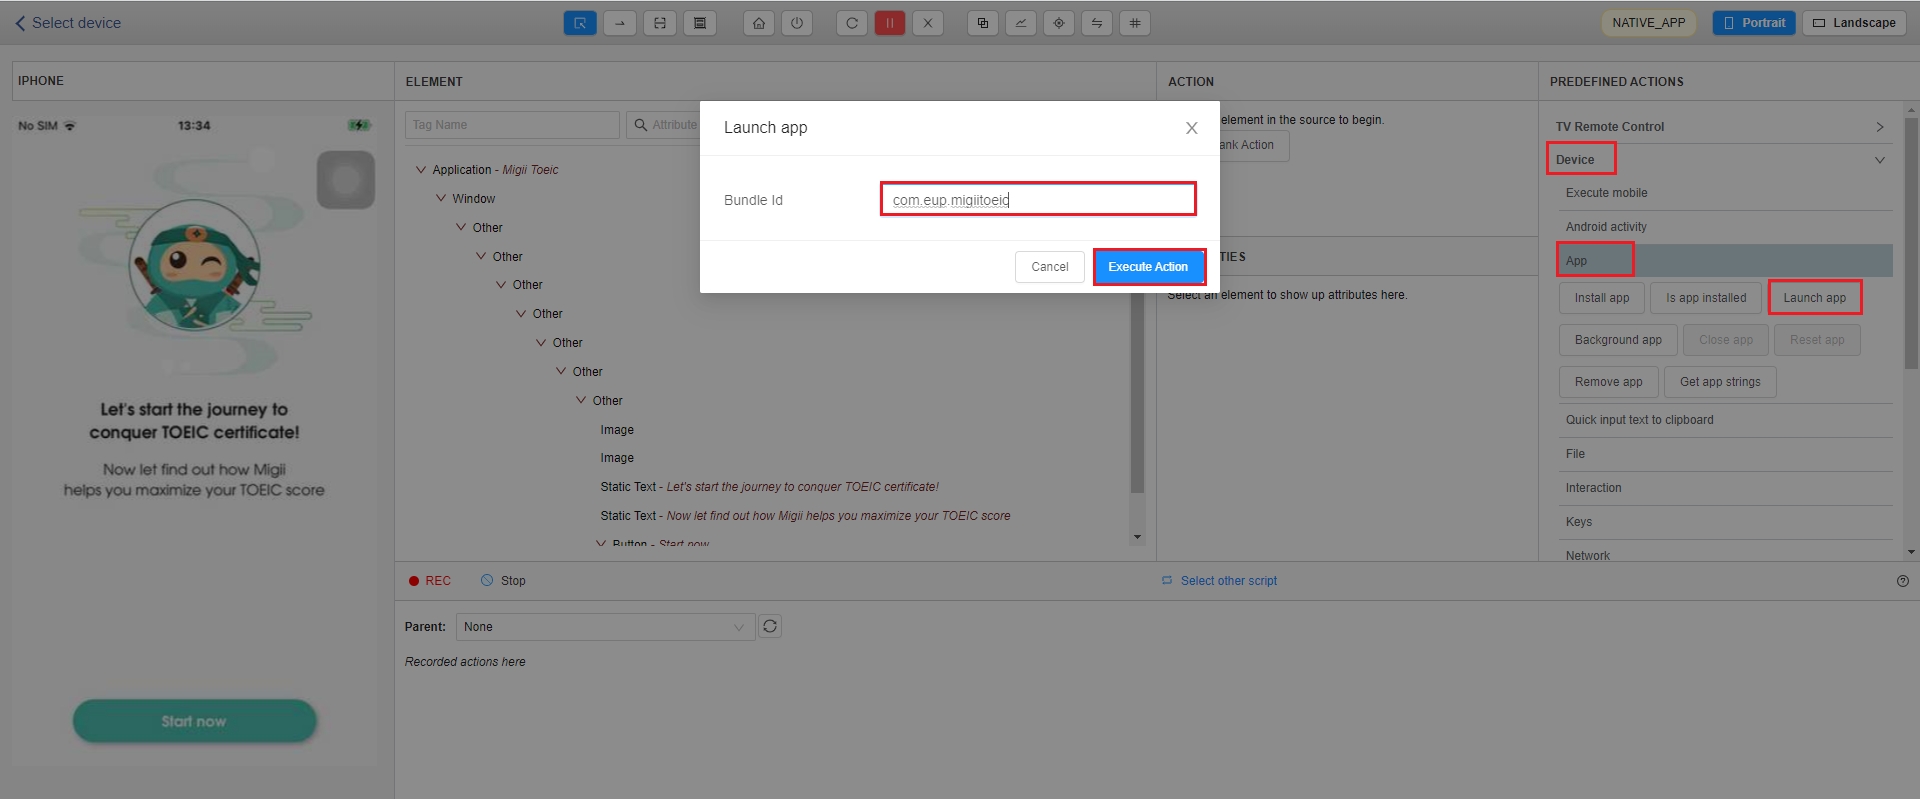
After clicking on Execute Action button, script will be displayed on screen.
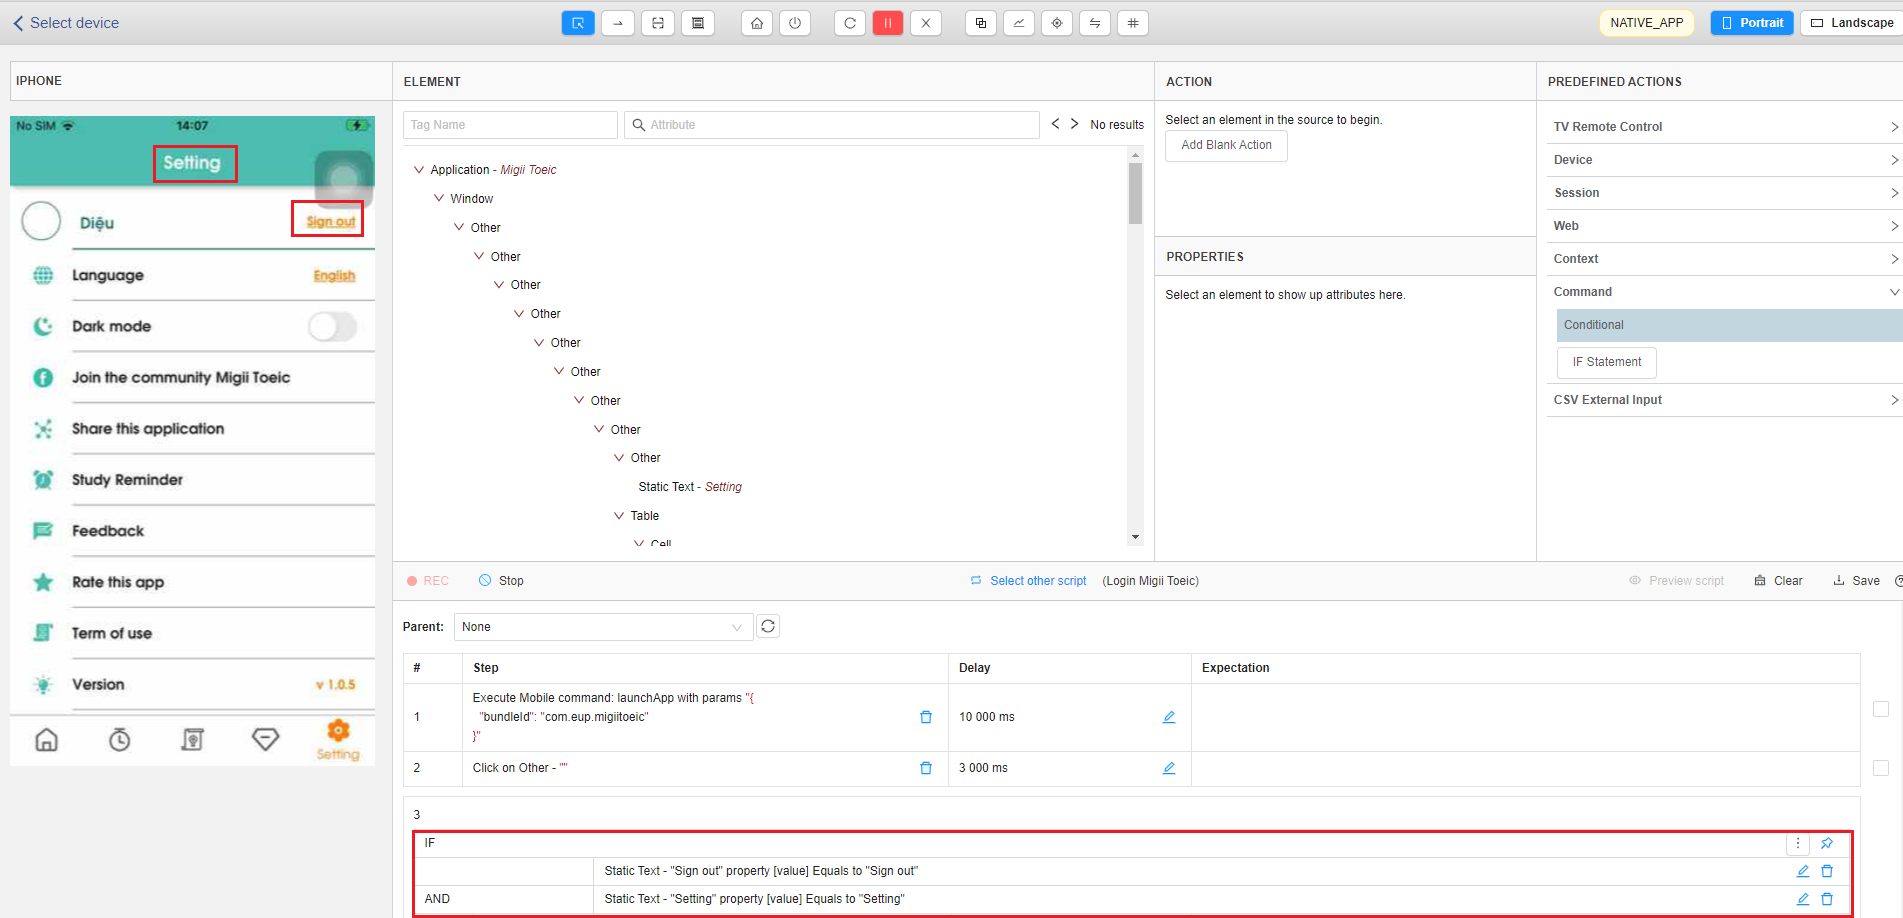
Firstly, users click on the Setting screen to determine if you are logged in or not. Before users must create the if command: if logged in, it will log out.
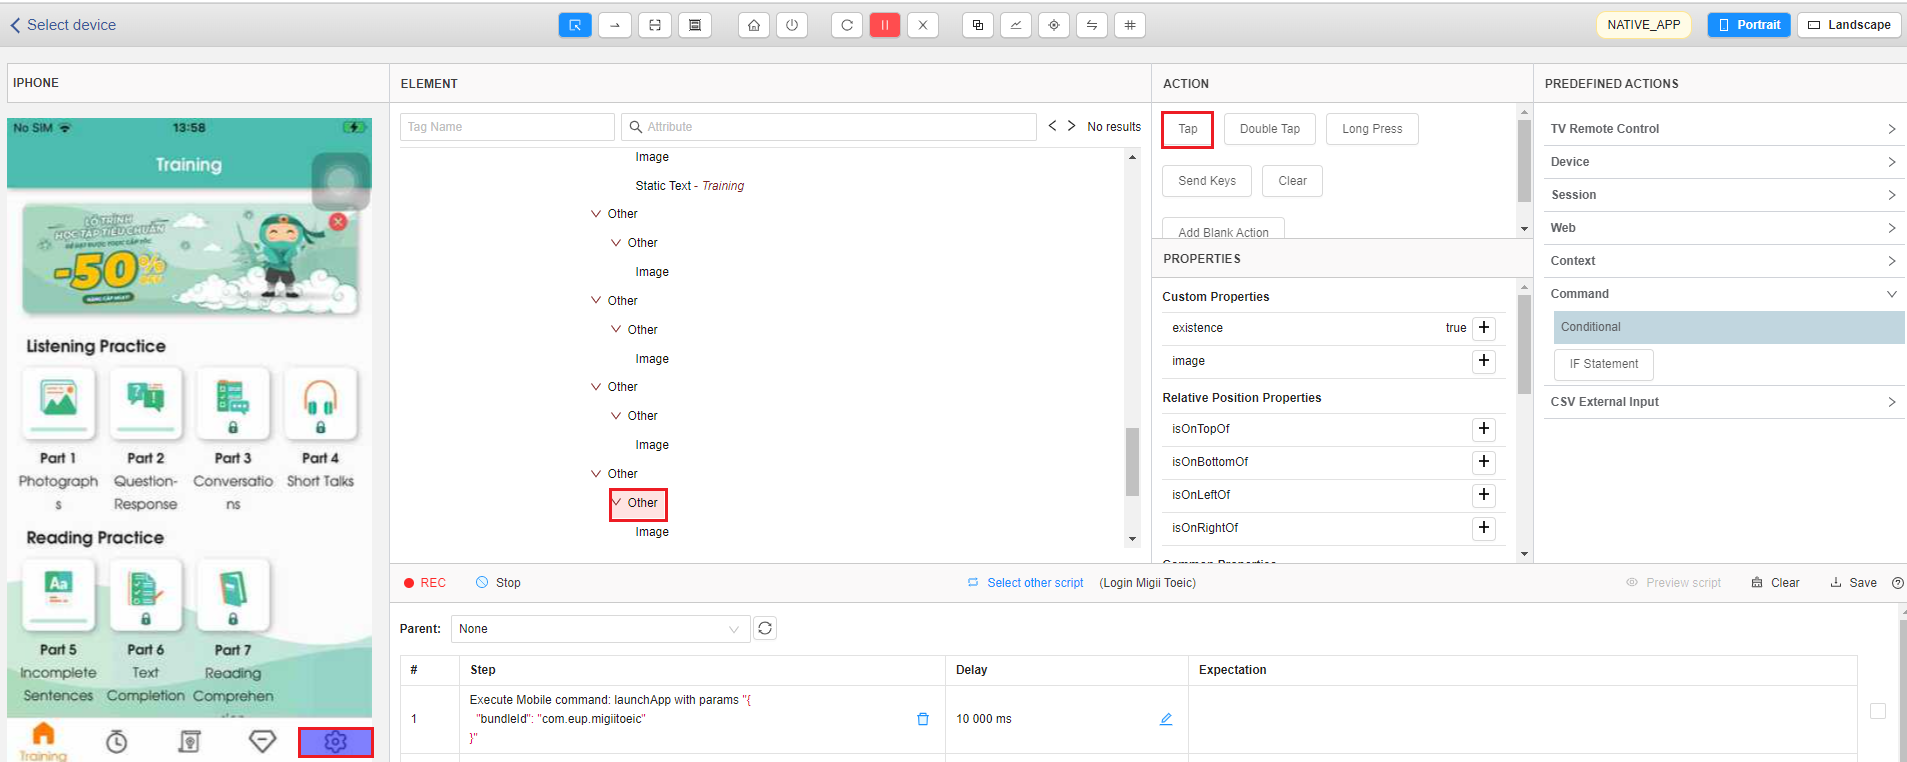
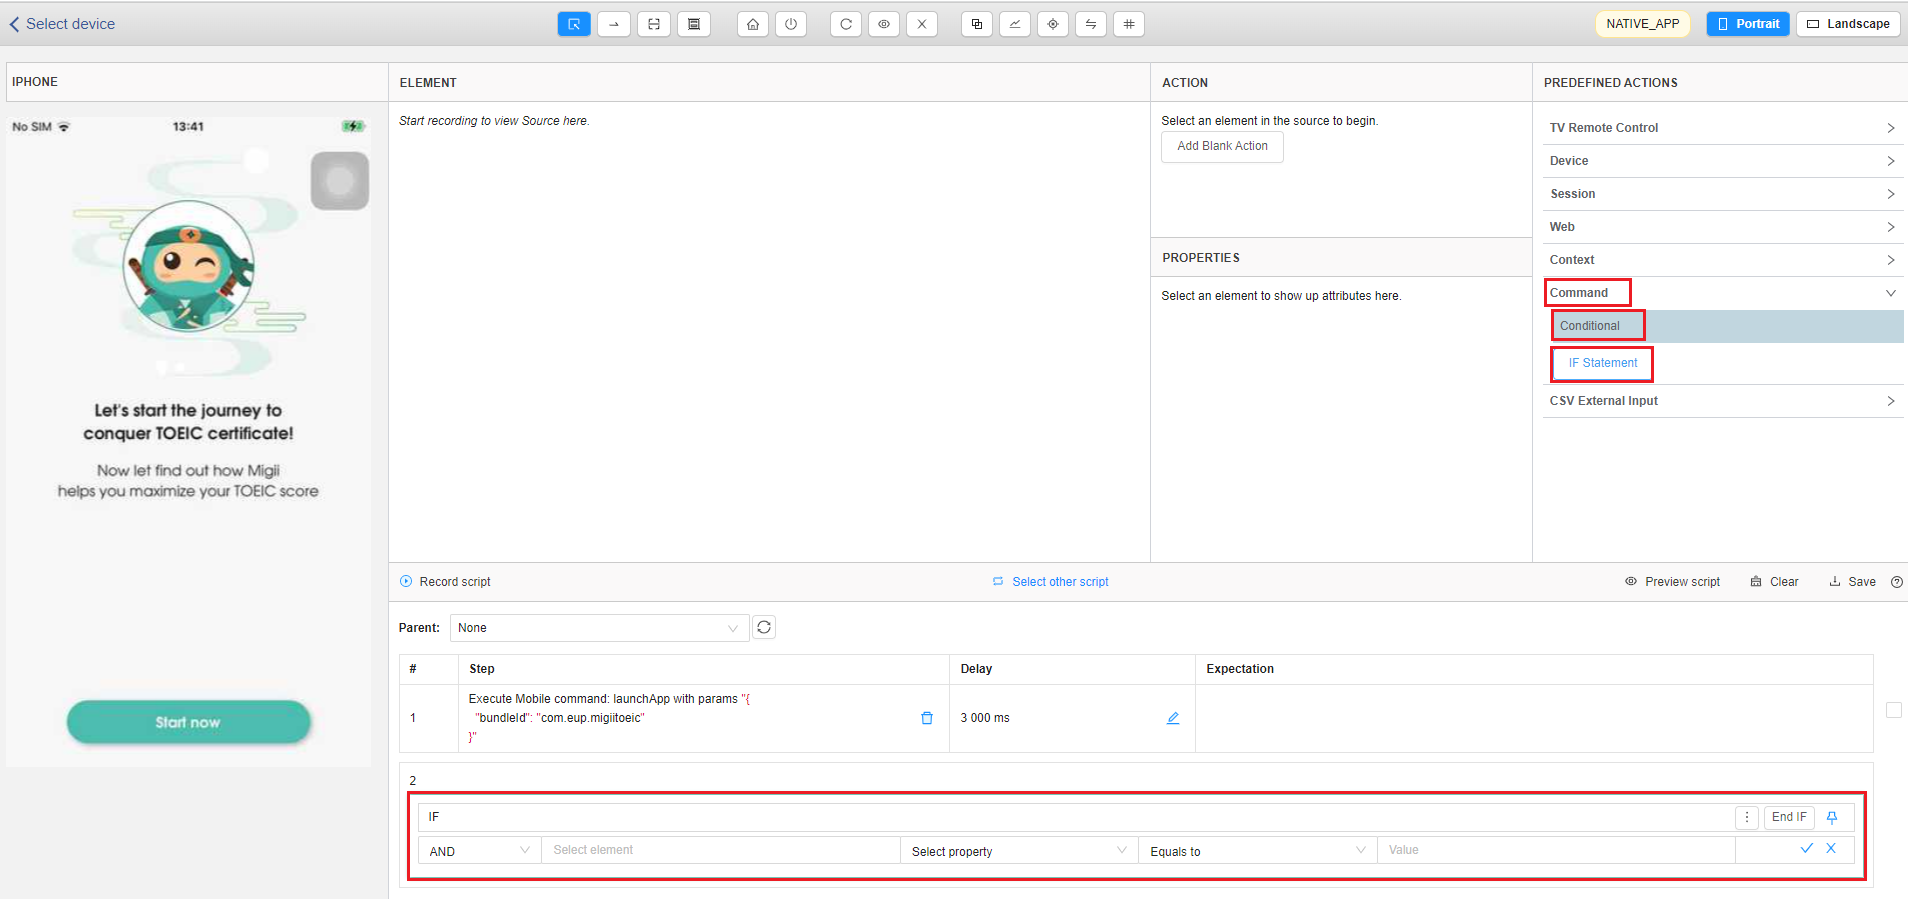
To create IF command, users select Command item on Predefined actions then select IF Statement, IF block will be displayed in step section.
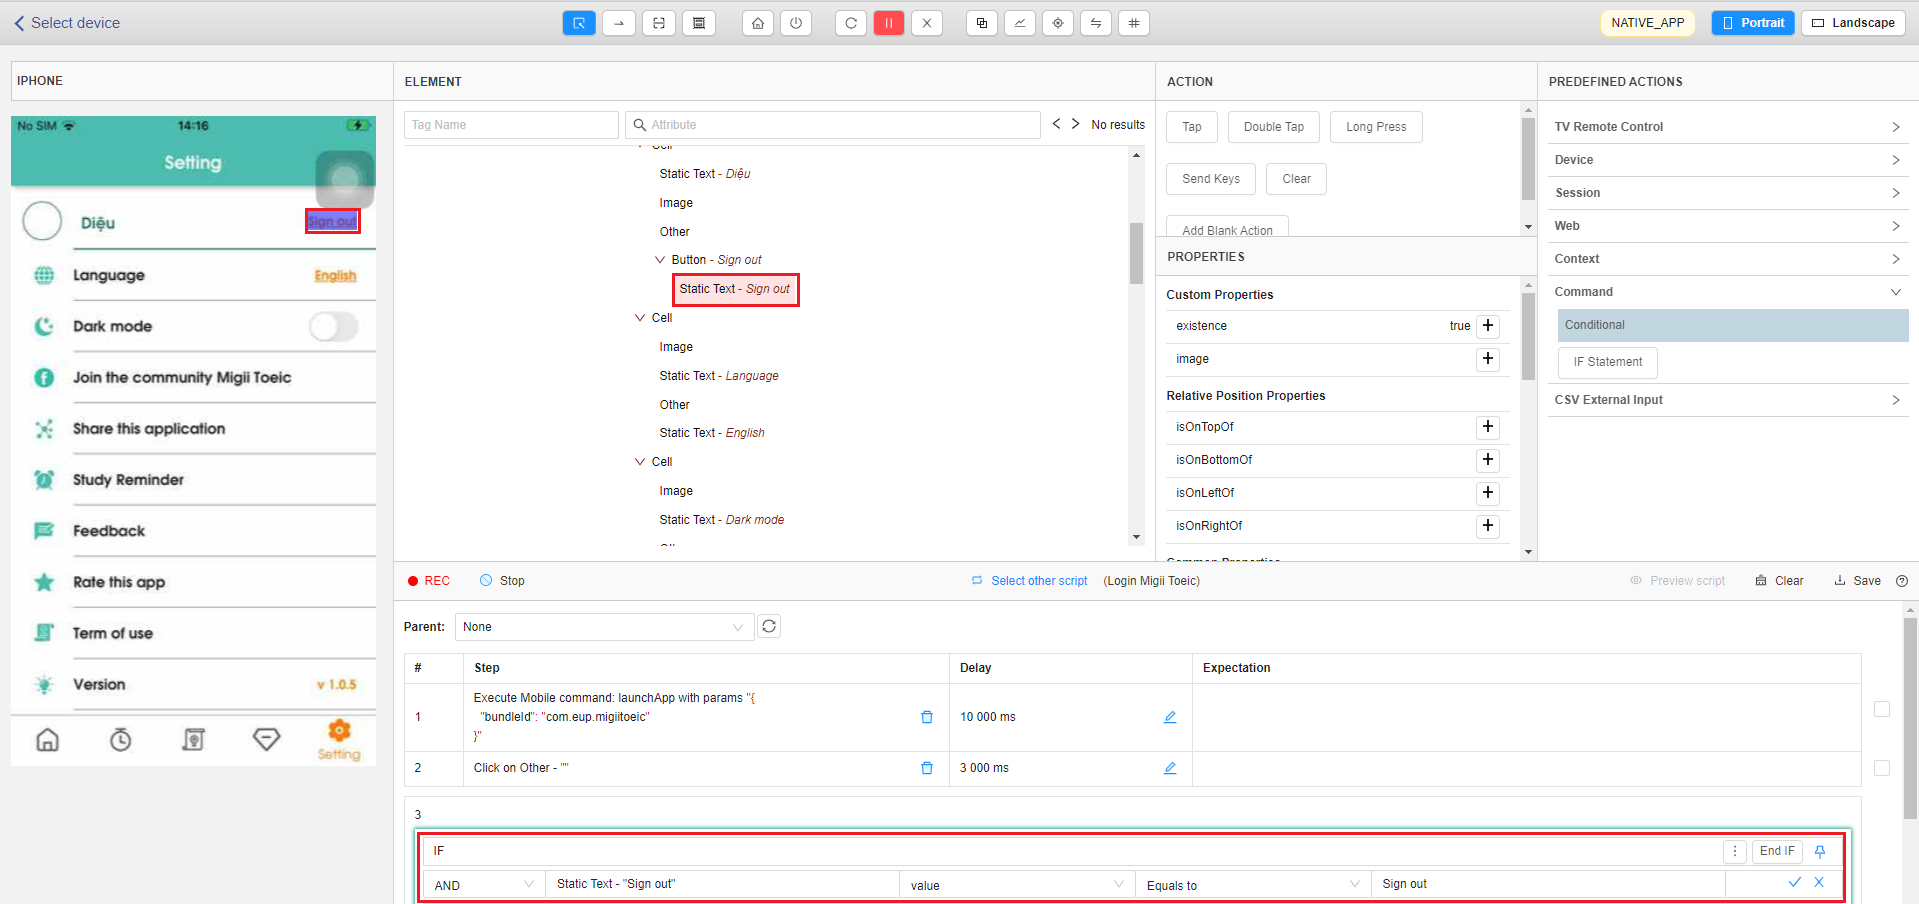
On the Setting screen, we need to confirm for text Signout and text Setting. Users select the Signout text element on the streaming screen (Note: needing to confirm whether the element on the List source has been properly focused).
Select Property as the value to display the expected element, now in the Value section, it will automatically select the value, confirm whether the value is correct and to finish creating conditions please select the tick icon.
Then, select the next condition to confirm that the Setting element is displayed, similarly select the property to display as name, and select the tick to complete.
To log out, select element icon setting and press Tap in Action to record the step.
Then select the Sign out button to log out.

Because the delay of step sign out takes a long time to execute, it will increase the time compared to the default time.
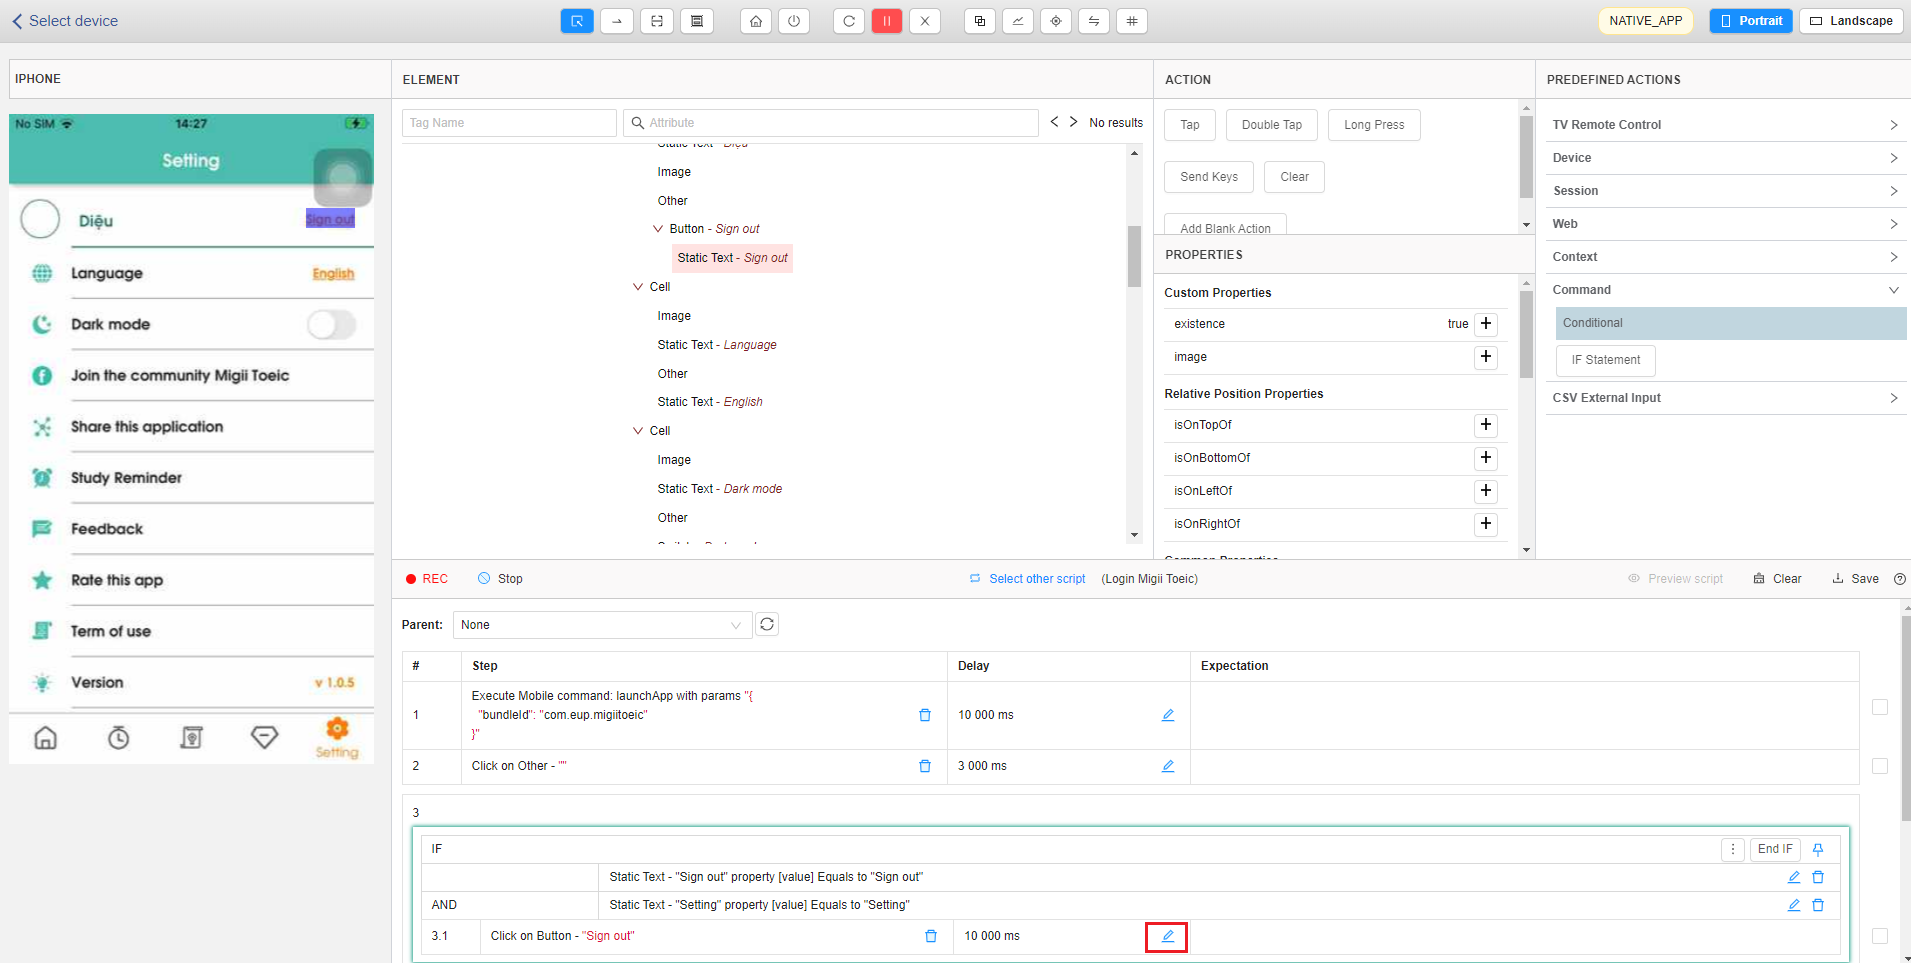
Similar to the step of opening the app, it also needs to increase the delay time.
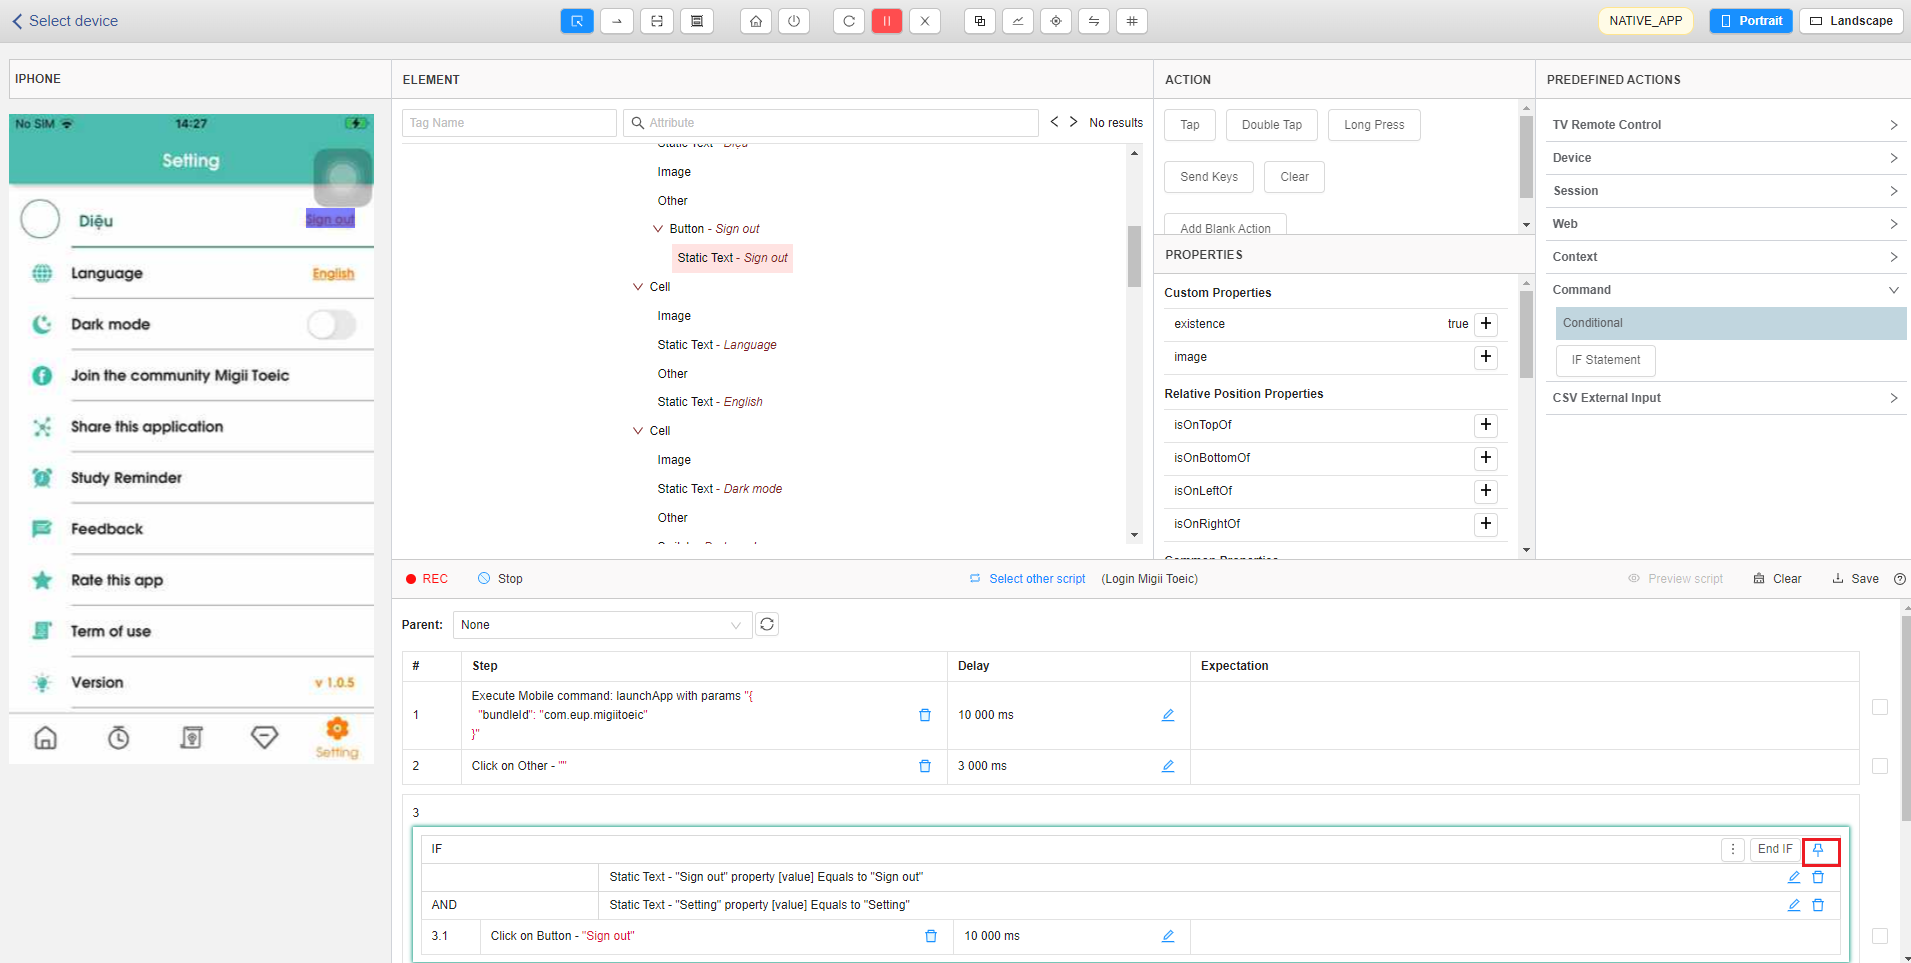
After completing the IF block, select the pin icon so that the next steps when the operation will be recorded outside the IF block.
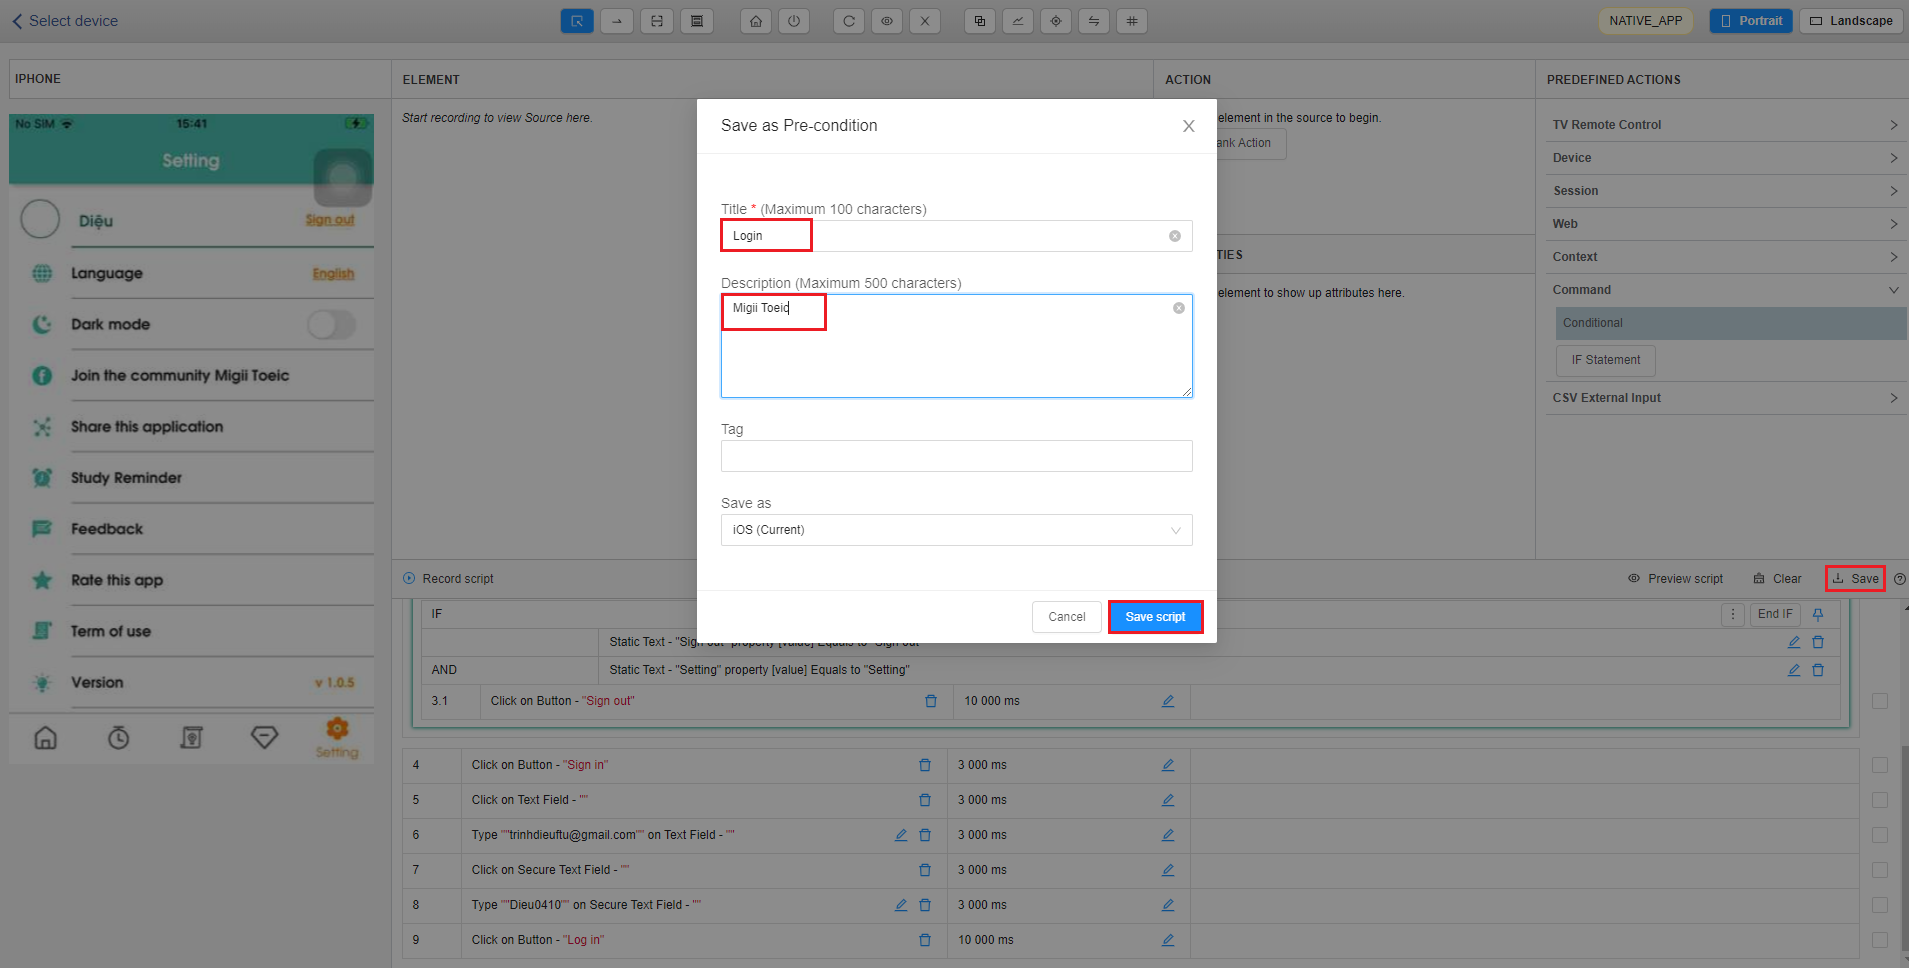
To log in to the application, the users will input the registered email and password by selecting the text box and selecting the [Send key] action.
Then, select the Login button and select the Tap action to perform the step click. The Login step also needs to increase the delay time.

After finishing this test precondition and want to save again, you need to select the Stop button and then select Save. Enter a title and description for the newly created test precondition. After your test precondition has been saved, a successful save pop up will be displayed.
Create Test script
The steps for creating test scripts are similar to creating test preconditions.
Go back to Tester 4.0. select Manage Test Script tab -> Click Create Test Script with ATOMP Studio button and select device.
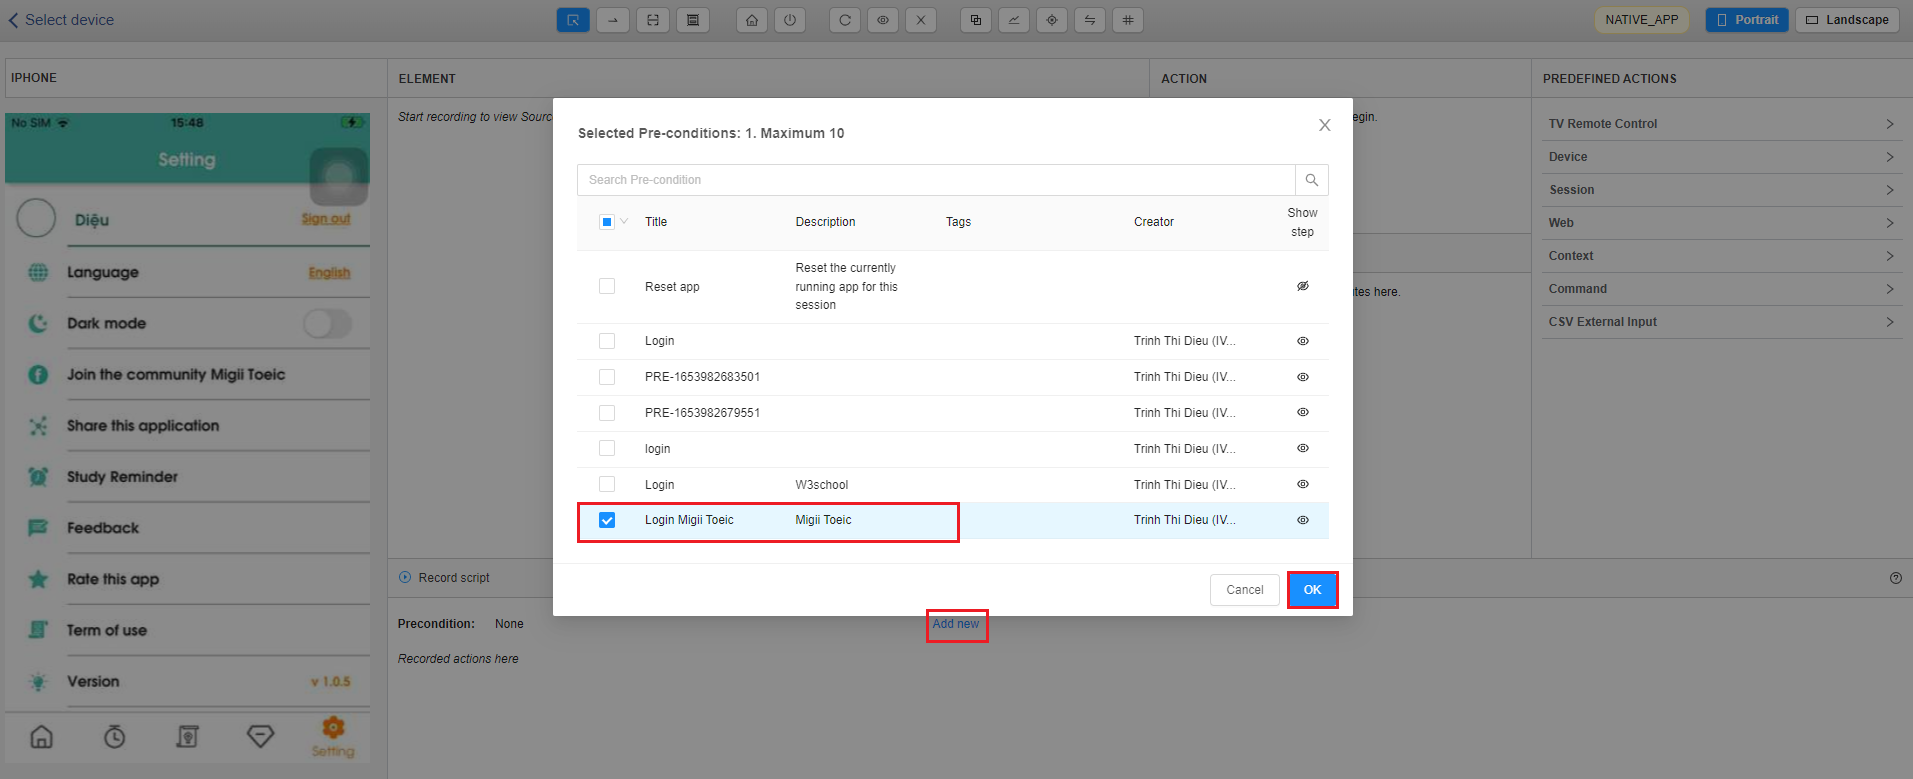
➢ Add precondition
For scripting screen, you will be able to select precondition to add precondition, which saves time with test scripts with same precondition. For example, the created Login test case is a precondition that can be reused with many different scripts.
After adding the precondition, the precondition will help you open the desired screen to perform step 1, so you need to preview this precondition.
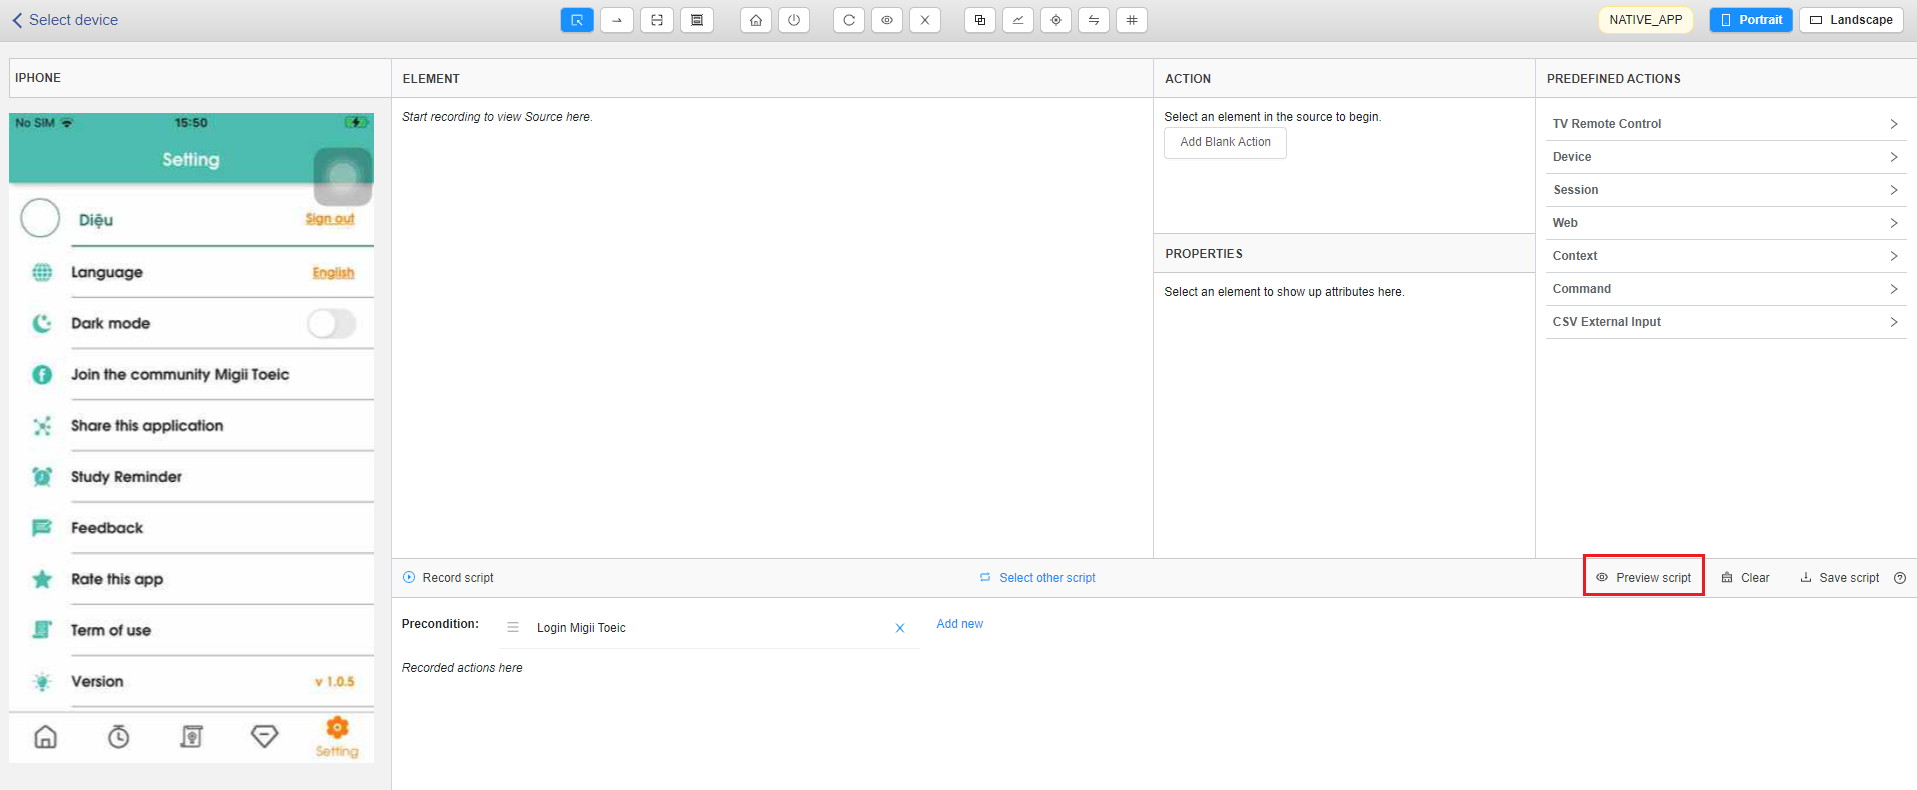
After finishing the preview test precondition, the user needs to return to the test script creation screen.
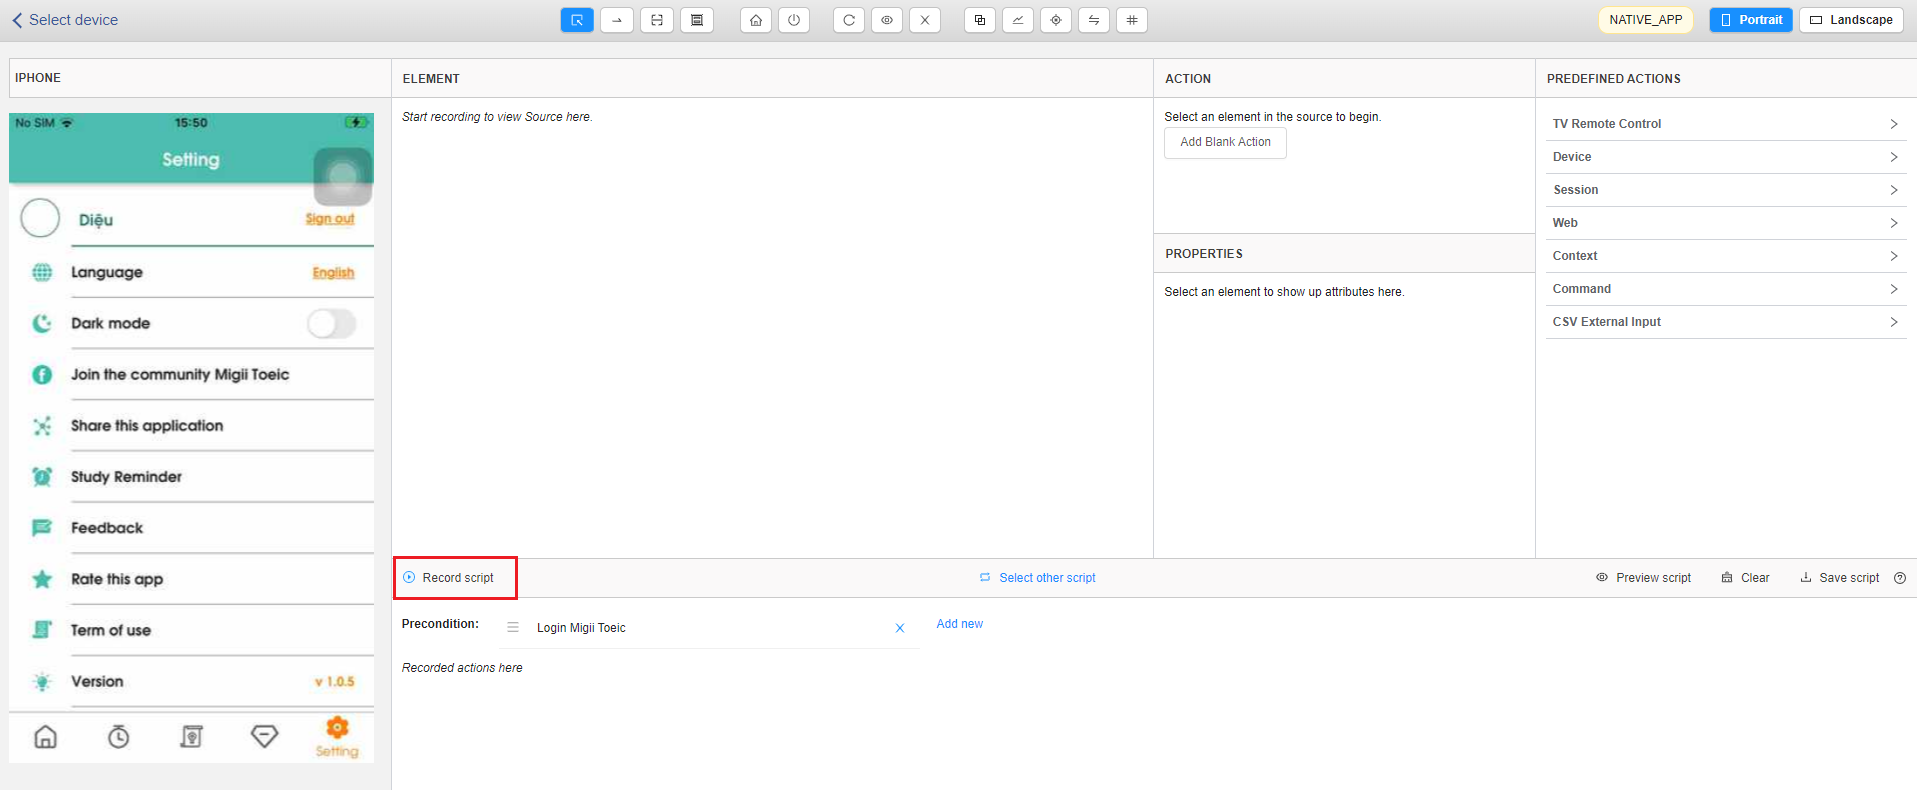
Before creating test script, select Record script button
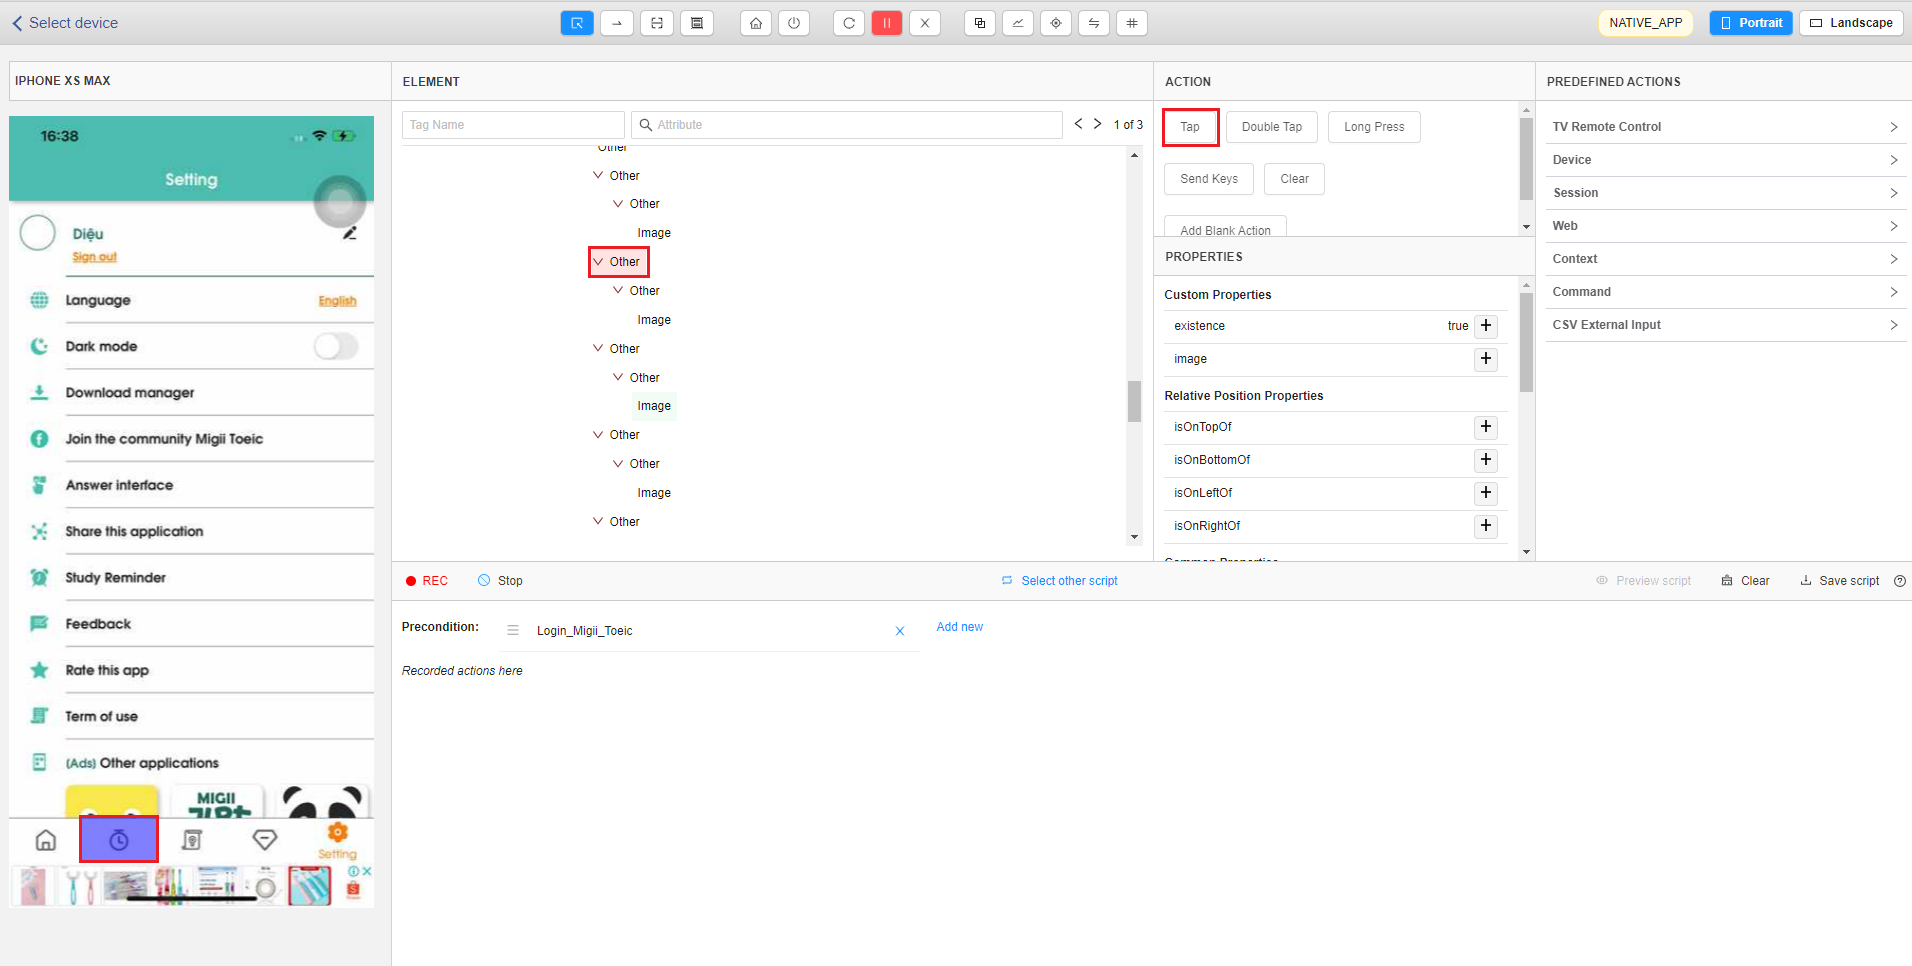
Step 1: To open Exam screen, select Exam element then click Tap action.
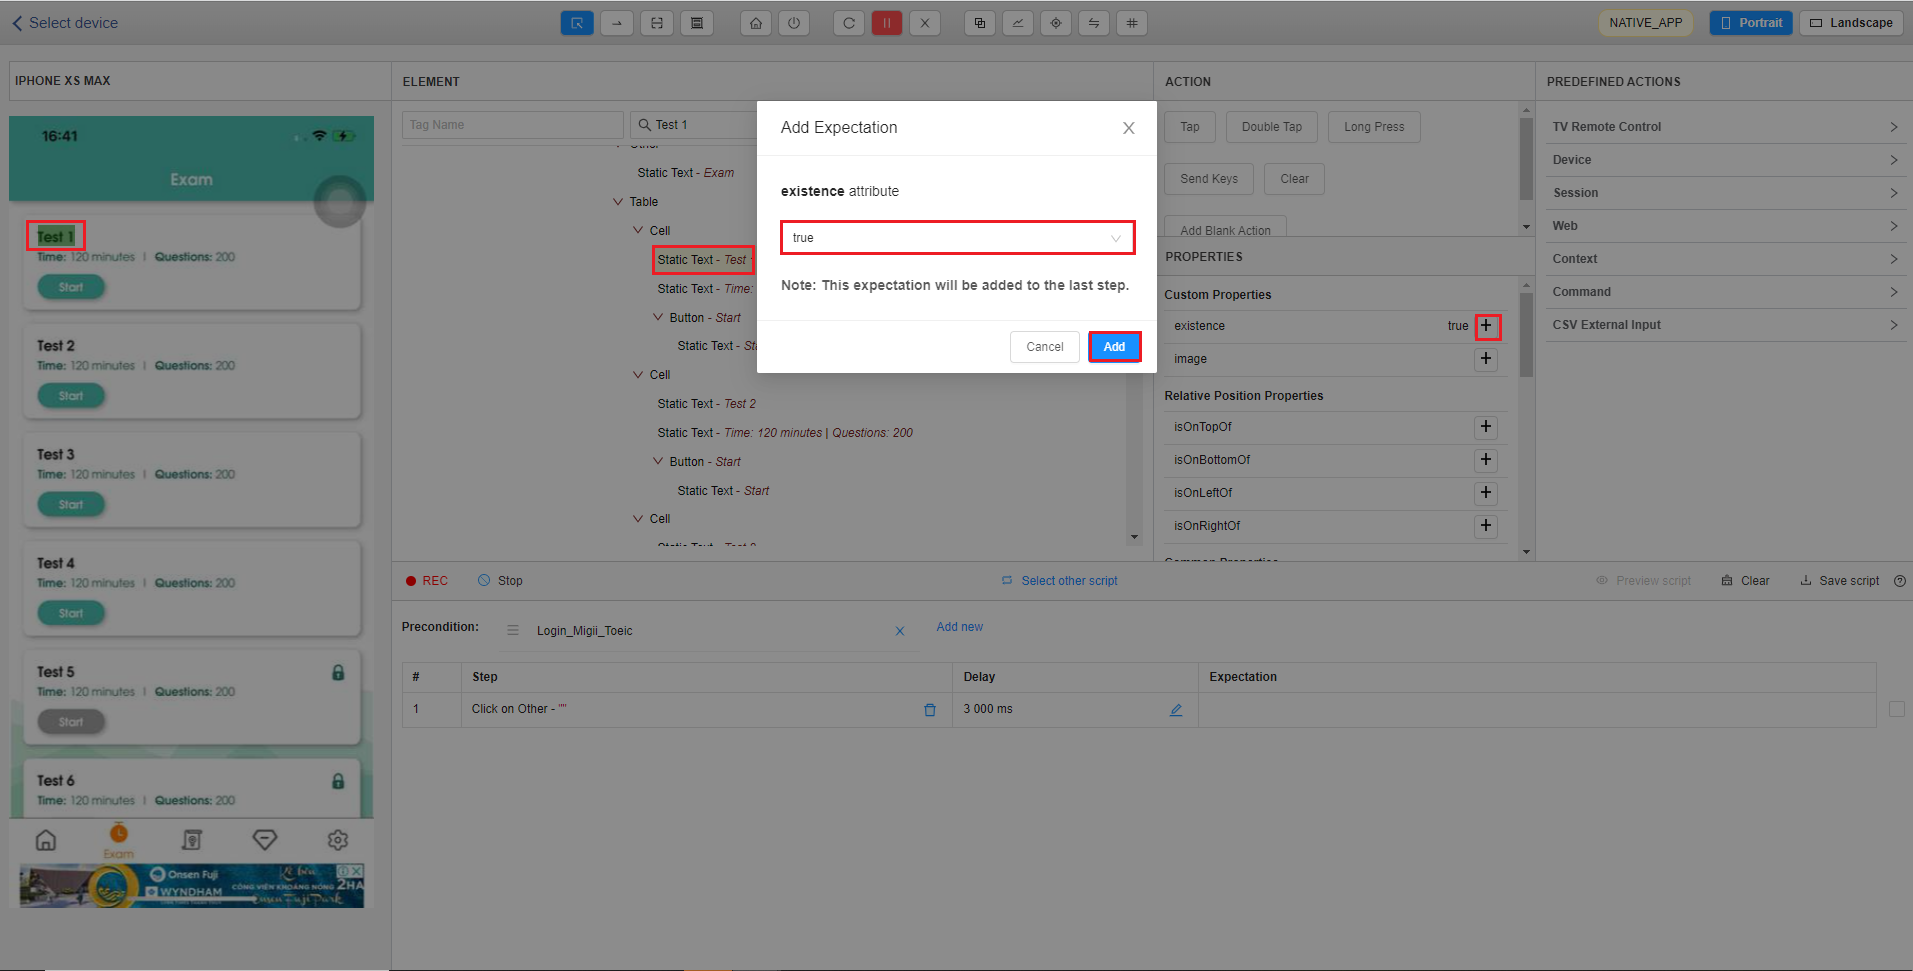
➪ To create an expectation in order to check “Test 1” text is displayed, the user clicks the “Test 1” element on the streaming screen and then selects the [+] sign next to [existence] property in Custom Properties. Then [Add Expectation] pop up will be displayed then click the [Add] button. Expectation will be displayed.
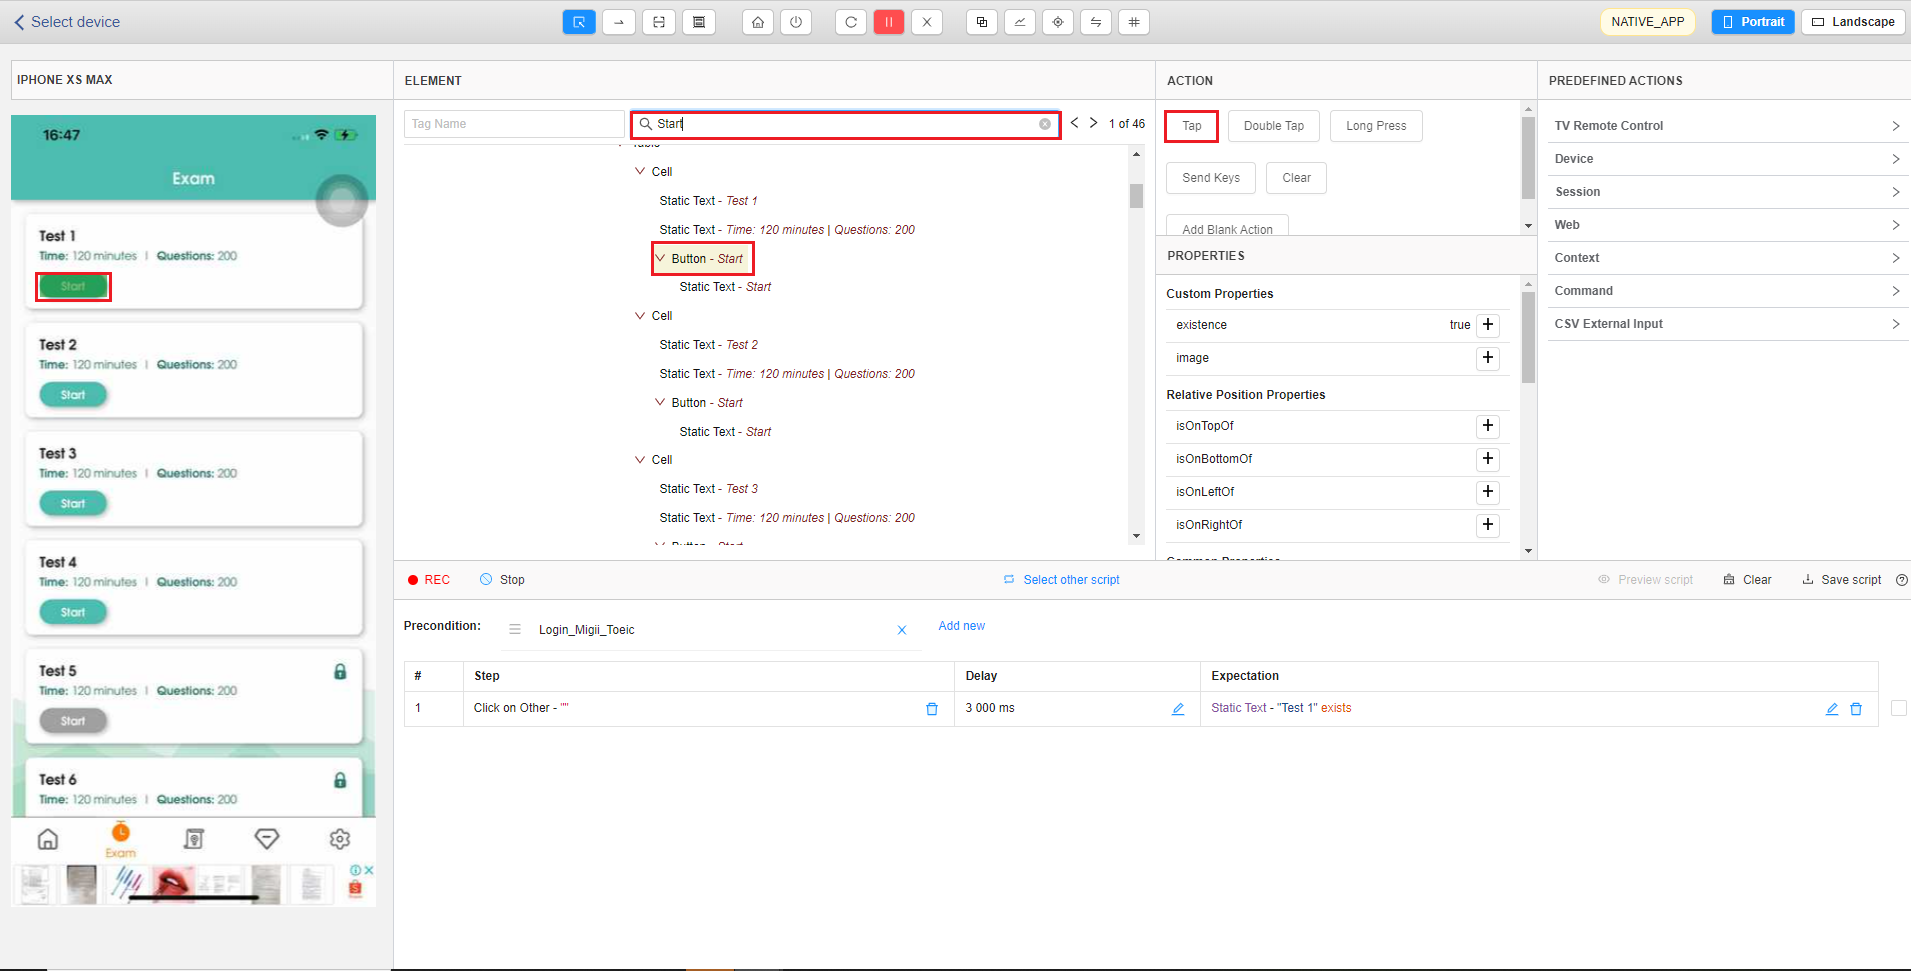
Step 2: To click on [Start] button in [Test 1] section, users search Start text in Attribute textbox. So that the [Start] is highlighted then users click on the [Tap] action.
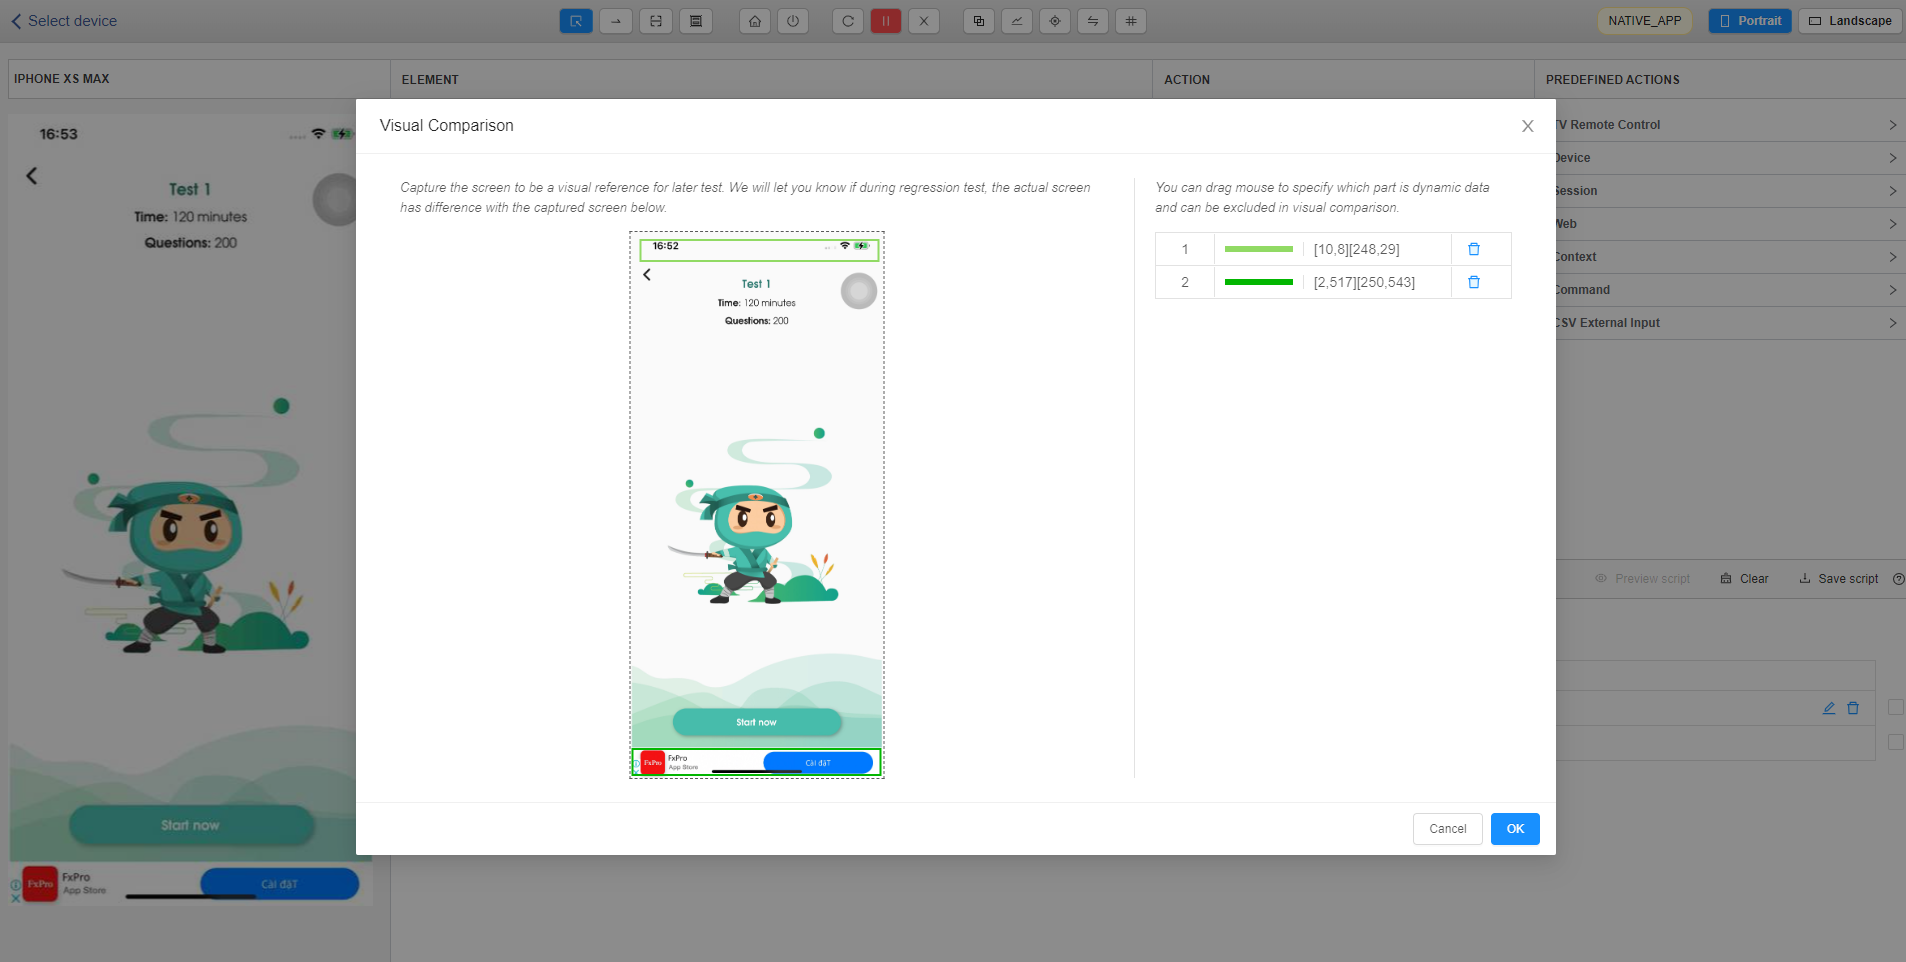
➪ Create expectation for step 2. Tool supports checking expectations by AI Visual check. Users select icon to add AI Visual Check to compare visual images.
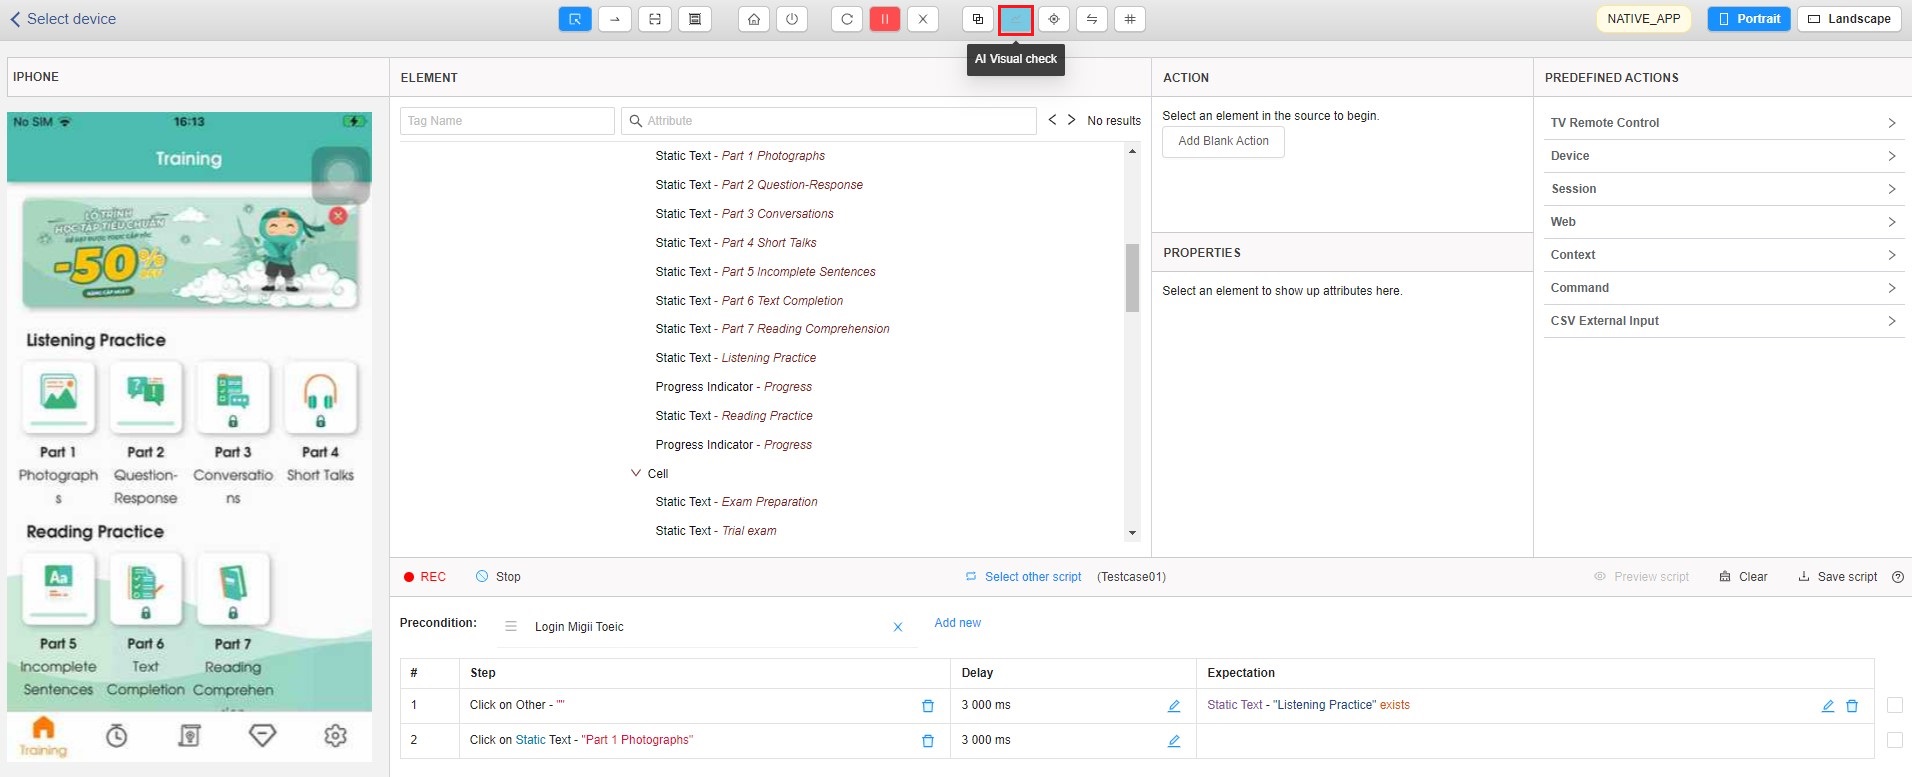
AI Visual check will capture the screen to be a visual reference for later test and let you know if during regression test, the actual screen has difference with the captured screen. You can drag mouse to specify which part is dynamic data and can be excluded in visual comparison. After that, you can click on “OK” button to save Expectation or click on icon to delete selected data area.