[Precondition]
- Open website: https://demoqa.com/radio-button .
[Steps]
1- Click item “Yes”.
2- Click item “Impressive”.
[Expected]
1- Item “No” is disabled.
Item “Yes” is checked.
Text “You have selected Yes” is displayed.
2- Item “Impressive” is checked and item “Yes” is not checked.
Text “You have selected No” is displayed.
Create Test precondition
Open website: https://demoqa.com/radio-button.
- Click button “Record script”
 to start making “record” at the website.
 - Enter the website link in the text box “Base URL” and Click “Start Recording” button.

Create steps for script
- When the URL link is opened, the tool will automatically generate the default steps: open and set window size.
- Click “Record script” to stop making “record” at the website.
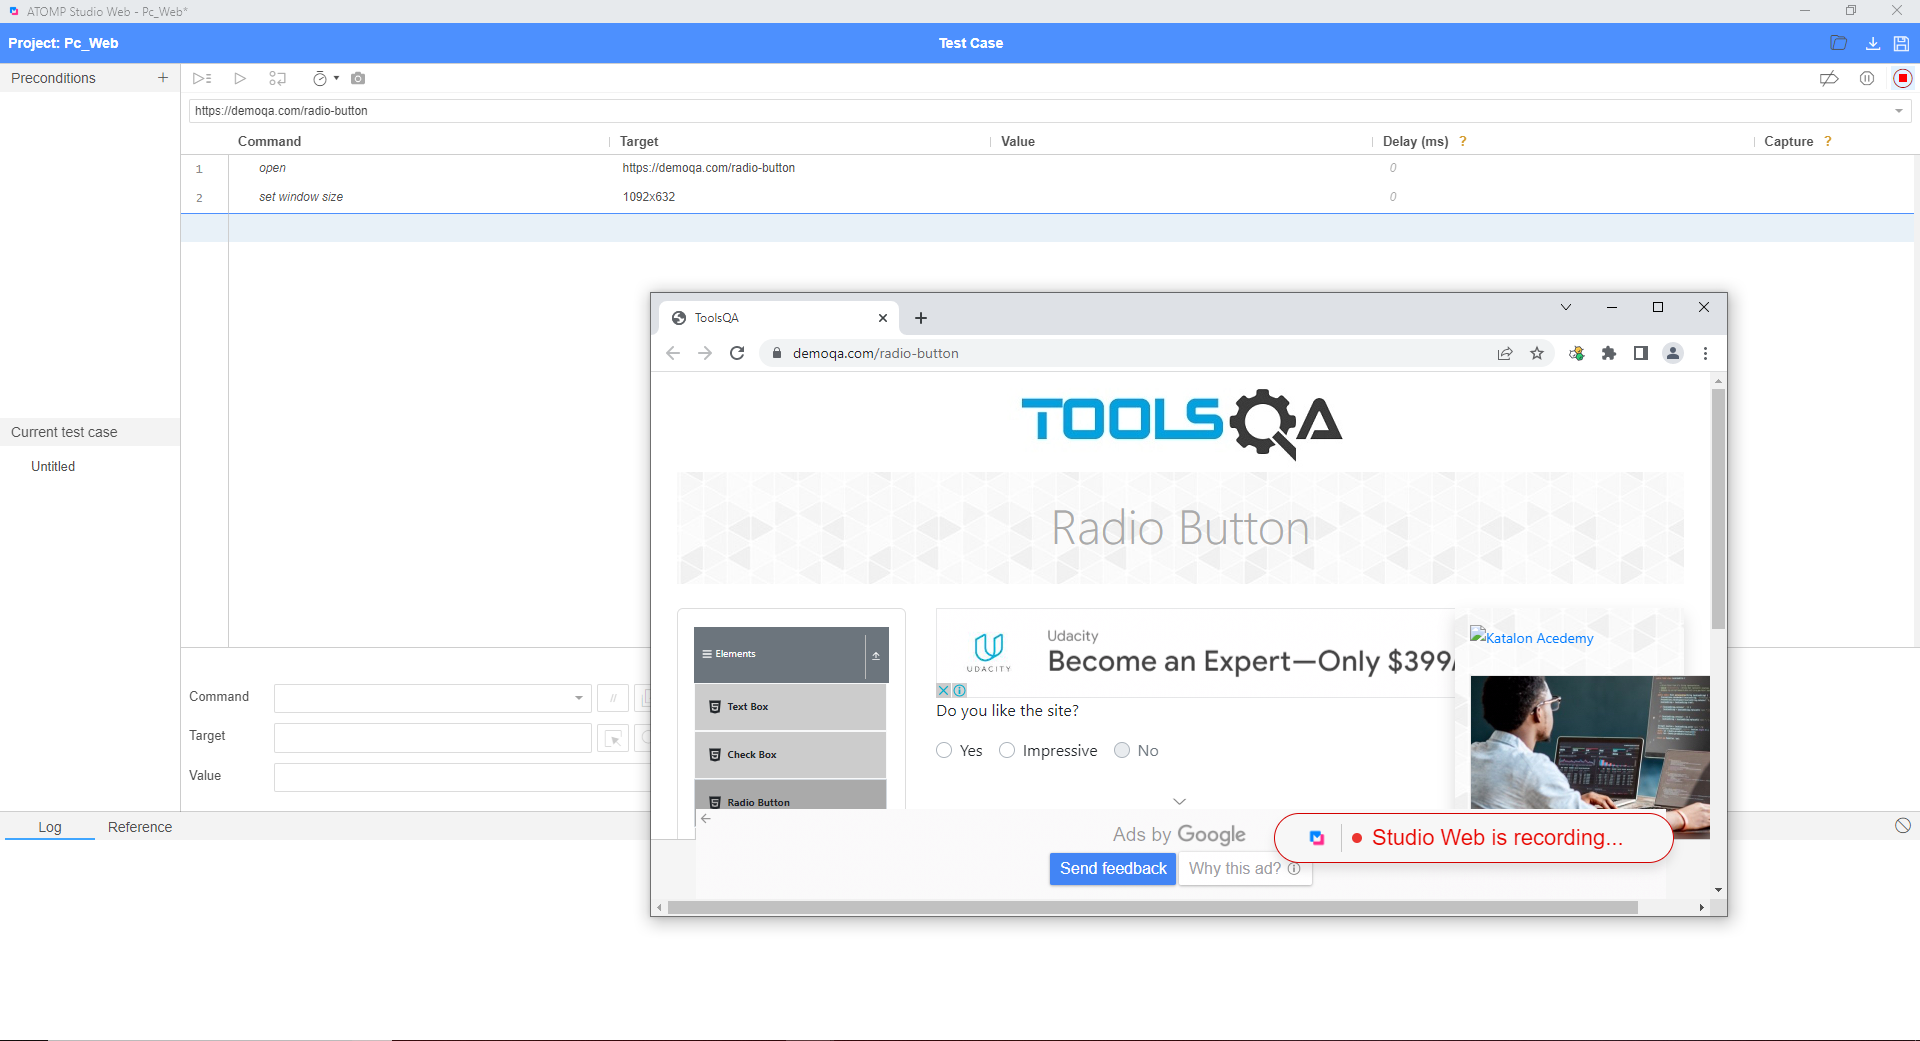
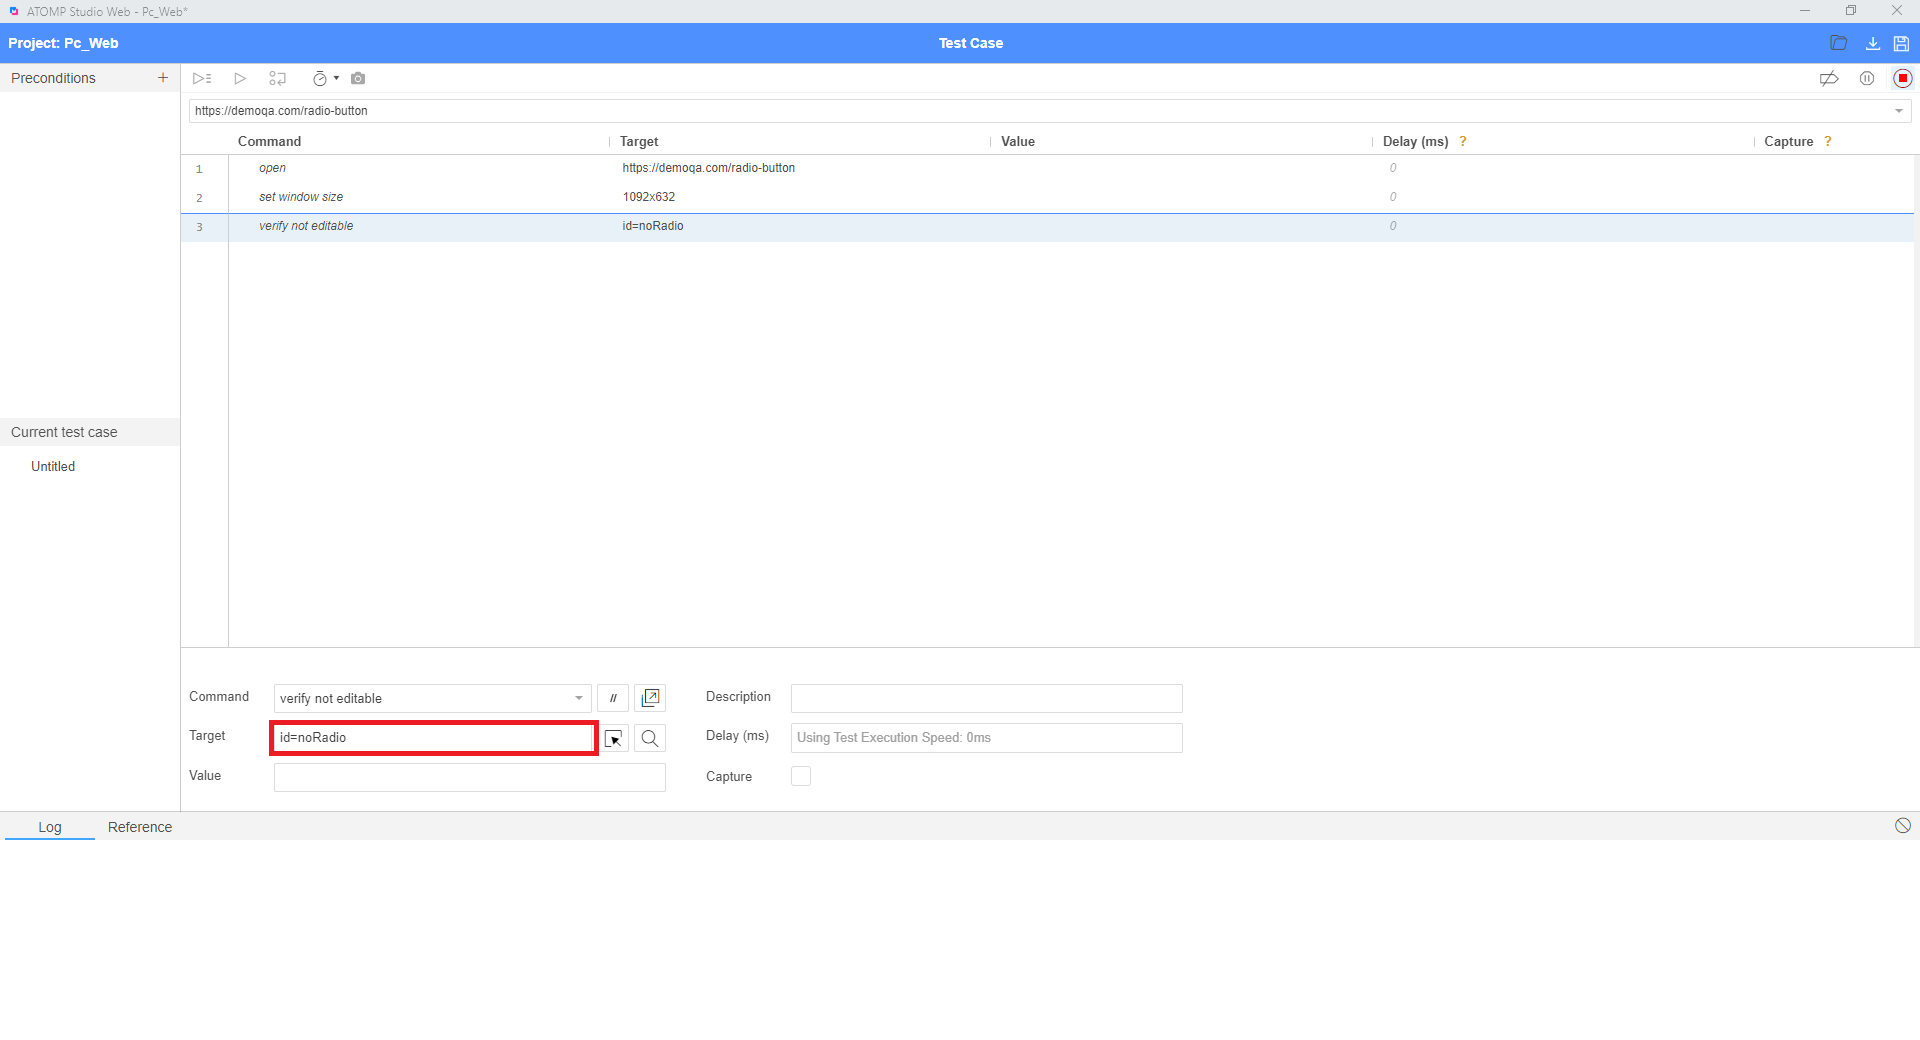
➢ Check radio disable
Step 1: In the input command box, enter “verify not editable”.
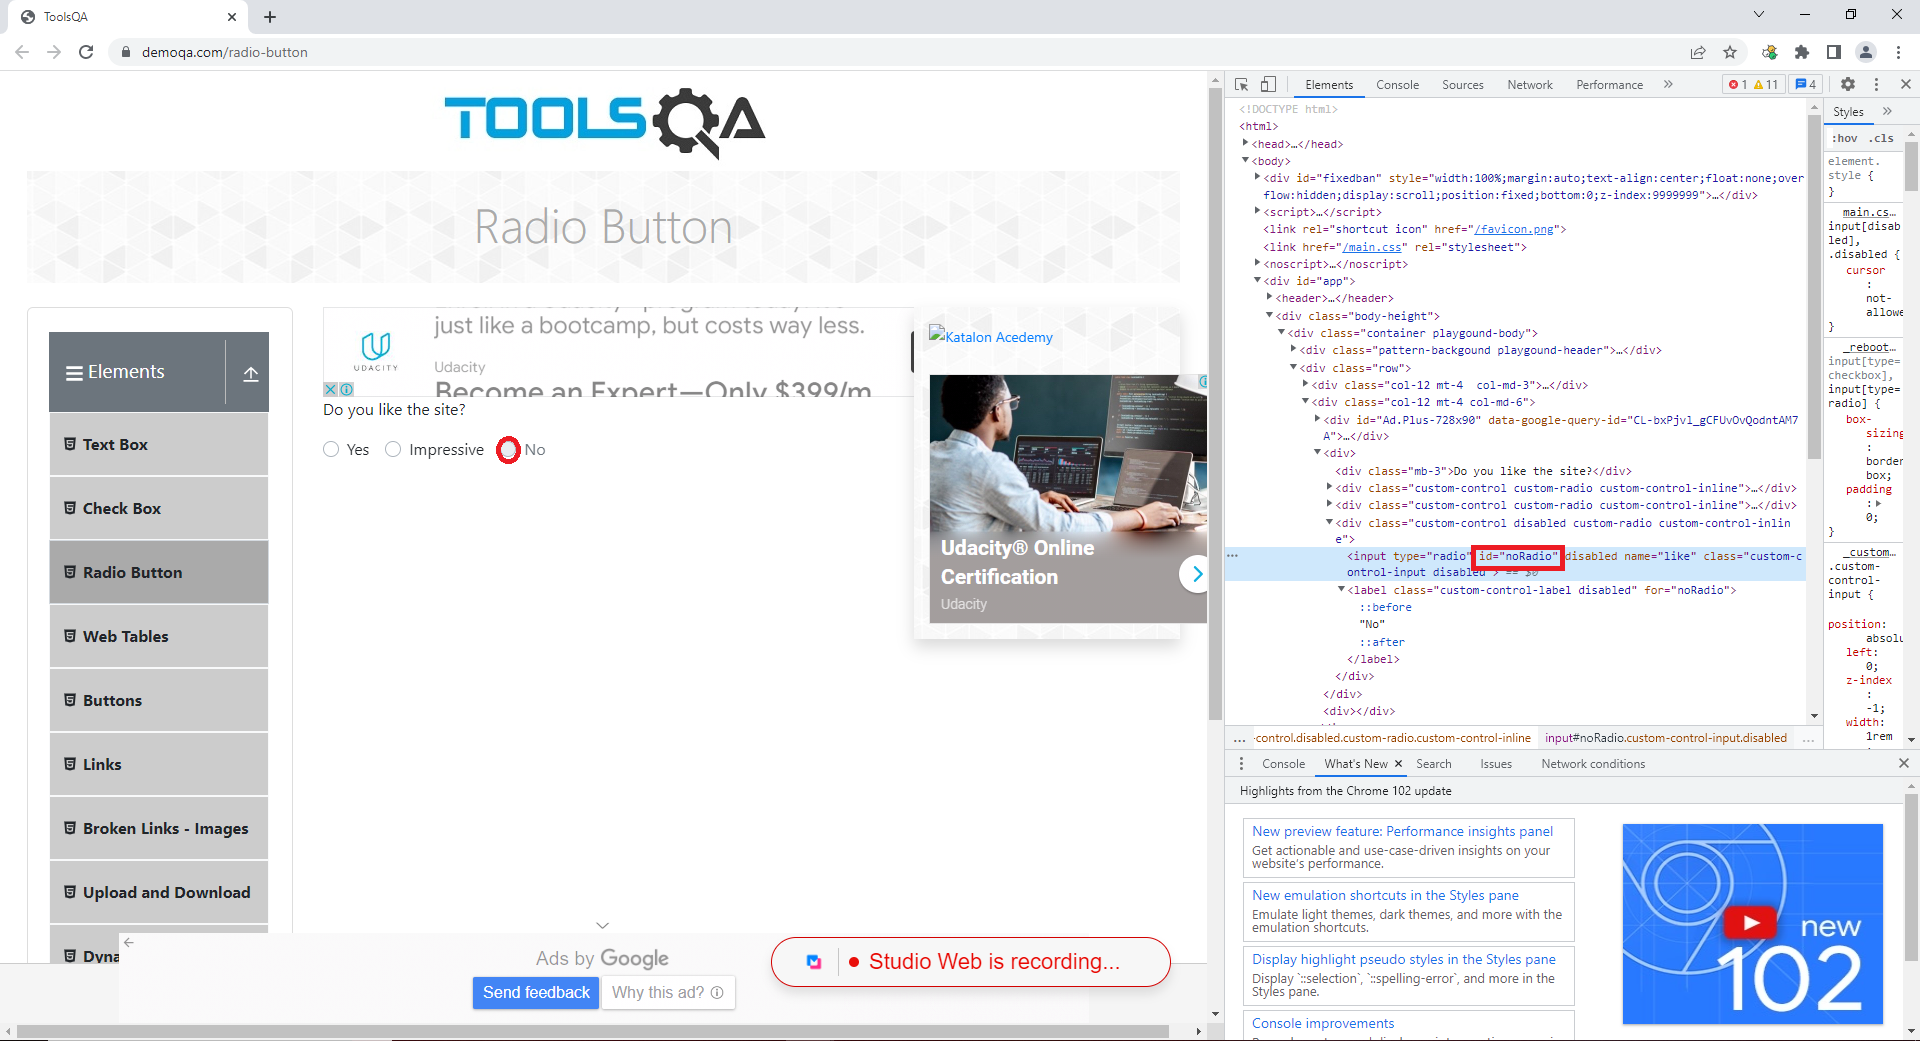
Step 2: On the page screen, select F12 or click right mouse and select inspect. Then use the  icon to point to the disabled button. Then get the id of the disabled radio “noRadio”.
Step 3: Assign “id=noRadio” to the Target input box.
➢ Check verify radio Yes
Step 1: In the input command box, enter “click”.
Step 2: Click the “Select target” button then point at the item you want to select to display the item’s xpath.
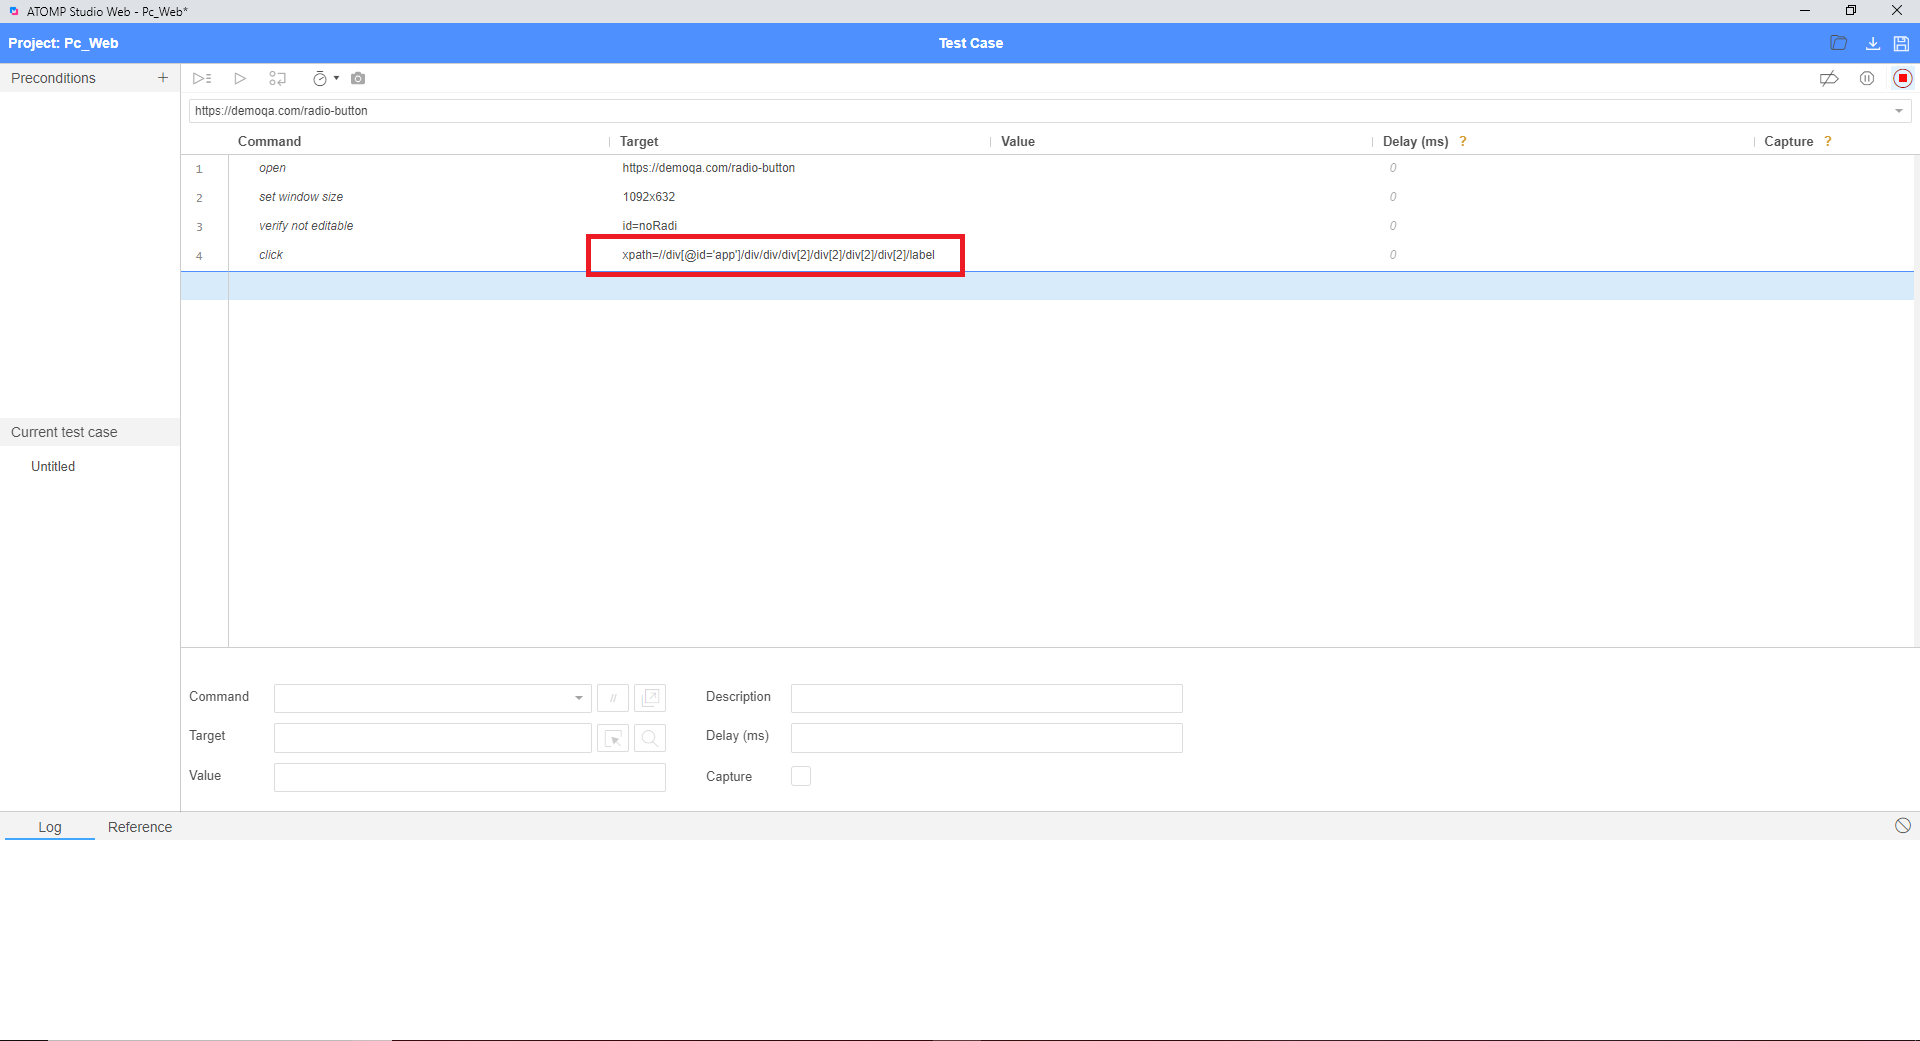
Step 3: Click the button “Select target” then point at the text “Yes” on the screen.
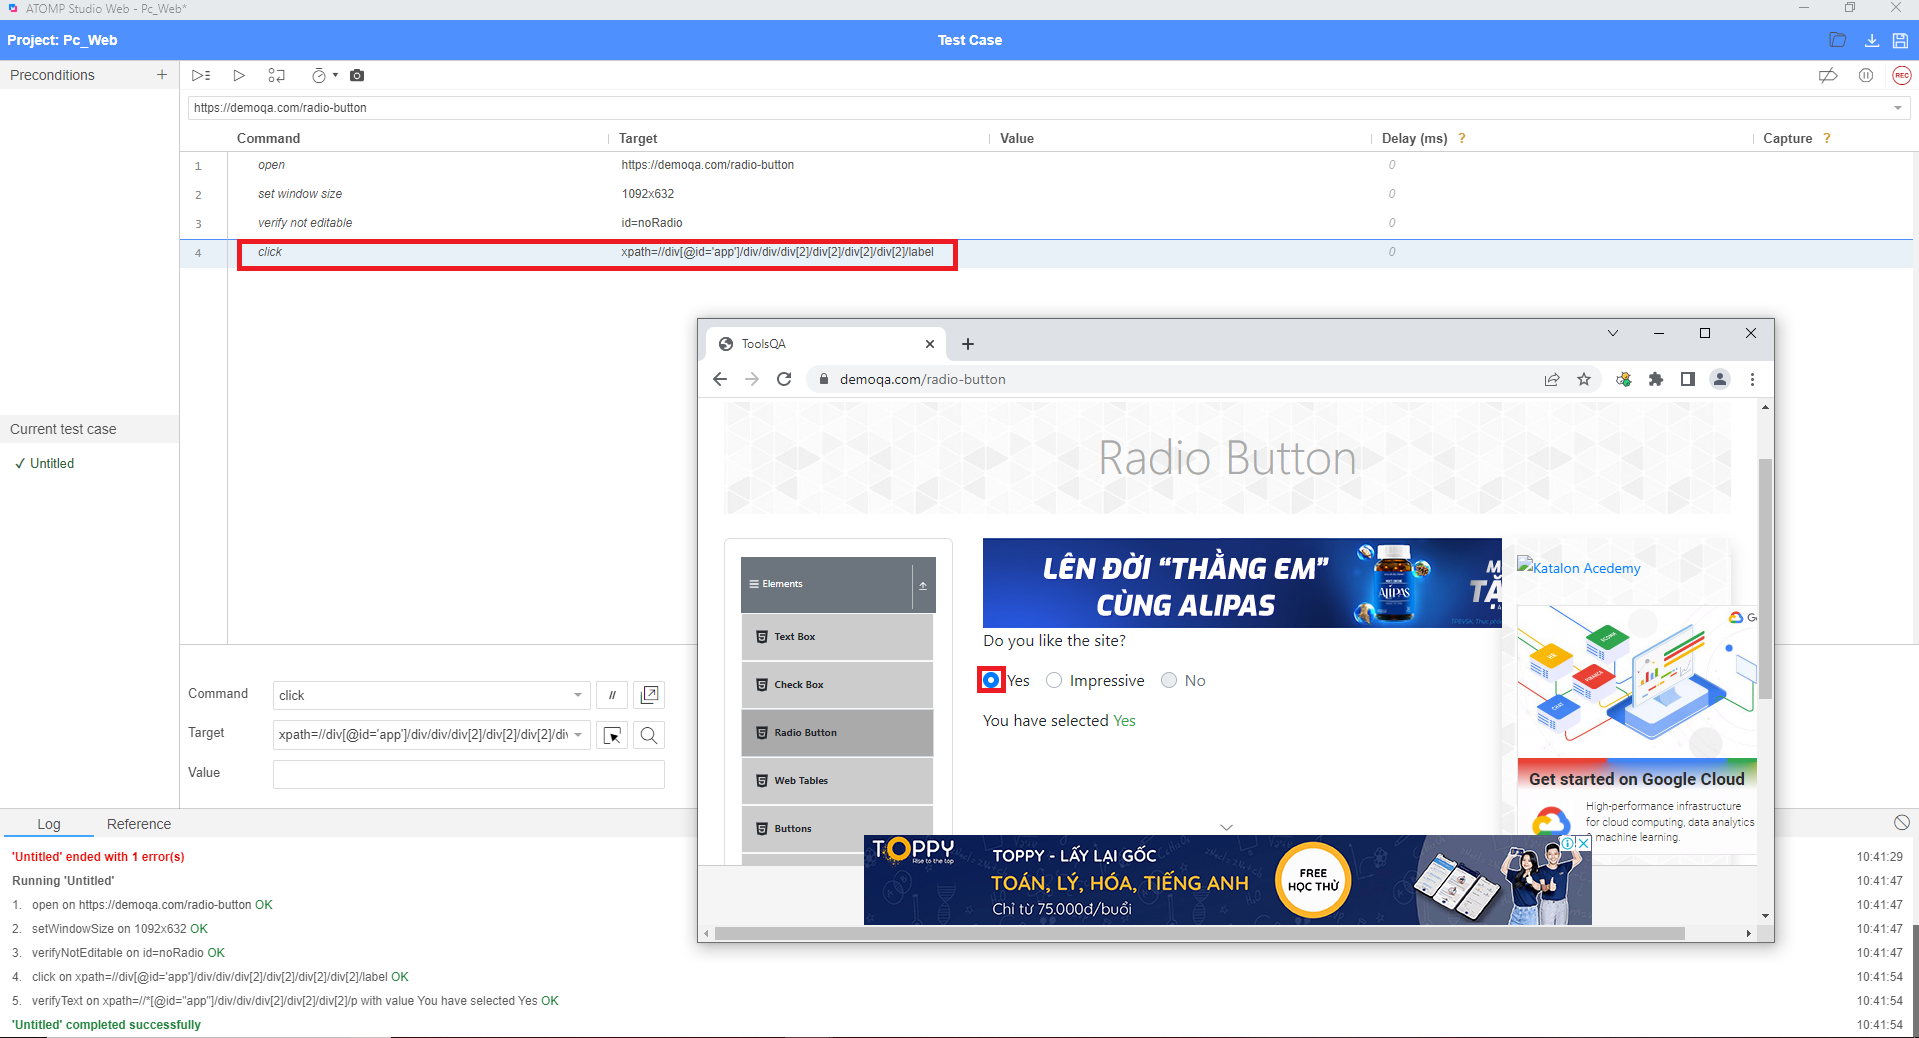
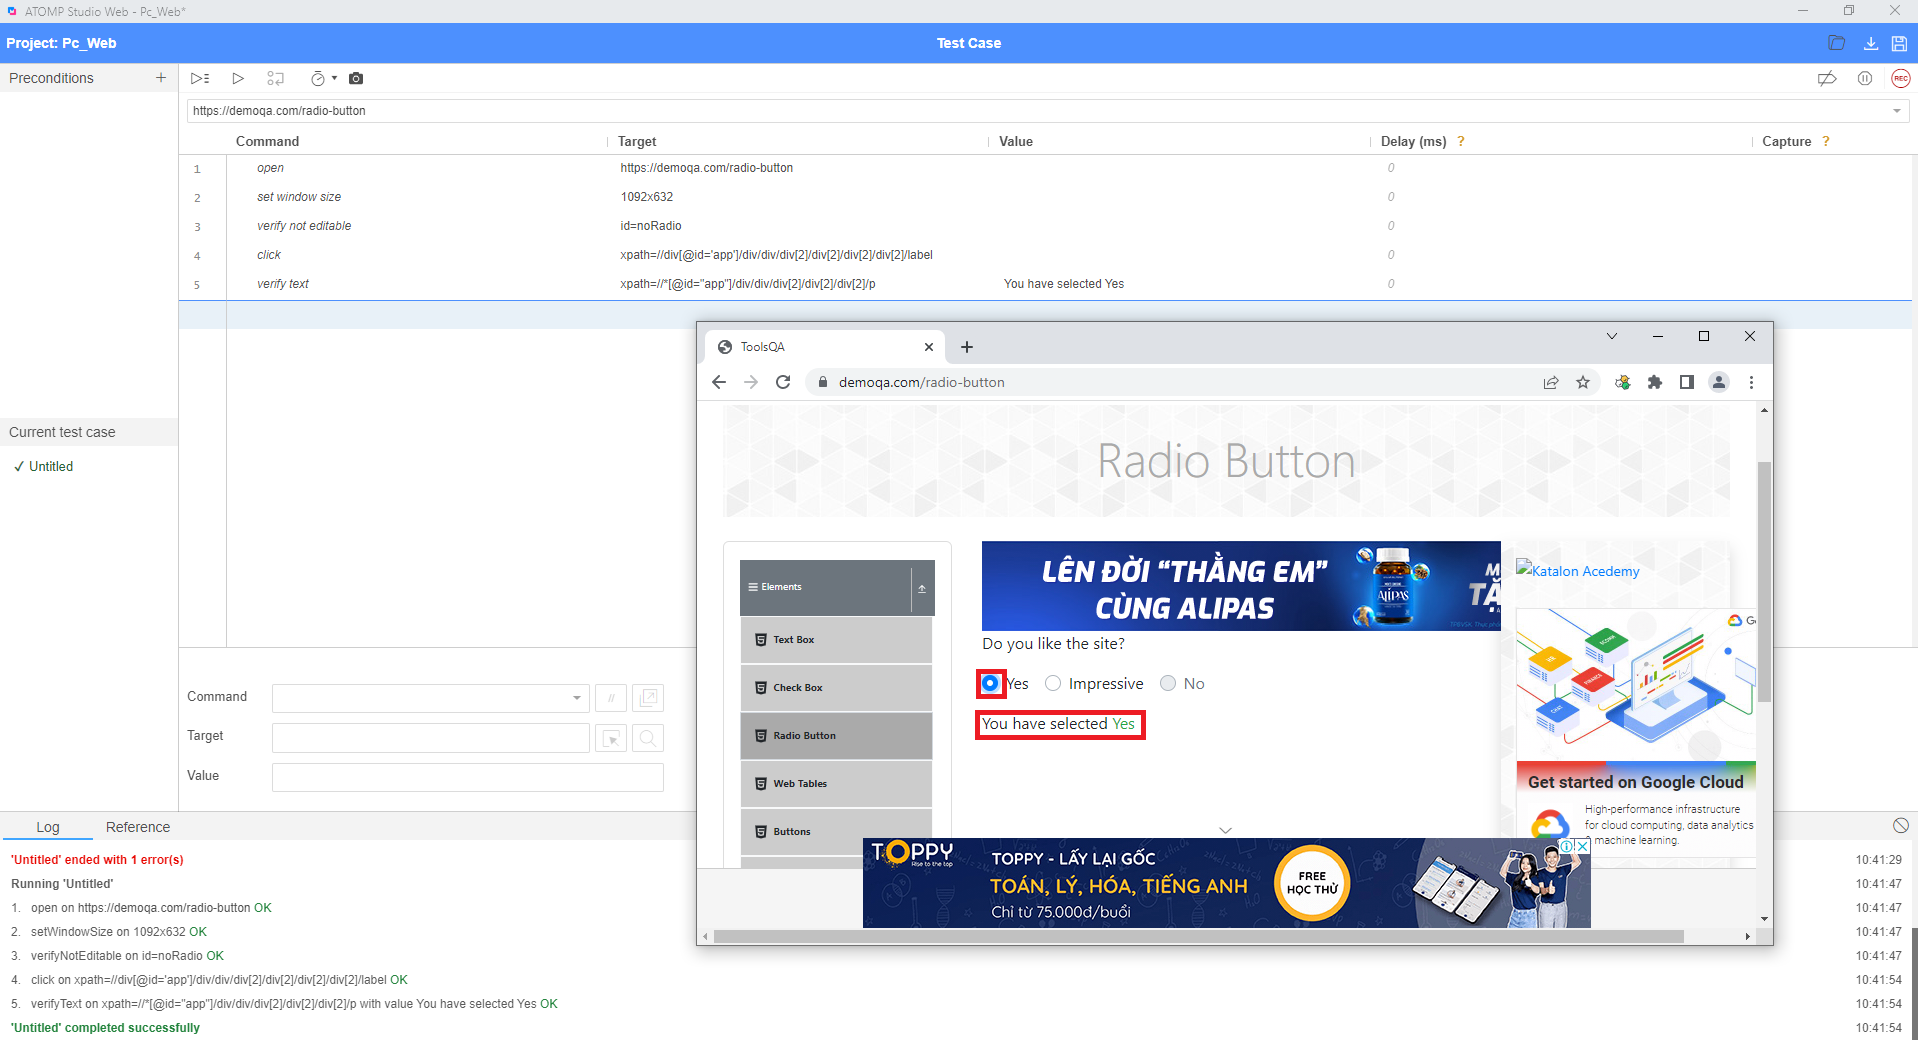
Step 4: In the input command box, enter “verify text”, value box enter “You have selected Yes”.
Step 5: In the input command box, enter “verify checked”.
Step 6: On the page screen, select F12 or click right mouse and select inspect. Then use the icon to point to the selected radio. Then get the id of the selected radio “yesRadio”.
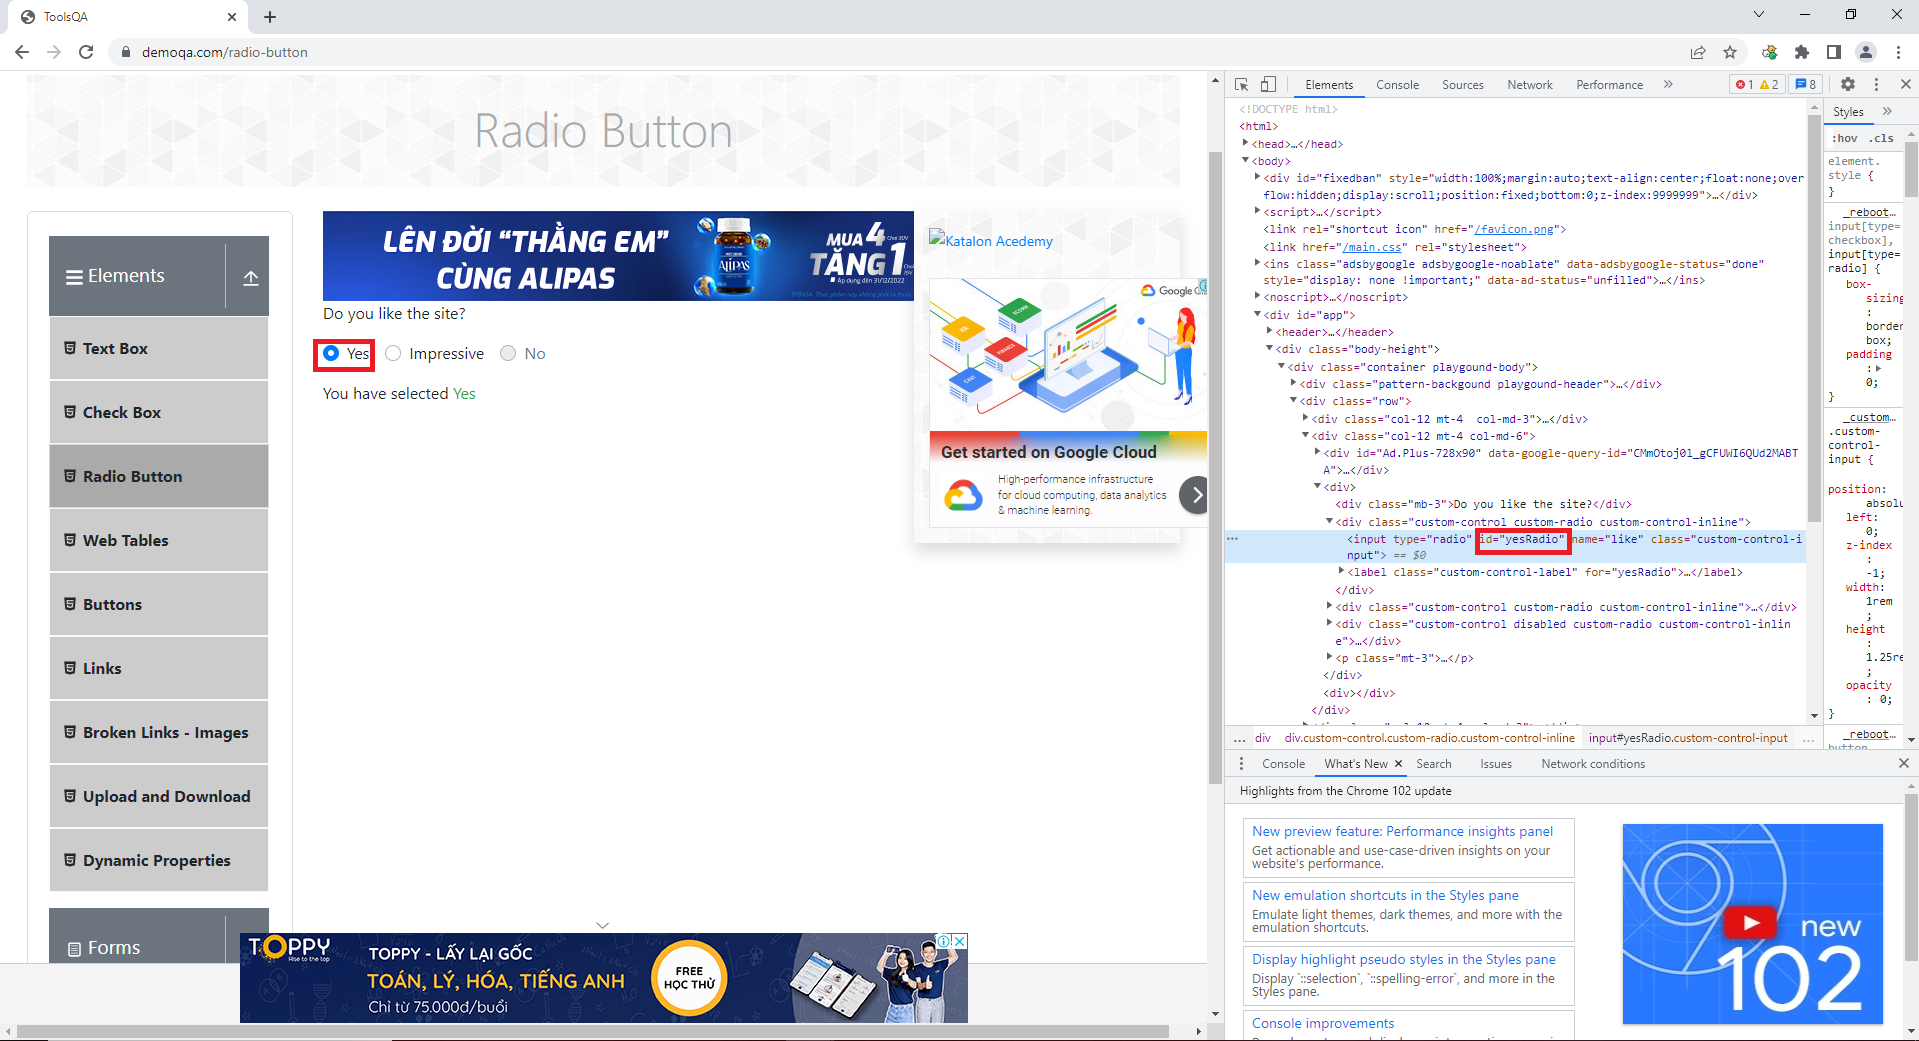
Step 7: Assign “id=yesRadio” to the Target input box.

➢ Check verify radio Impressive
- Follow the same steps to check verify radio yes.
Run Test script
➩ Test script was created and run successfully.
