Part 2: Setting
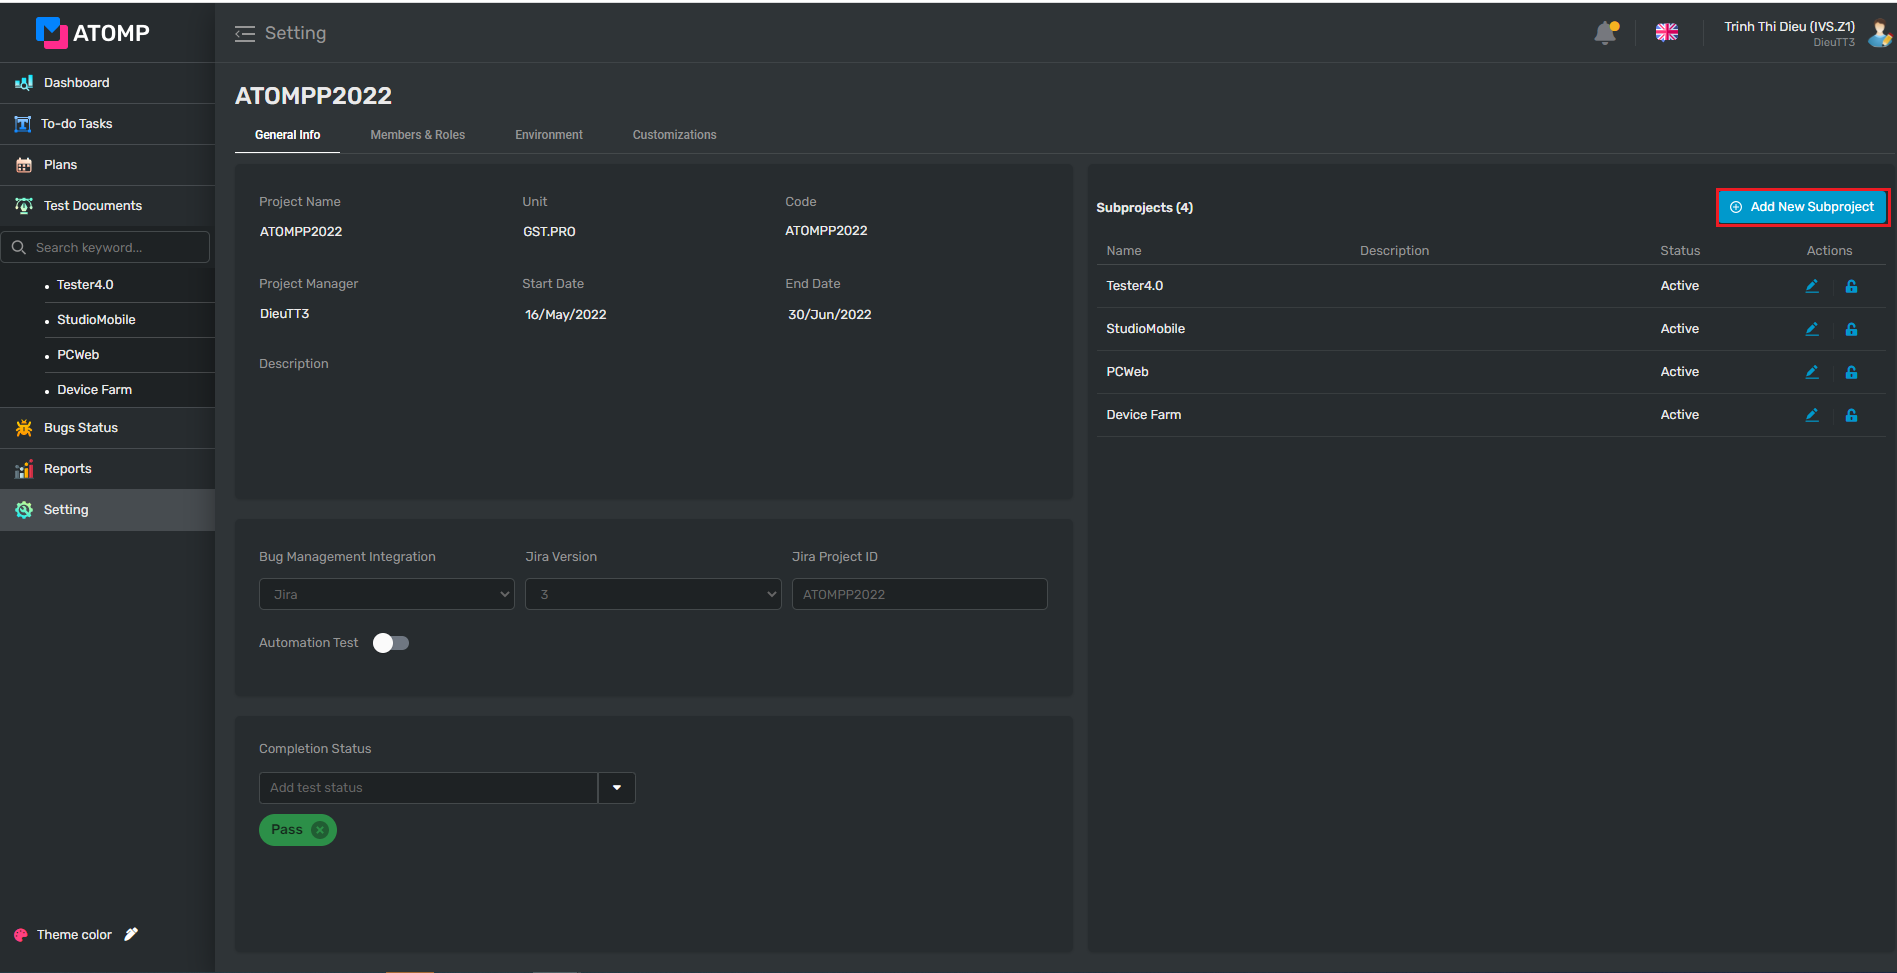
I. General Info
The General info screen shows the project information that admin has created. PM can change the following project’s information: Project Manager, Planned Start, Planned End and Description.
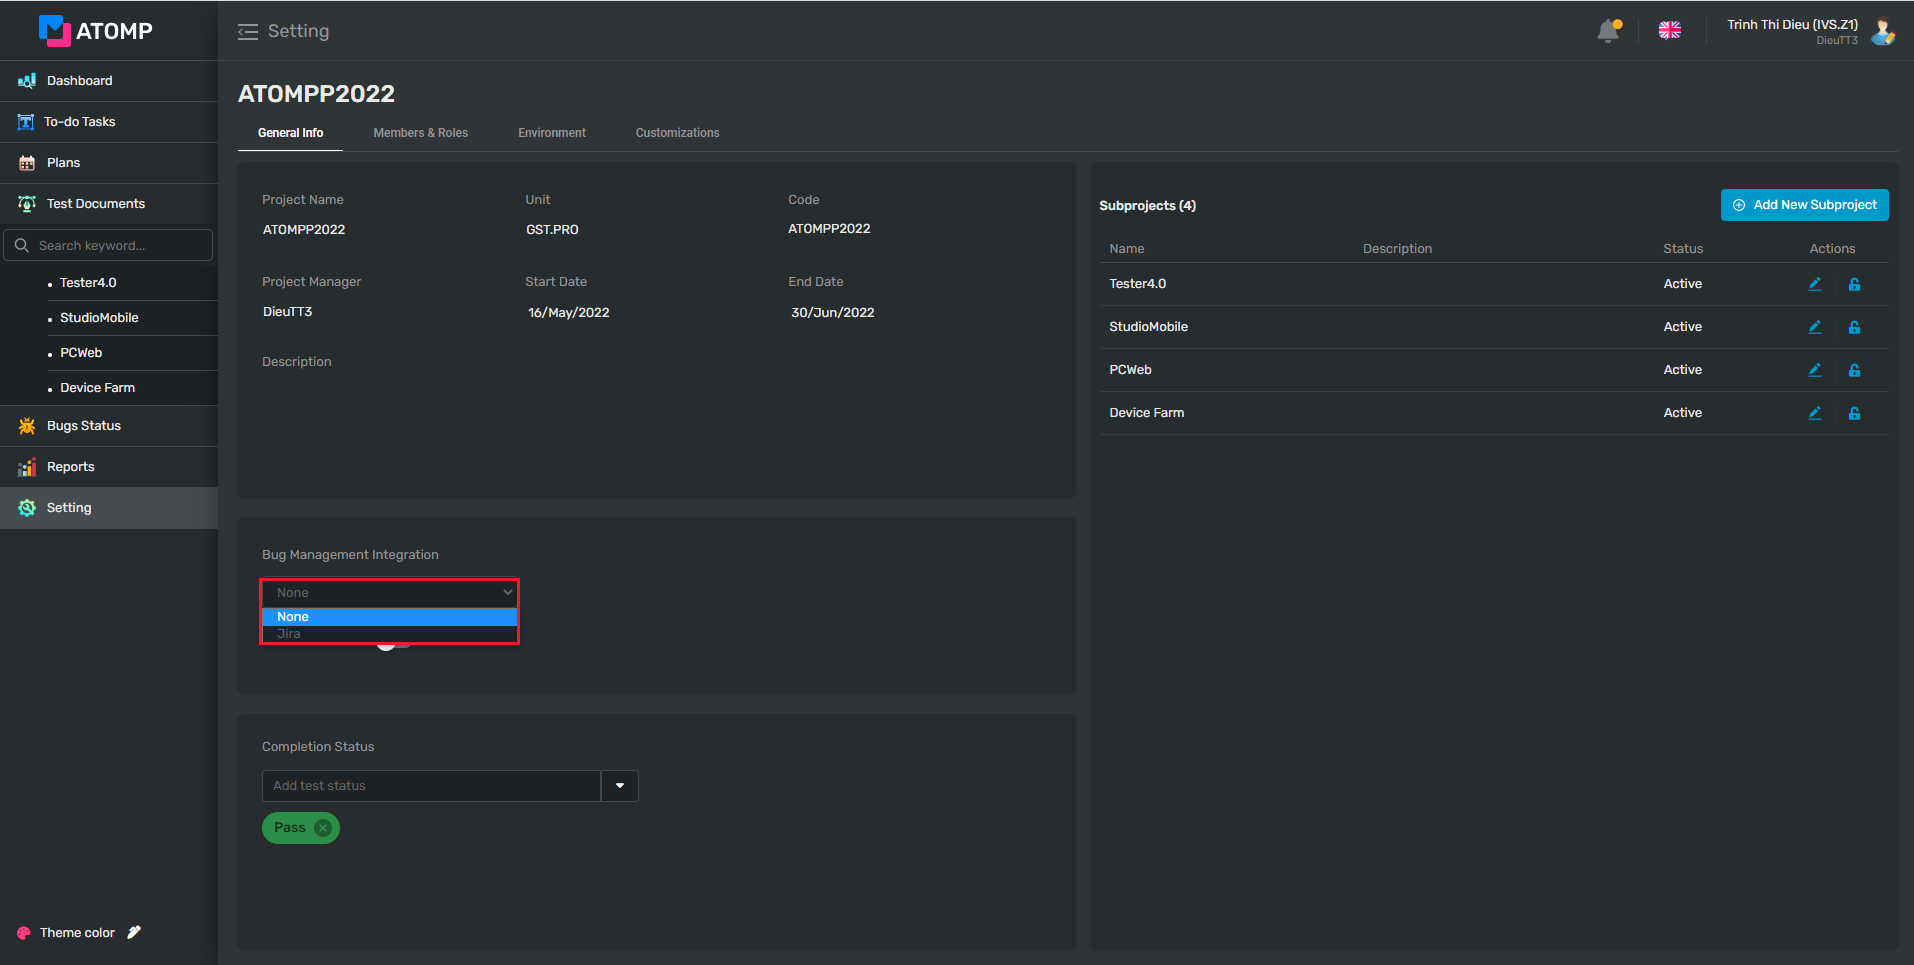
Bug Management Integration: User can set the Bug Management to Jira tool or none. If user decides to use the Jira tool, user can log bugs from the Test Management tool to the Jira tool and view all bugs of the project.
- Subproject
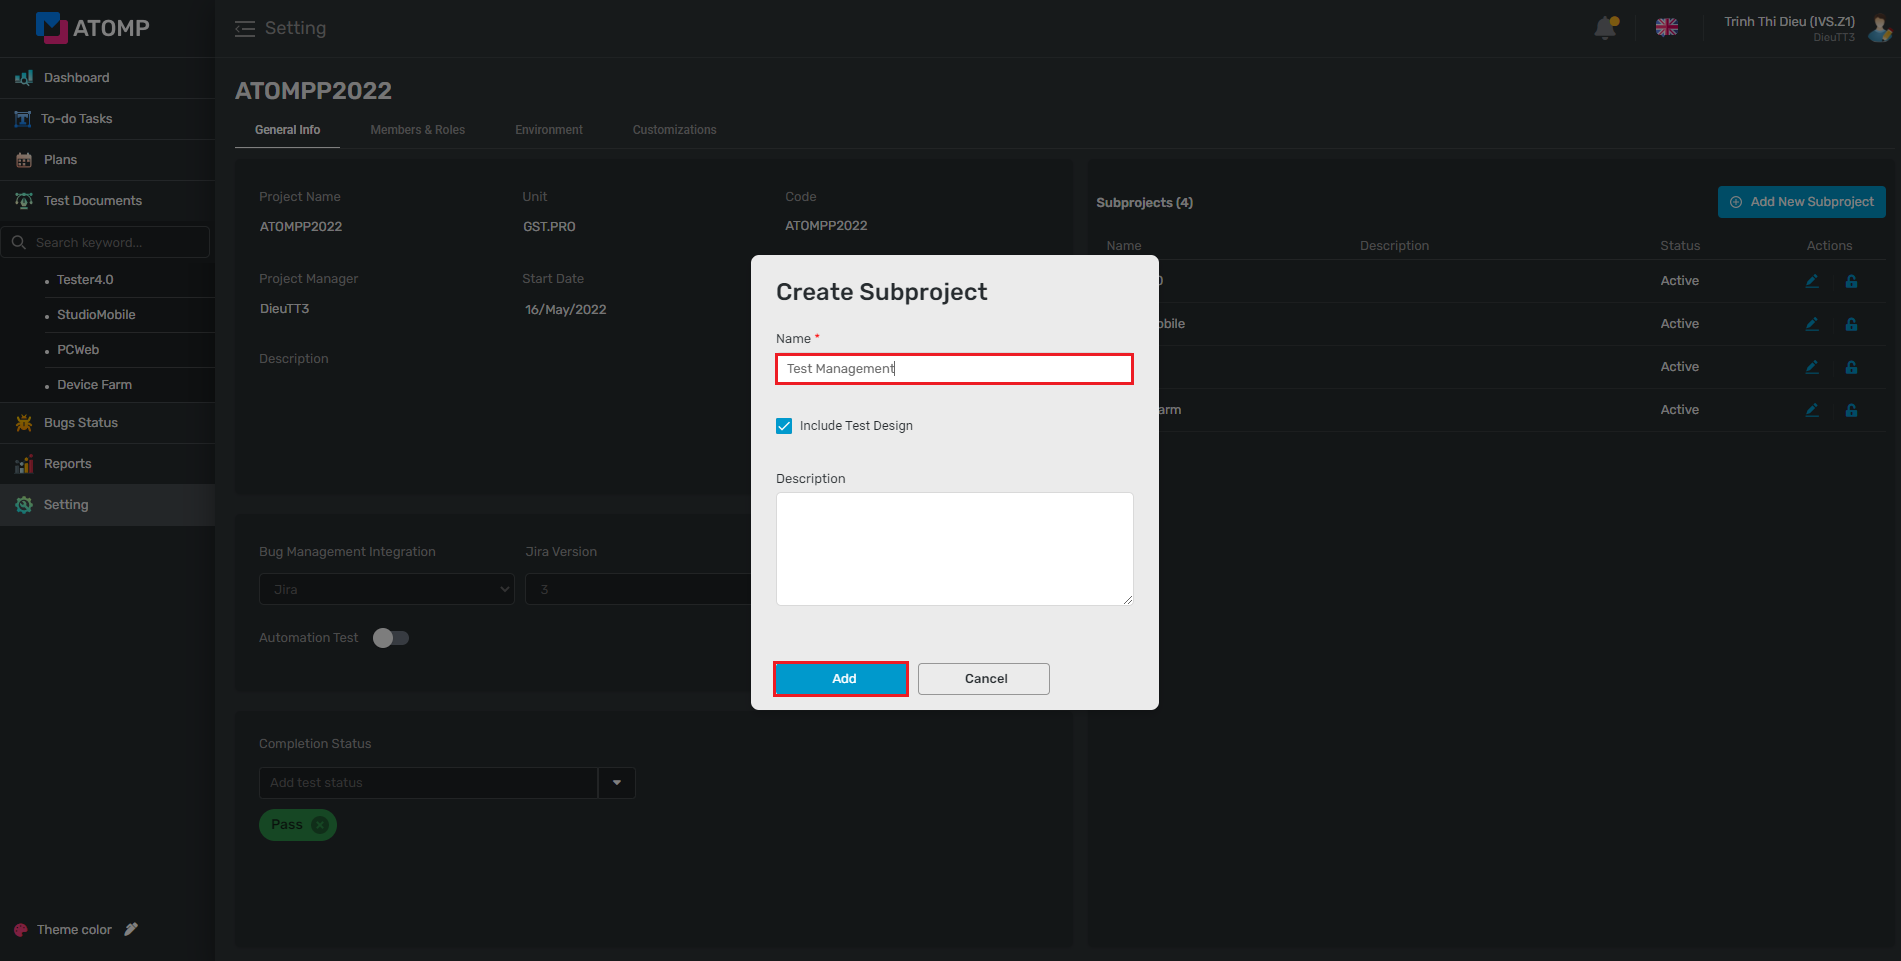
To make it easier to manage, first create a subproject
Step 1: Click [Setting] on the left menu.
Step 2: Click button [Add New Subproject].
Step 3: Fill in Subproject at “Name” field (mandatory).
You can input Description for Subproject (this field is not mandatory).
Step 4: Click the [Add] button.
• Bug Management Integration
You can set Bug Management Integration to Jira tool in 3 steps:
Step 1: Click [Setting] on the left menu.
Step 2: Choose Jira option from the dropdown list => after selecting Jira version -> show dropdown list [Jira version]
Step 3: Choose Jira version from the dropdown list => selecting Jira option -> show text box [Jira Project ID].

Step 4: User inputs the project ID correctly inside the Jira tools.
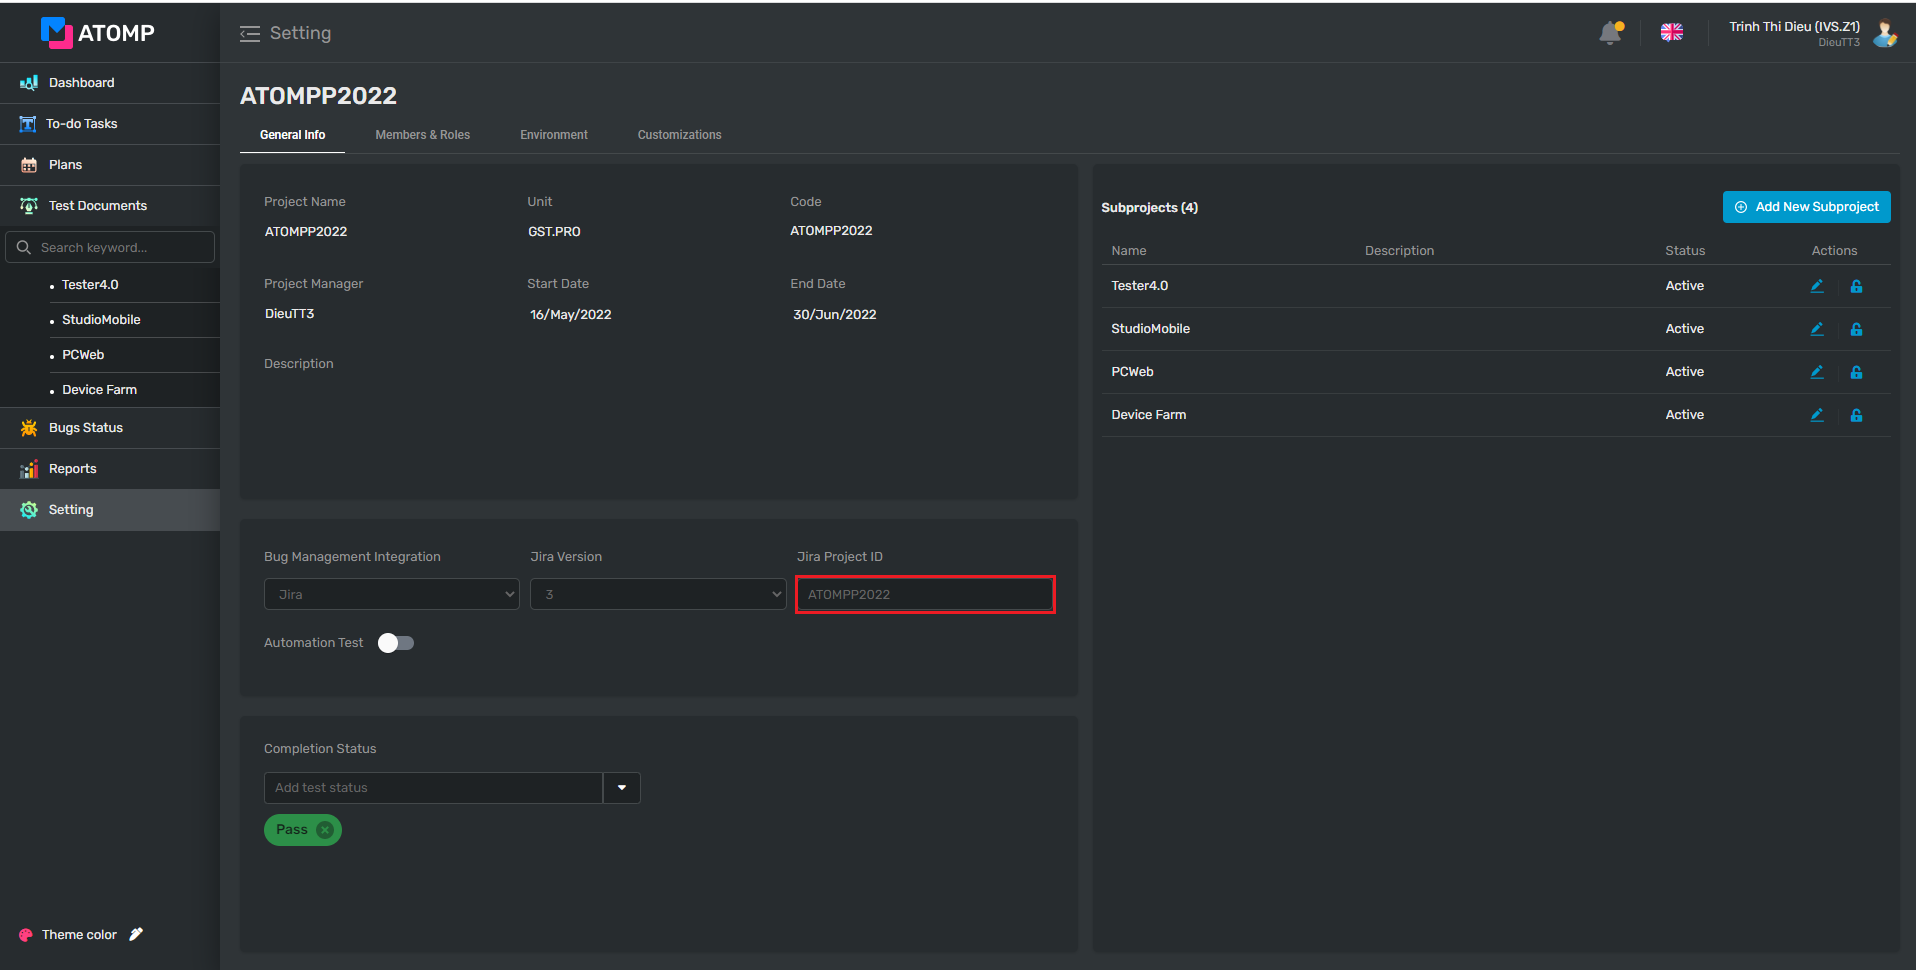
After setting the Bug Management Integration as Jira, all the project’s bugs on Jira will be linked to Test Management.
- Completion Status
You can add any status which is suitable for the condition to complete your project
Step 1: Click [Setting] on the left menu.
Step 2: Click on dropdown at “Add test status” field, then select any status.

II. Add Members & Roles
Only PM can add members into the Project by following these steps:
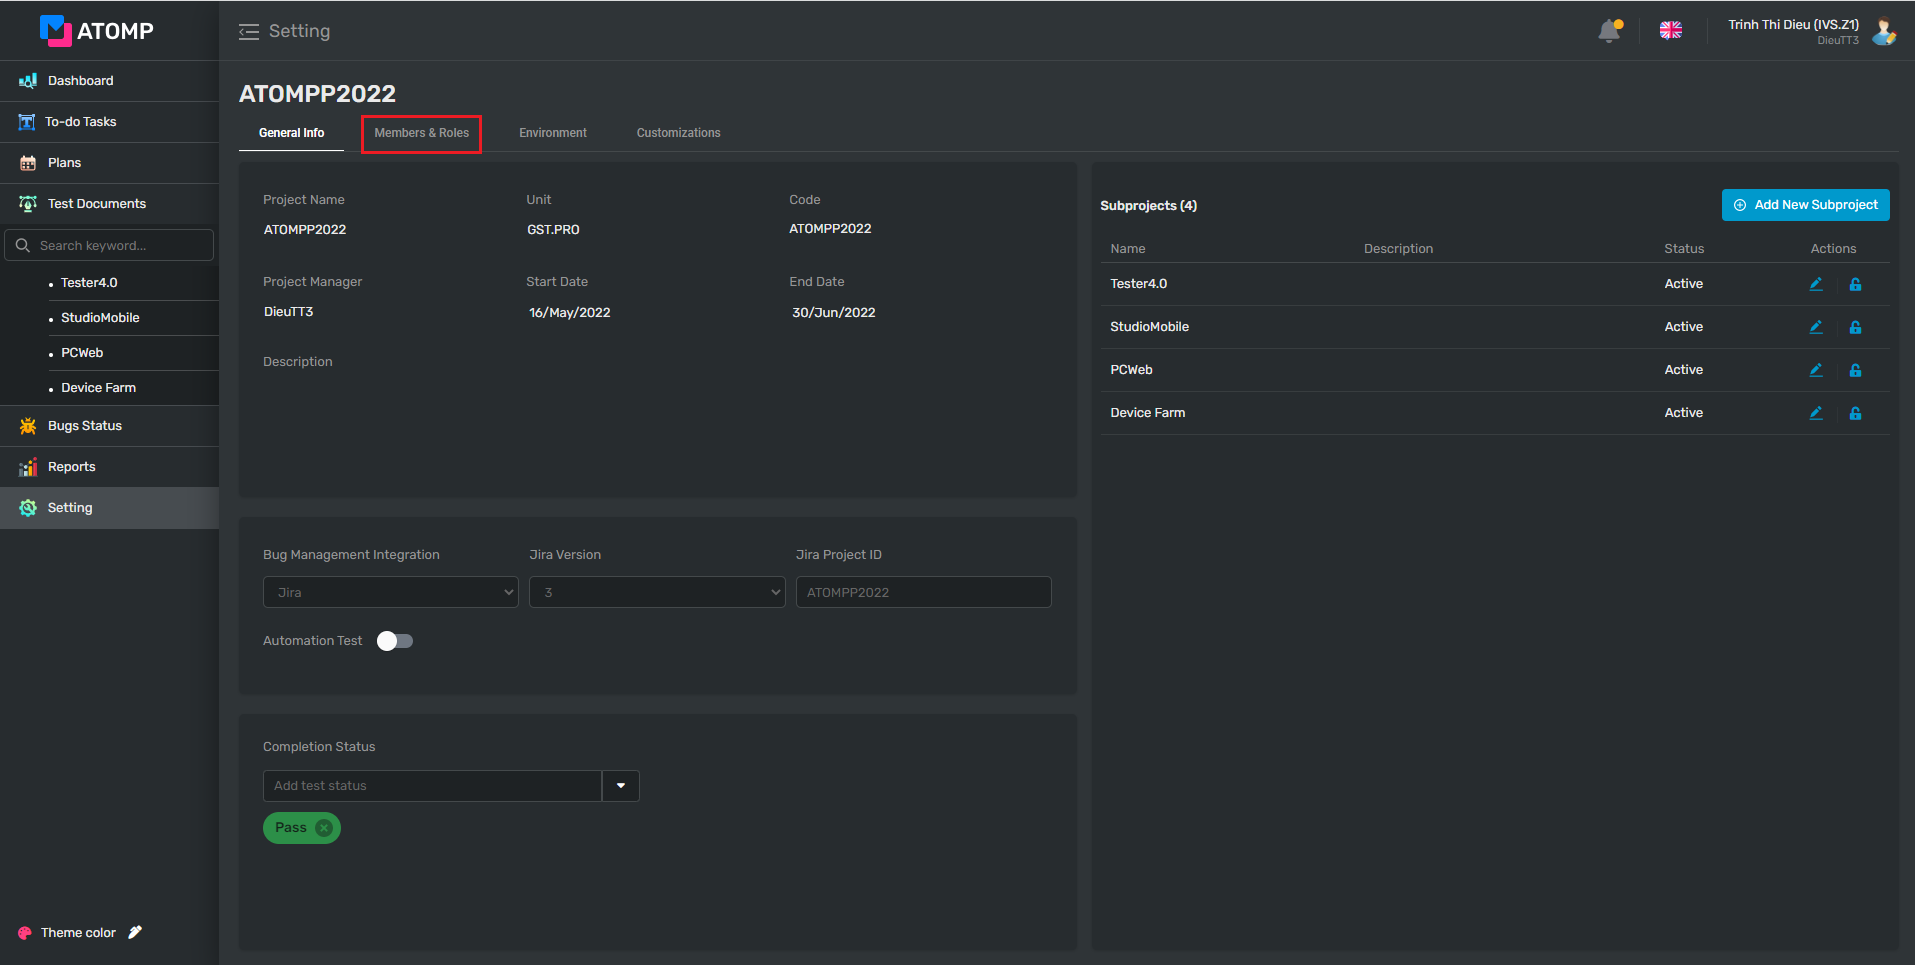
Step 1: Click [Setting] on the left menu
Step 2: Click [Members & Roles] tab.
Step 3: Project Manager can input member’s account whose he/she wants to add -> Click [Add Member] button.
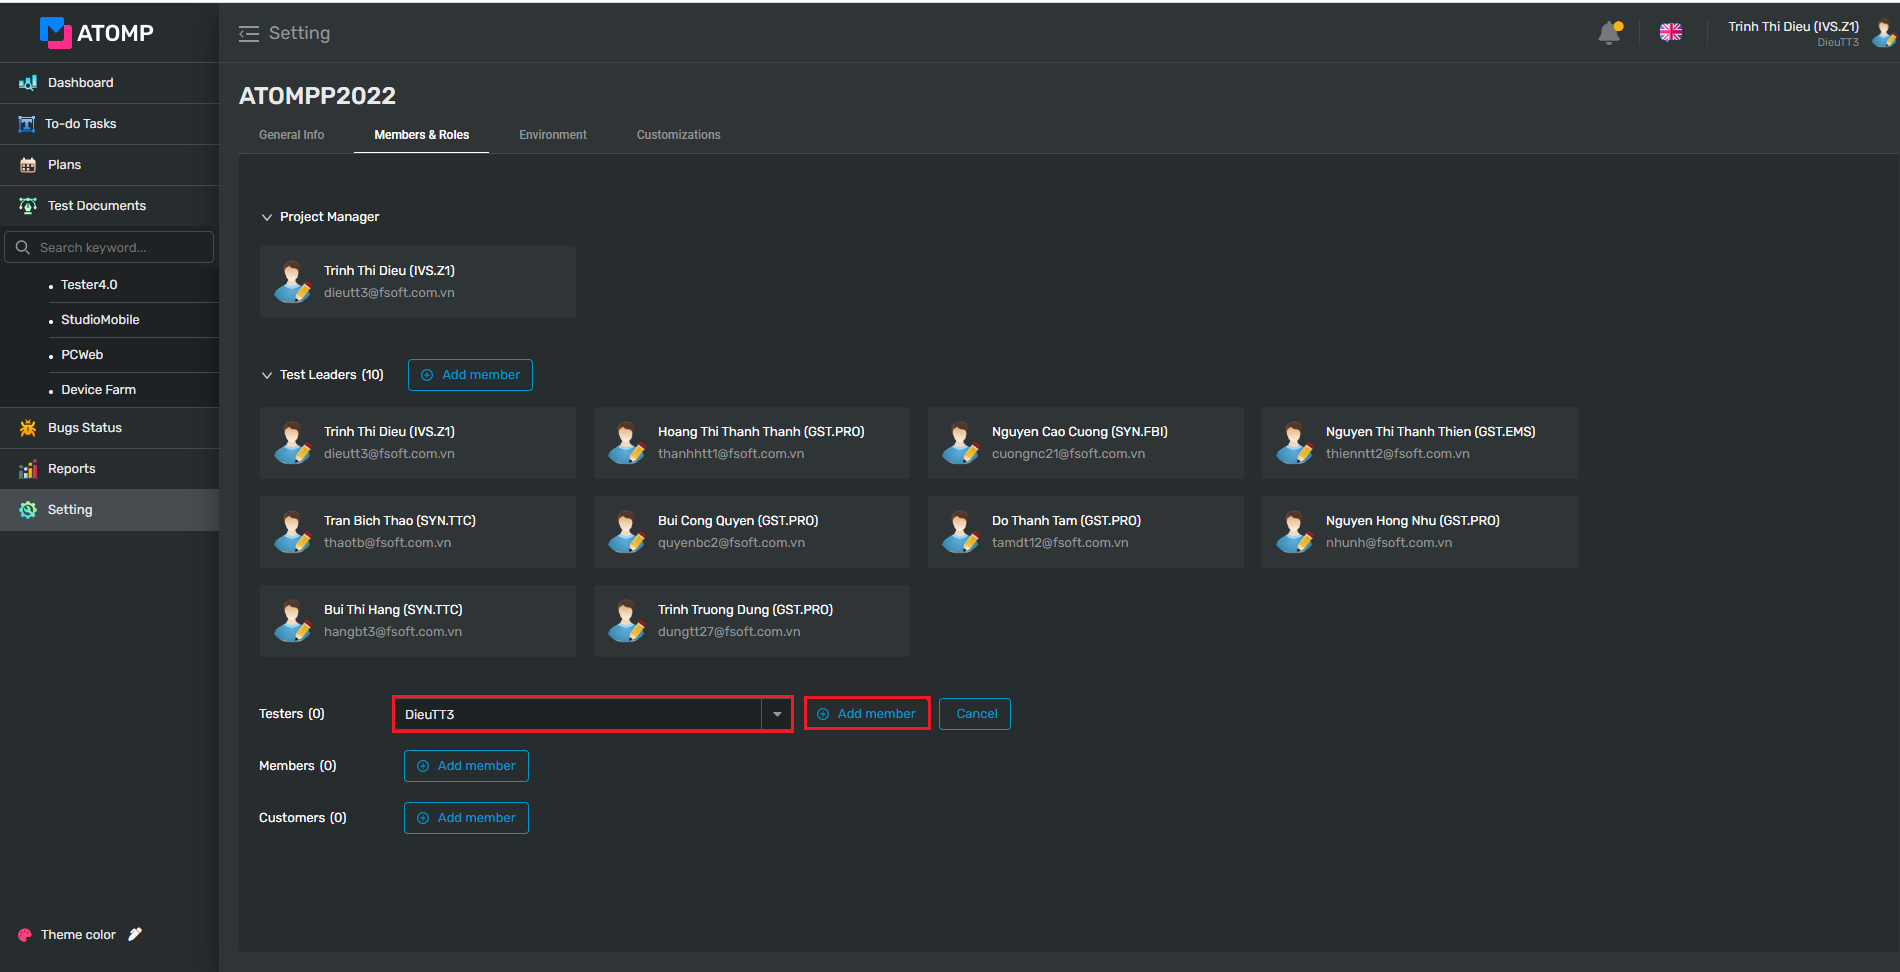
- Project Manager can add Test Leader, Tester, Member and Customer.
- Test Leader can create Test Execution and Plan (how to add plan and test execution Plans).
- Tester can execute and fill test results (how to fill test result Run Test).
- Member and Customer can view all functions, export test documents and test reports.
Note: After being changed roles, the user has to logout then login again to system
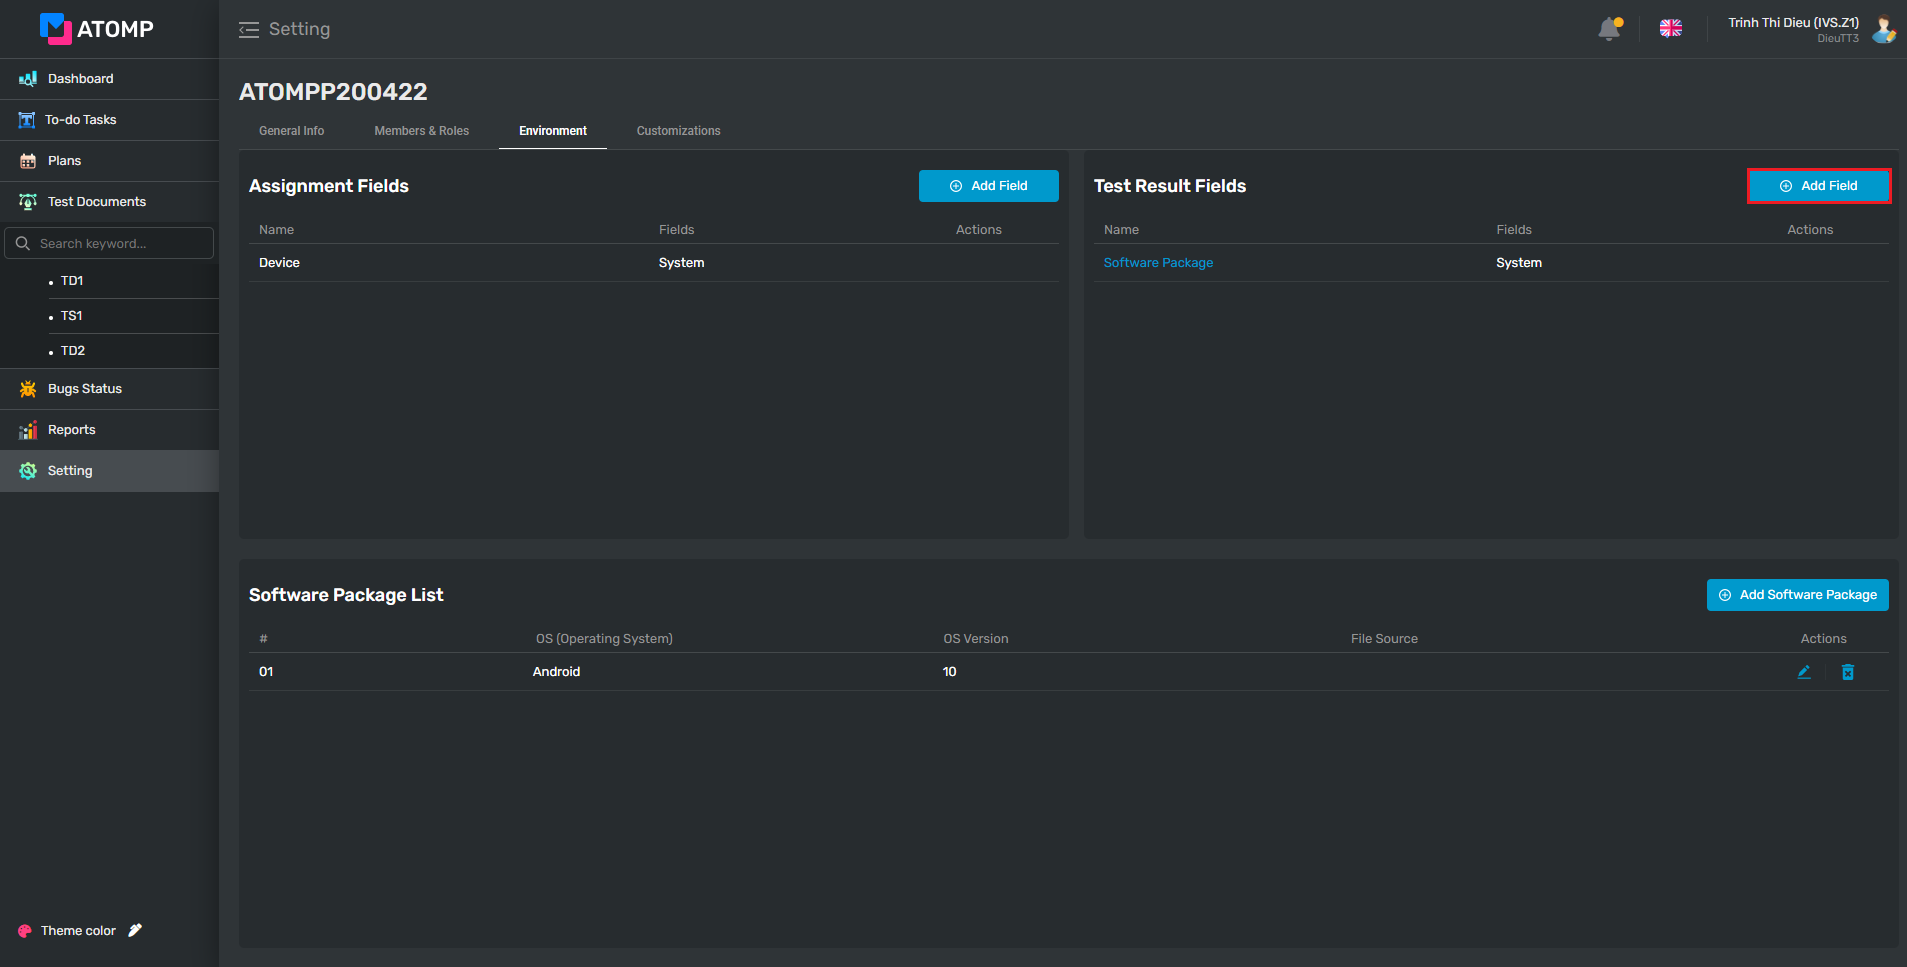
III. Add Environment
1. Add Assignment Fields
Assignment Fields manage information fields when user assigns test cases. The default value when initializing project is Device. PM can add assignment fields by following step:
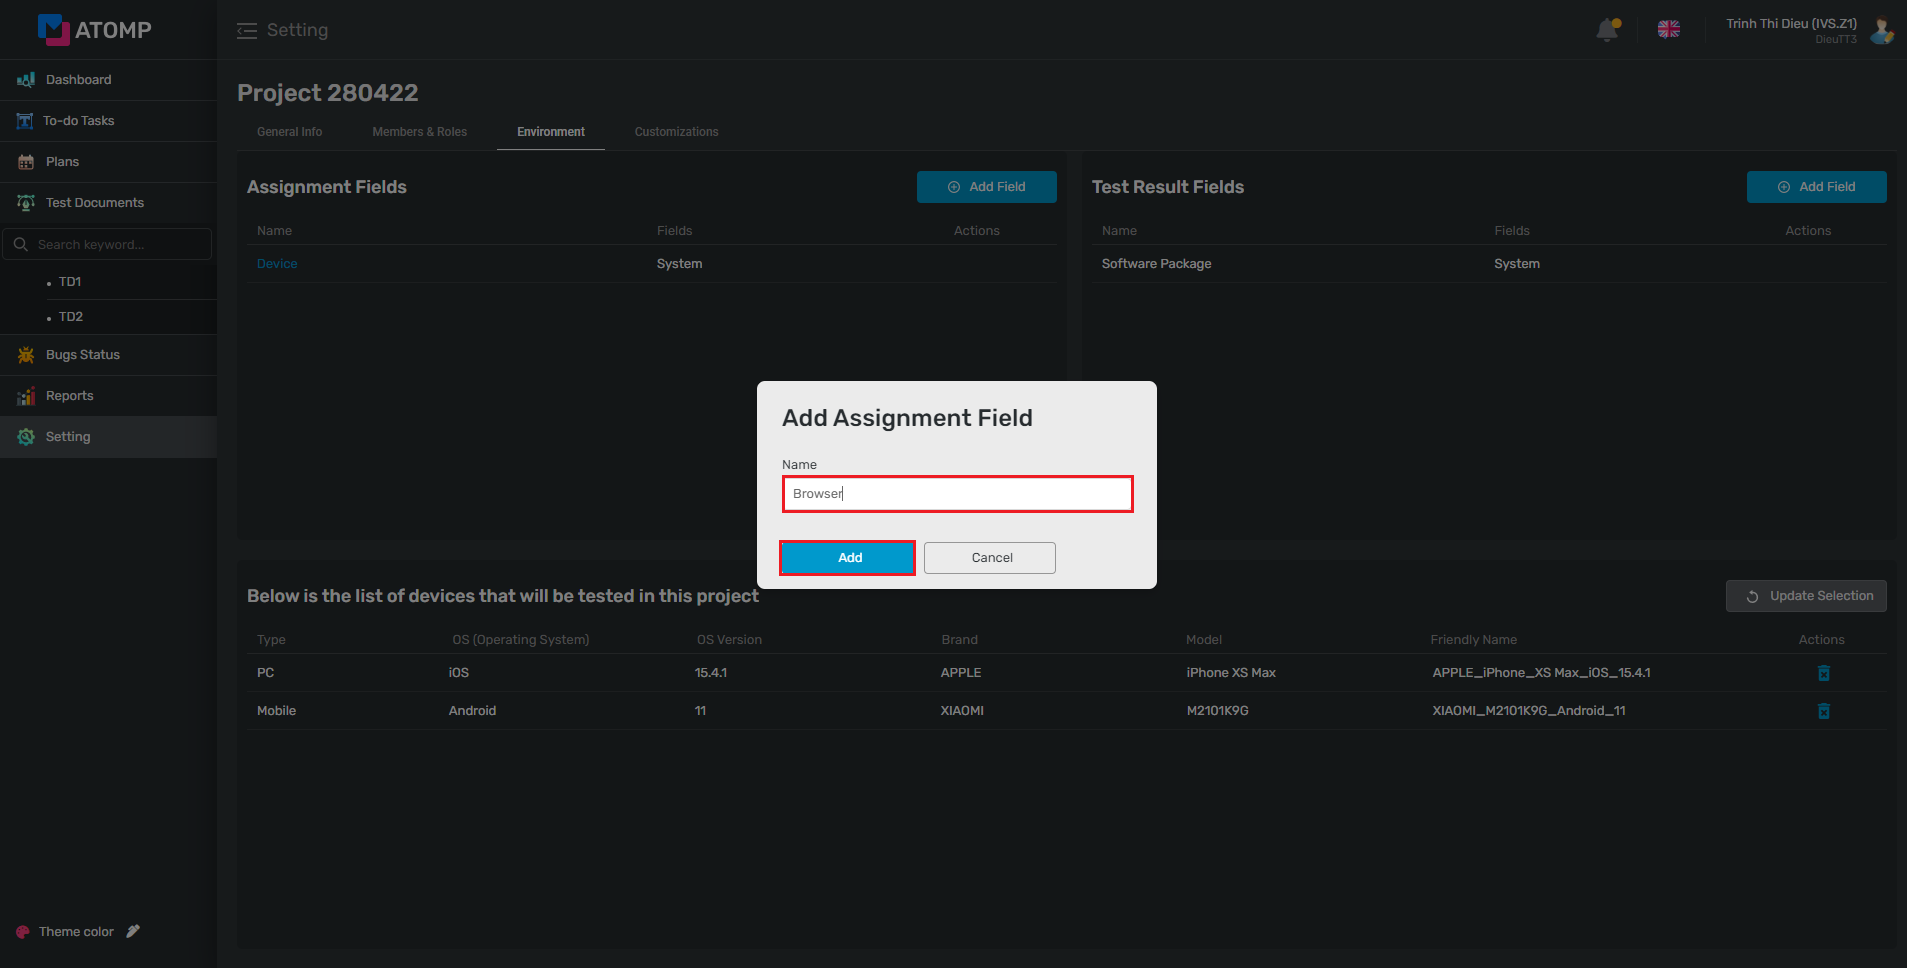
Step1: Inside the Environment tab of the Setting screen, click on [Add Field] button. The Add Assignment Field pop up is displayed.

Step 2: Input Assignment field name then click on [Add] button. The added Assignment field will be displayed in Assignment Field.
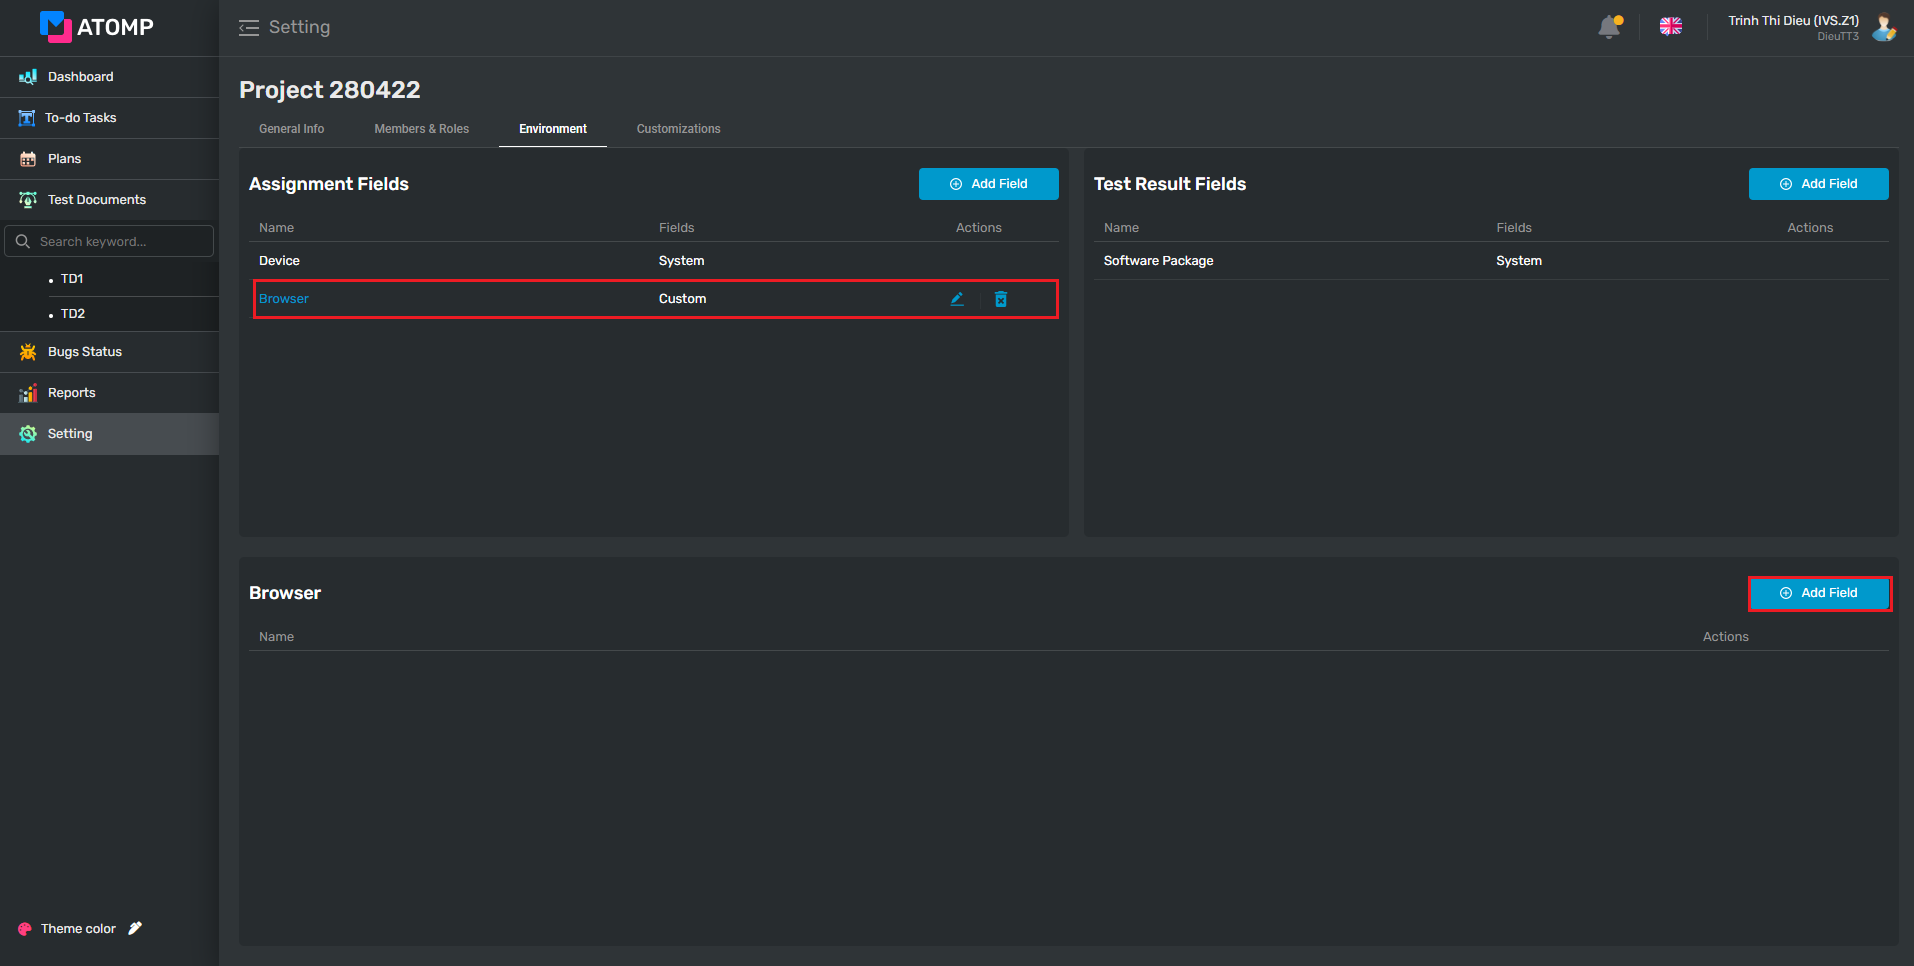
Step 3: Add the list of values for the created assignment fields by selecting the assignment field which you want to create then clicking on [Add Field] button. The Add Field pop up will be displayed.
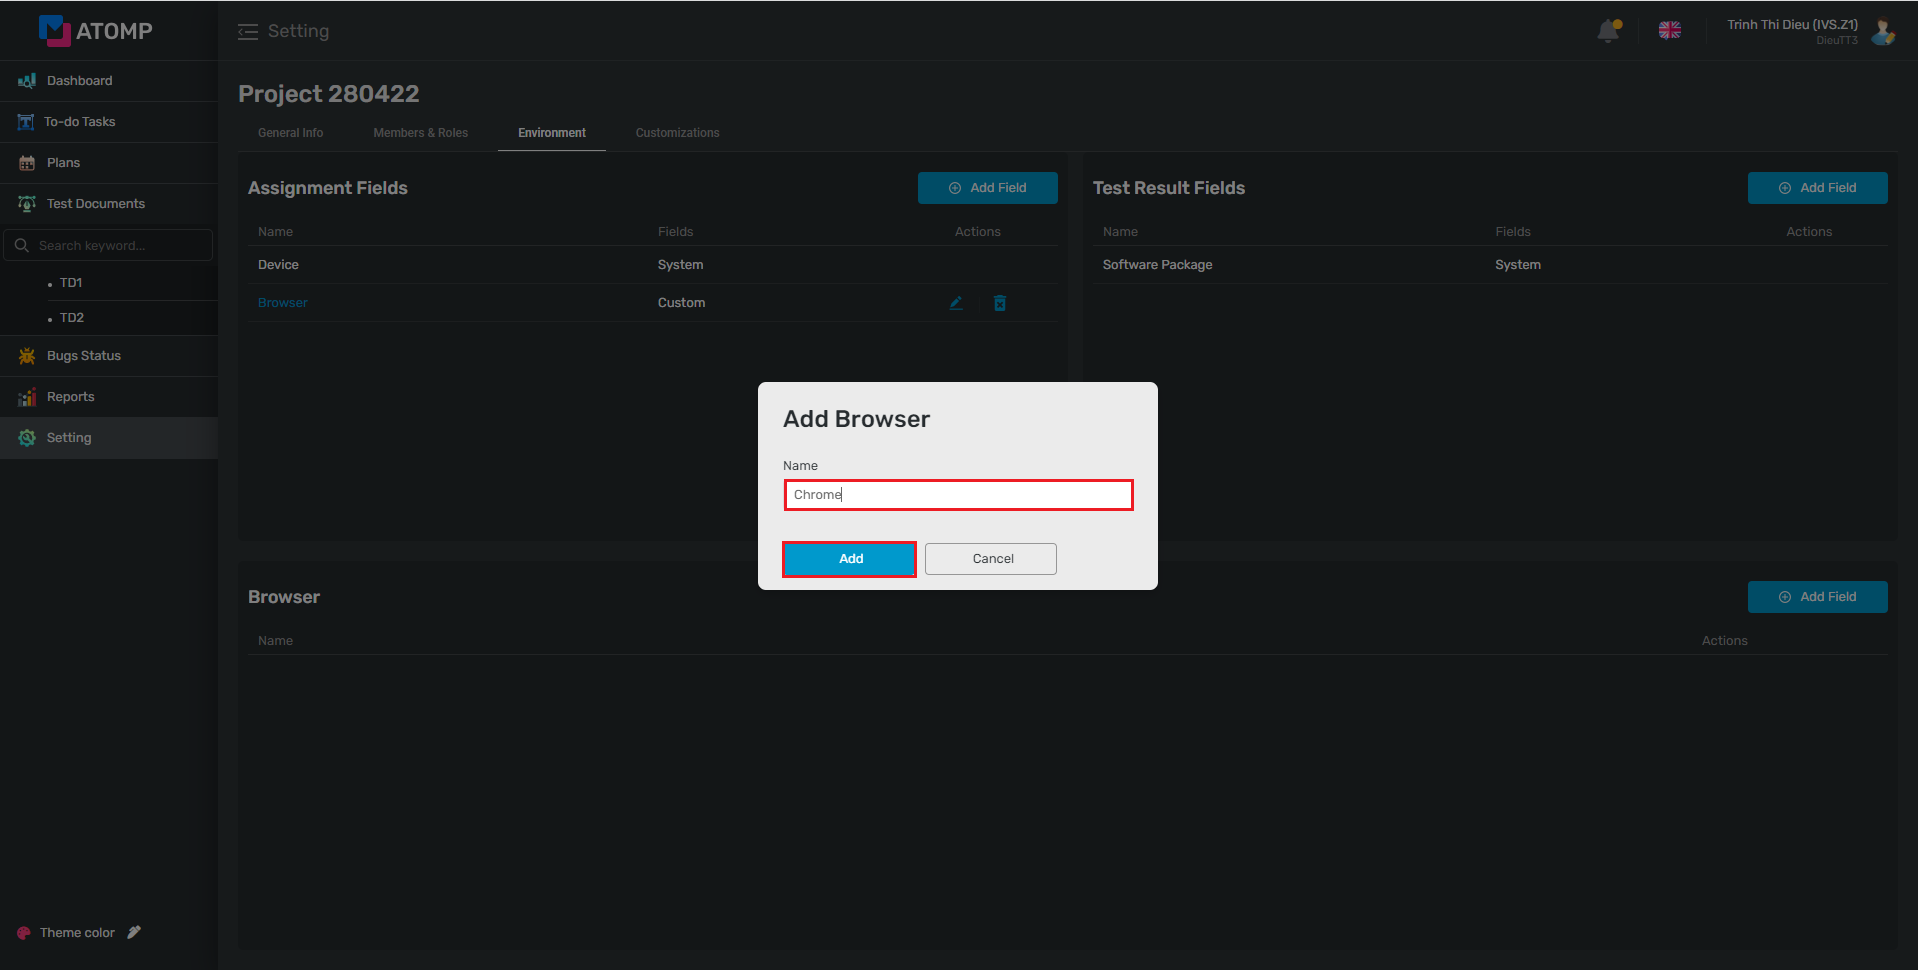
Step 4: Input assignment field’s name then click on [Add] button.
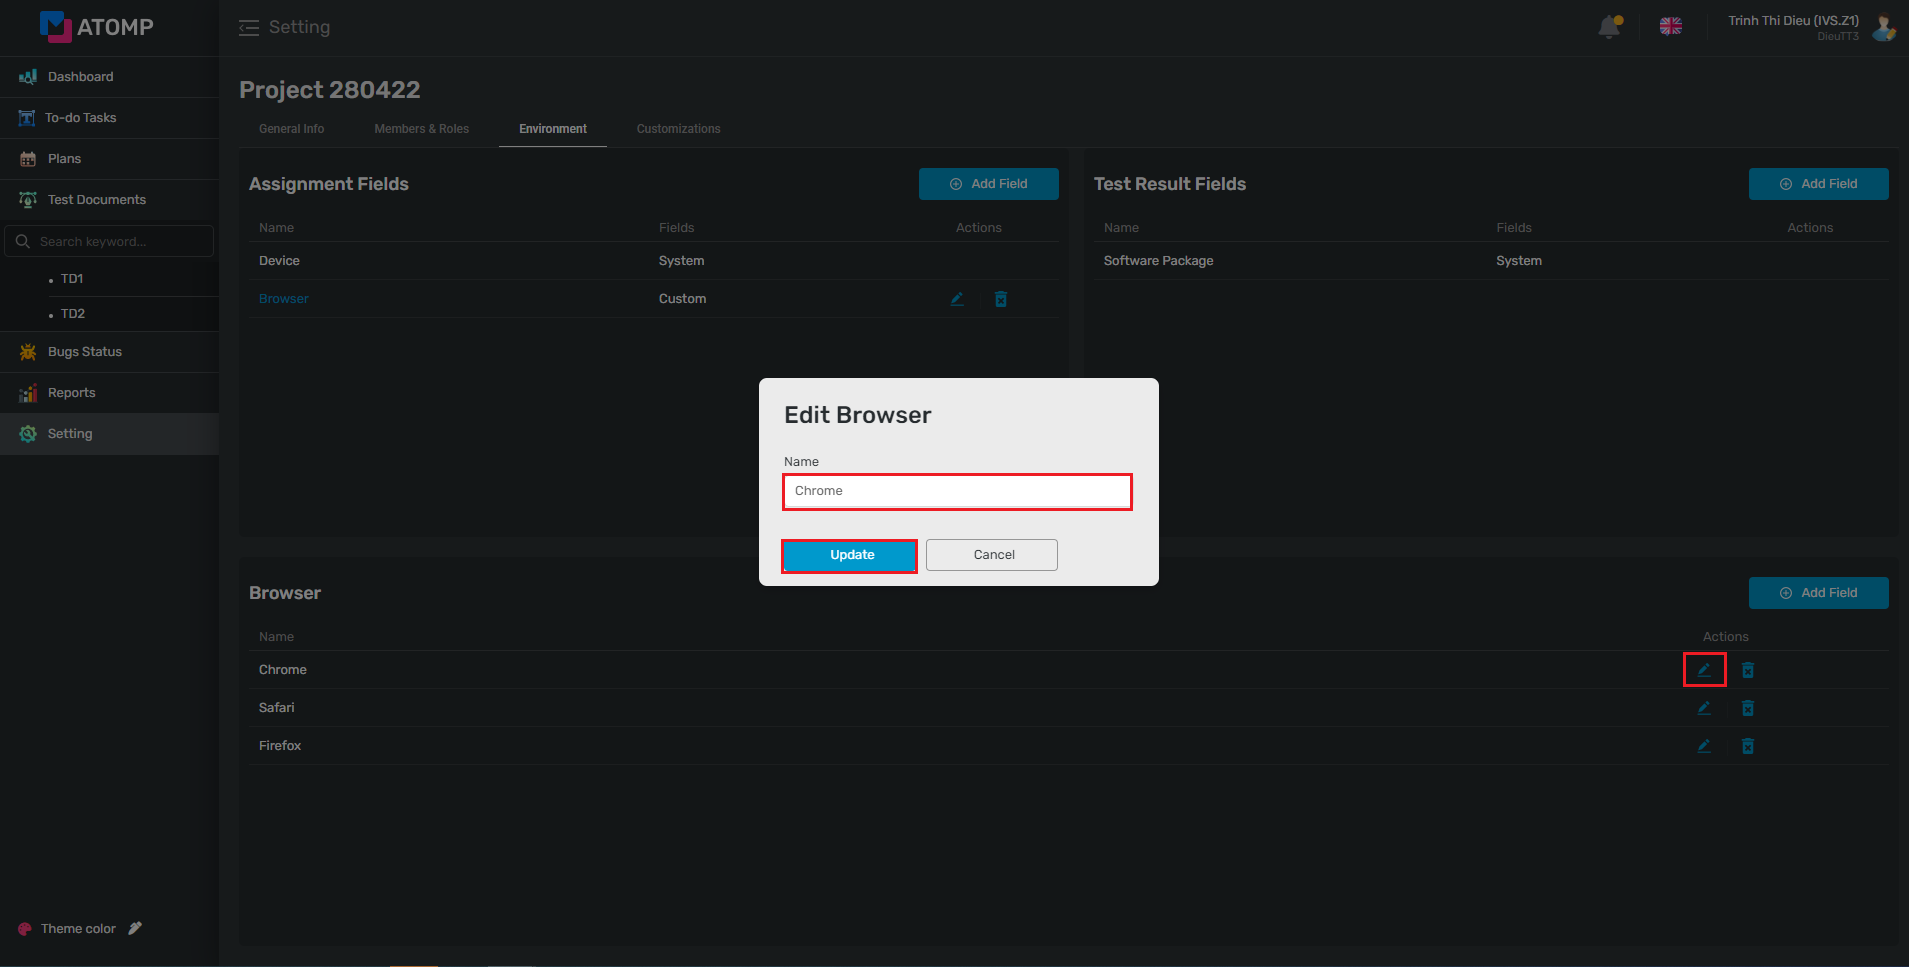
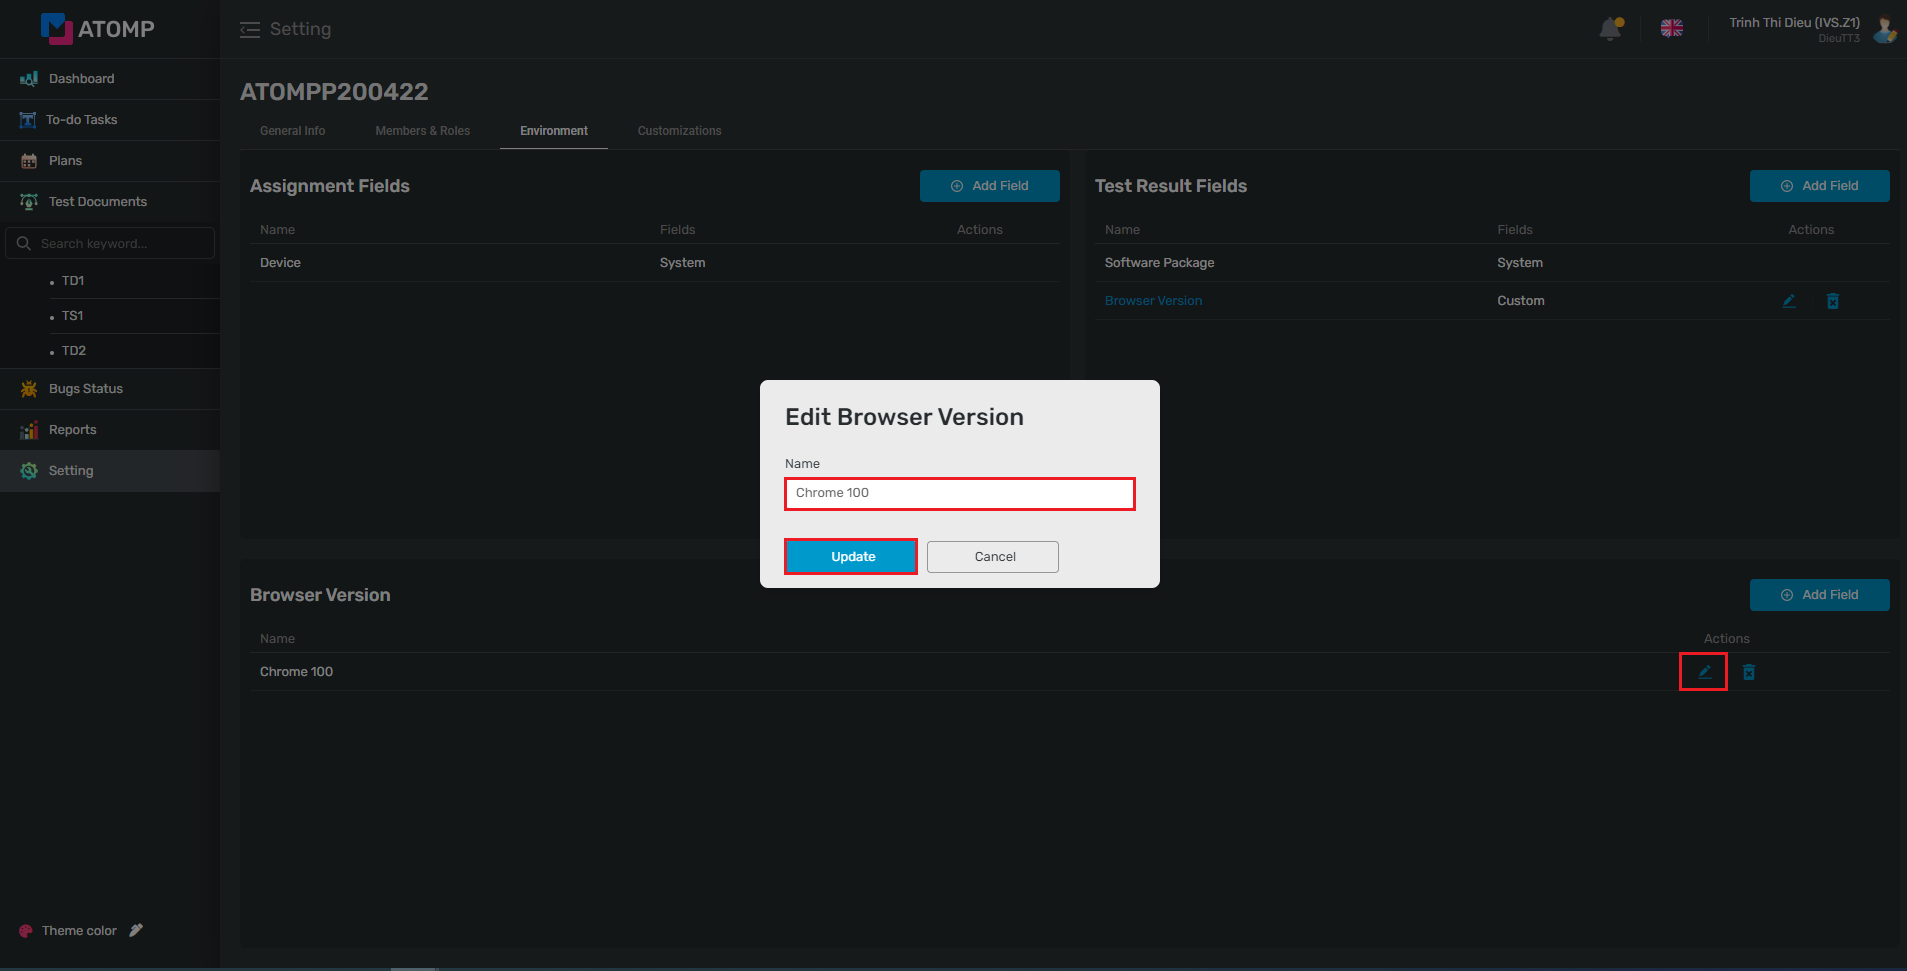
Step 5: Click on the icon  to edit field(s) that user wants => The “Edit field” pop up will be displayed => Input new name then click on the [Update] button.
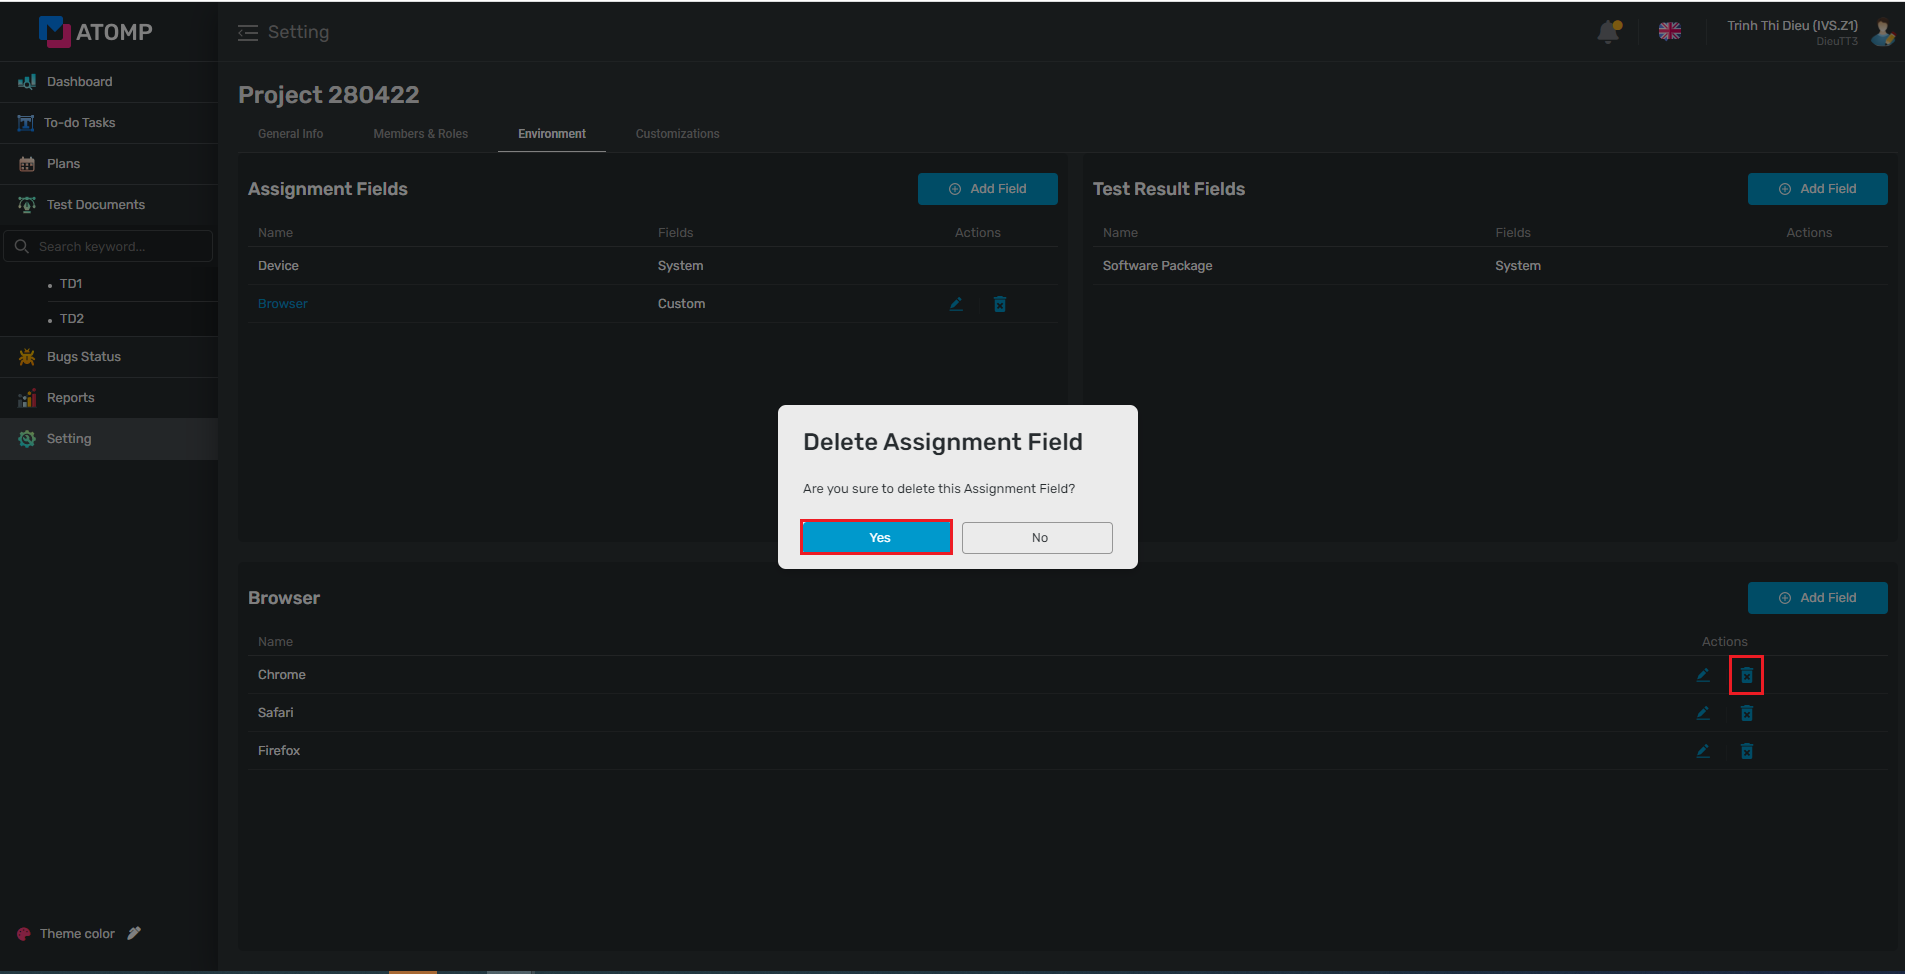
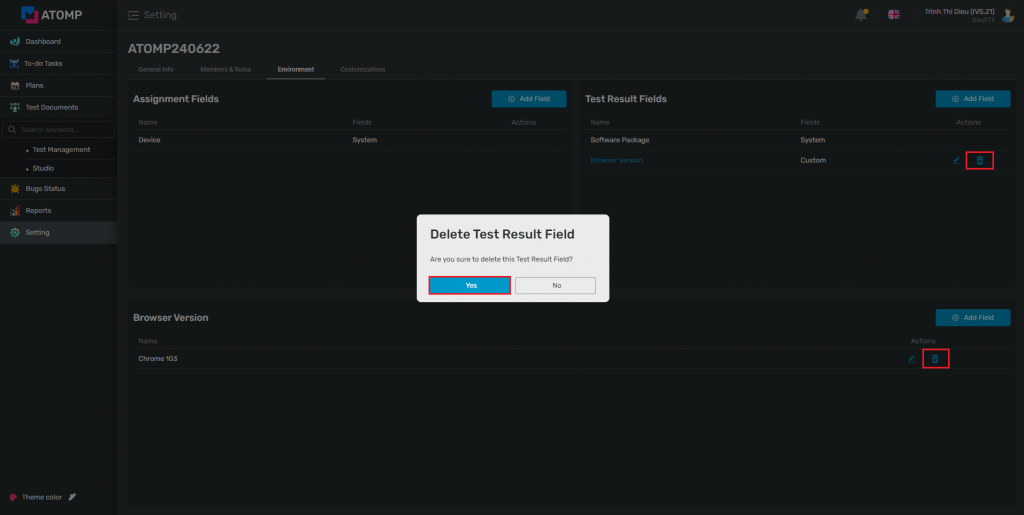
Step 6: Click on the icon  to delete field(s) that user wants => The “Delete Assignment Field” pop up will be displayed => Click [Yes] button.
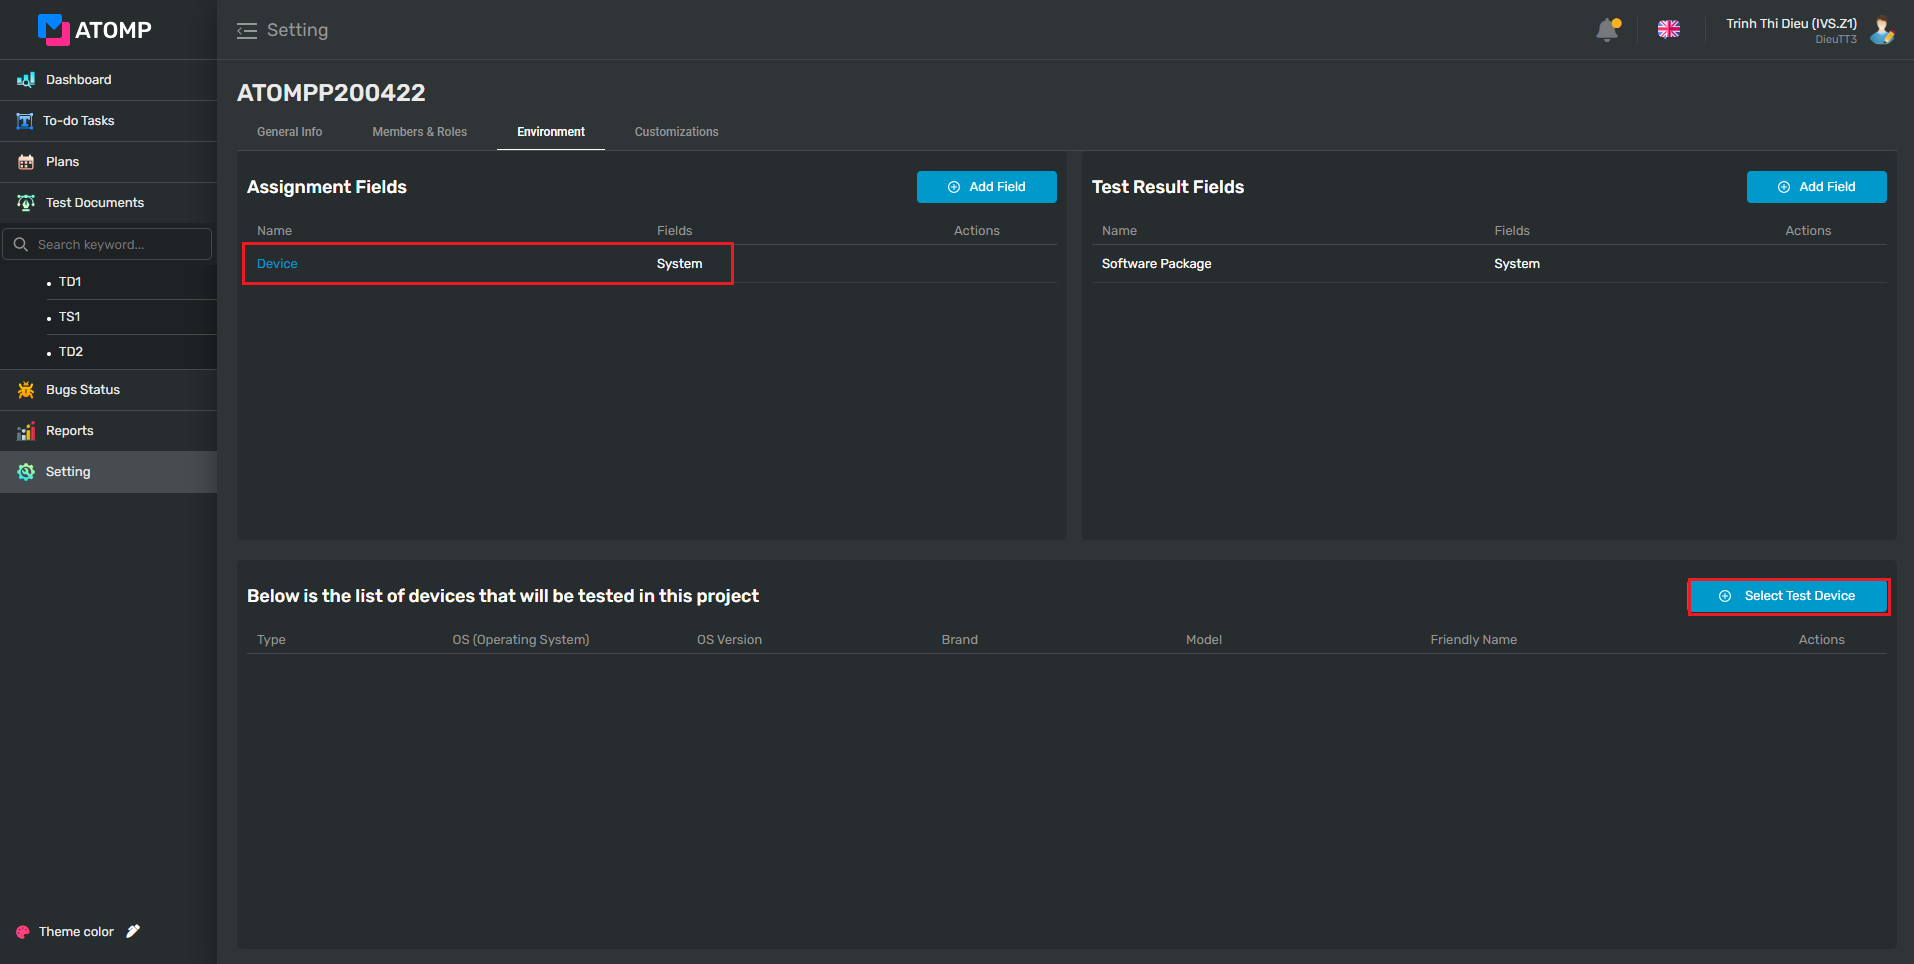
If the PM is selecting devices for this project for the first time, please follow these steps:
Step 1: Select Device field.
Step 2: Click on [Select Test Device] button => The Select Device pop up will be displayed.
Step 3: In this Select Device pop , check one or more checkboxes to select device(s) which you want to use for this project => Click on [Add device] button => A toast message “Select Successful” will be displayed.

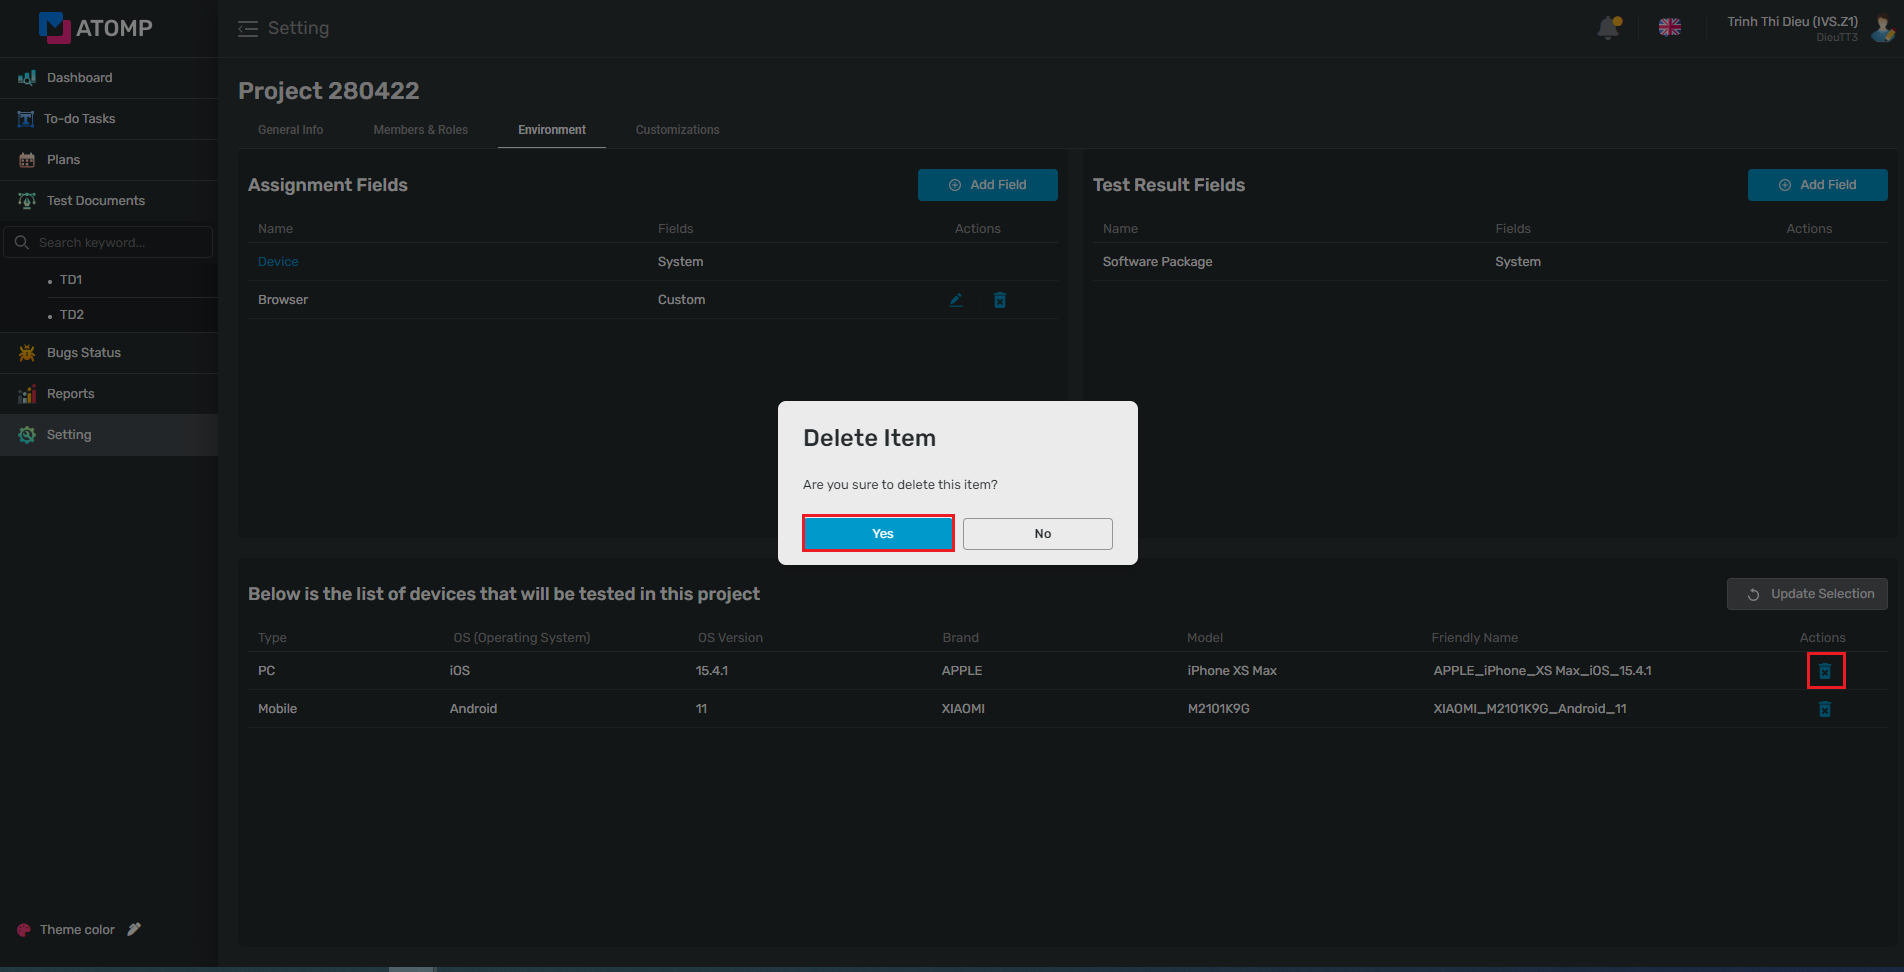
Step 4: Click on the icon  to delete device(s) that user wants => The “Delete Item” pop up will be displayed => Click [Yes] button => A toast message “Unselect Successful” will be displayed.
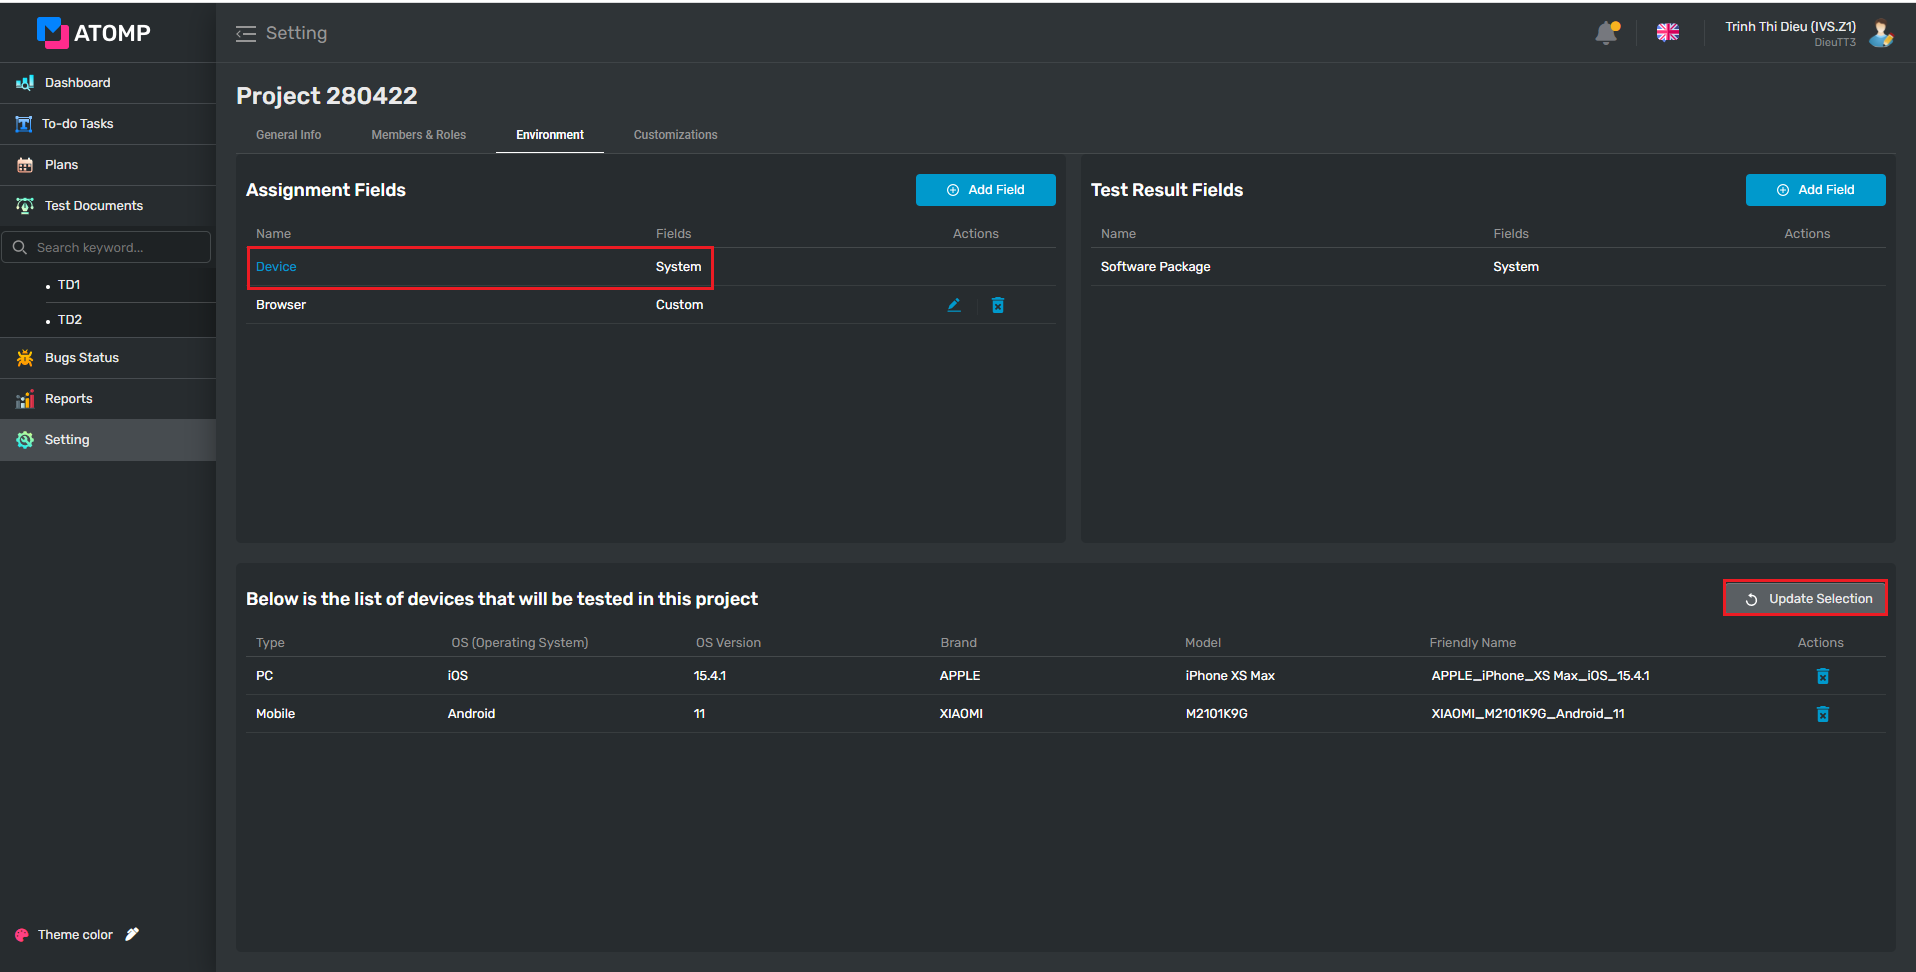
Note: When the list “Test Device” has data, if you want to select more devices for your project, please click on [Update Selection] button and repeat step 2 & step 3 as above.
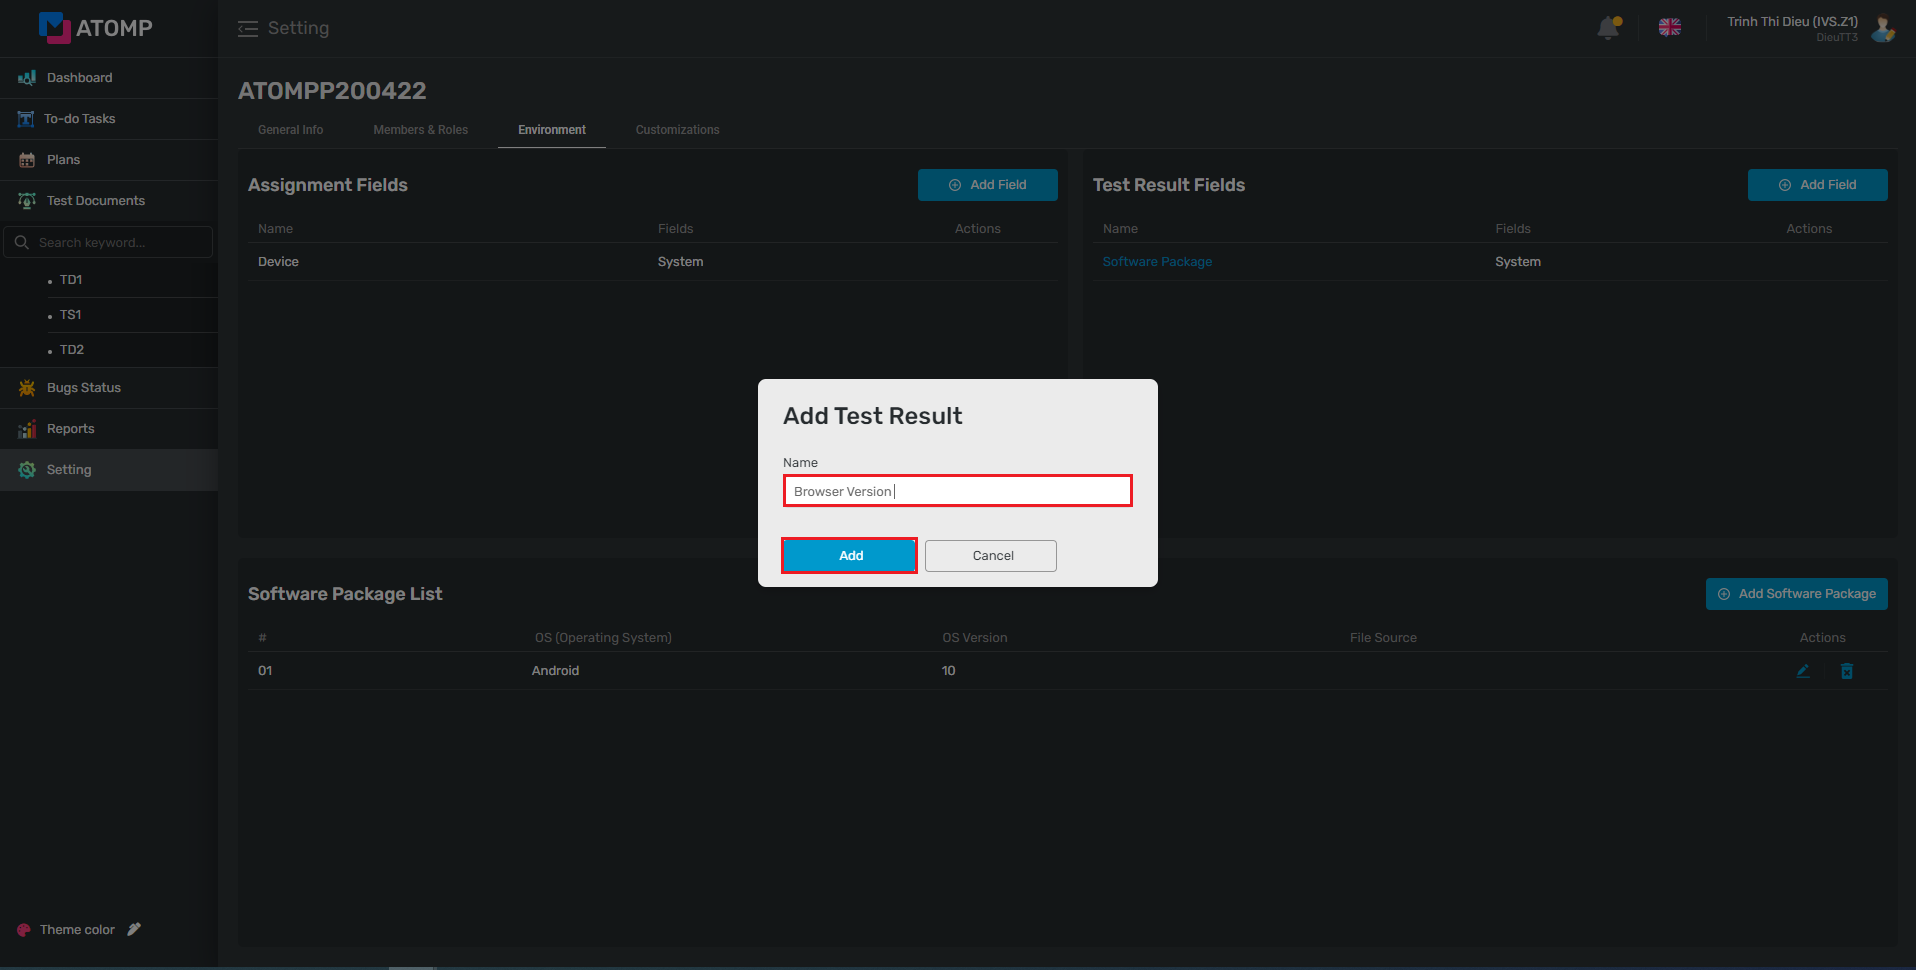
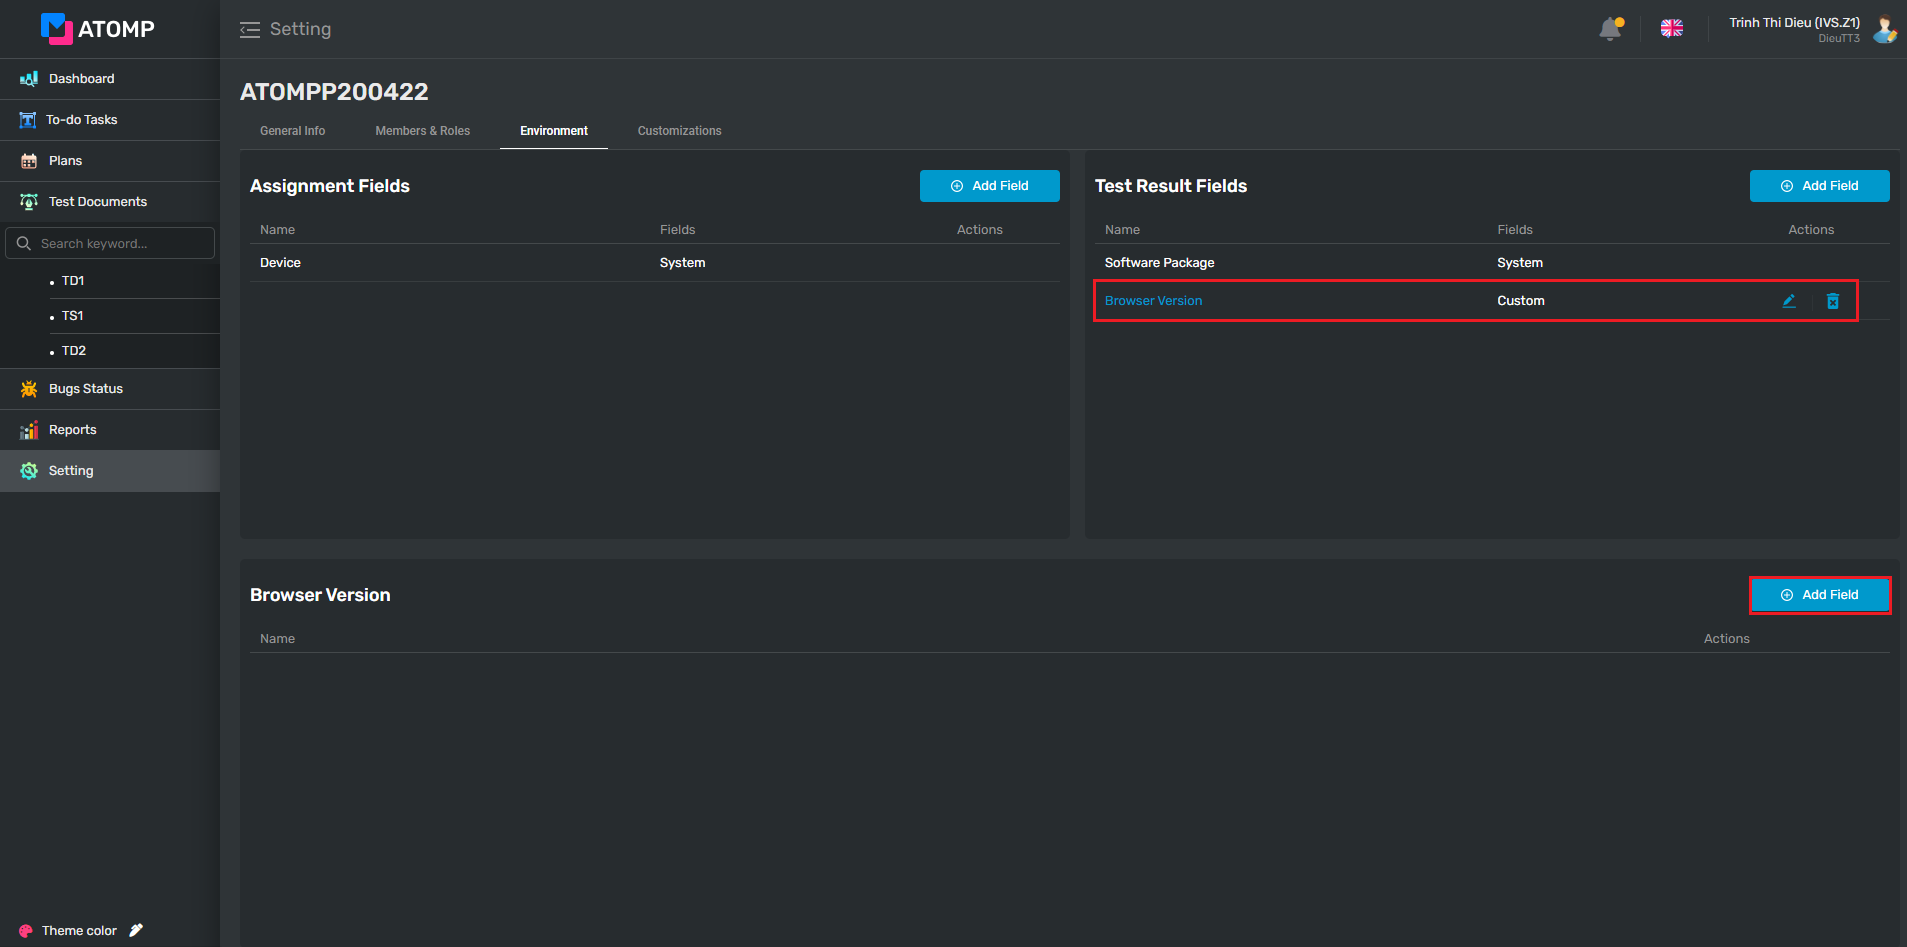
2. Test result field
Test result field is used to manage information field when filling in test case results. The default value when initializing project is Software Package. PM can add test result fields by follow:
Step 1: Inside the Environment tab of the Setting screen, click on [Add Field] button. The Add Test Result Field popup is displayed.
Step 2: Input test result field name then click on [Add] button. The added test result field will be displayed in list of test result field.
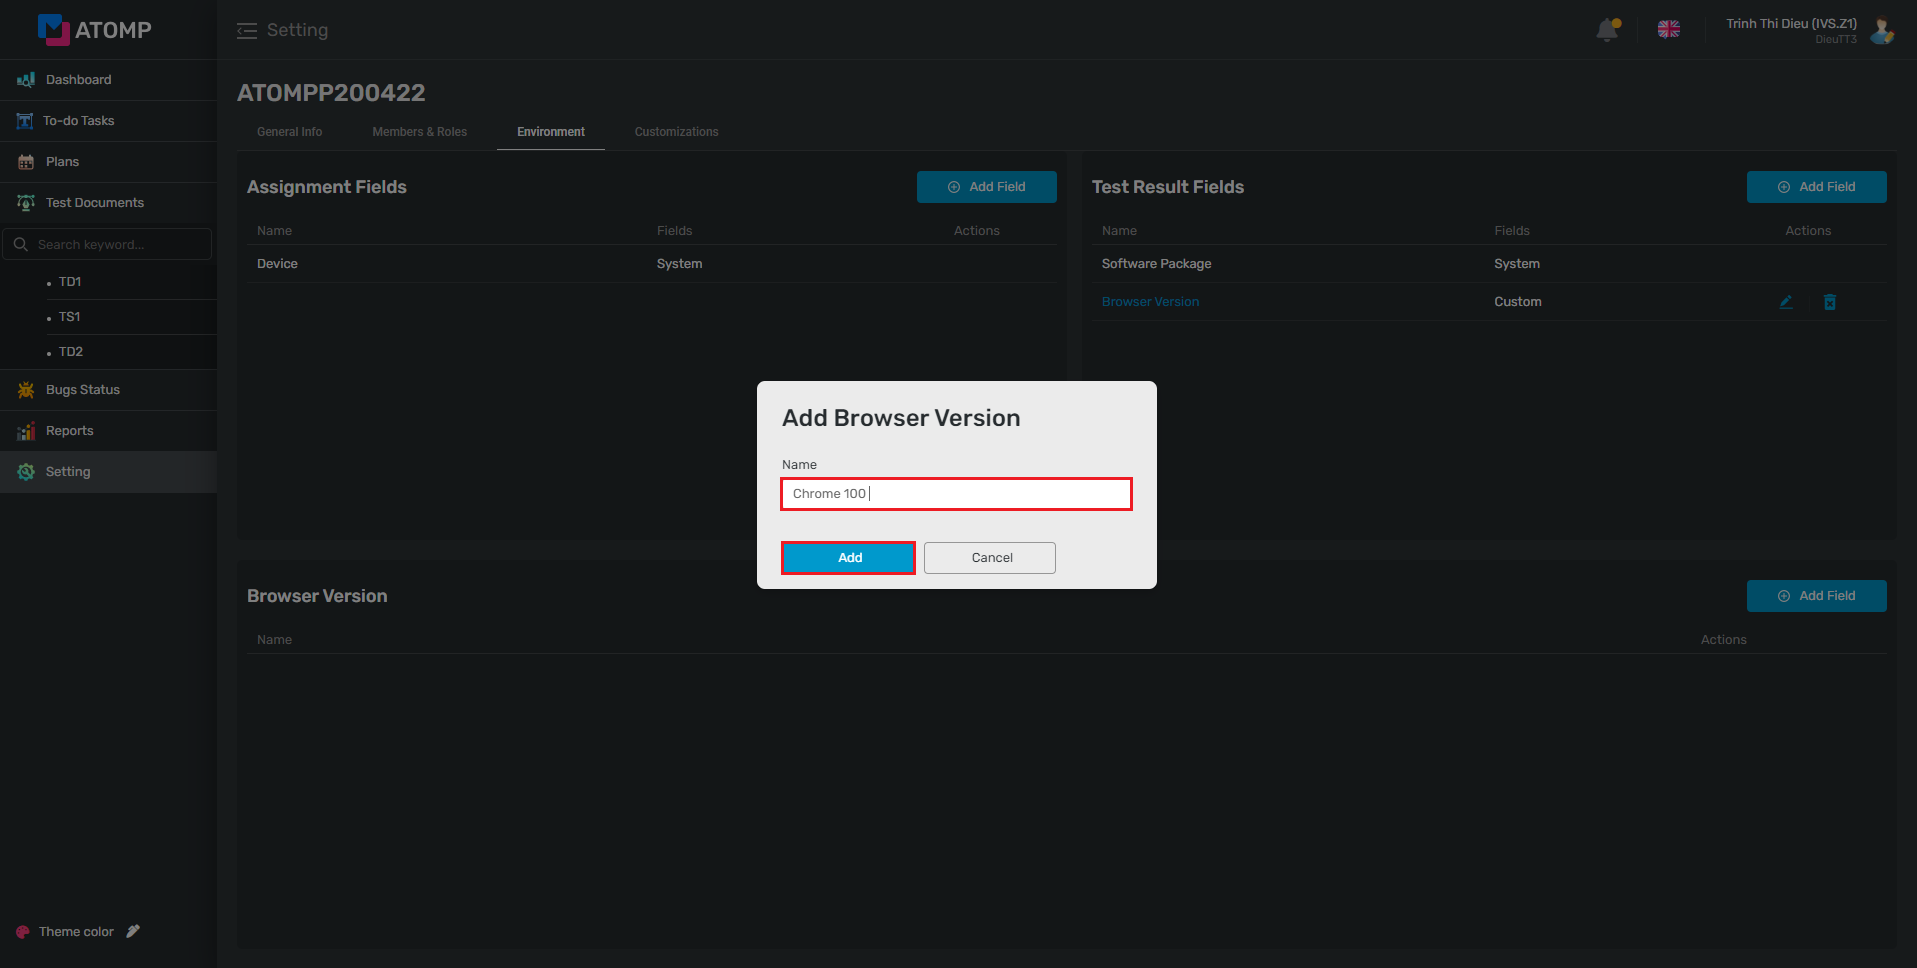
Step 3: Add the list of values for the created test result fields by selecting the test result field which you want to create then clicking on [Add Field] button. The Add Field pop up will be displayed.
Step 4: Input test result field’s name then clicking on [Add] button.
Step 5: Click on the edit icon to edit fields that user wants => The “Edit field” pop up will be displayed => Input new name then click on [Update] button.
Step 6: Click on the remove icon to delete field(s) that user wants => The “Delete Test Result Field” pop up will be displayed => Click on [Yes] button.
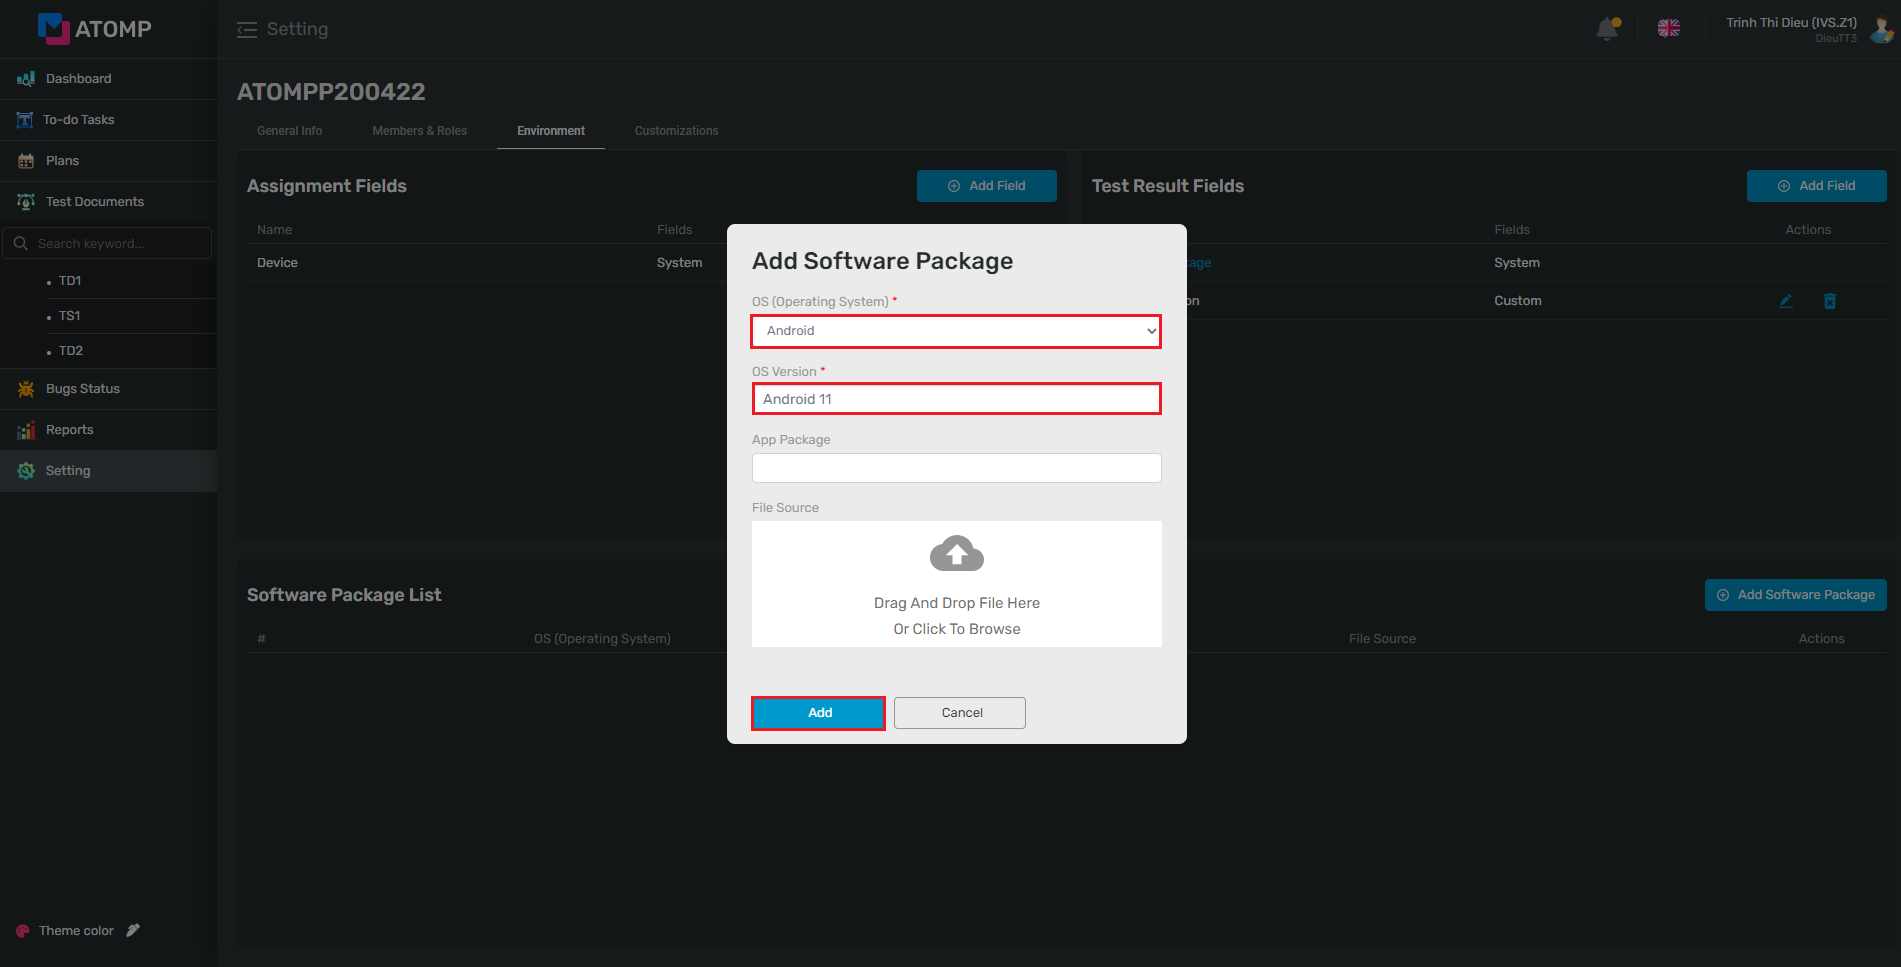
In the Project, PM can add software packages in 6 steps bellow:
Step 1: Inside the Environment tab of the Setting screen, select Software Package in Test Result Field.
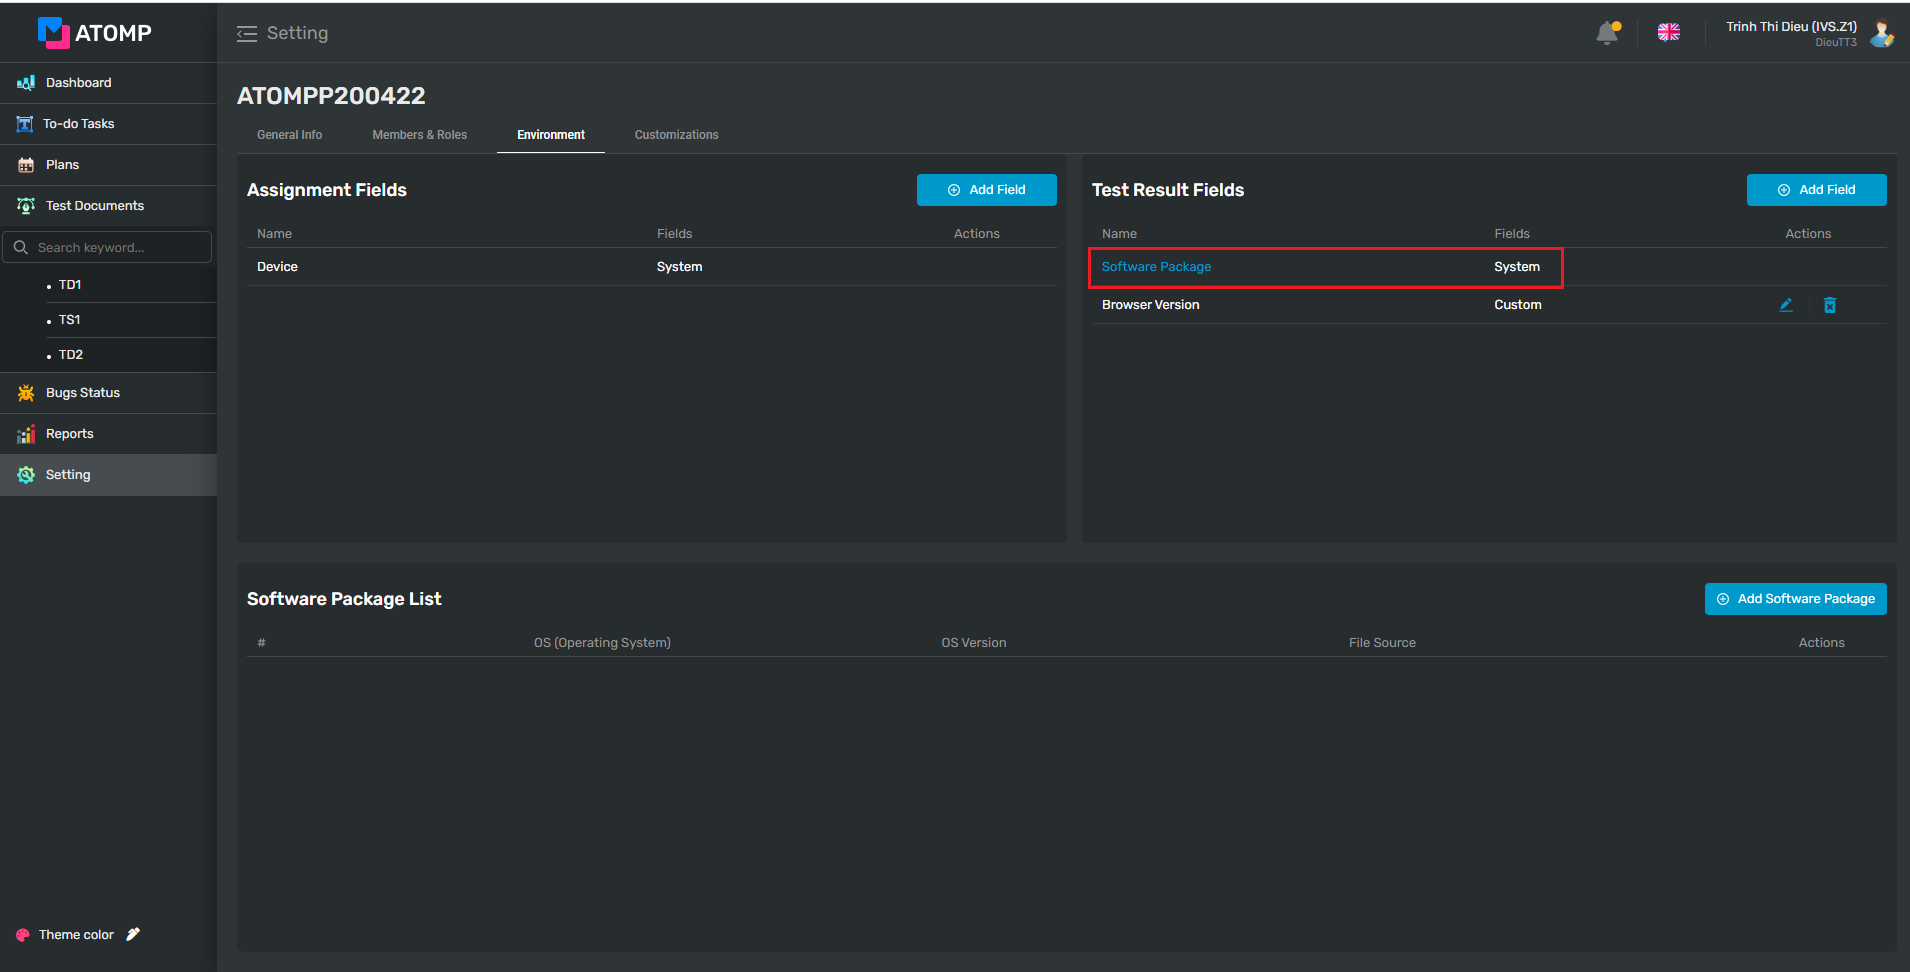
Step 2: Click on [Add Software Package] button. The Add Software Package pop up is displayed.
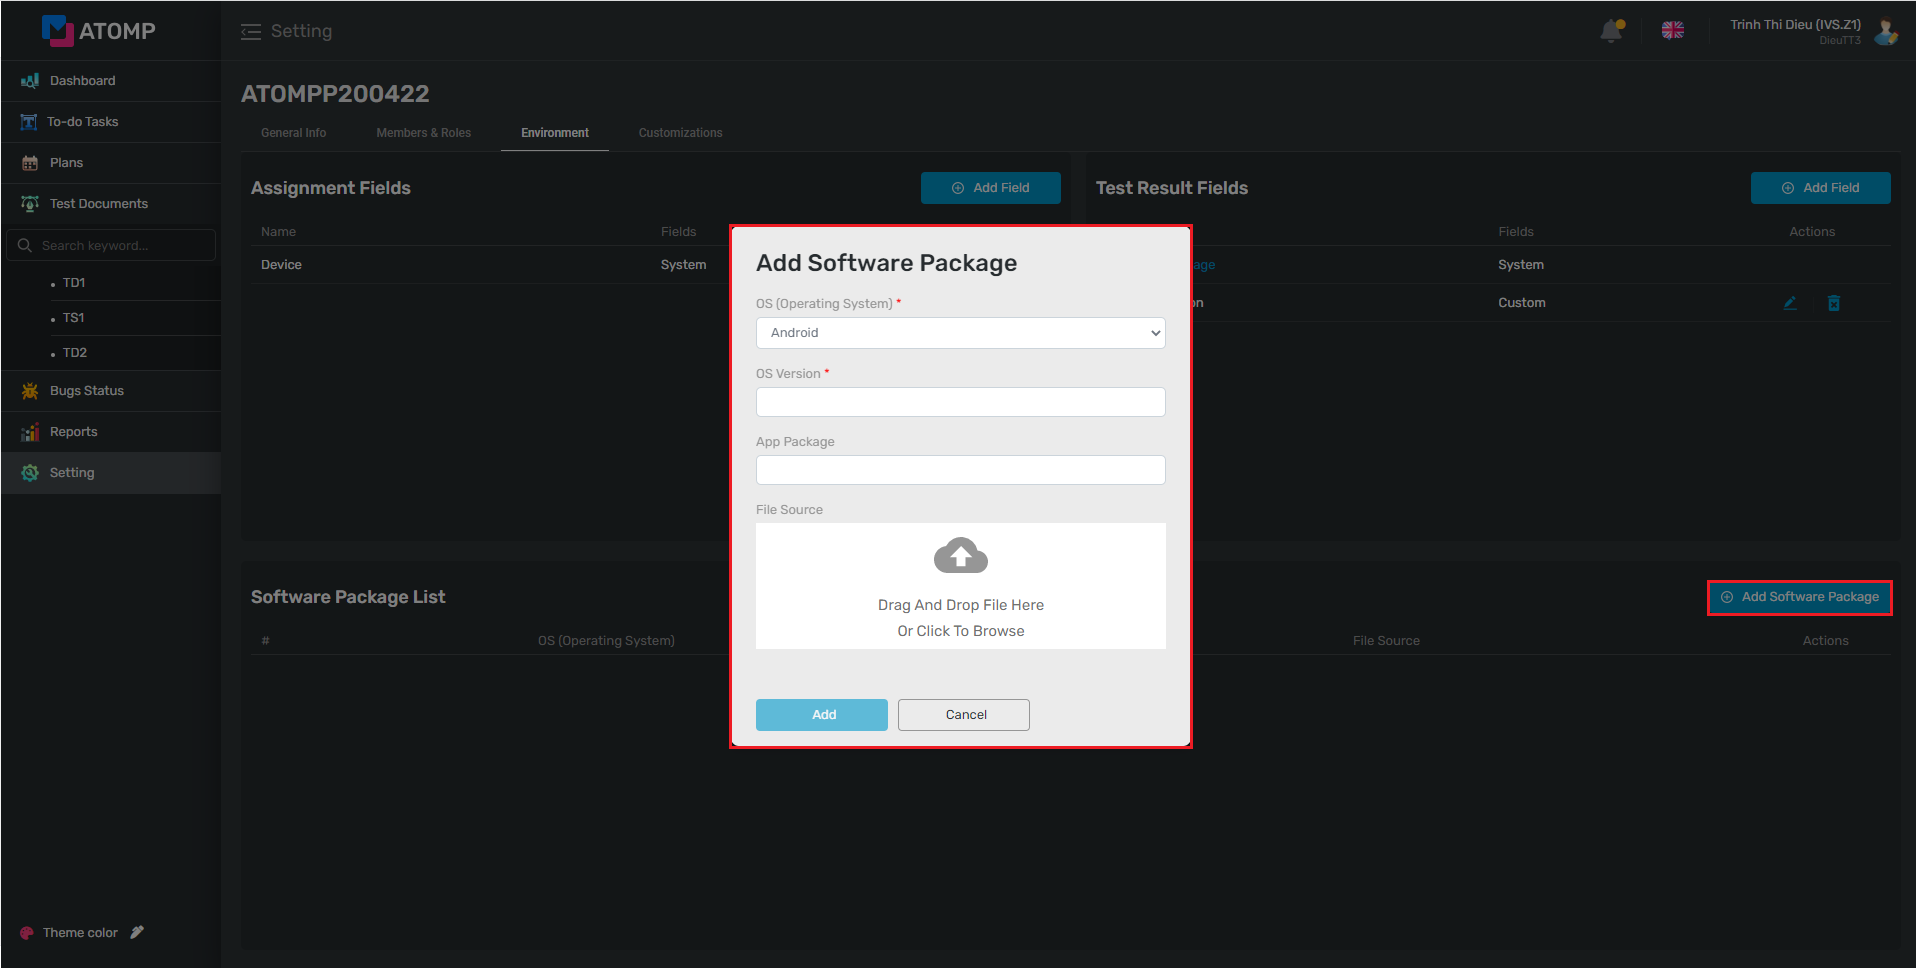
Step 3: Select the type of OS by clicking on the icon dropdown.
Step 4: Input software package information.
Step 5: By clicking this icon  , user can upload any file (ex: APK, IPA) from theirs PC .
Step 6: Then, click [Add] button.
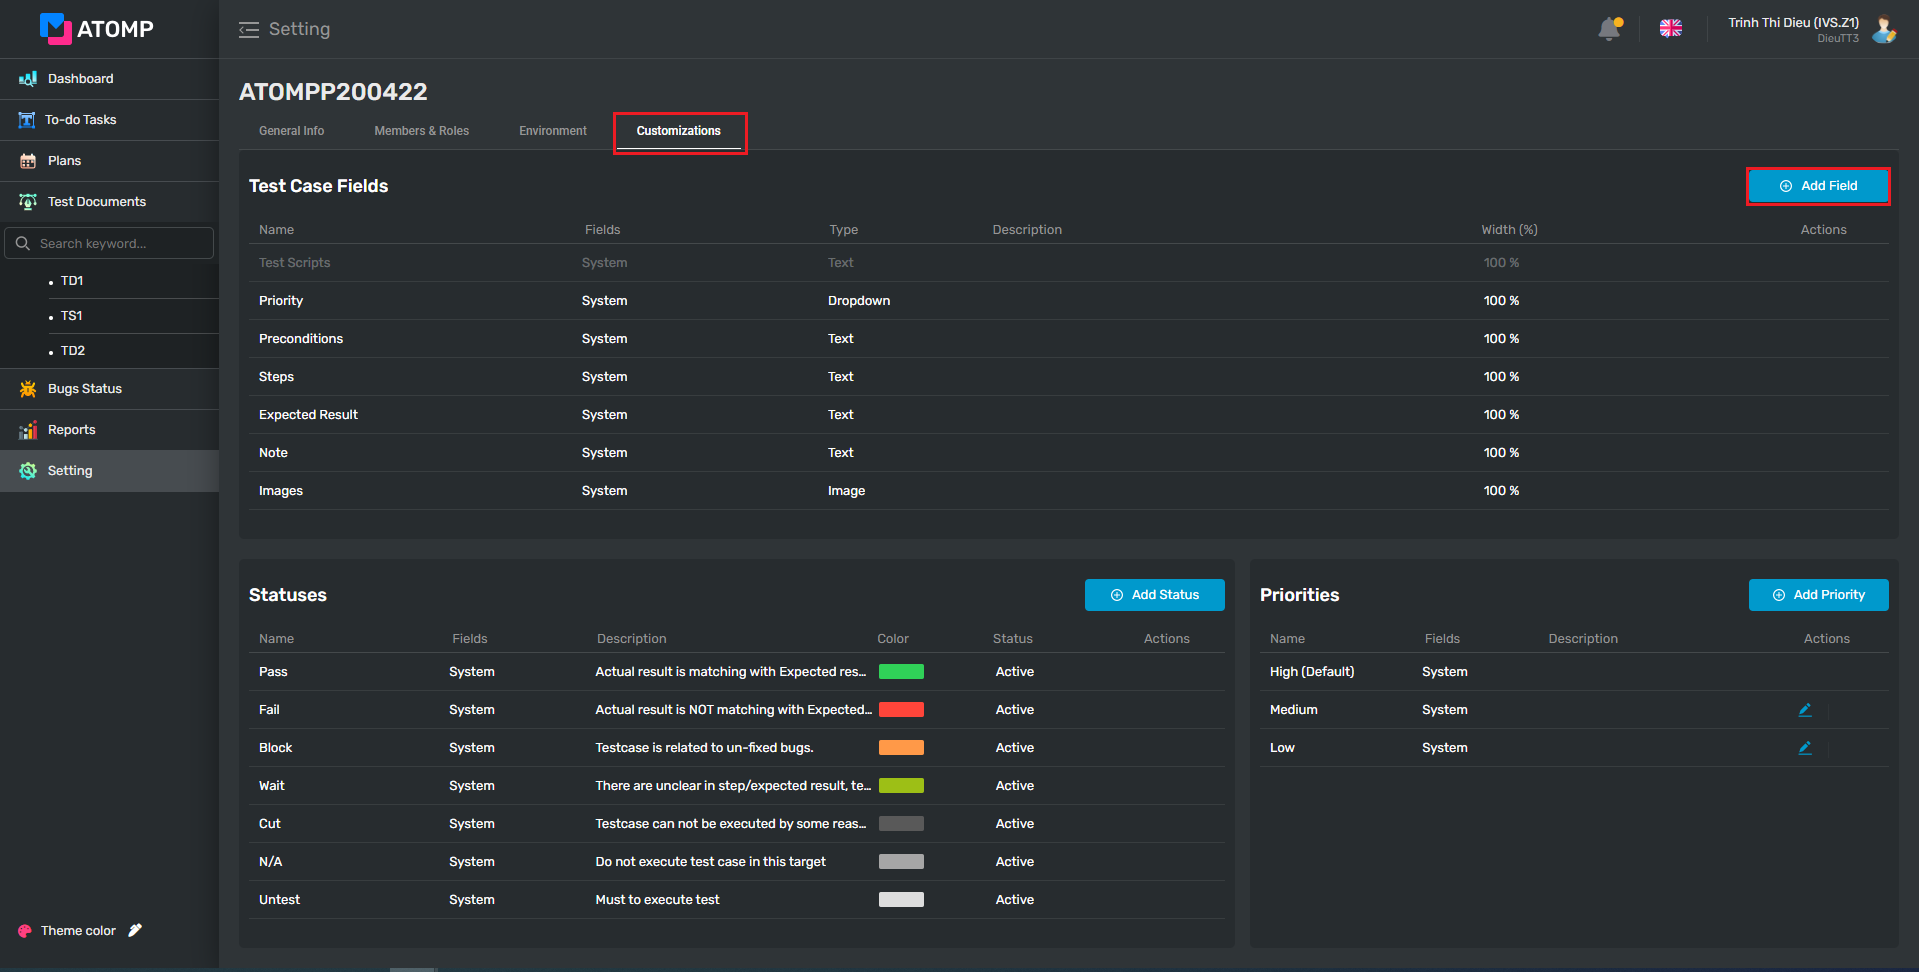
IV. Customizations
1.Test Case Field
➢ Add Test Case Fields
Step 1: On Setting, click on Customizations tab
Step 2: Click on [Add Field] button => popup Add Custom Fields will be displayed.
Step 3: Input valid data into Name text box.
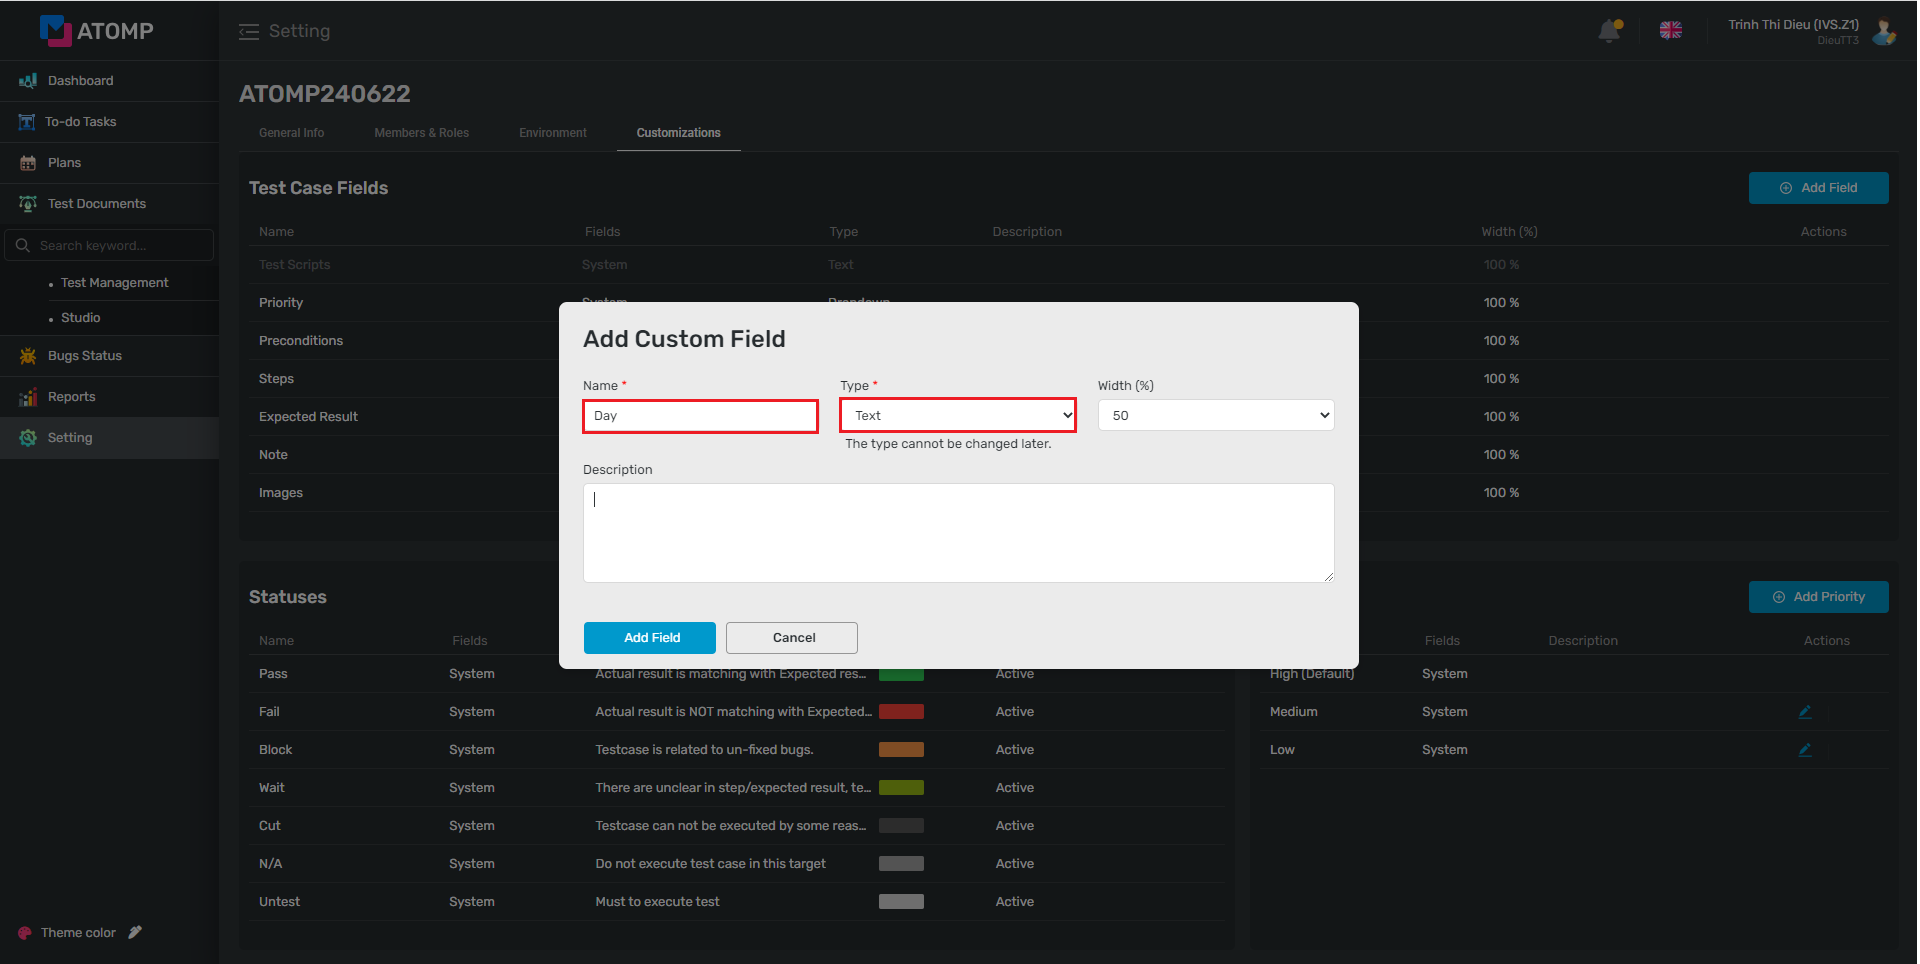
Step 4: Select the type of test case field by clicking on the icon dropdown at Type field. There are 2 values: Text and Dropdown.
- If you select the type as Text, please do these steps (3), (5), (9), (10).

- If you select the type as Dropdown, please do these steps (3), (5), (6), (7), (8), (9), (10).
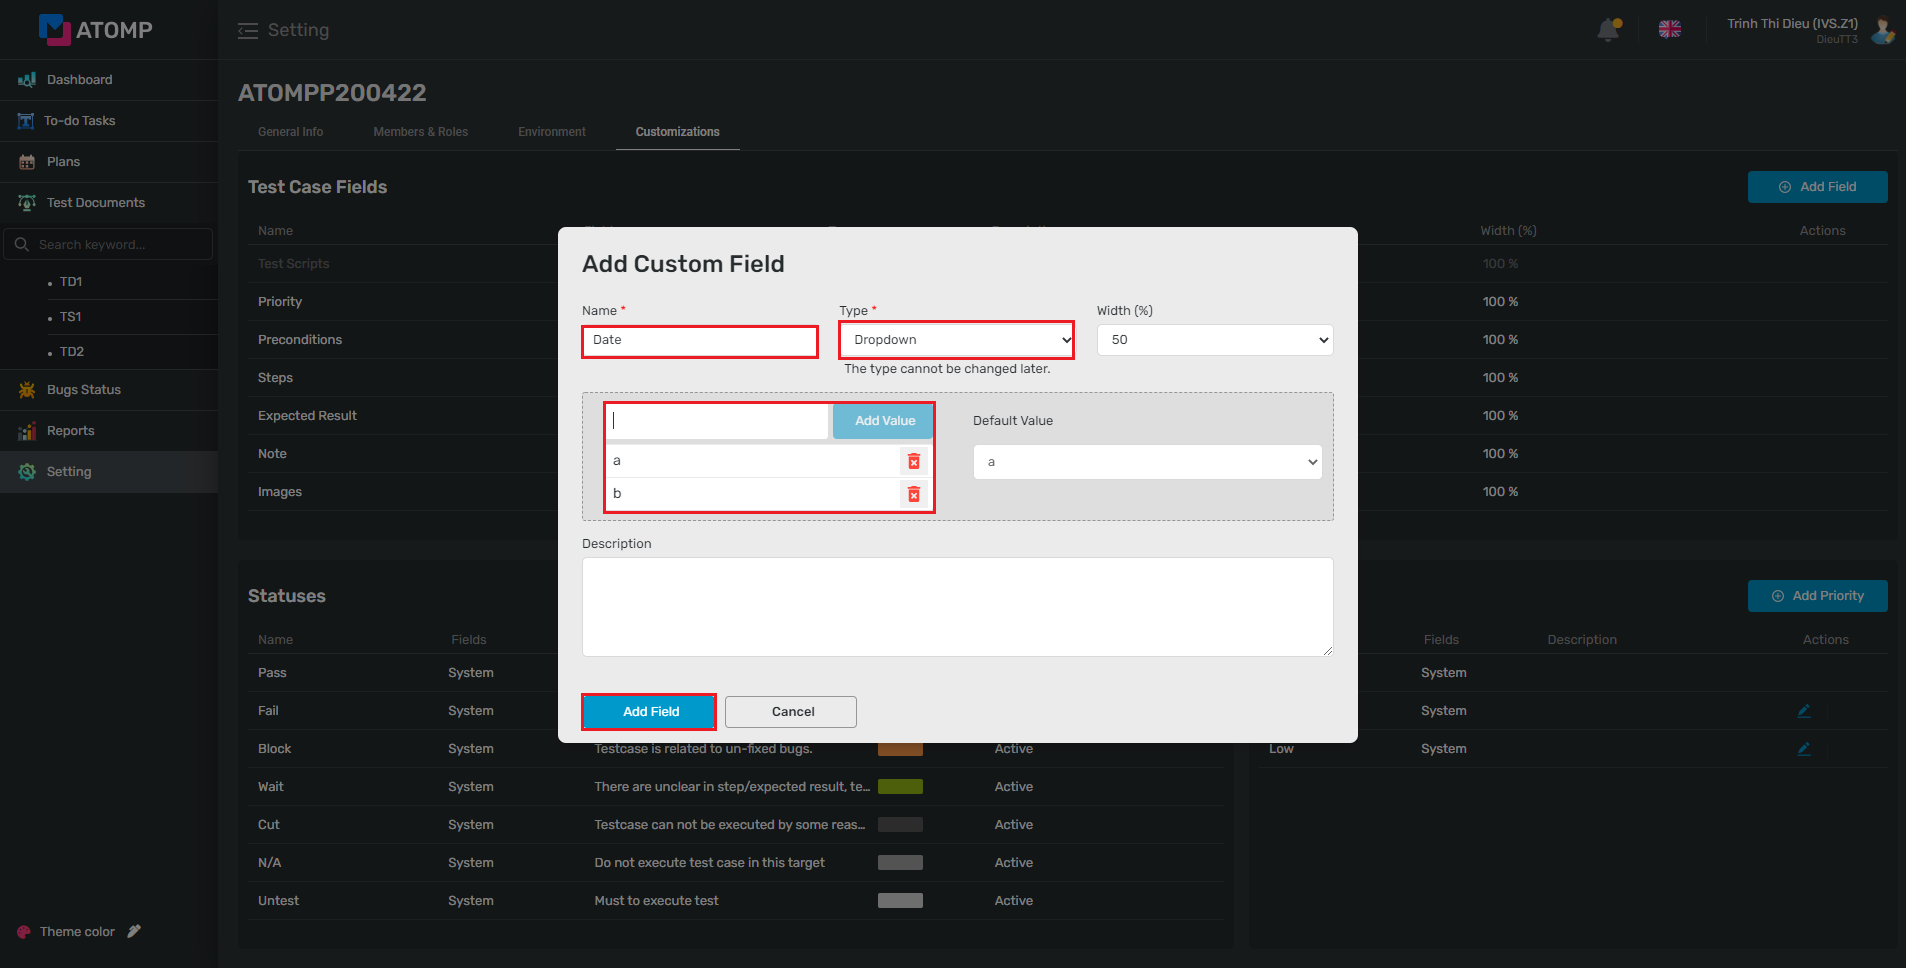
Step 5: Select the width (%) of custom field by clicking on the icon dropdown at Width (%) field.
Step 6: Input value for custom field dropdown list. User can enter one or more values following this format: “name1” or “name1, name2, name3”. (name must be unique). The number of values is not limited.
Step 7: Click on [Add Value] button => list of values will be displayed at the list box area.
Step 8: Click on icon dropdown at Default Value field to set the default value
Step 9: Input description for the custom field. This is an optional field.
Step 10: Click on [Add Field] button.
⇨ Custom fields when added successfully will be displayed as below:
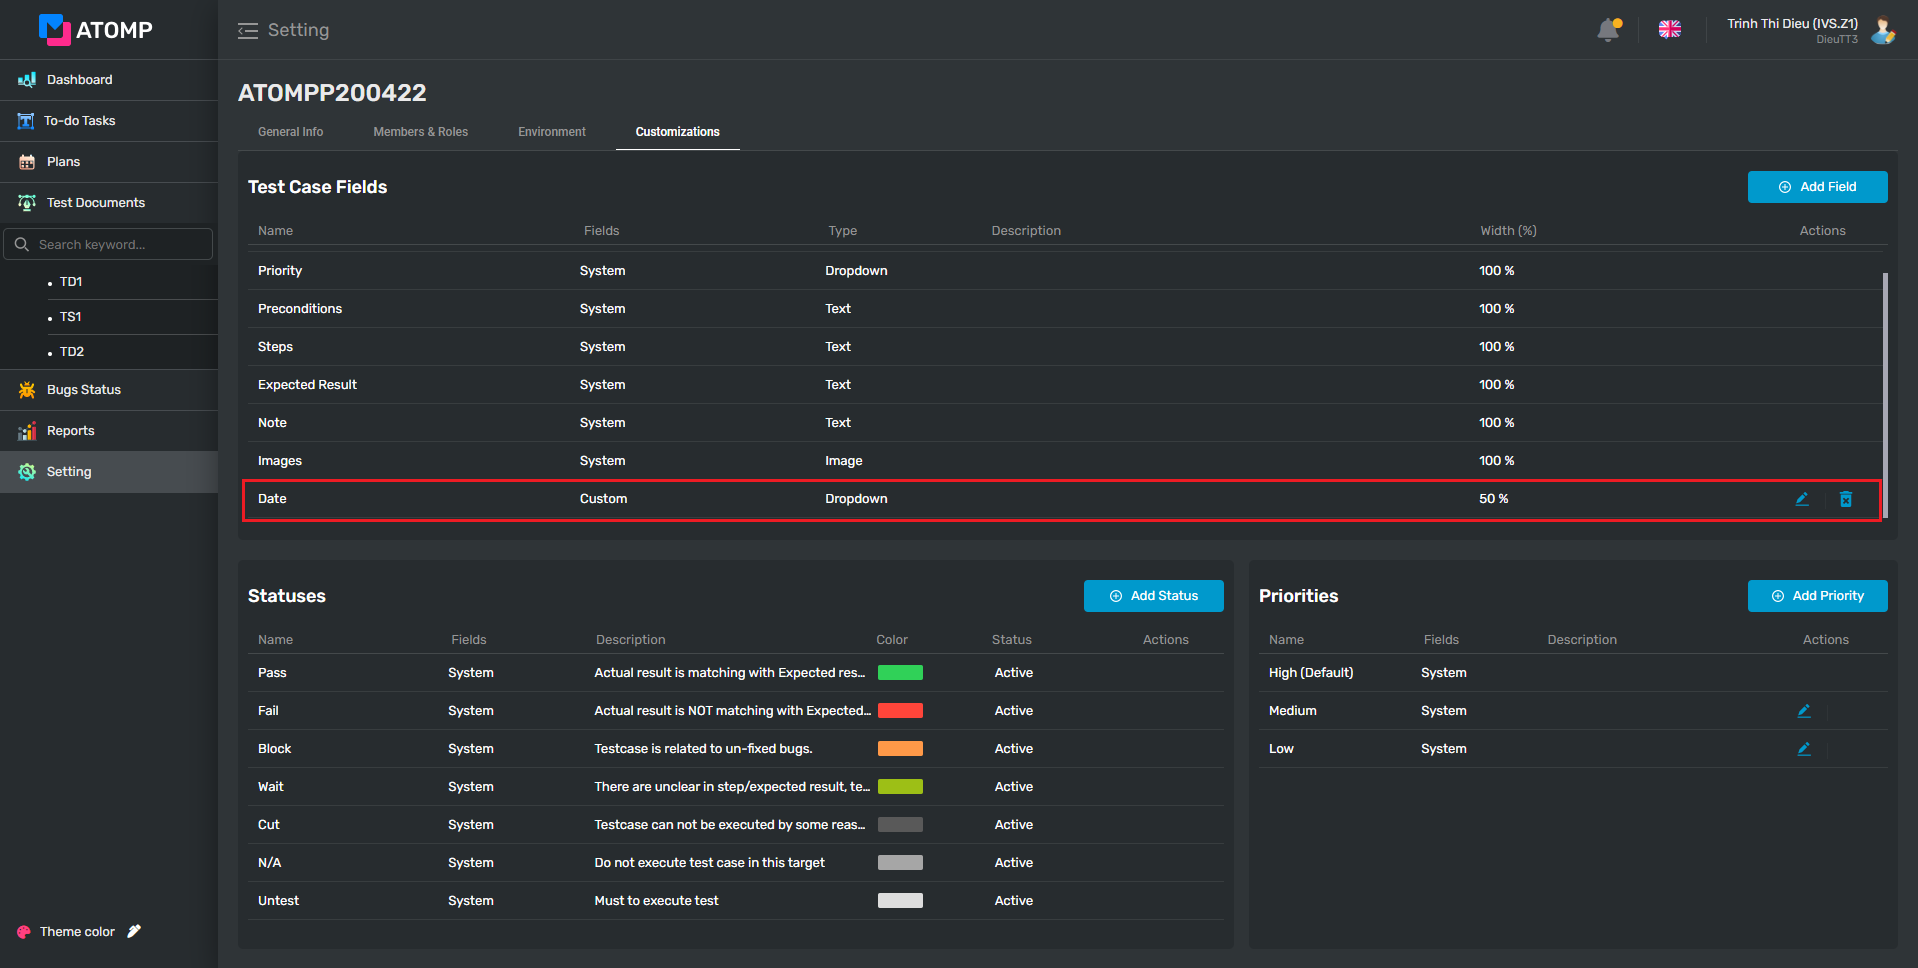
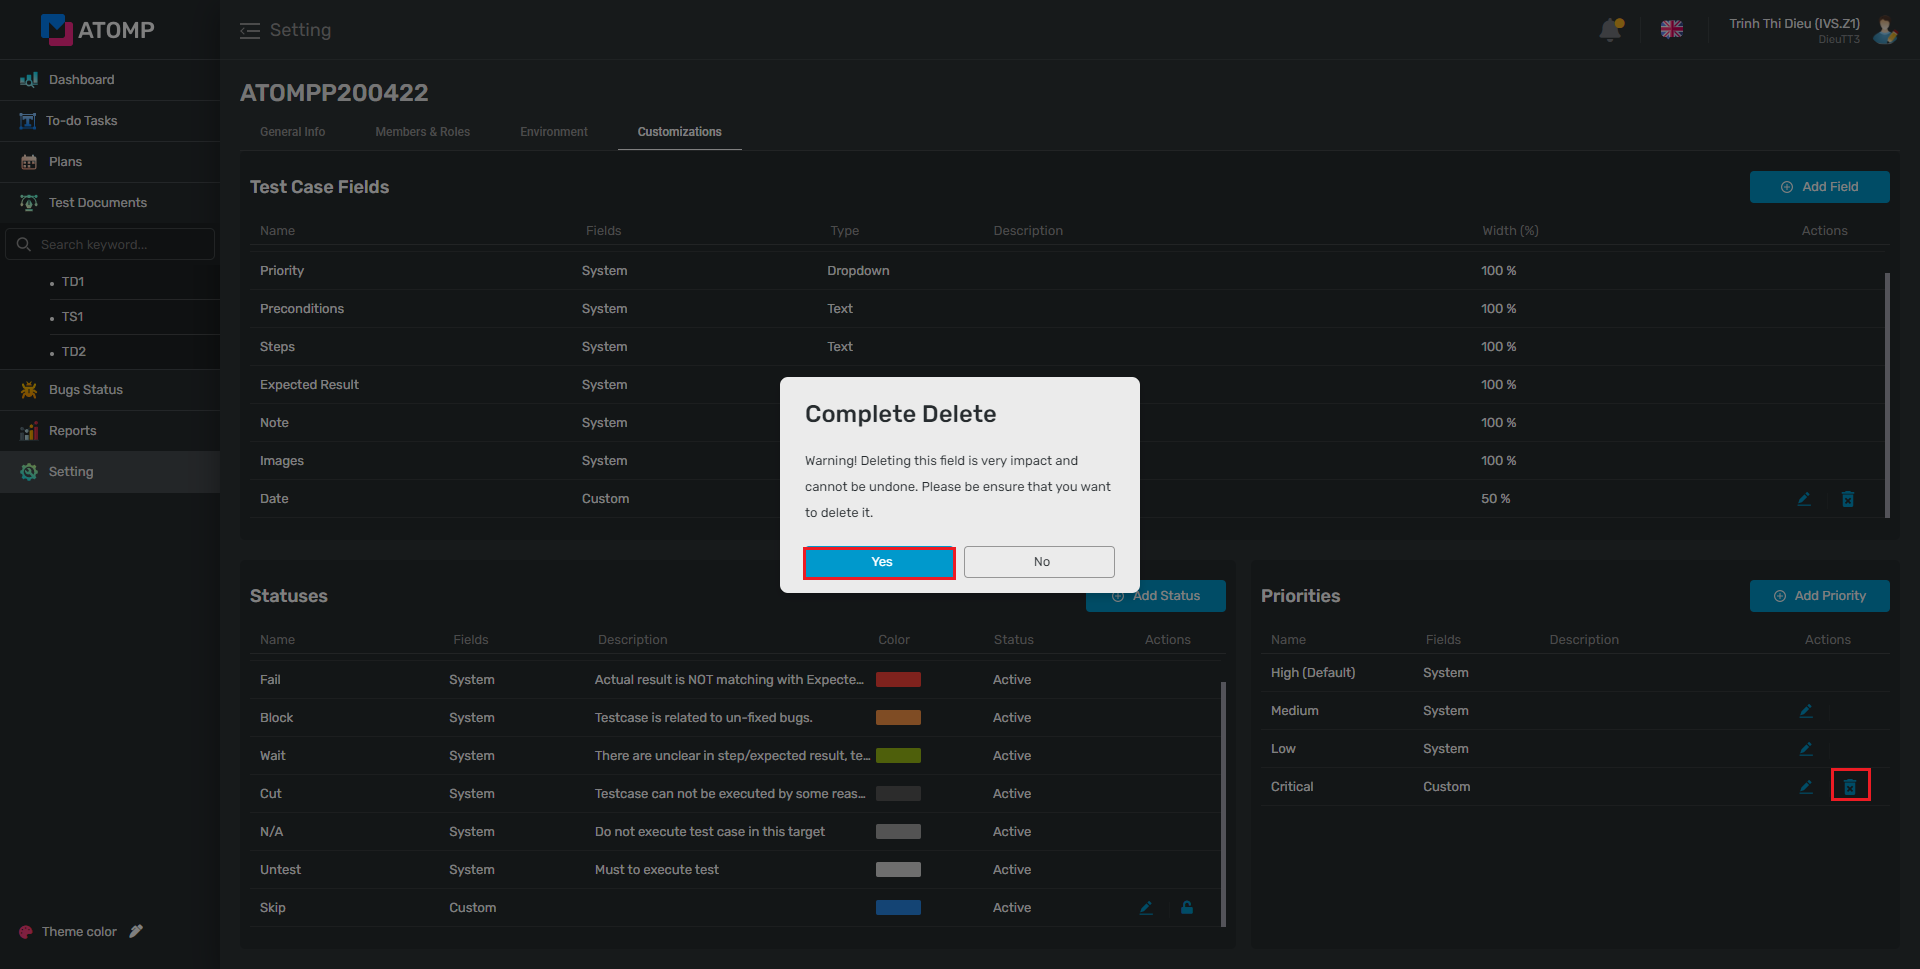
➢ Delete Test Case Fields
User can delete existing test case field, by following these steps:
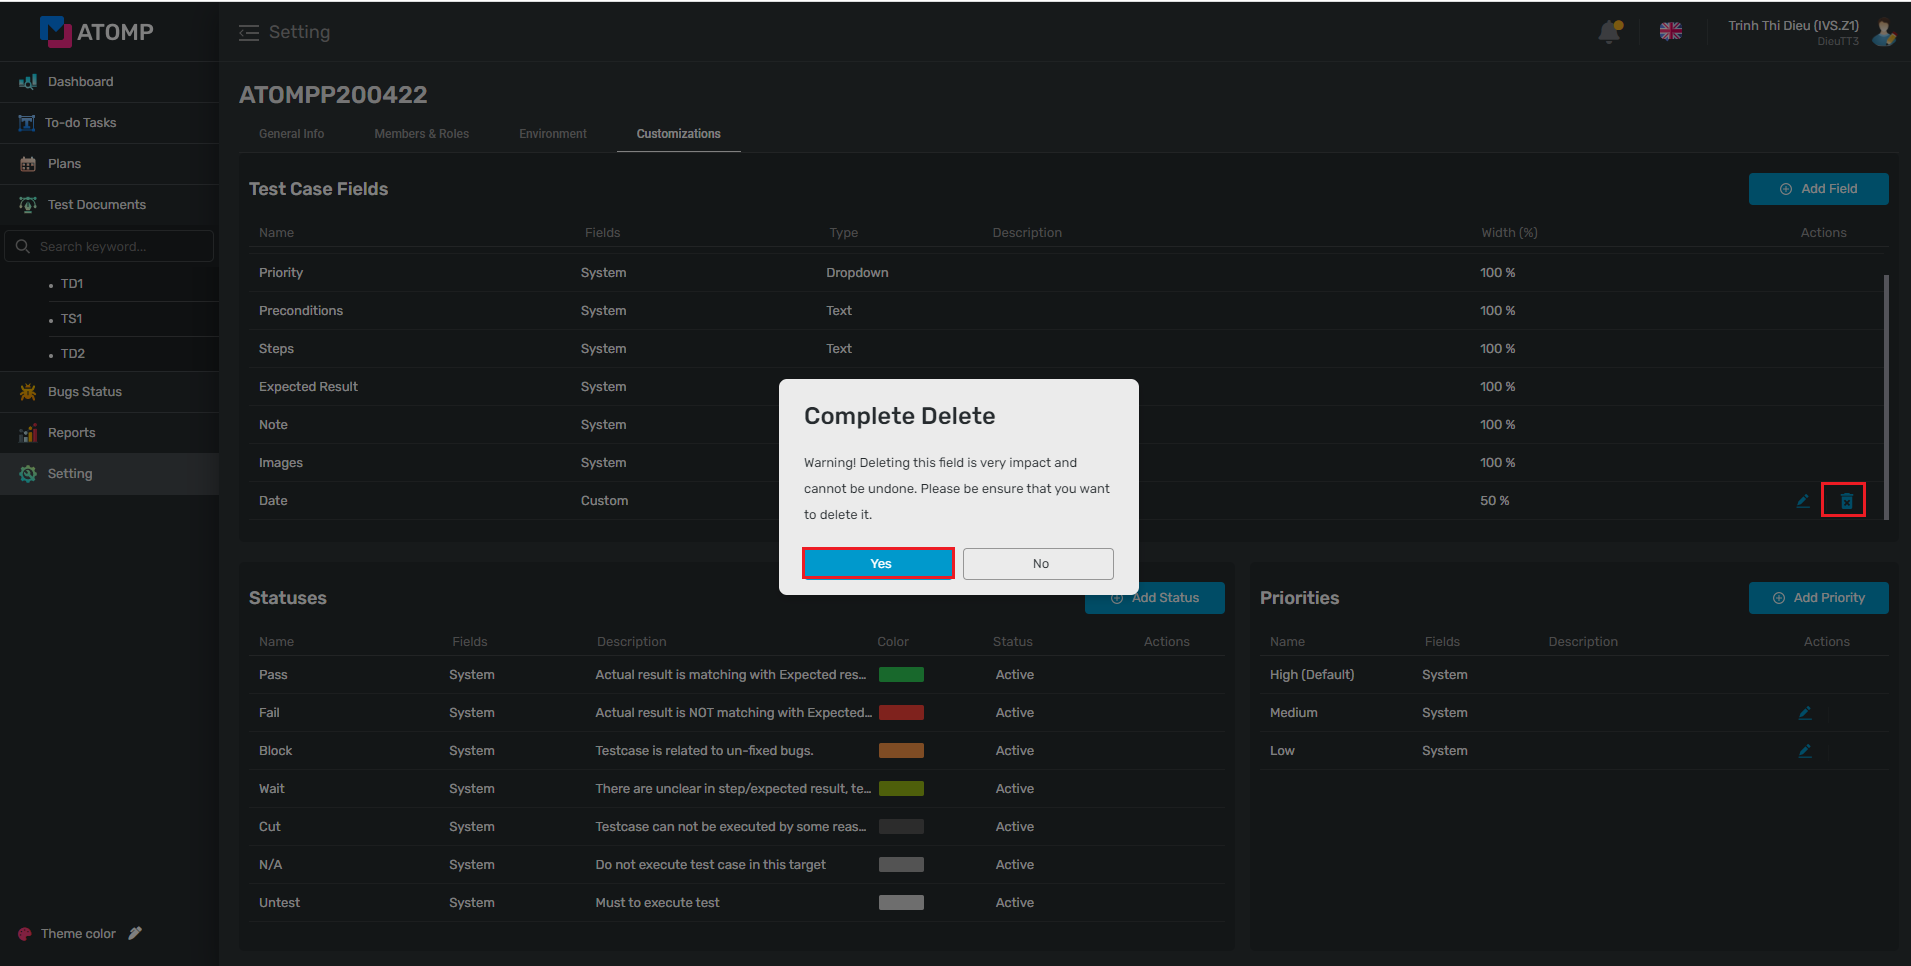
Step 1: Click on icon at the same line of the Test Case Fields that you want to delete.
Step 2: Click on [Yes] button on the Complete Delete popup => custom field will be deleted.
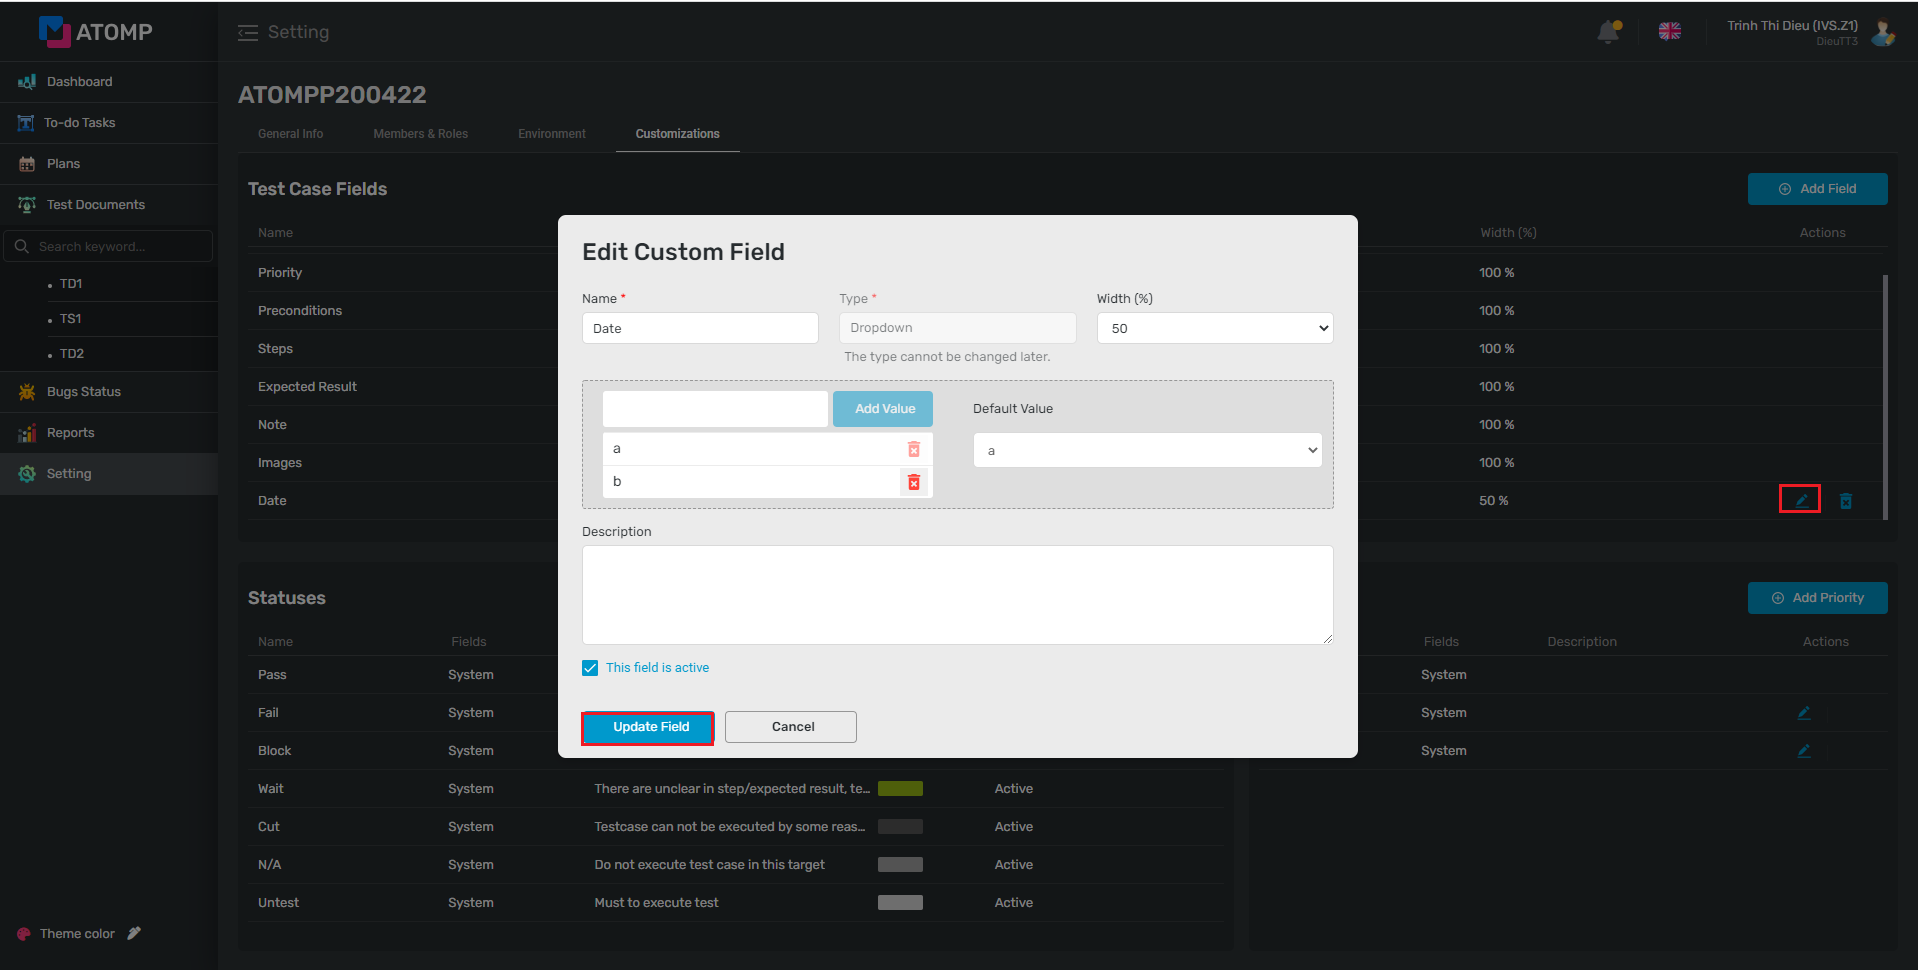
➢ Edit Test Case Fields: To edit existing custom field, please
Step 1: Click on the icon  at the same line of the custom field which you want to edit => popup Edit custom field will be displayed.
Step 2: Inside Edit Custom Field popup, user can edit Name, Width (%) and Description fields. Other fields are unmodifiable.
Besides, user can activate/inactivate custom field by checking/unchecking on checkbox “This field is active”.
Step 3: Click on [Update field] button.
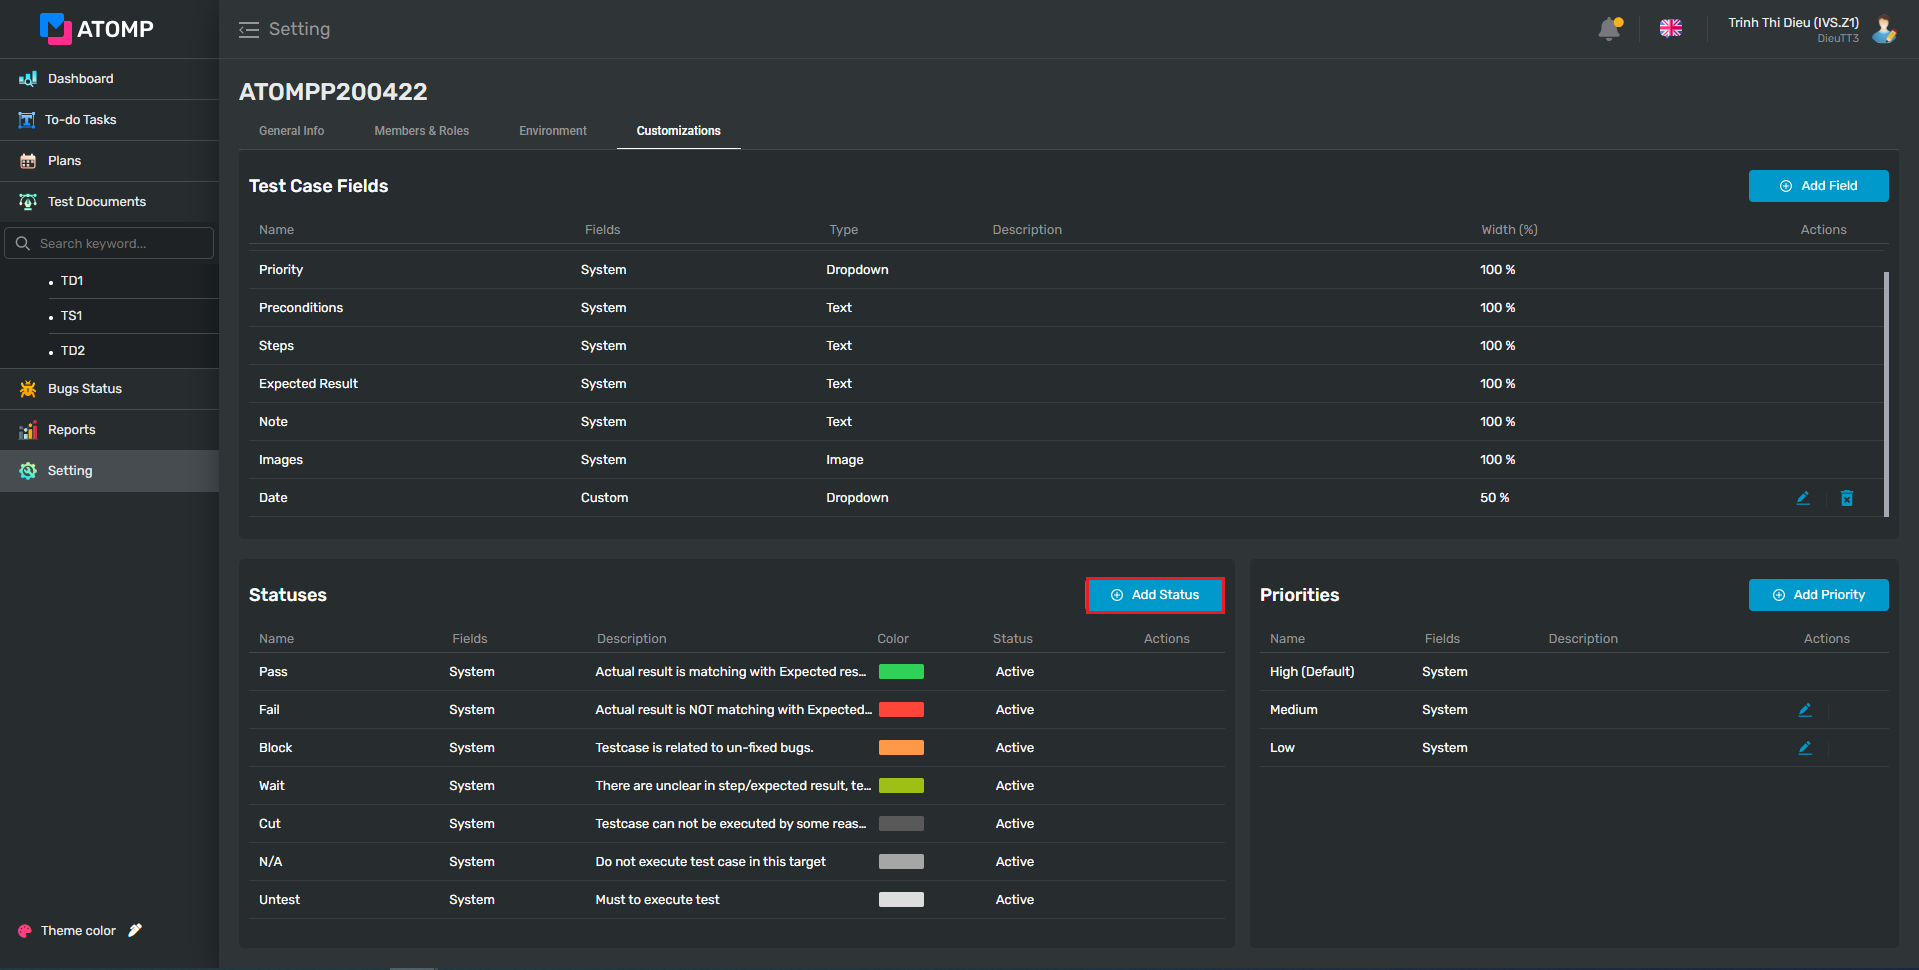
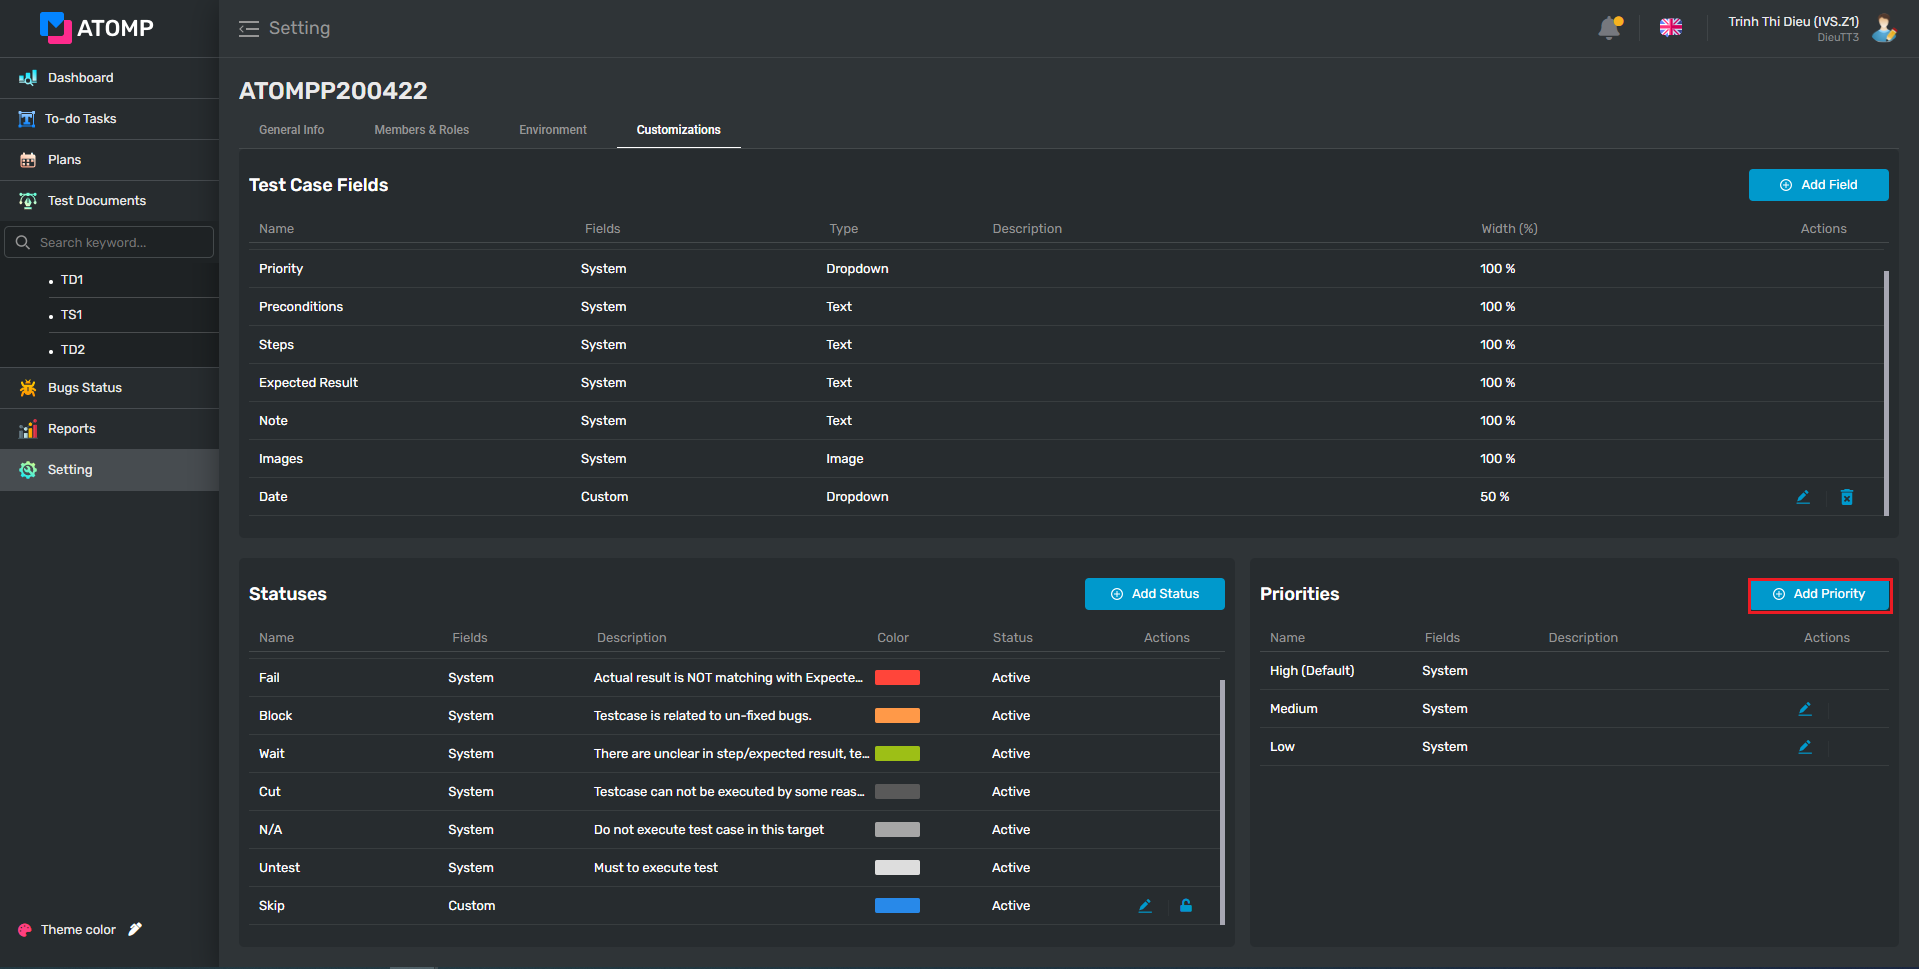
2. Statuses
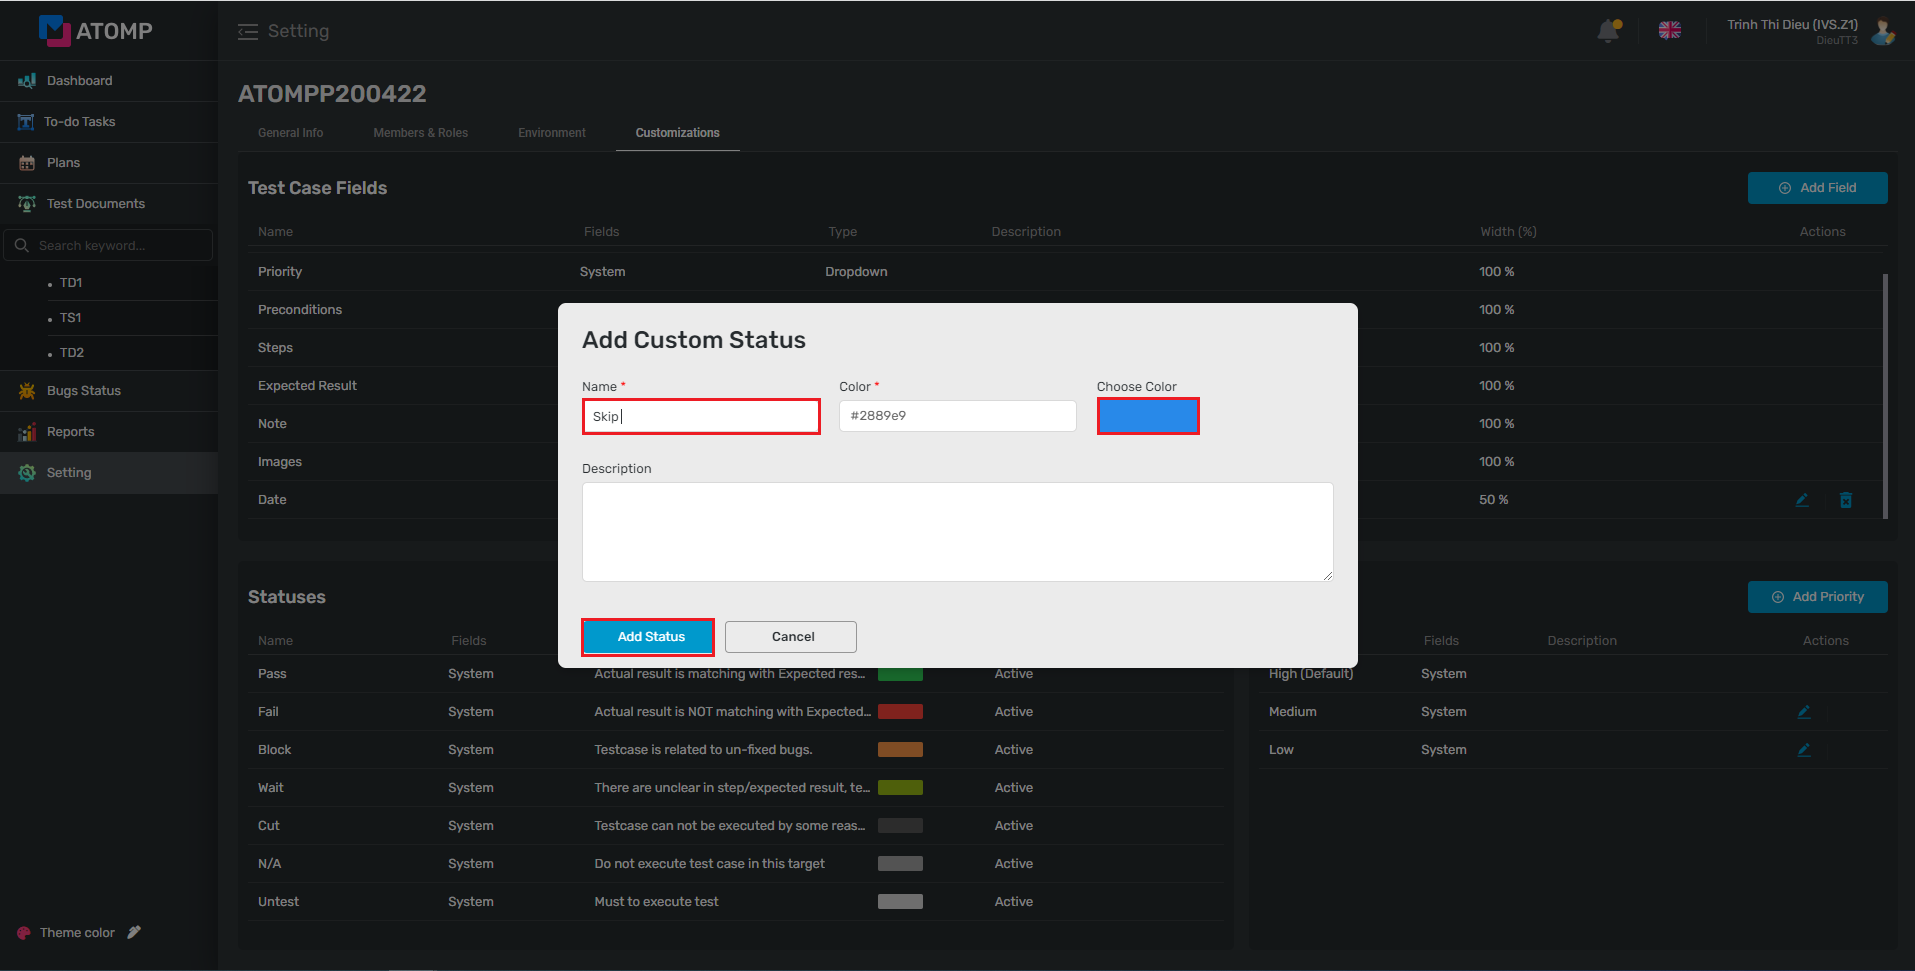
➢ Add statuses
To make your project more manageable, you can add statuses (a maximum of 8 statuses) by following these steps bellow:
Step 1: On Setting, click on Customizations tab.
Step 2: Click on [Add Status] button => Popup Add Custom Status will be displayed.
Step 3: Input valid data into the Name text box, then choose Color.
Step 4: Click on [Add Status] button.
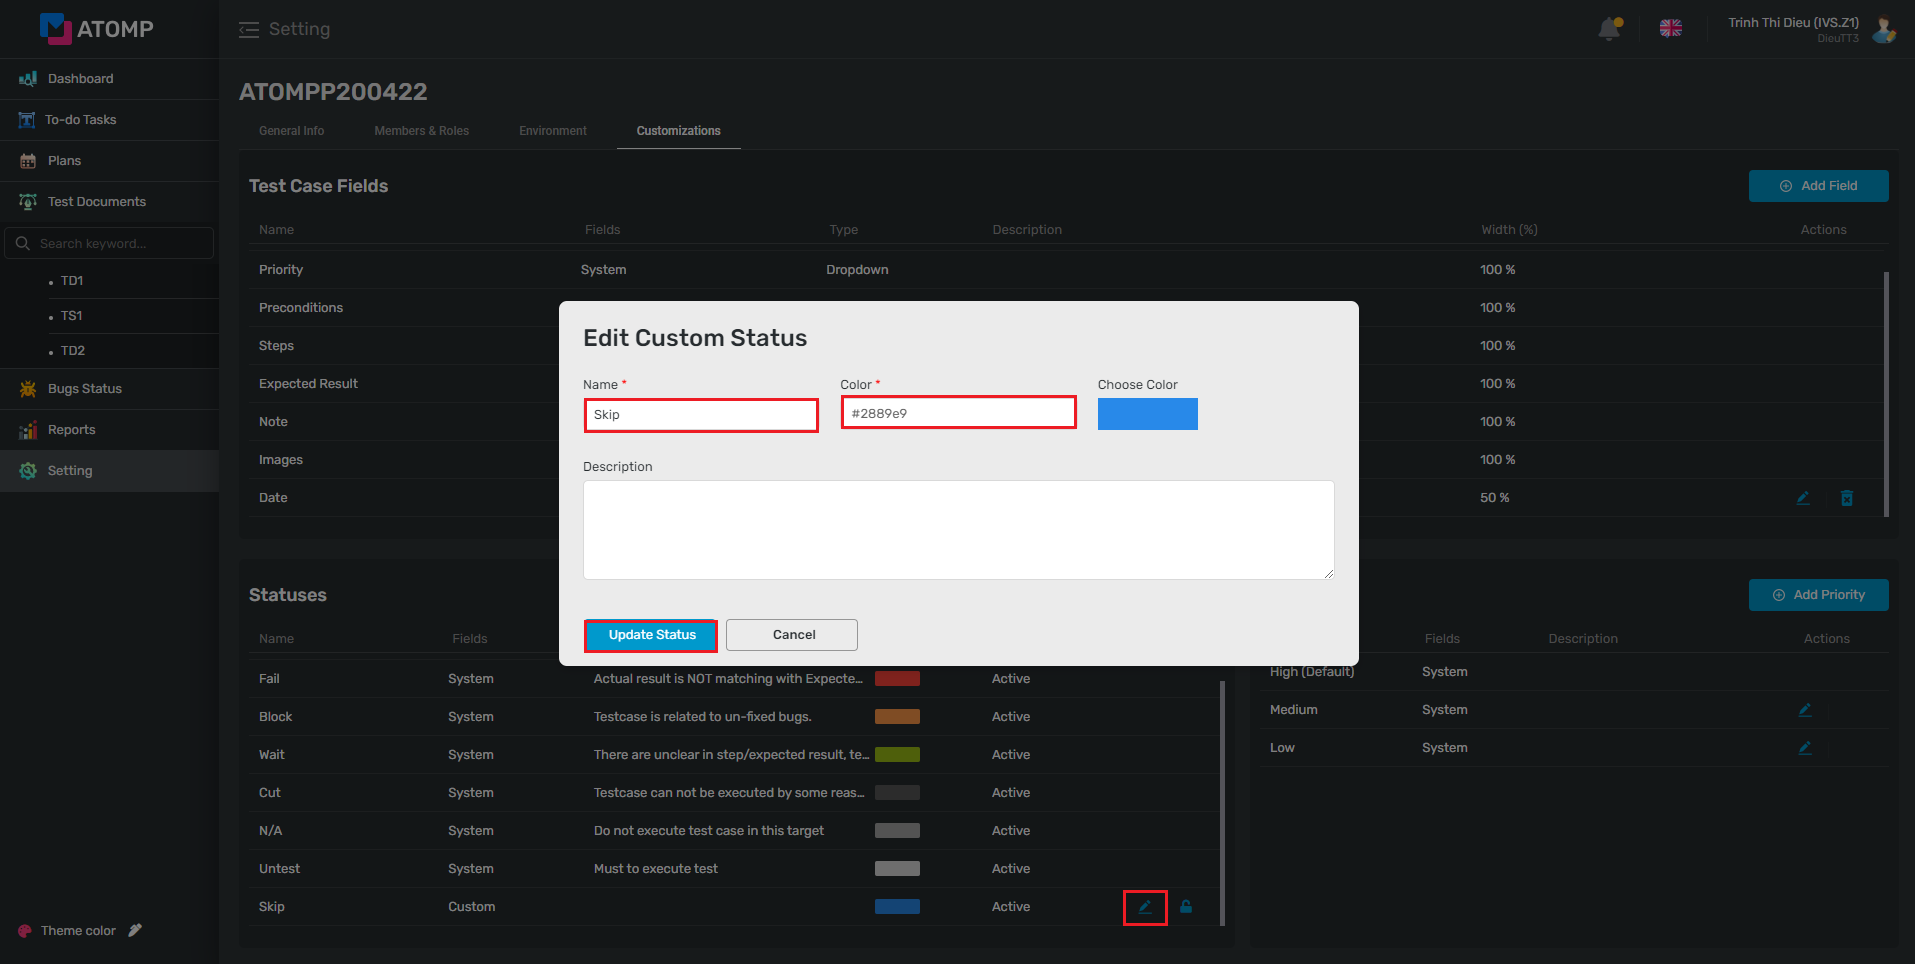
➢ Edit Statuses
User can edit an existing Custom Status, by following these steps:
Step 1: Click on the icon  at the same line of the Custom Status which you want to edit => popup Edit custom status will be displayed.
Step 2: Inside the Edit Custom Status popup, user can edit Name, Color and Description fields.
Step 3: Click on [Update Status] button.
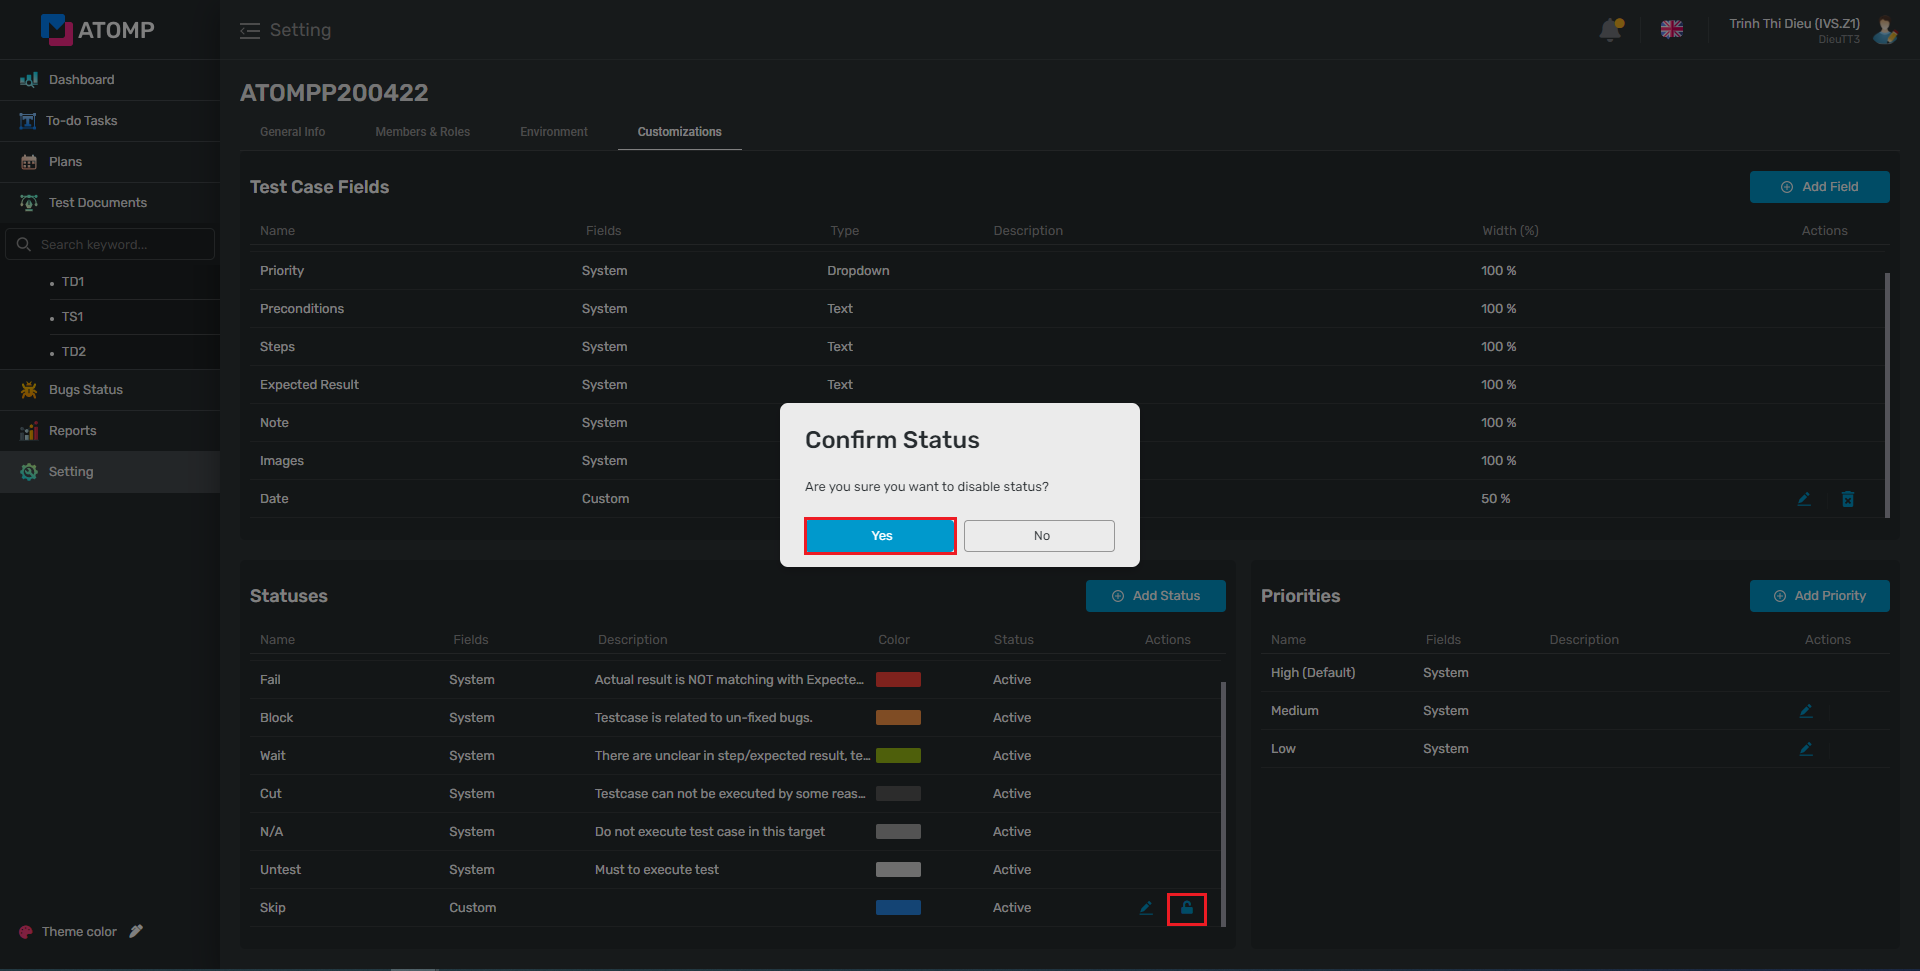
➢ Inactive/Active status
User can Activate/Inactivate custom field by following these steps bellow:
Step 1: Click on the icon  or
or  at the same line of the Custom Status which you want to Activate/Inactivate => confirmation popup “Are you sure you want enable/disable status” will be displayed.
Step 2: Click on button [Yes] or [No] to fulfill your expectation.
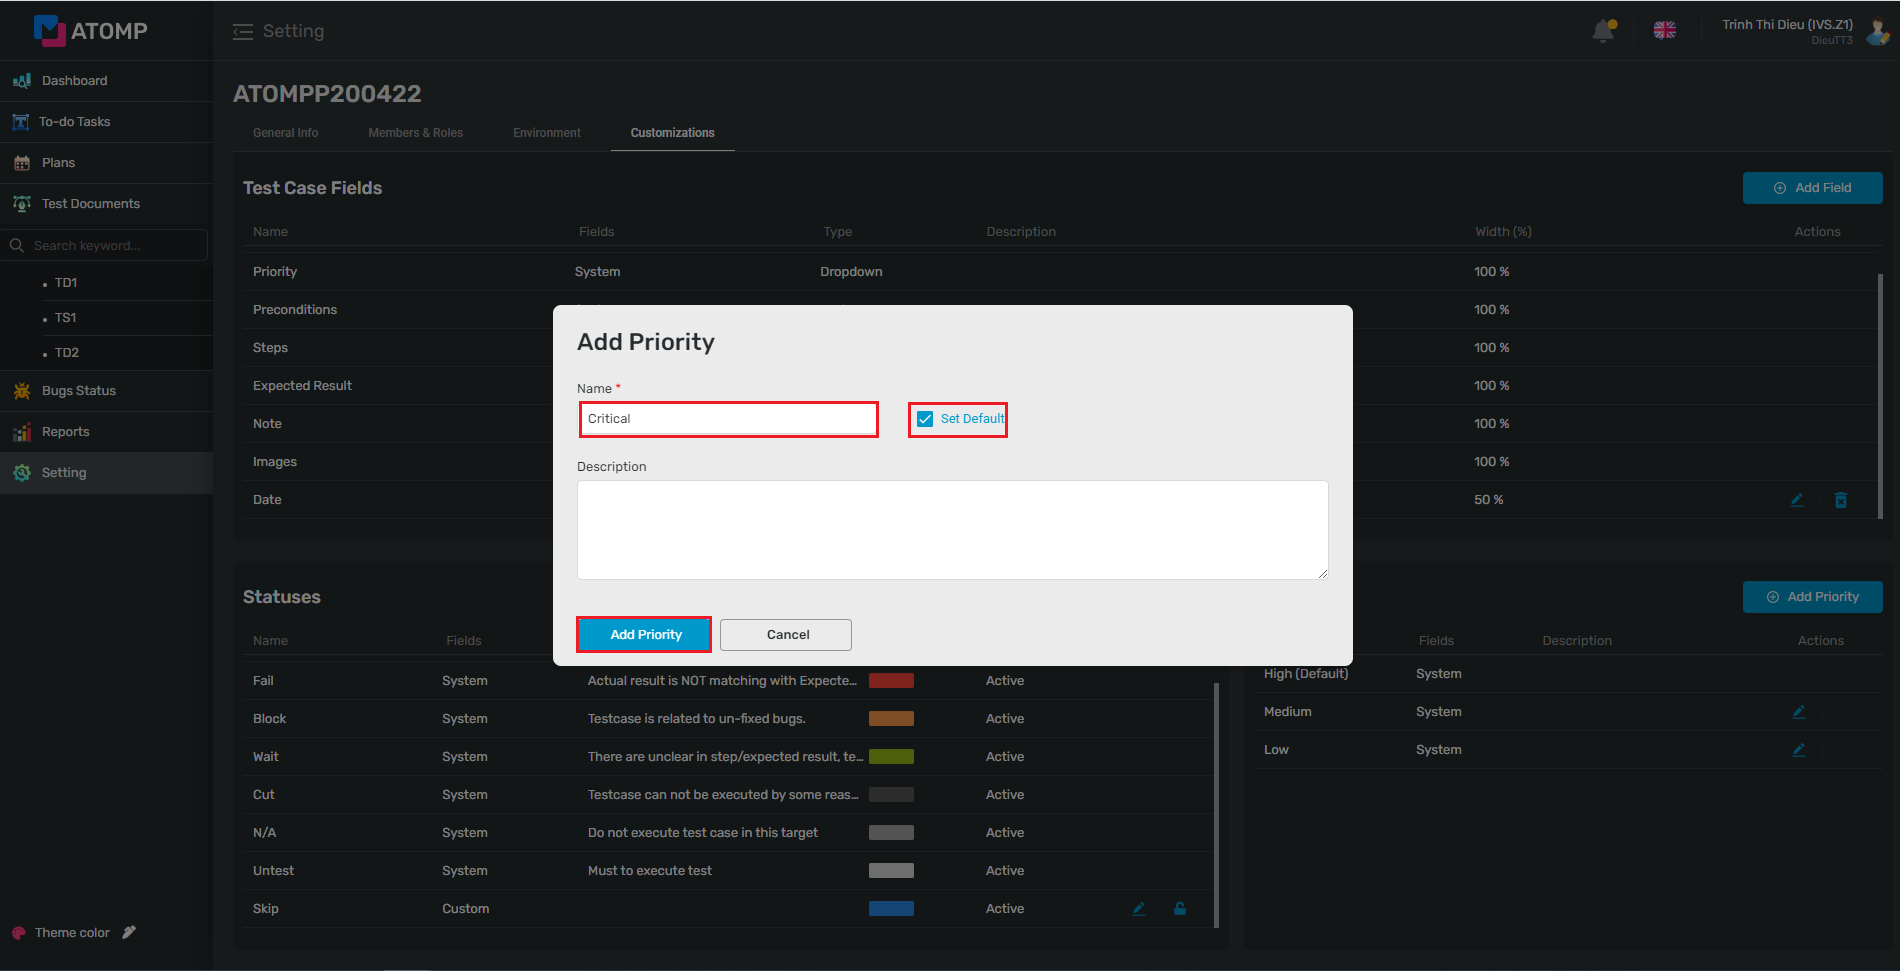
3. Priority
➢ Add Priority
To manage the priorities of all test cases in a project, you can add a priority for each test case by following these steps bellow:
Step 1: On Setting, click on “Customizations” tab.
Step 2: Click on [Add Priority] button => popup Add Priority will be displayed.
Step 3: Input valid data into the Name text box.
Step 4: Check or Uncheck on check box “Set default”.
Step 5: Click on [Add Priority] button.
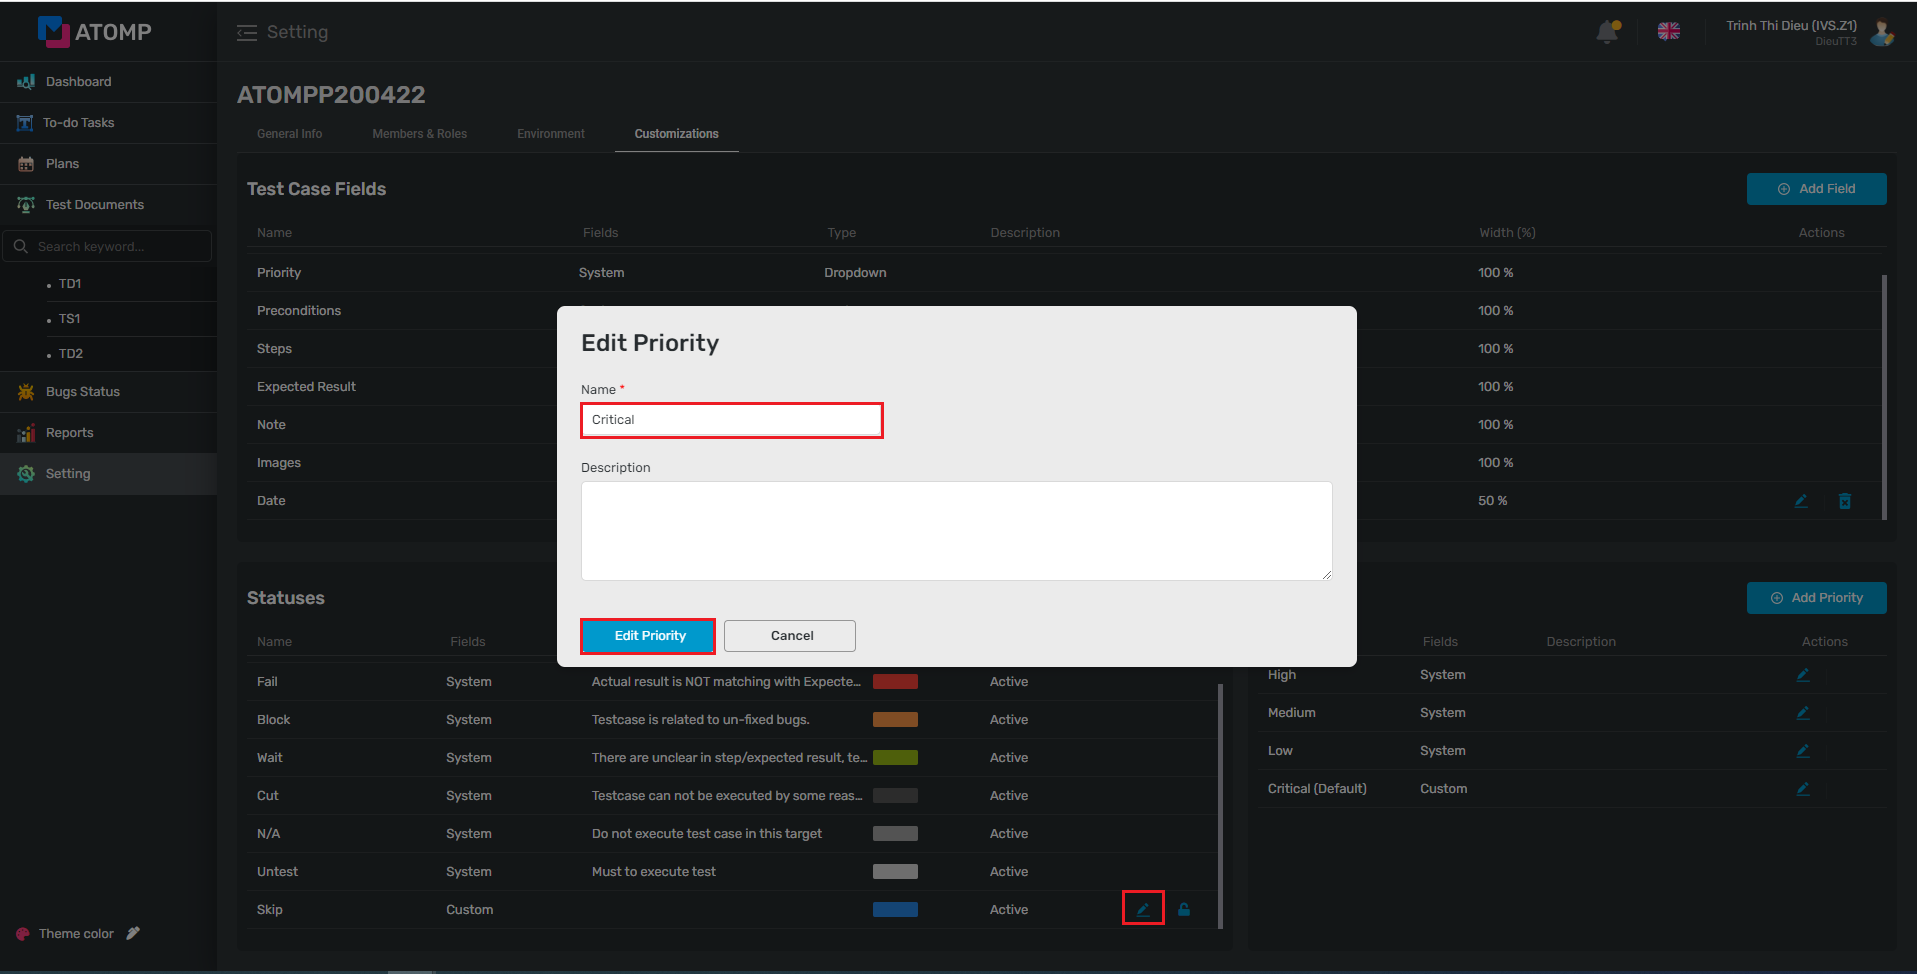
➢ Edit Priority
Users can edit an existing Priority, by following these steps:
Step 1: Click on the icon at the same line of the Priority which you want to edit => popup Edit Priority will be displayed.
Step 2: Inside Edit Priority popup, user can edit Name and Description
Besides, user can change default status by checking/unchecking on checkbox “Set default”.
Step 3: Click on [Edit Priority] button.
➢ Delete Priority
Note: If the priority is currently set as default or the priority is system priority, users can’t delete it
Otherwise, users can delete a custom priority, by following these steps:
Step 1: Click on icon at the same line of the Custom Priority that users want to delete.
Step 2: Click on [Yes] button on the Complete Delete popup => custom priority will be deleted.