Part 2: Setting
III. Add Environment
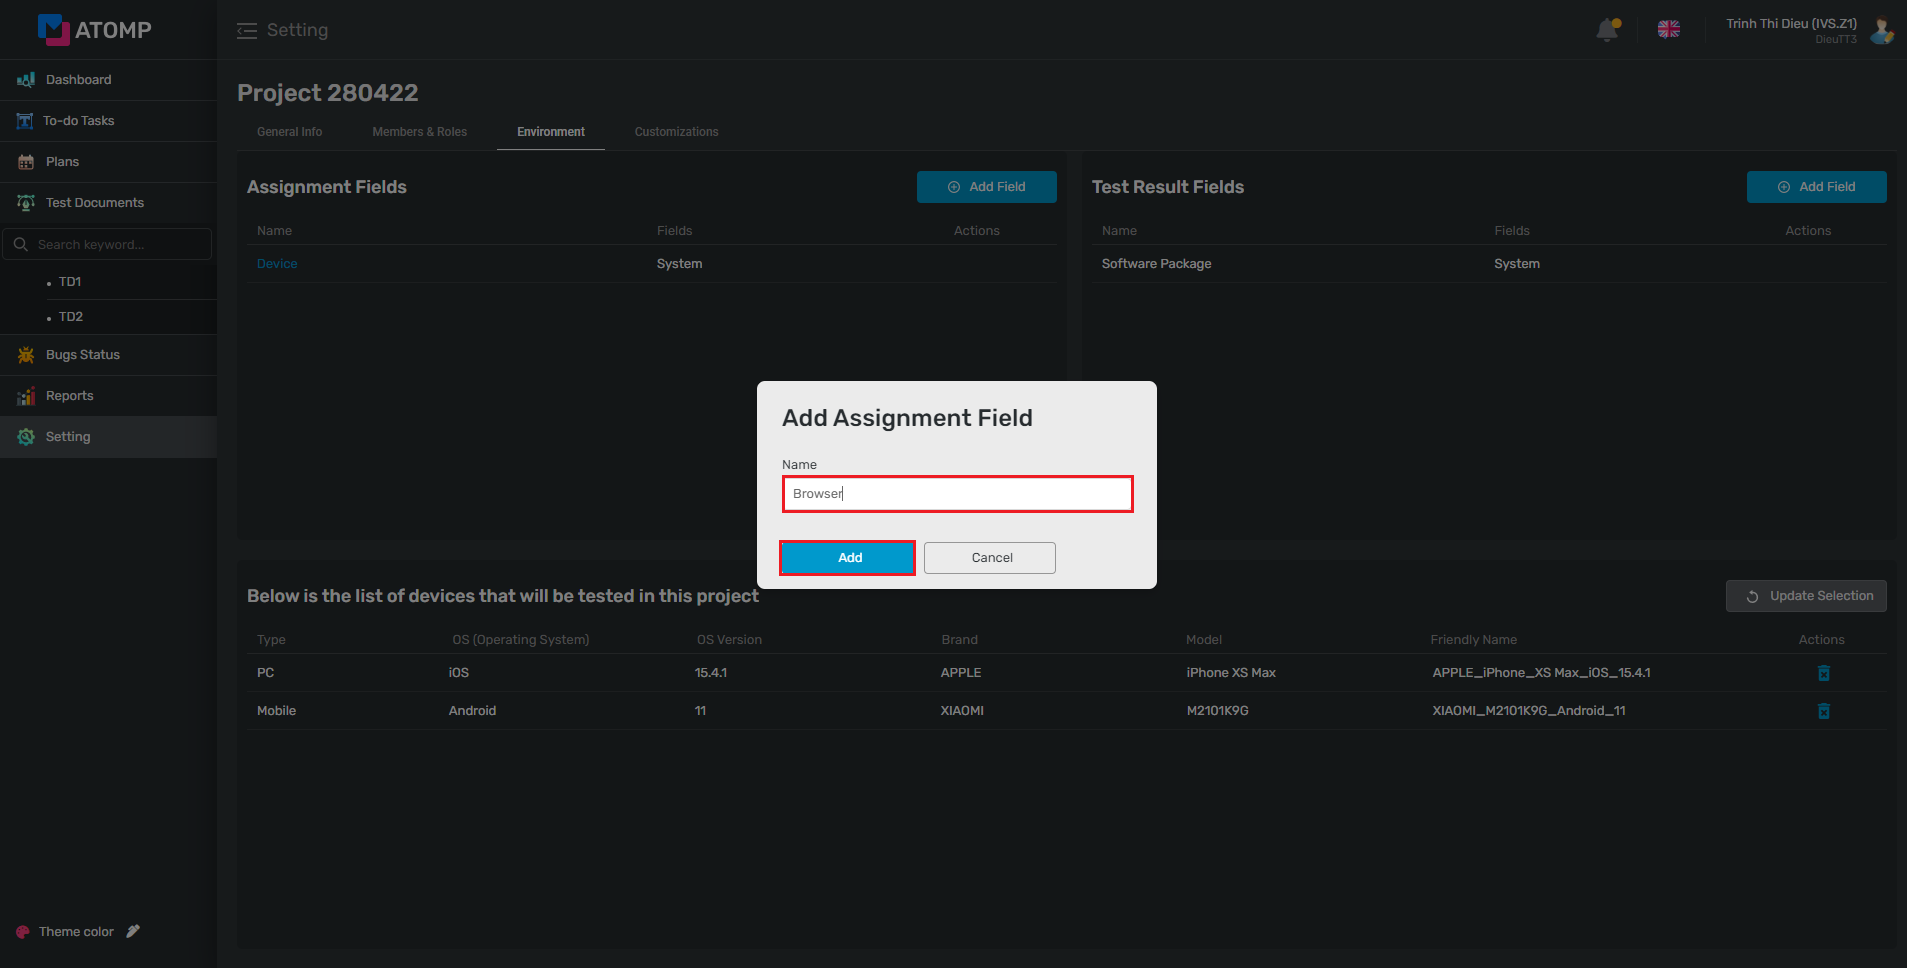
1. Add Assignment Fields
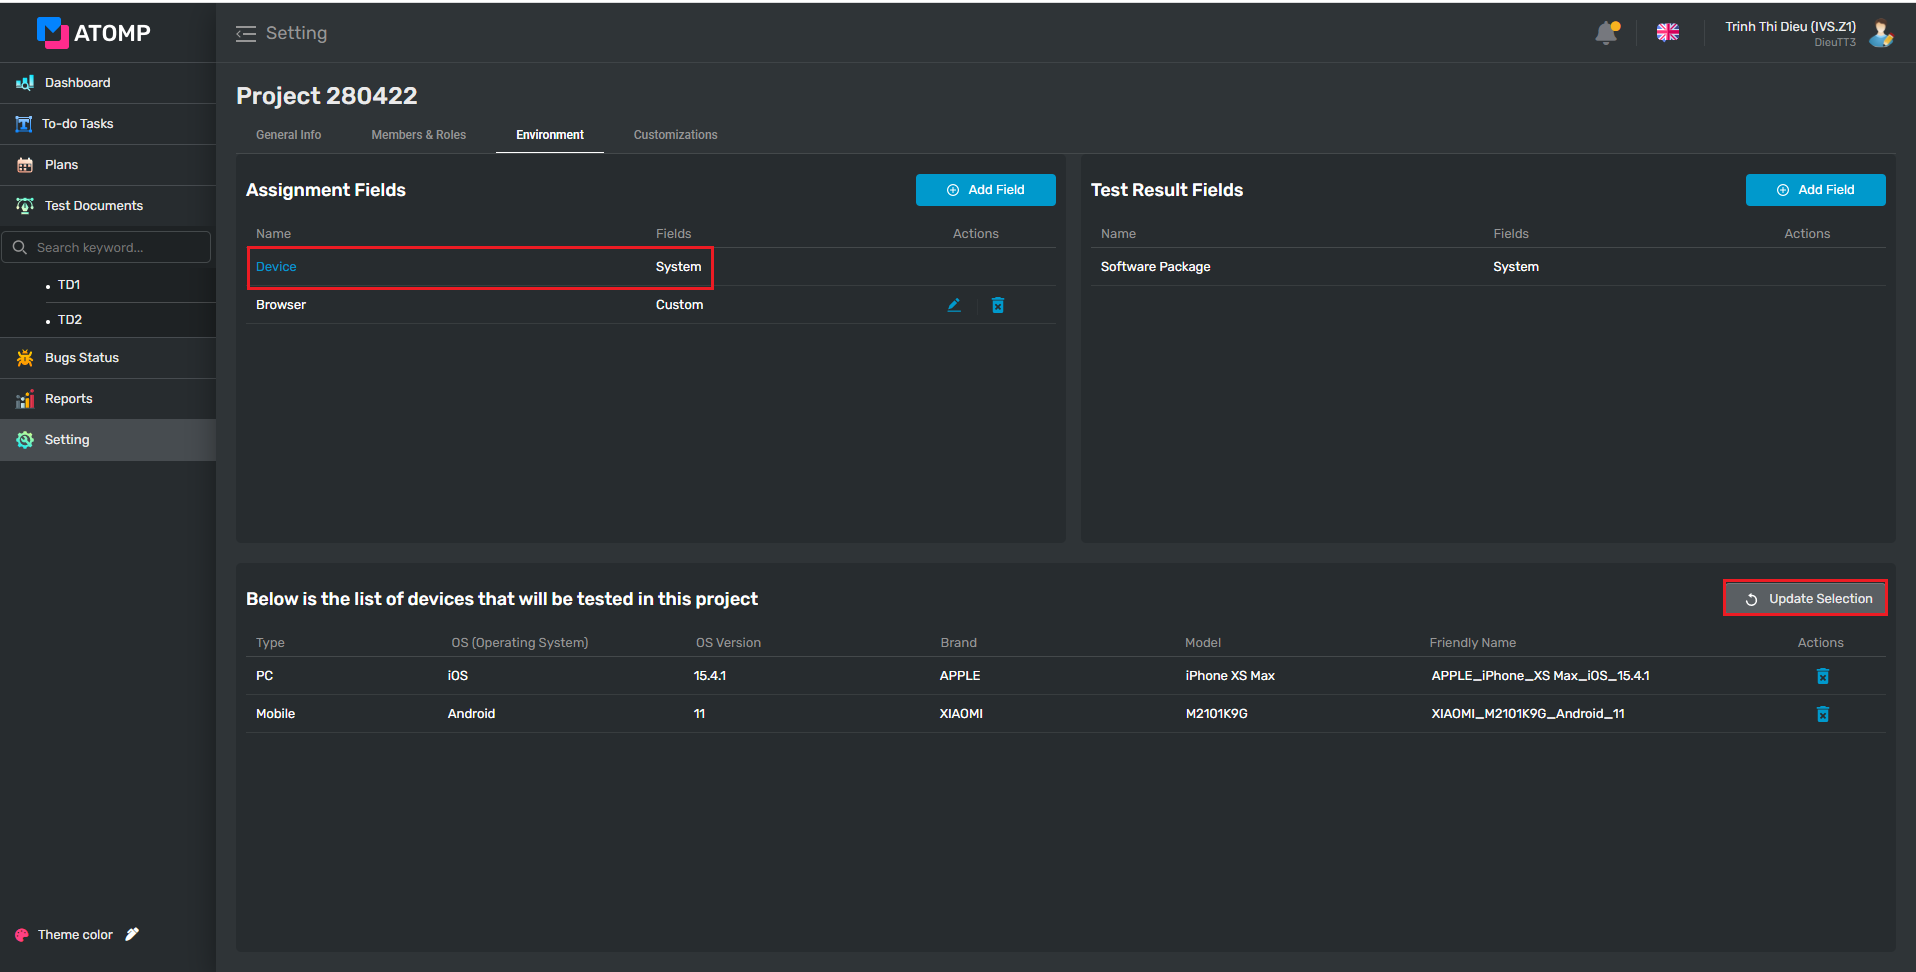
Assignment Fields manage information fields when user assigns test cases. The default value when initializing project is Device. PM can add assignment fields by following step:
Step1: Inside the Environment tab of the Setting screen, click on [Add Field] button. The Add Assignment Field pop up is displayed.

Step 2: Input Assignment field name then click on [Add] button. The added Assignment field will be displayed in Assignment Field.
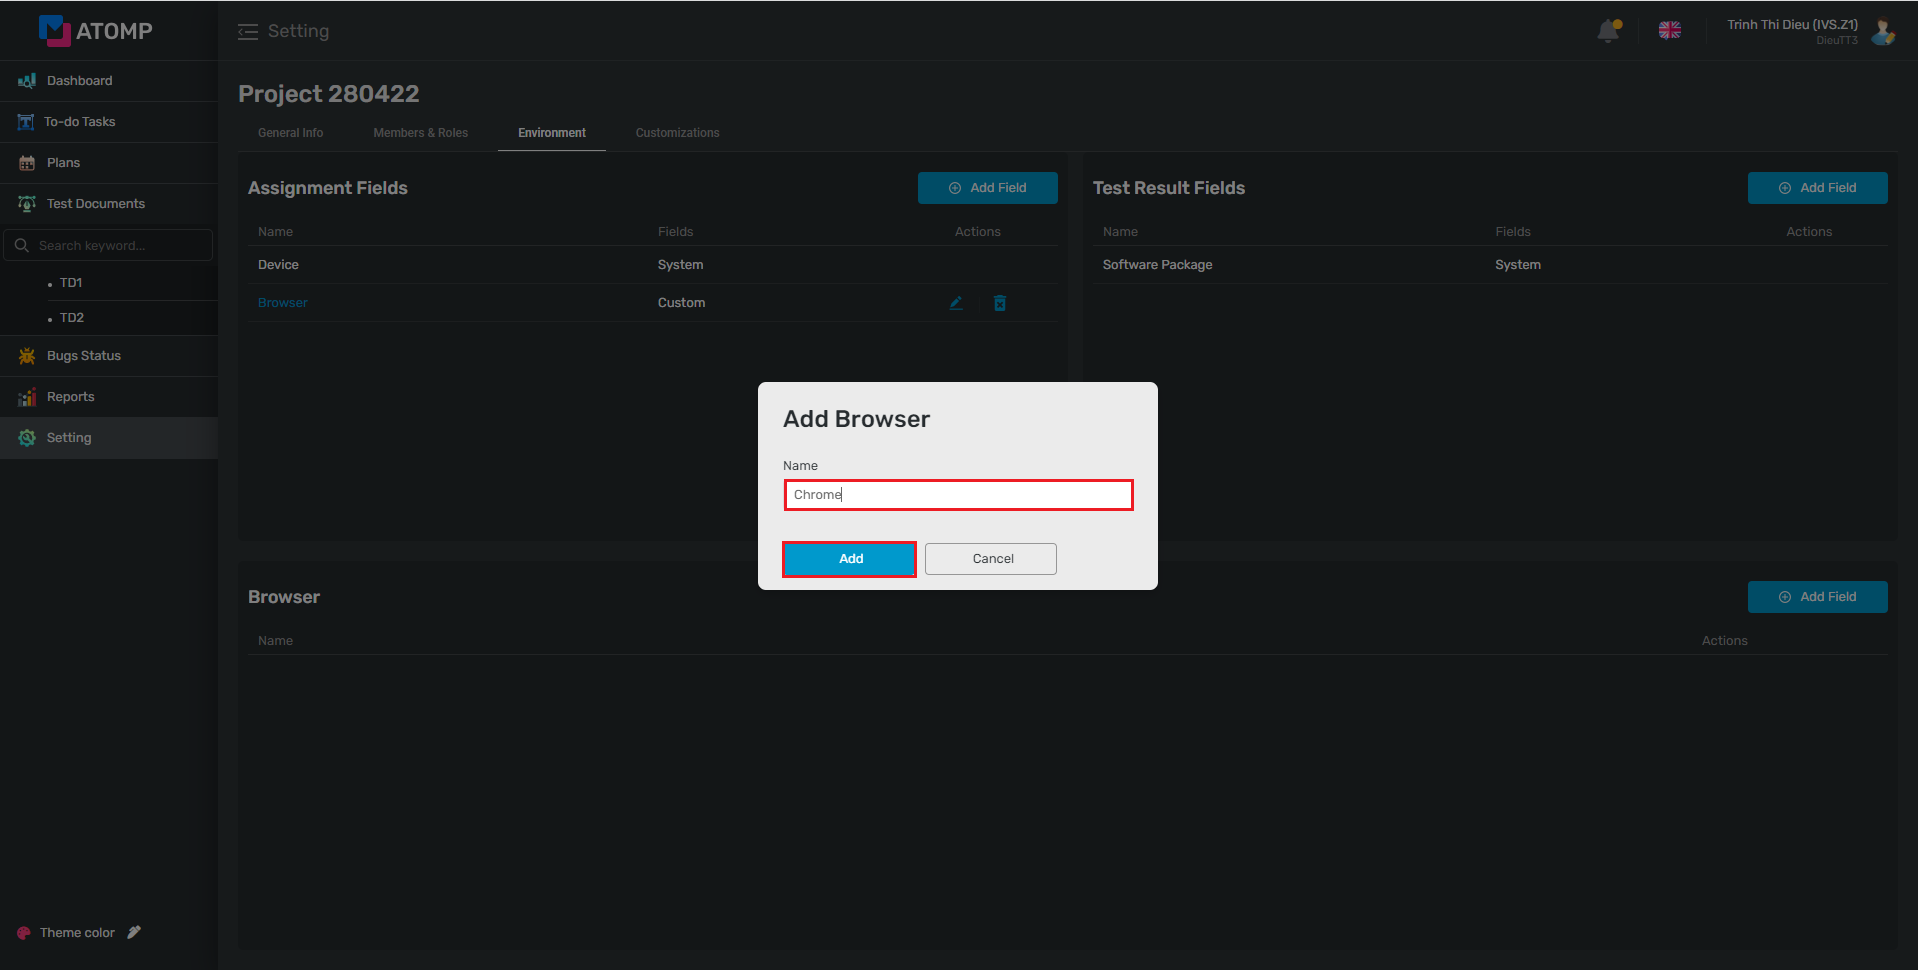
Step 3: Add the list of values for the created assignment fields by selecting the assignment field which you want to create then clicking on [Add Field] button. The Add Field pop up will be displayed.
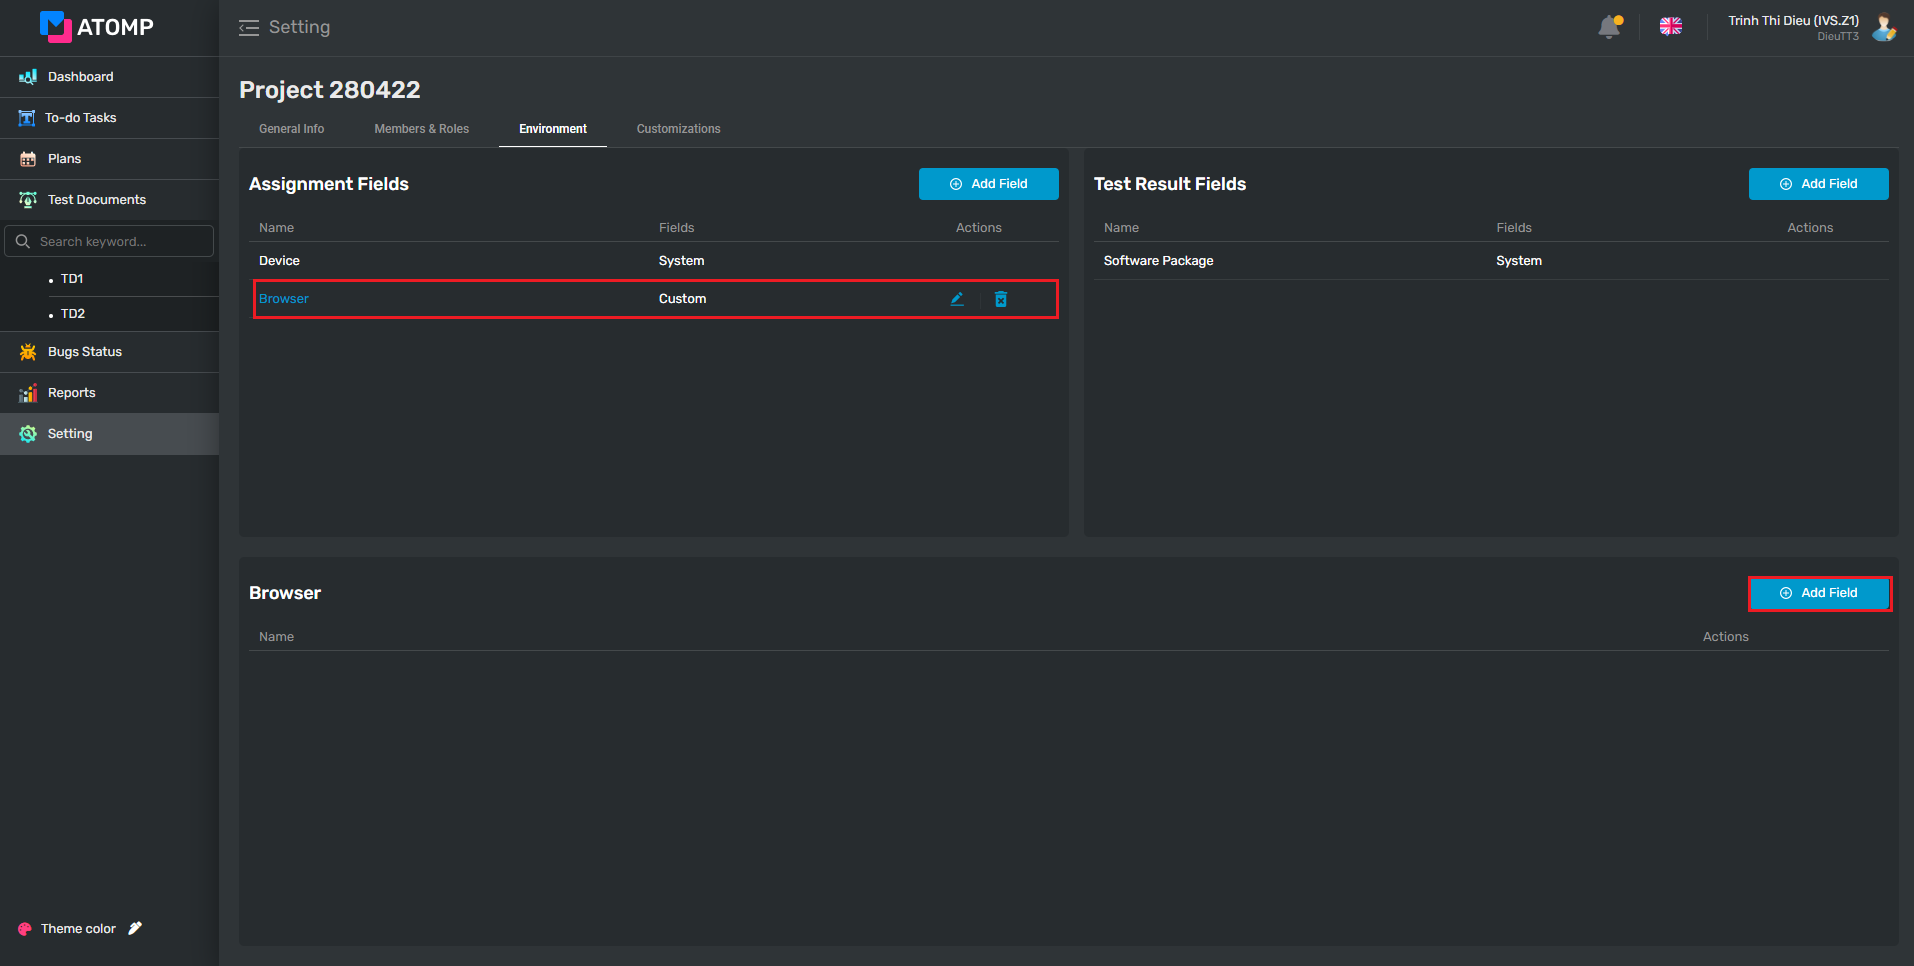
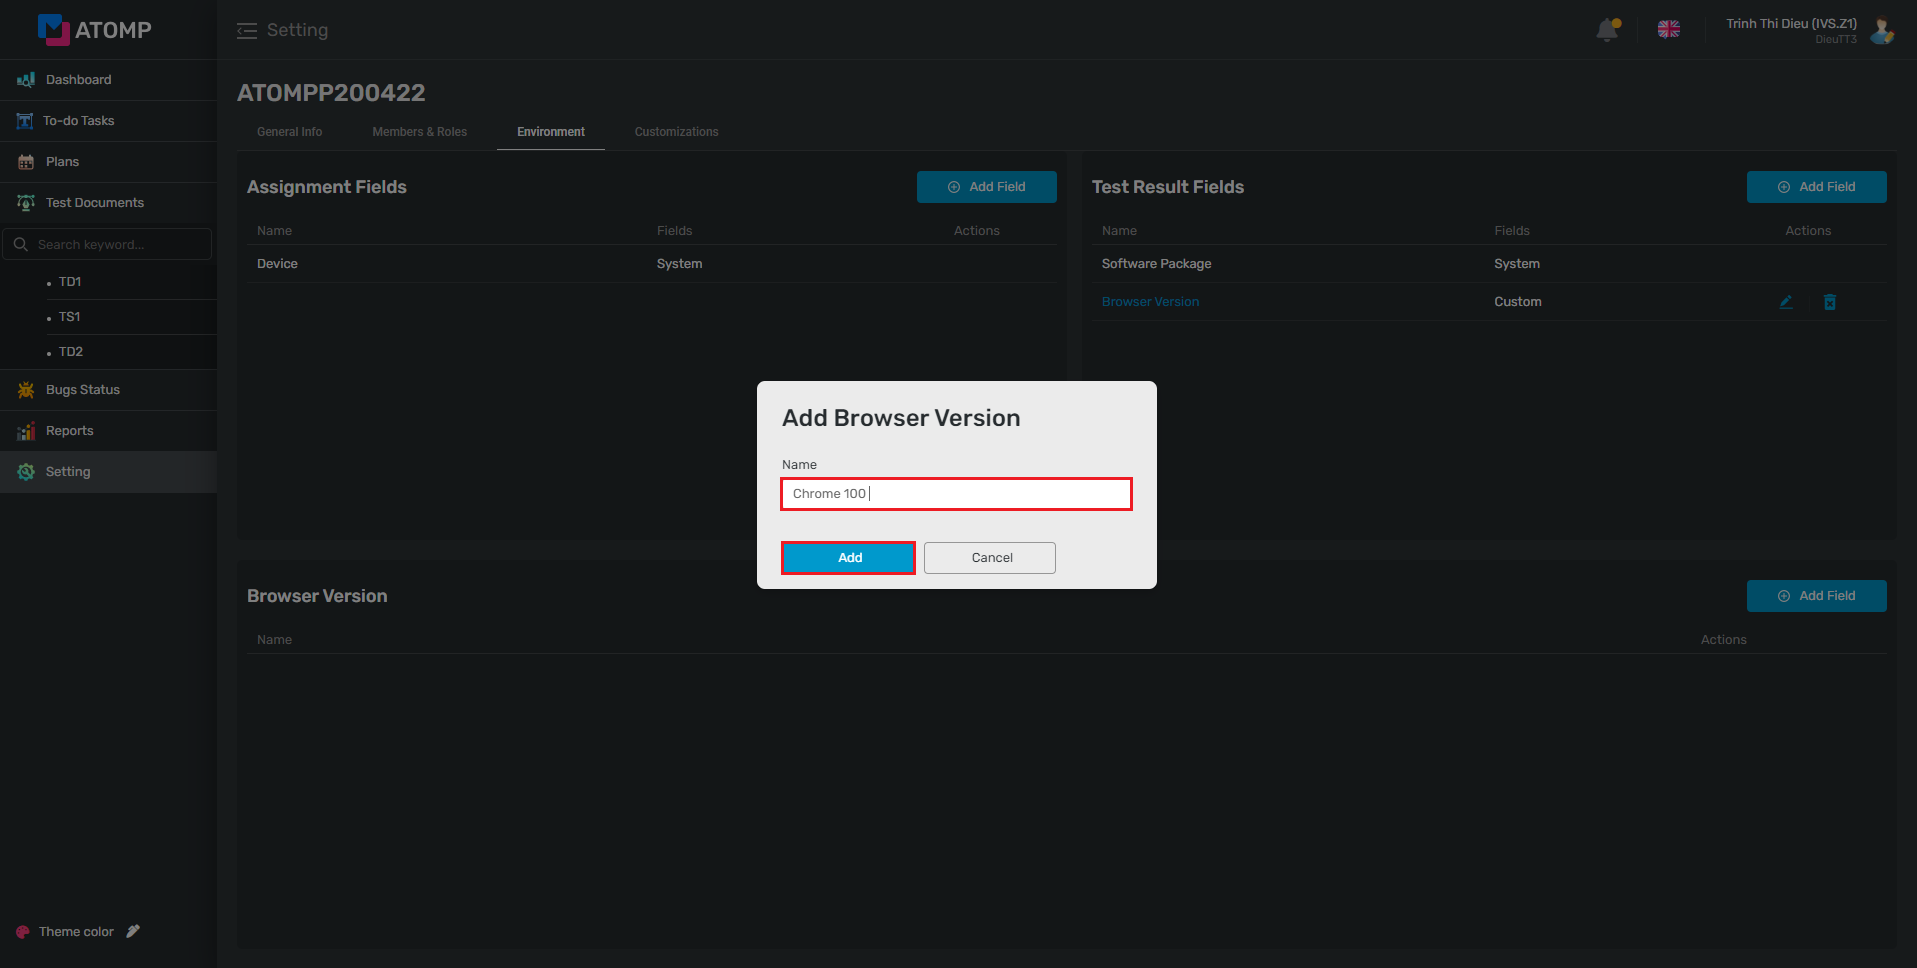
Step 4: Input assignment field’s name then click on [Add] button.
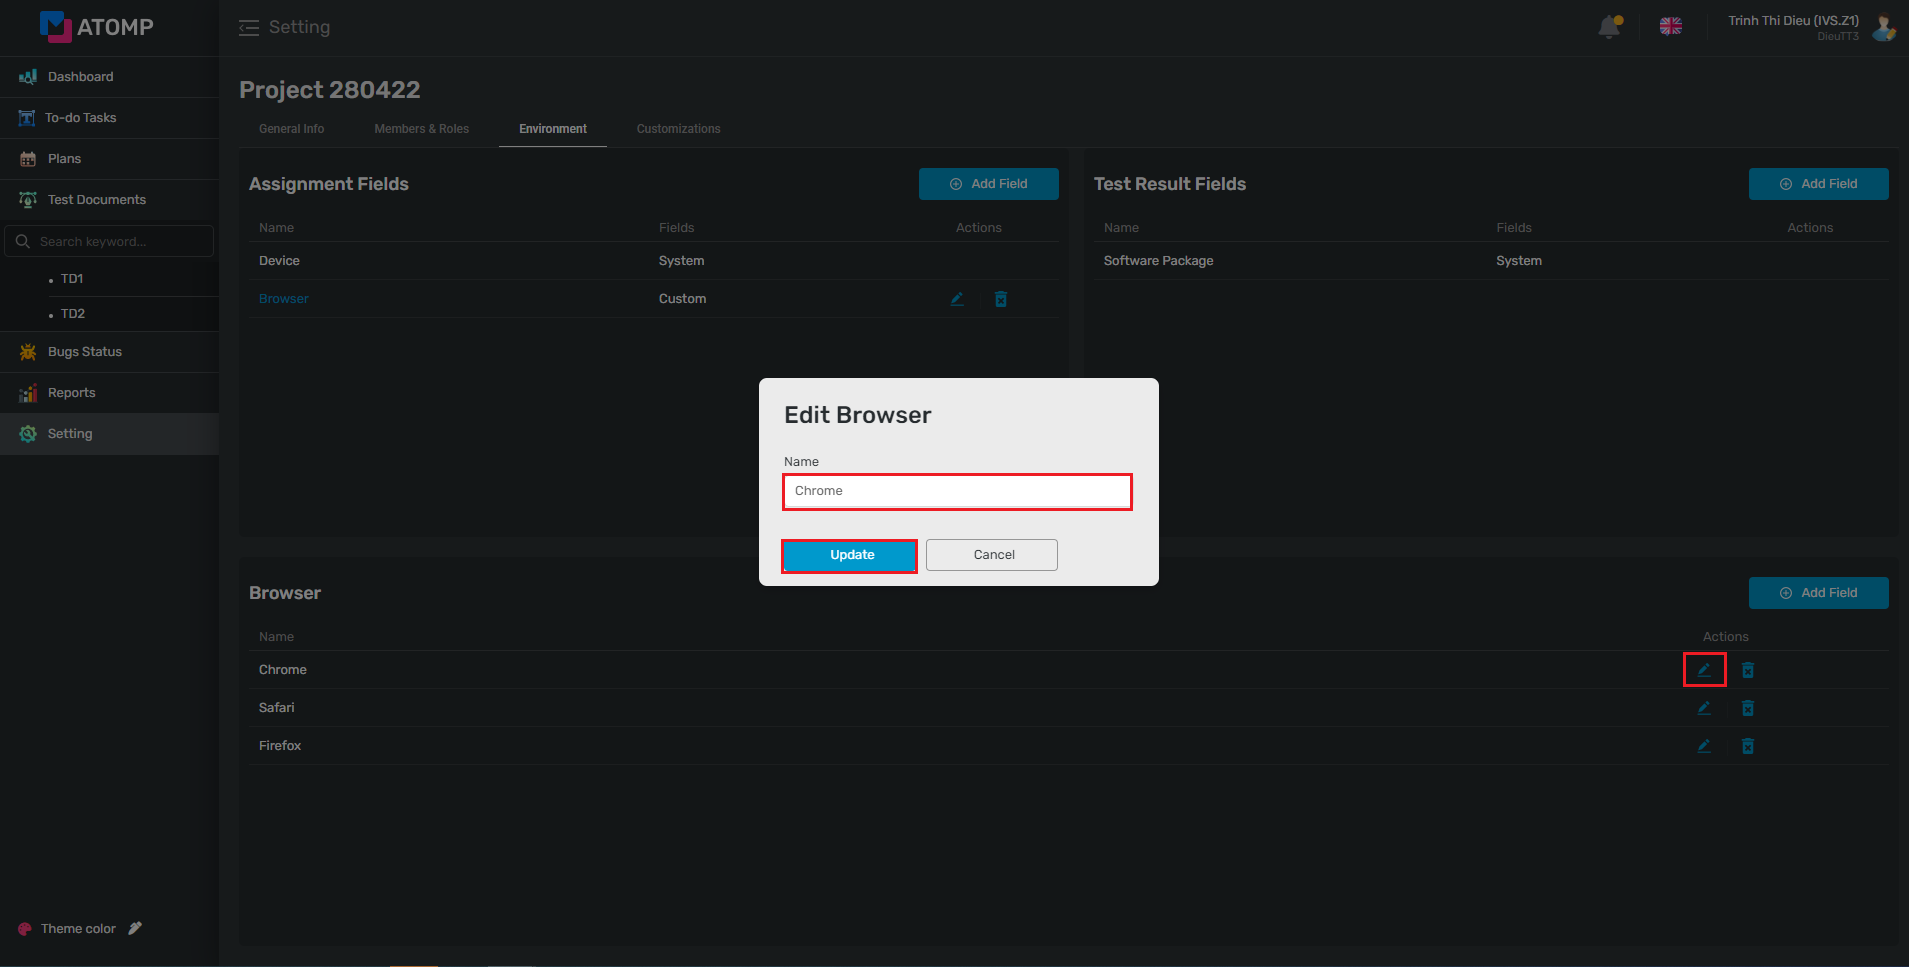
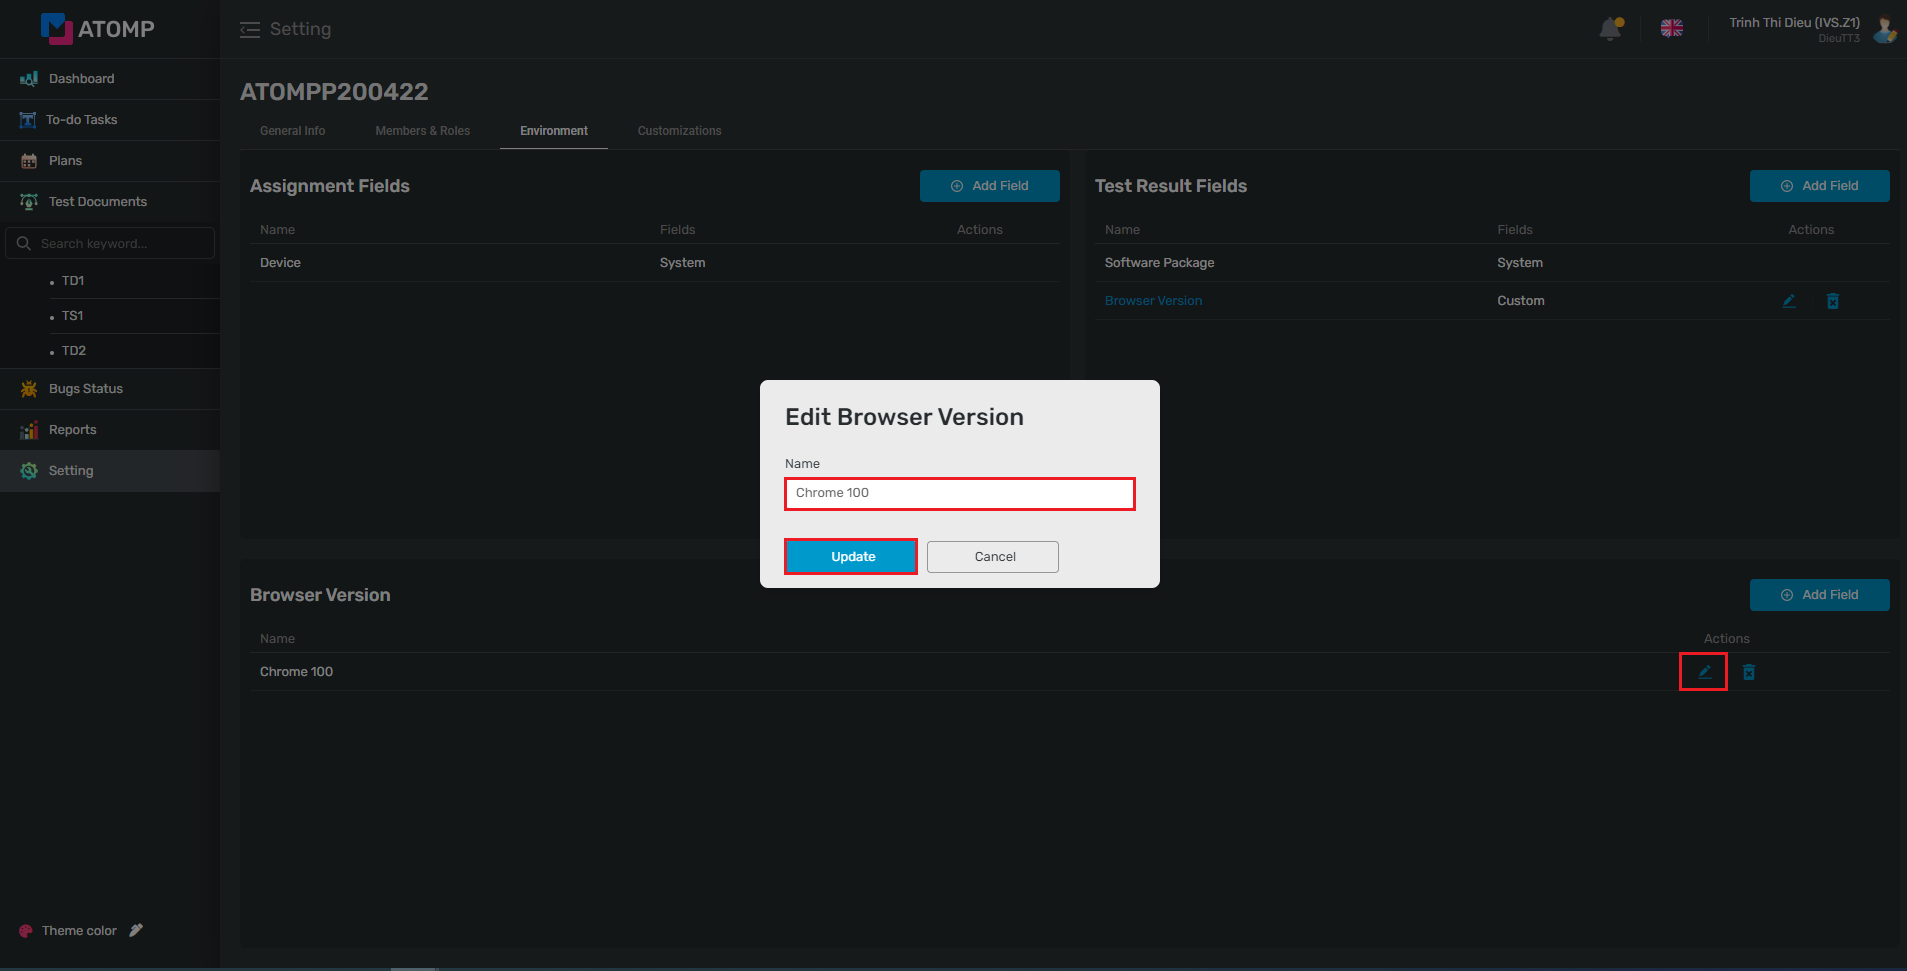
Step 5: Click on the icon  to edit field(s) that user wants => The “Edit field” pop up will be displayed => Input new name then click the on [Update] button.
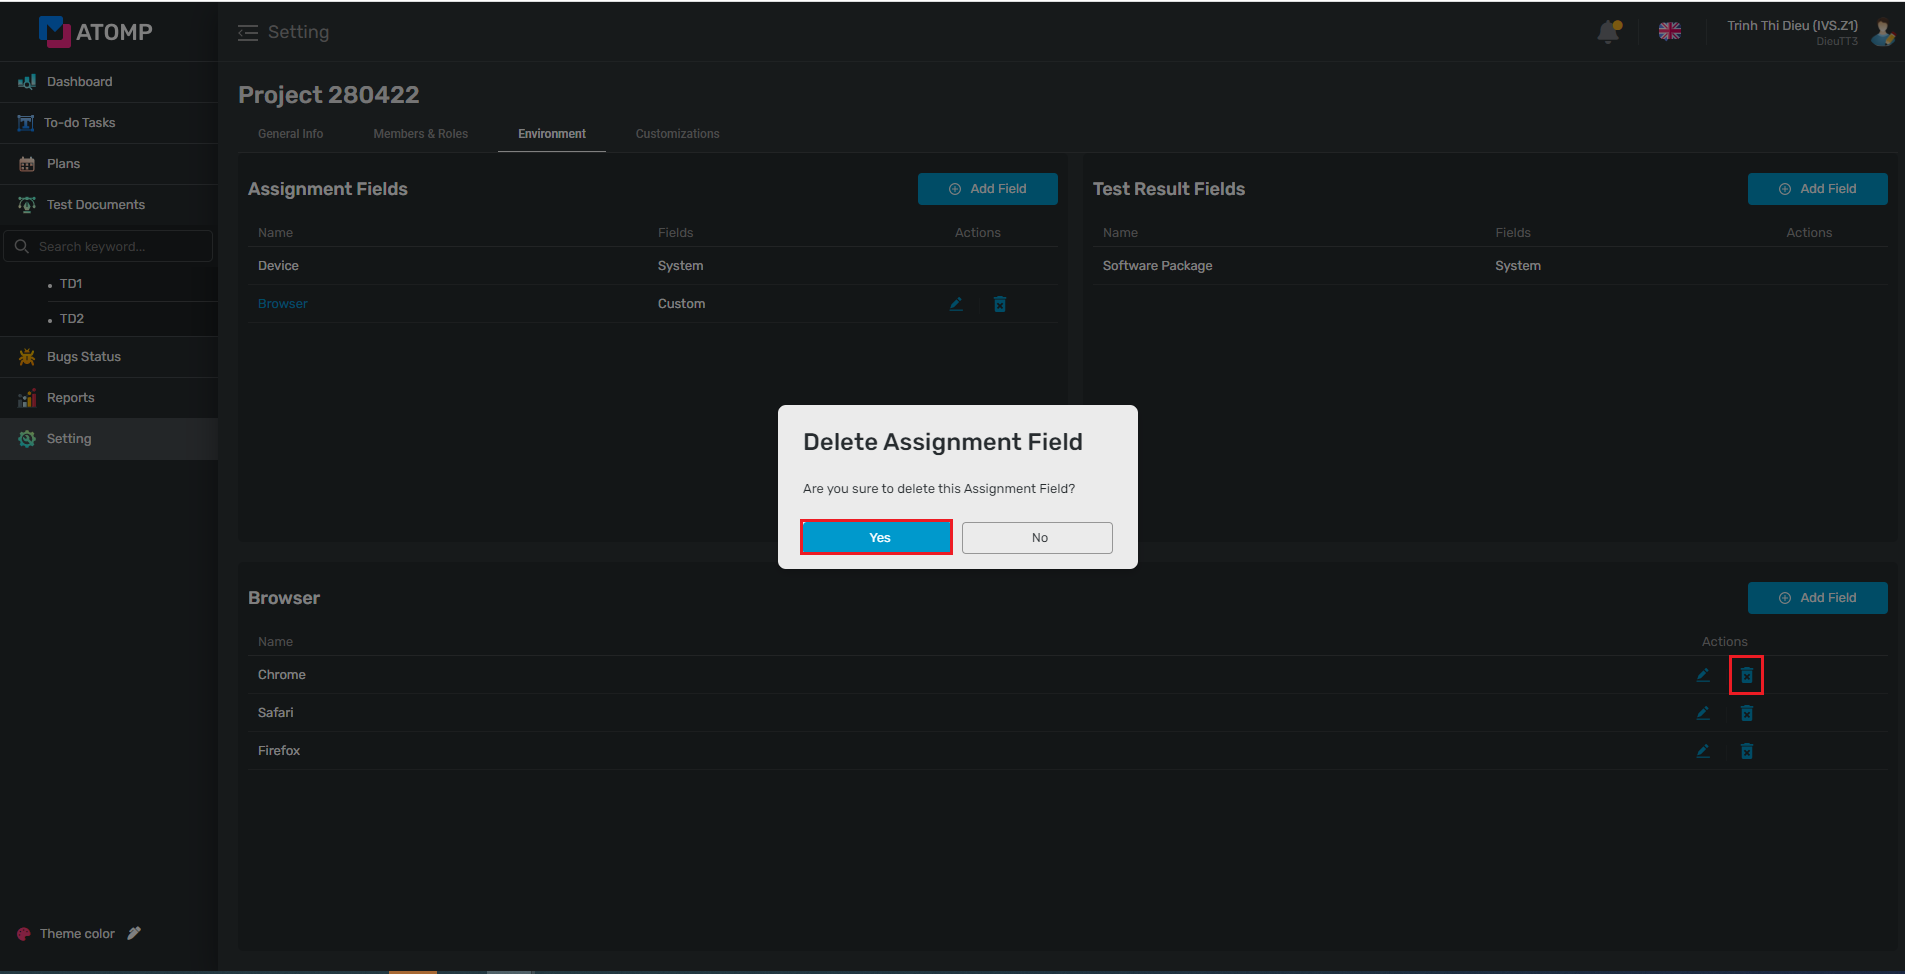
Step 6: Click on the icon  to delete field(s) that user wants => The “Delete Assignment Field” pop up will be displayed => Click [Yes] button.
If the PM is selecting devices for this project for the first time, please follow these steps:
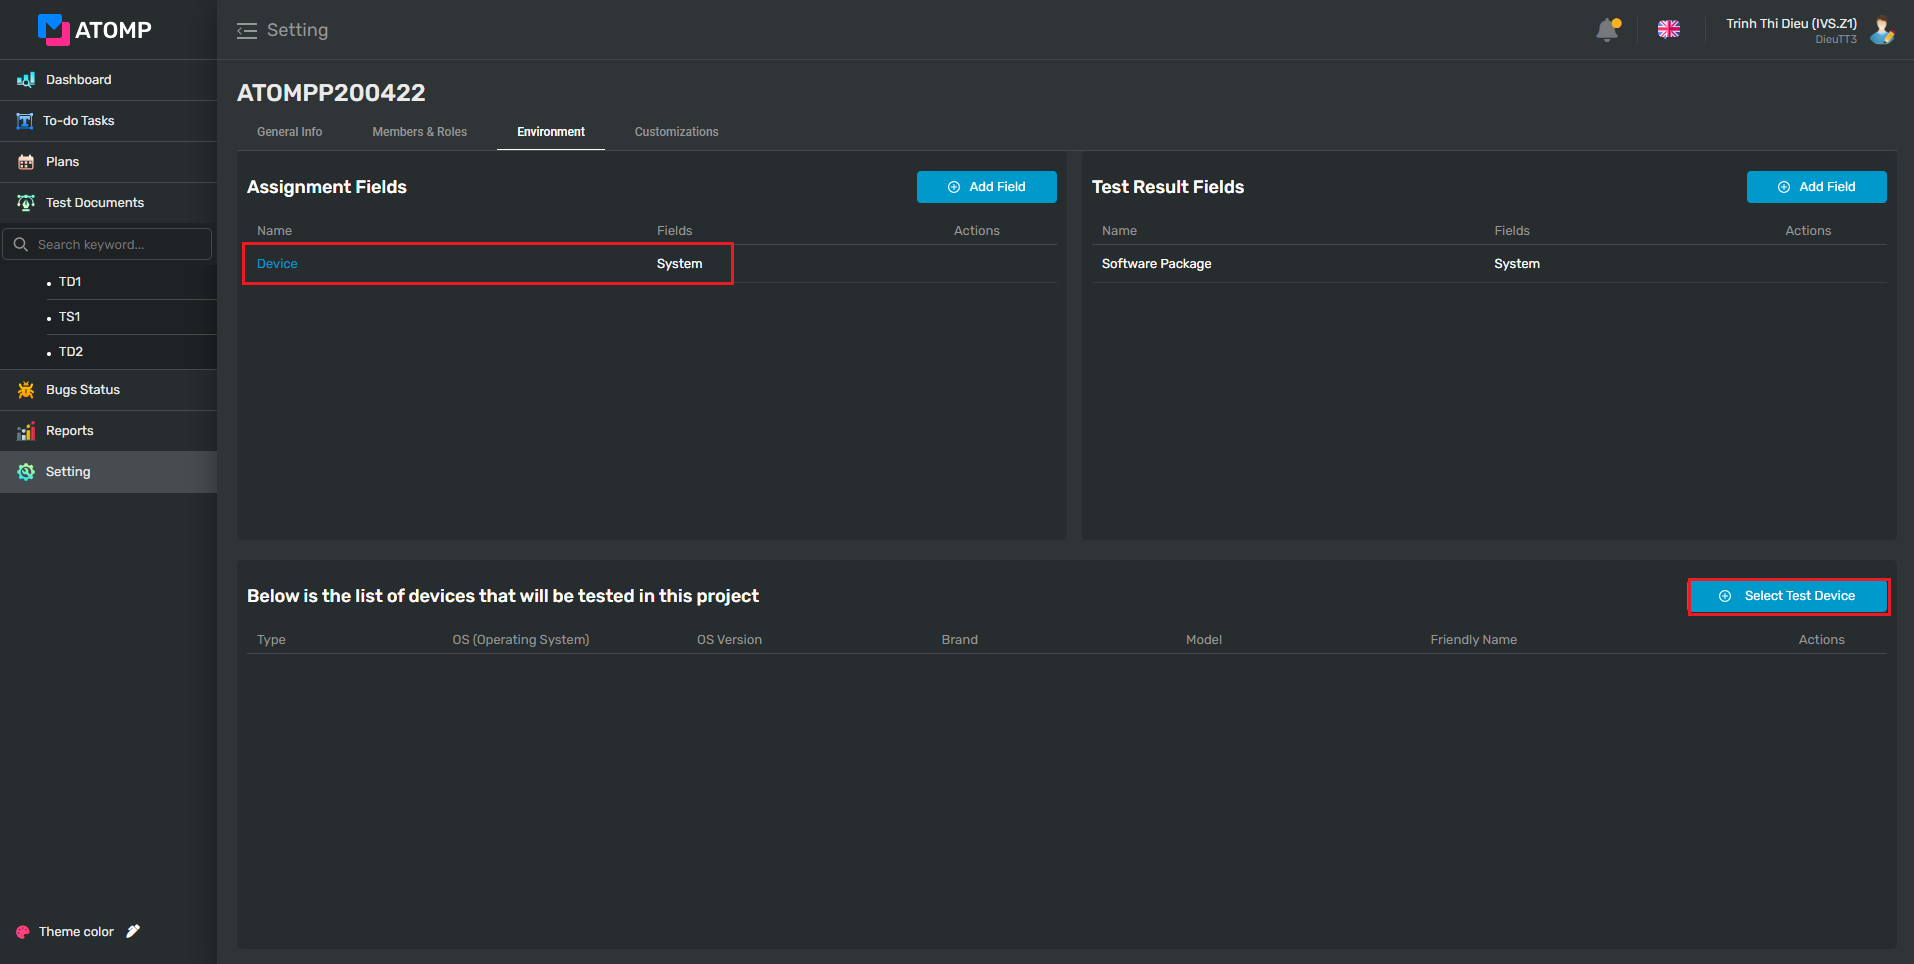
Step 1: Select Device field.
Step 2: Click on [Select Test Device] button => The Select Device pop up will be displayed.
Step 3: In this Select Device pop , check one or more checkboxes to select device(s) which you want to use for this project => Click on [Add device] button => A toast message “Select Successful” will be displayed.

Step 4: Click on the icon  to delete device(s) that user wants => The “Delete Item” pop up will be displayed => Click [Yes] button => A toast message “Unselect Successful” will be displayed.
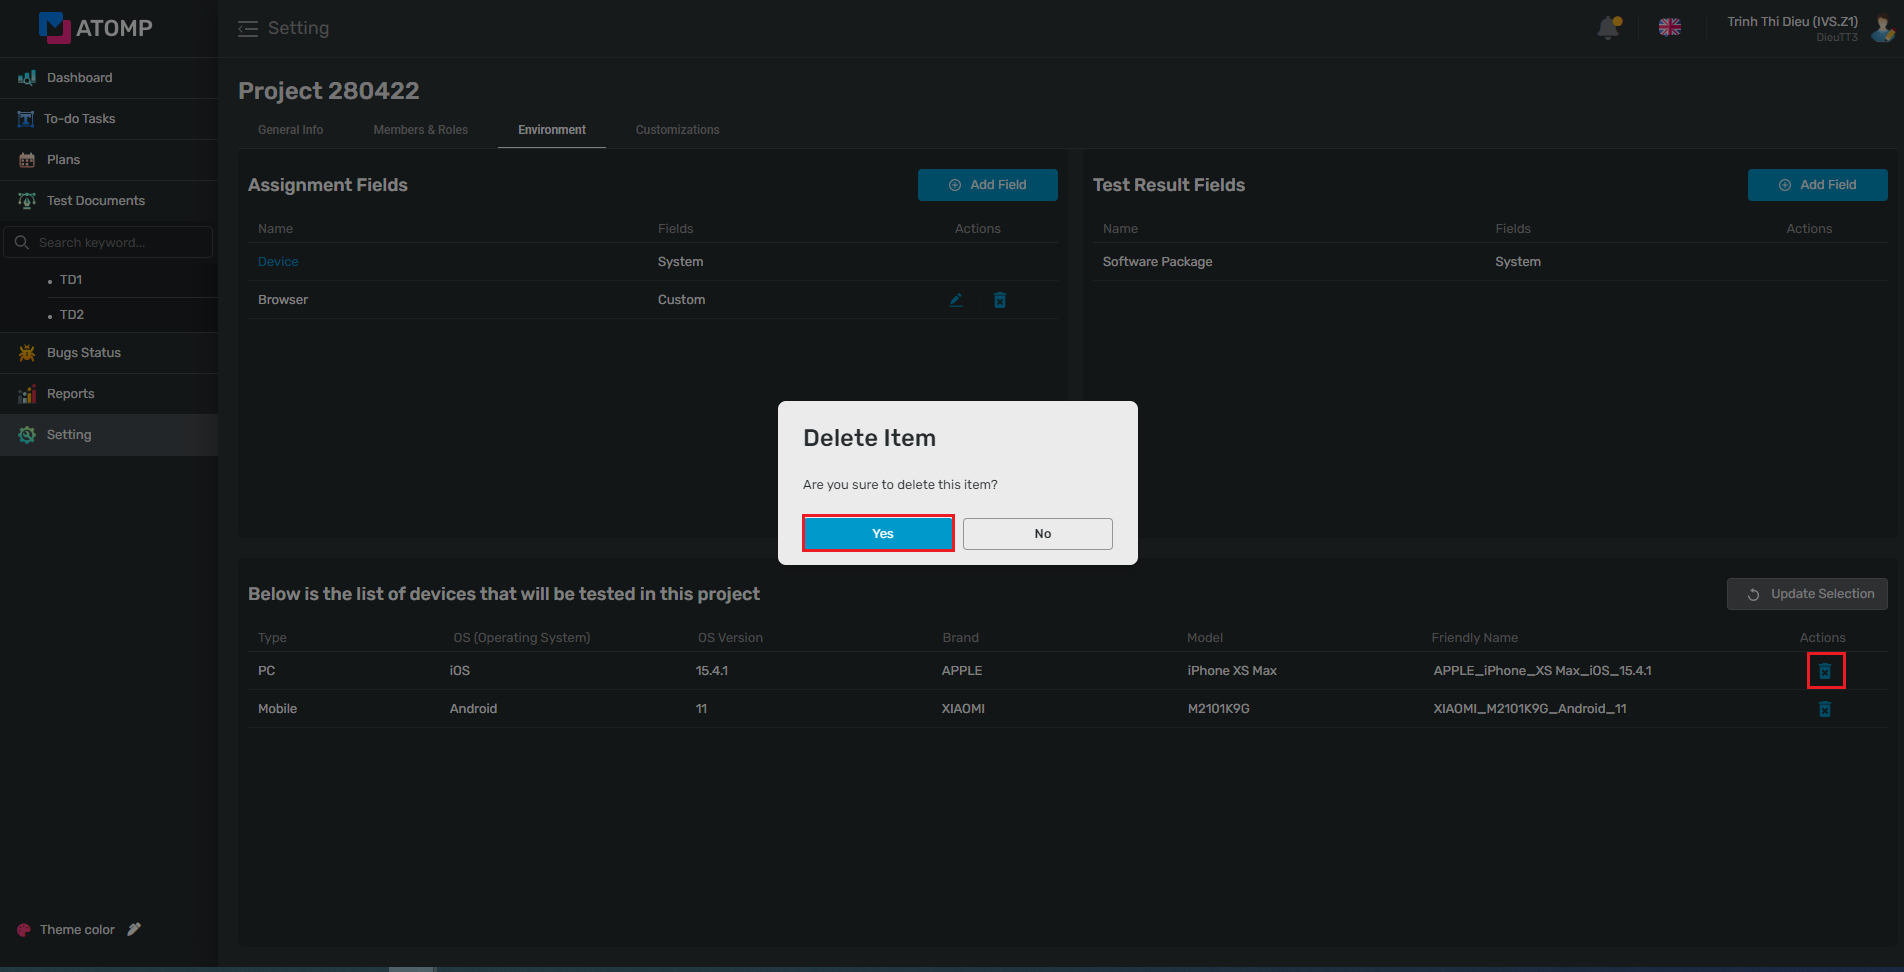
Note: When the list “Test Device” has data, if you want to select more devices for your project, please click on [Update Selection] button and repeat step 2 & step 3 as above.
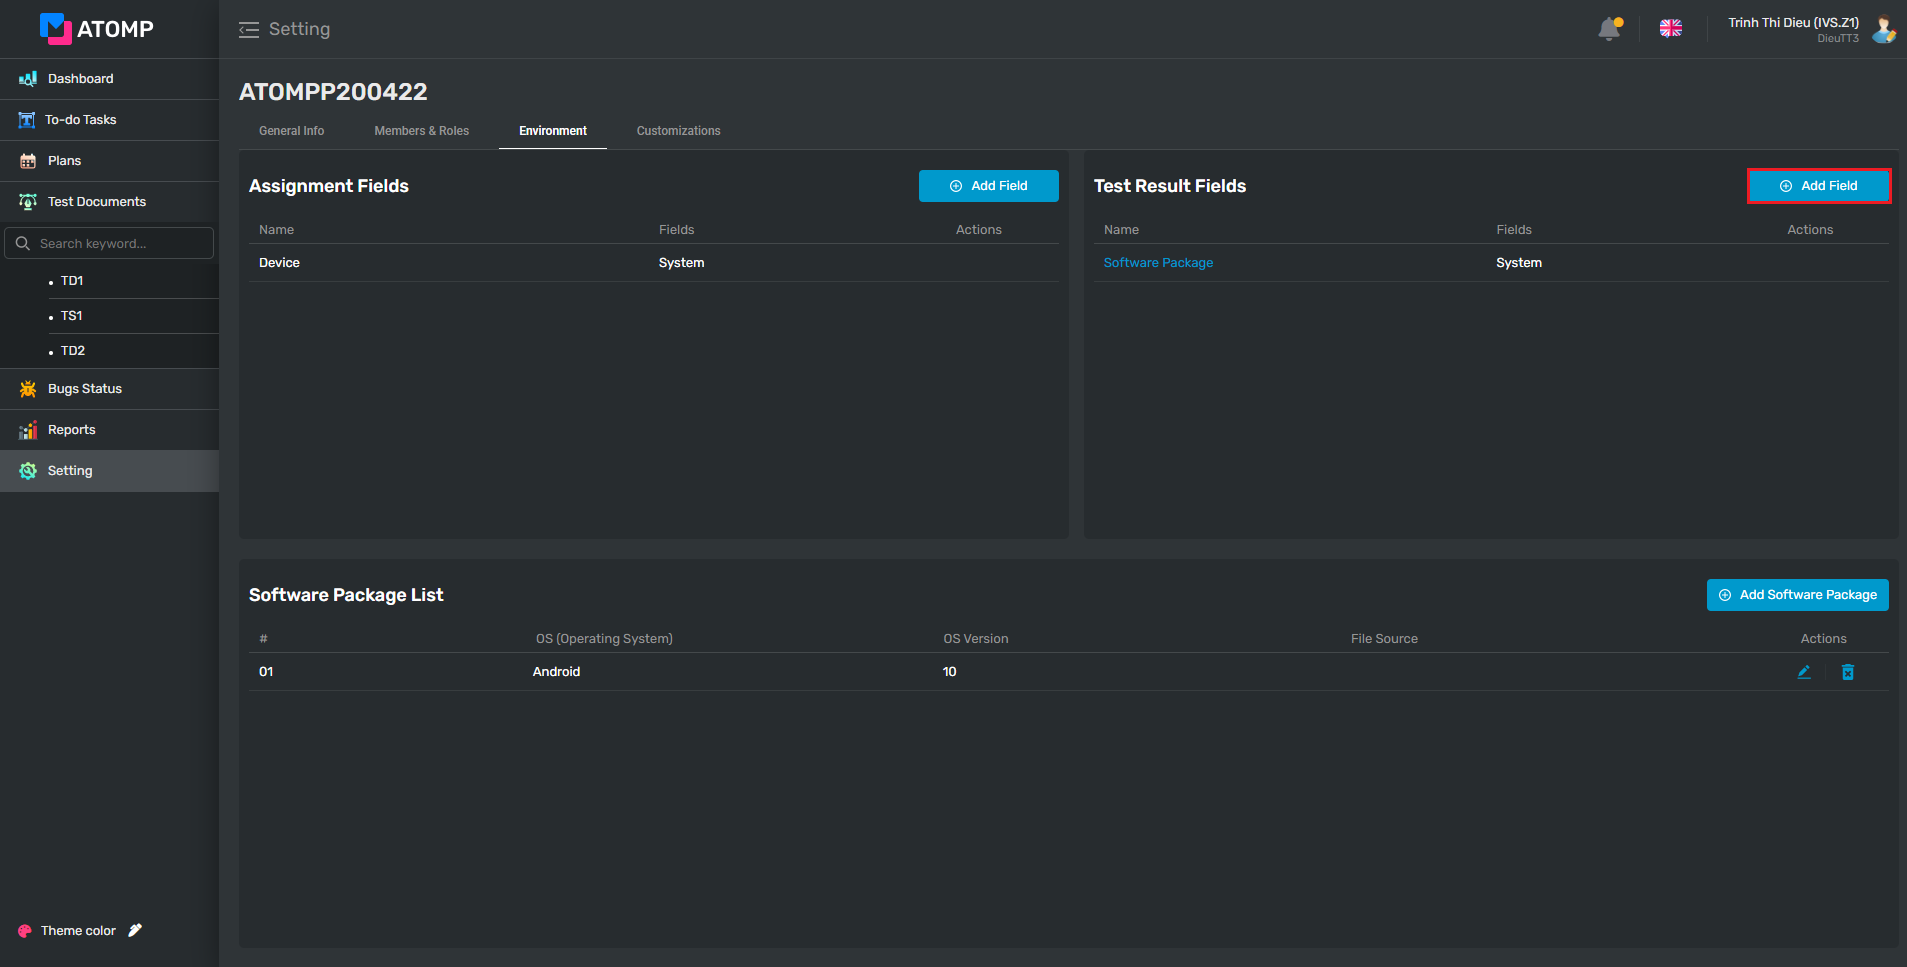
2. Test result field
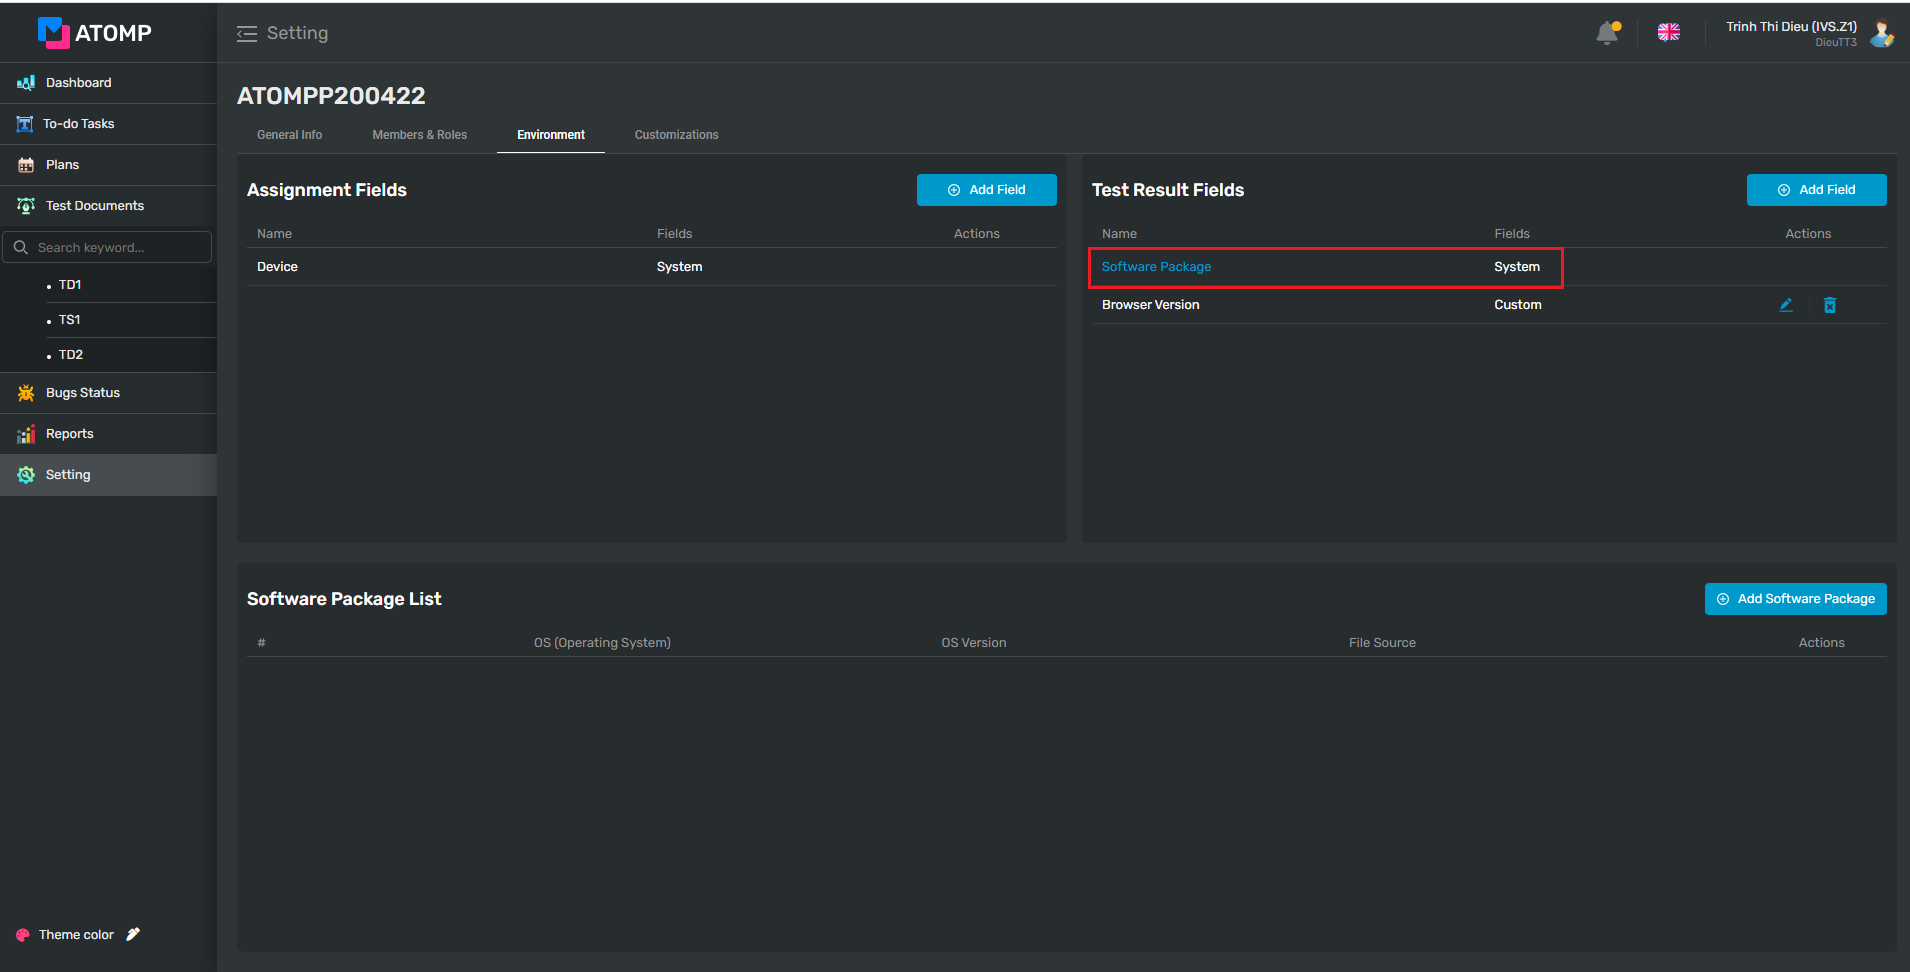
Test result field is used to manage information field when filling in test case results. The default value when initializing project is Software Package. PM can add test fields by follow:
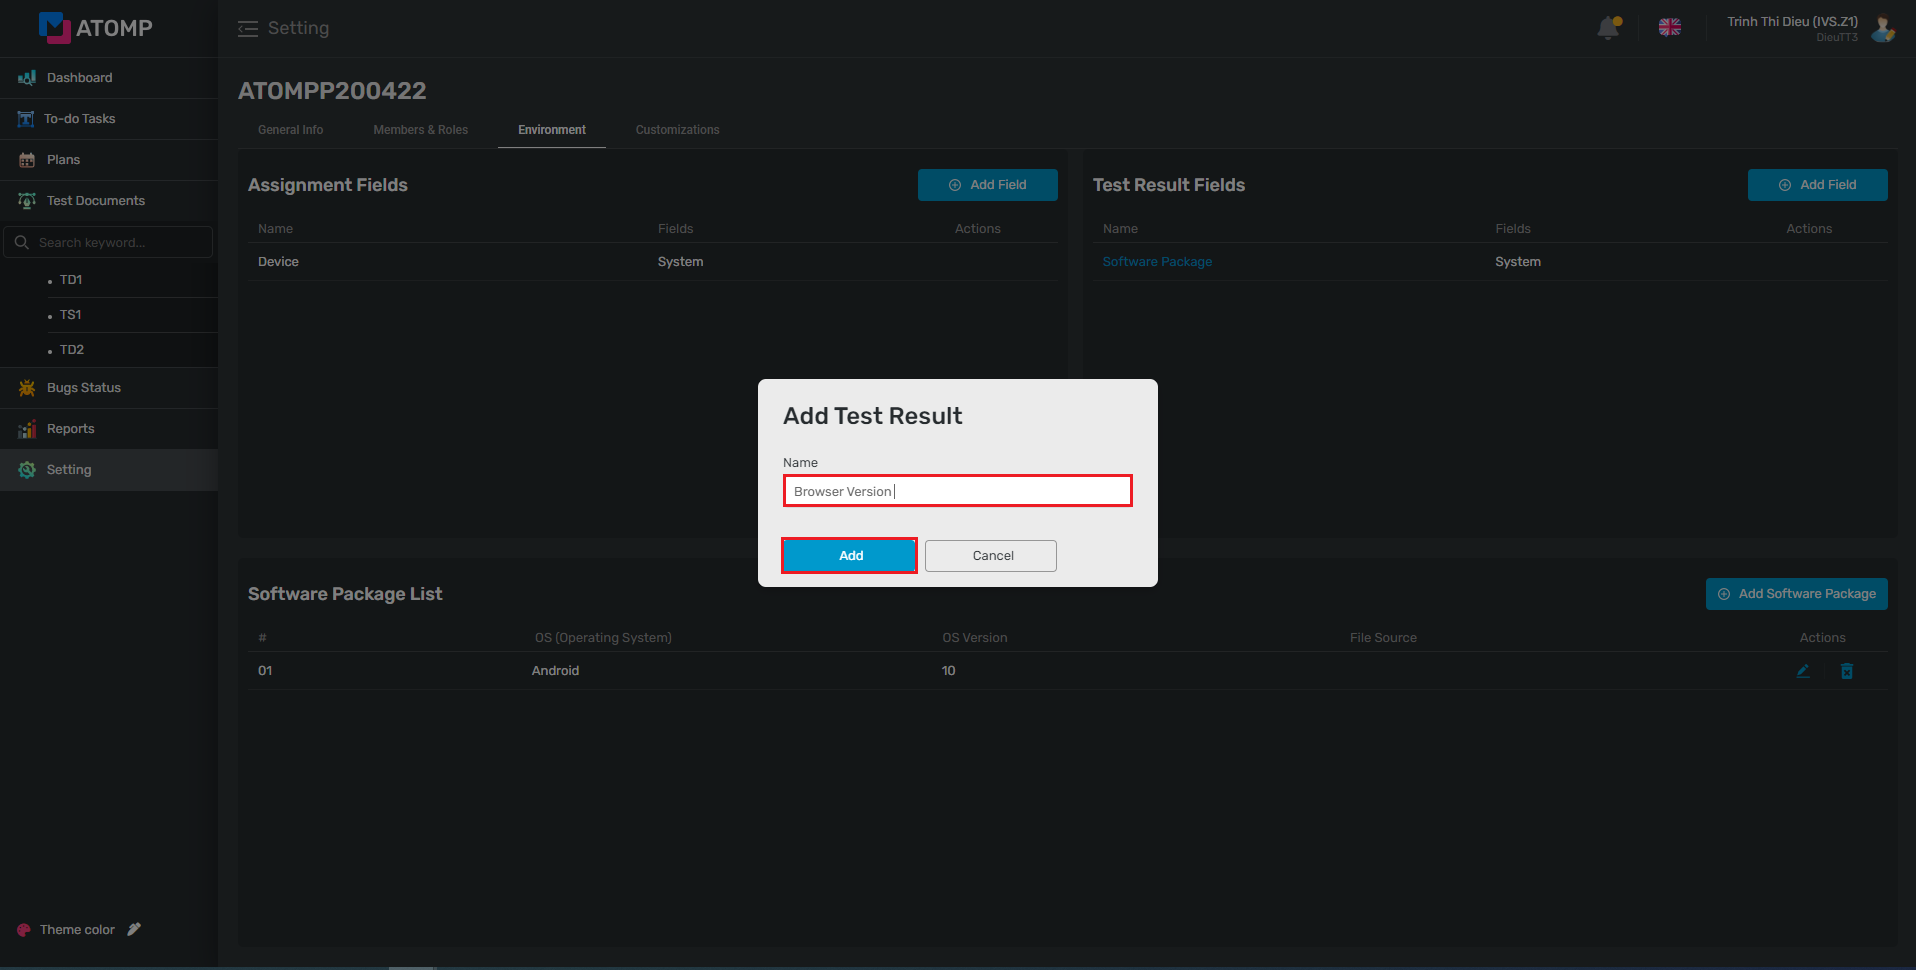
Step 1: Inside the Environment tab of the Setting screen, click on [Add Field] button. The Add Test Result Field pop is displayed.
Step 2: Input test result field name then click on [Add] button. The added test result field will be displayed in list of test result field.
Step 3: Add the list of values for the created test result fields by selecting the test result field which you want to create then clicking on [Add Field] button. The Add Field pop up will be displayed.
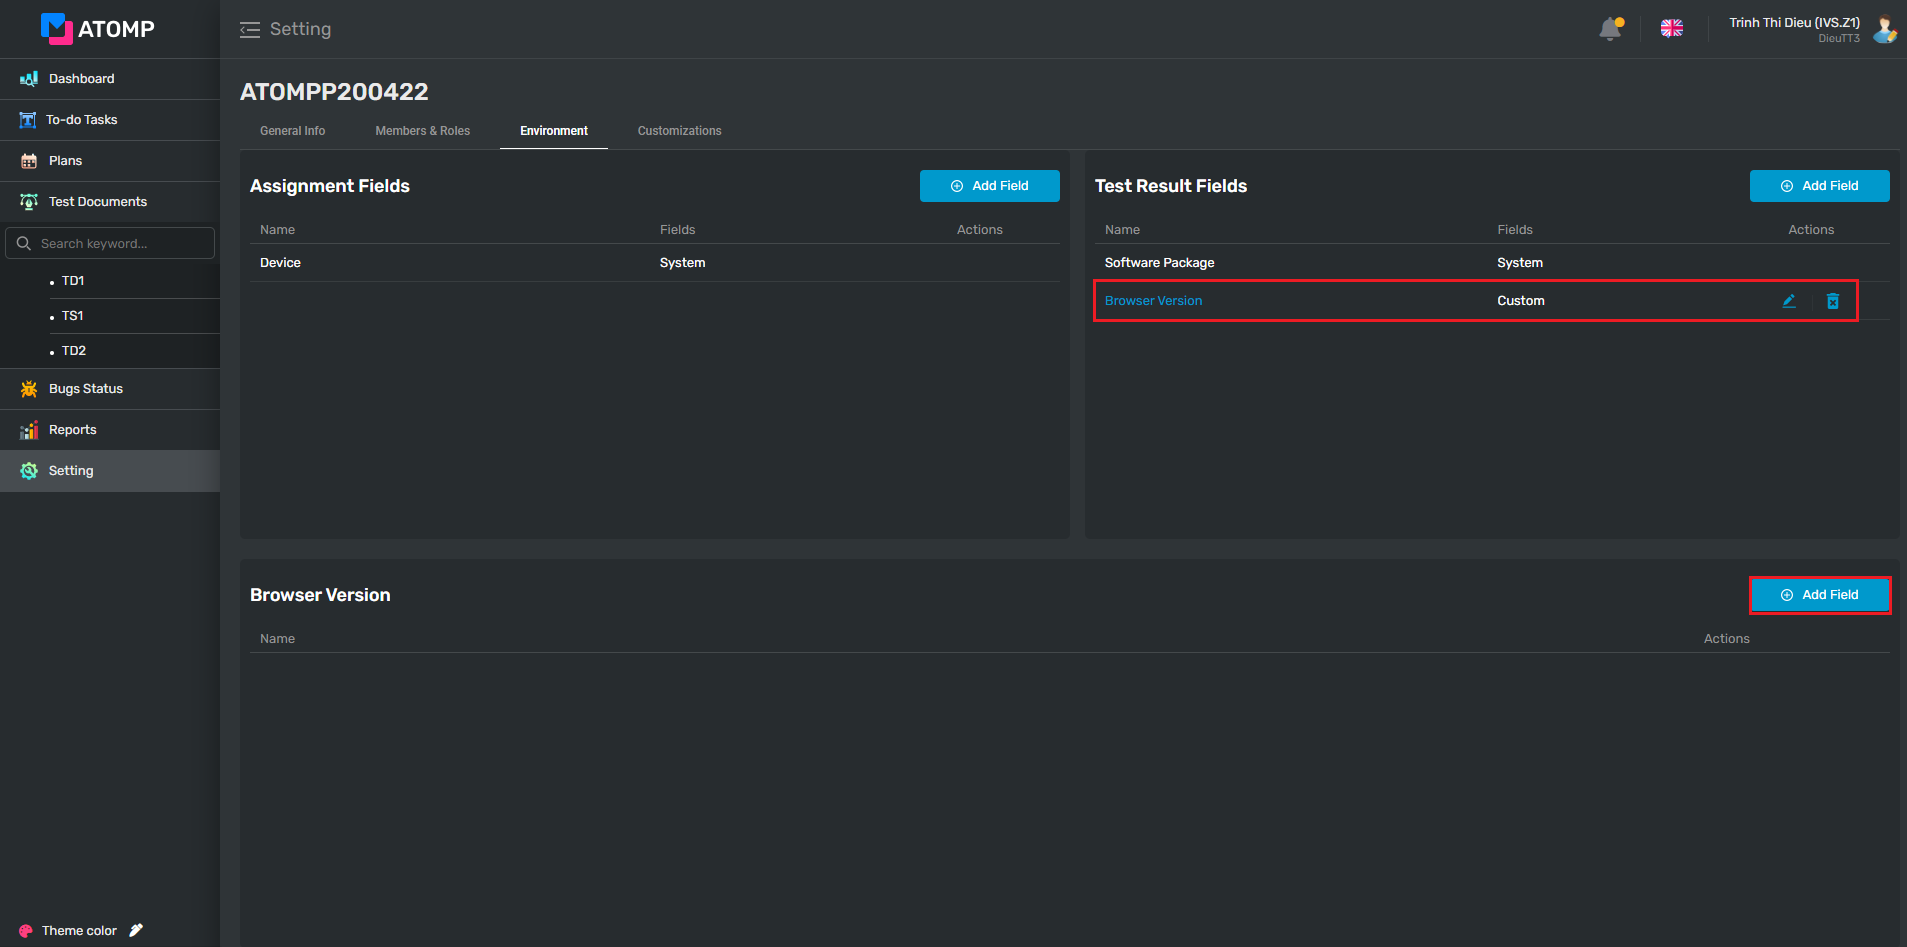
Step 4: Input test result field’s name then clicking on [Add] button.
Step 5: Click on the edit icon to edit fields that user wants => The “Edit field” pop up will be displayed => Input new name then click on [Update] button.
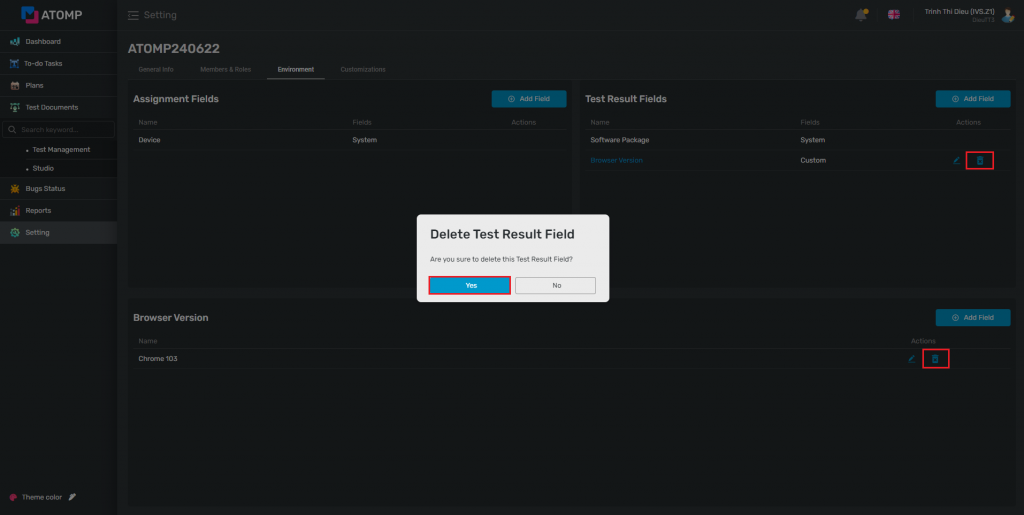
Step 6: Click on the remove icon to delete field(s) that user wants => The “Delete Test Result Field” pop up will be displayed => Click on [Yes] button.
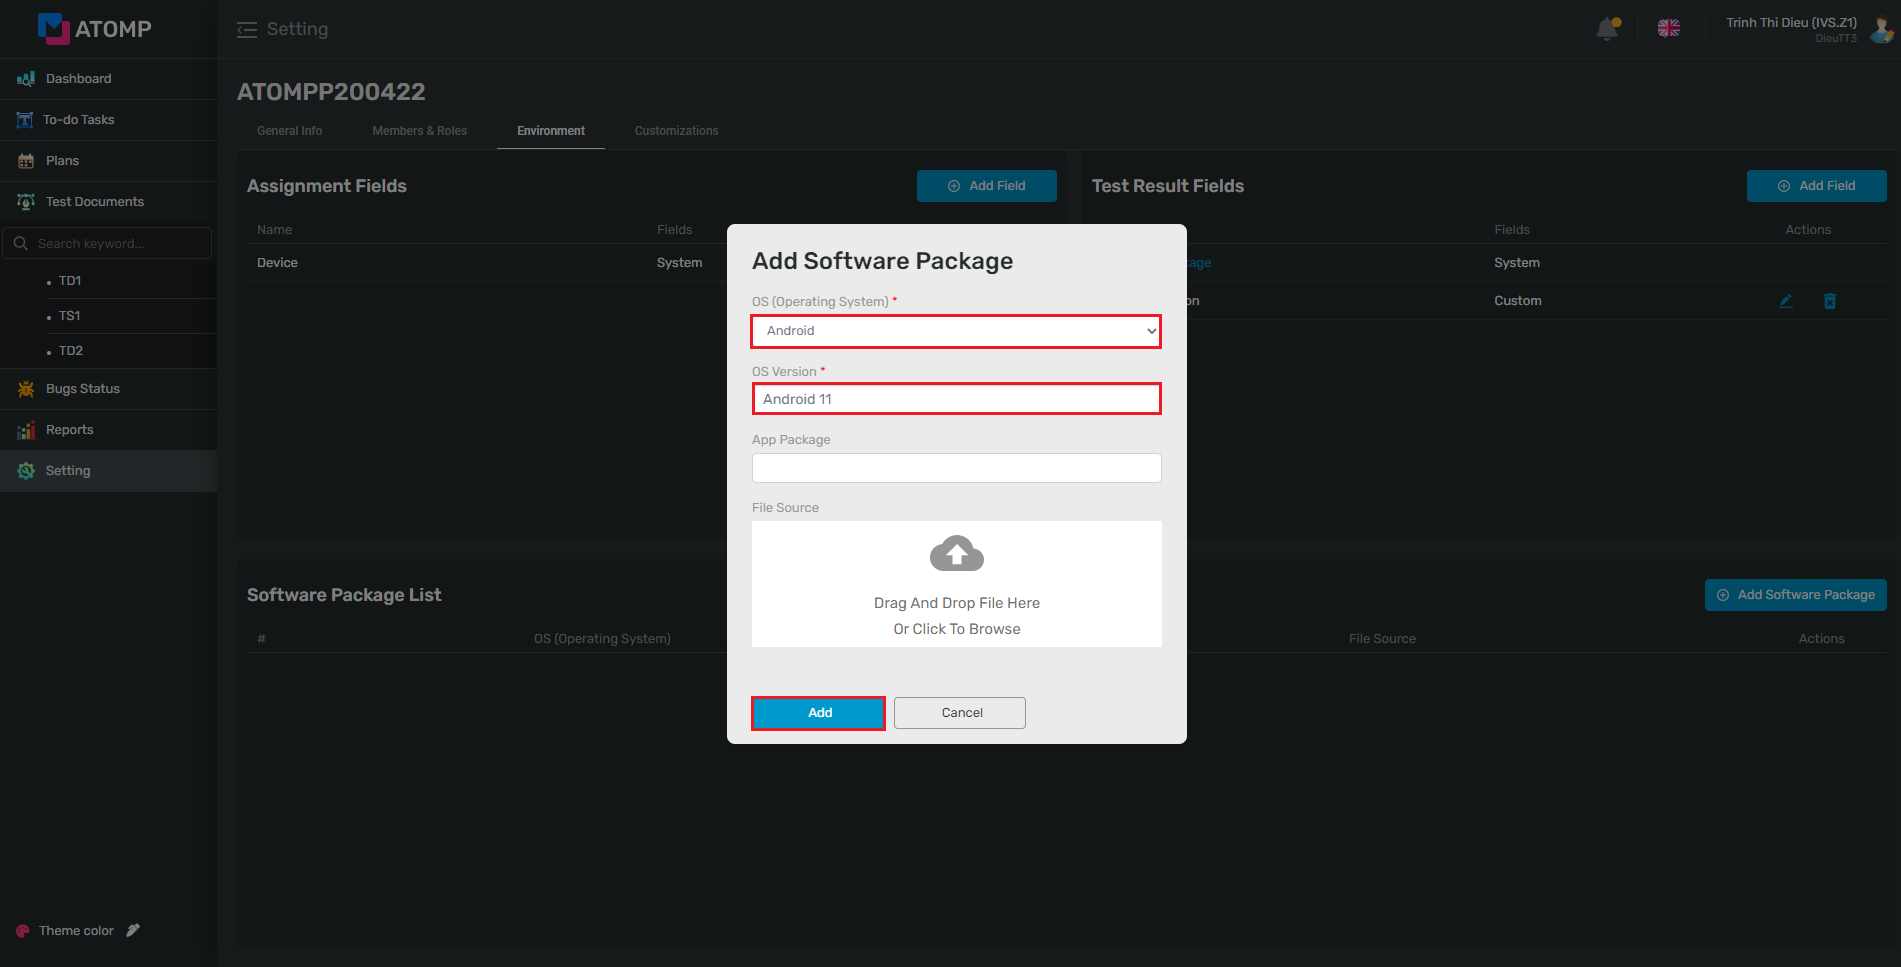
In the Project, PM can add software packages in 6 steps bellow:
Step 1: Inside the Environment tab of the Setting screen, select Software Package in Test Result Field.
Step 2: Click on [Add Software Package] button. The Add Software Package pop up is displayed.
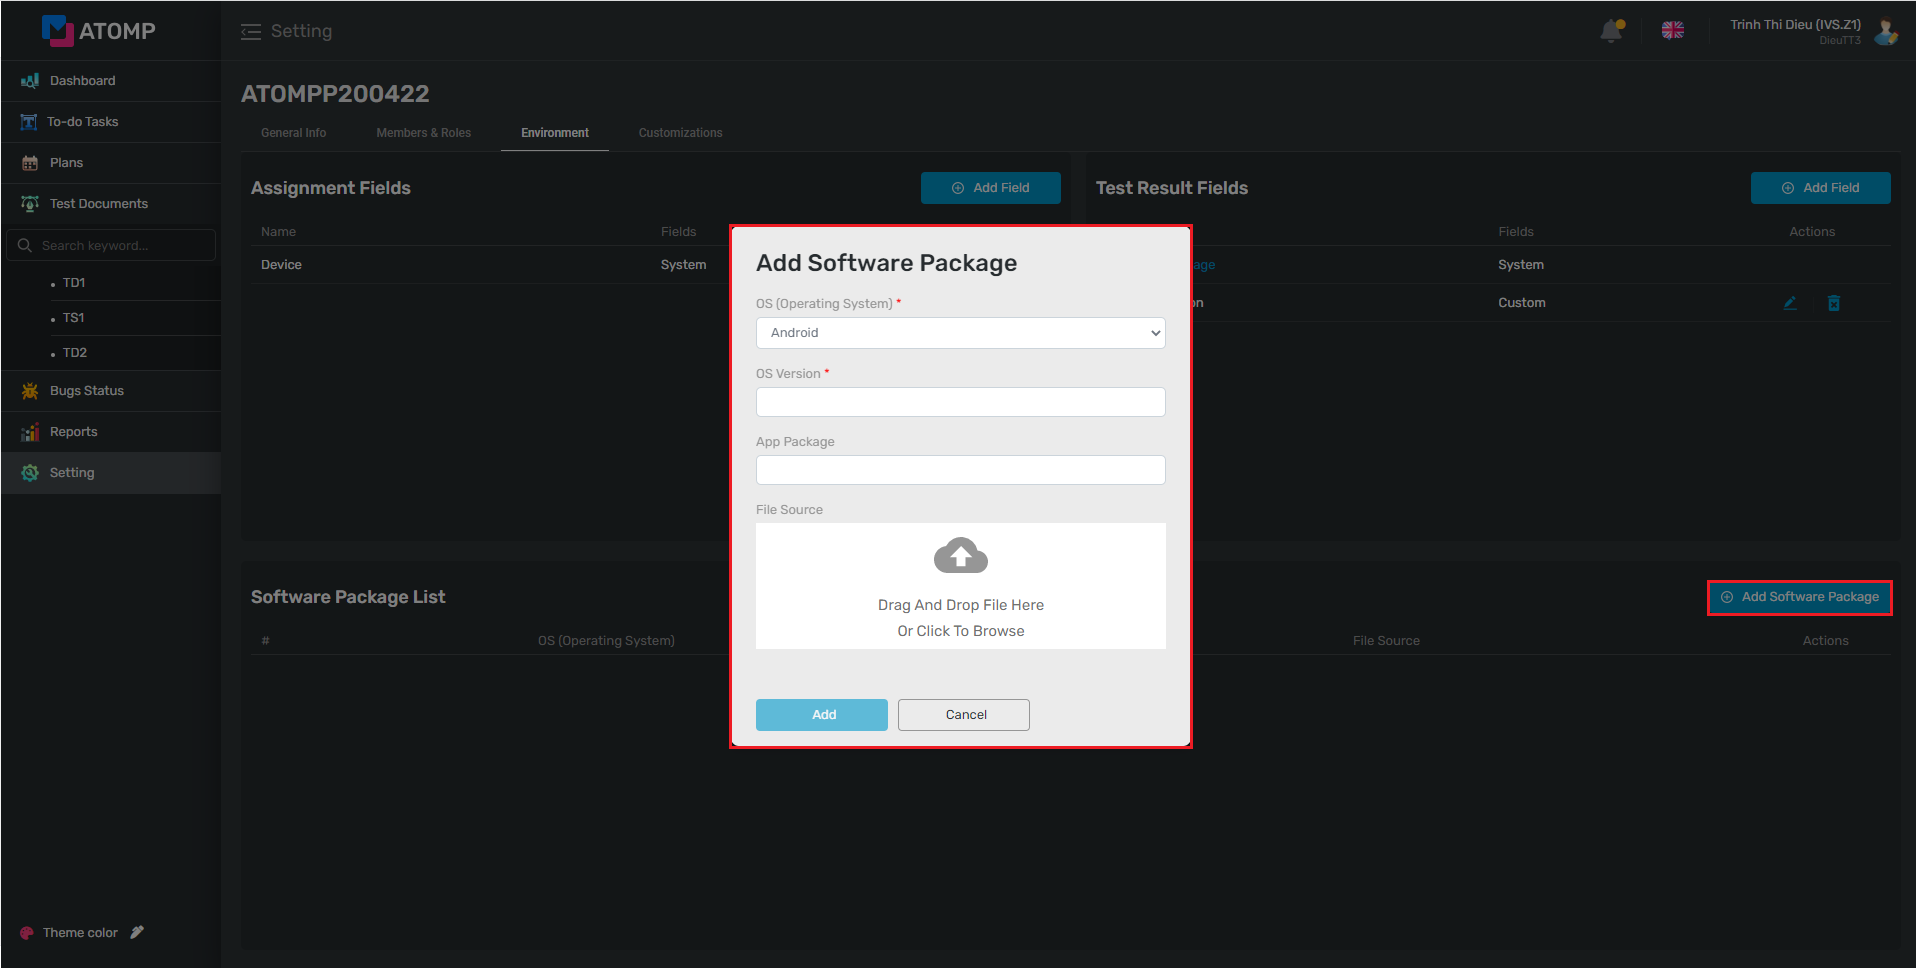
Step 3: Select the type of OS by clicking on the icon dropdown.
Step 4: Input software package information.
Step 5: By clicking this icon  , user can upload any file (ex: APK, IPA) from theirs PC .
Step 6: Then, click [Add] button.