Part 2: Setting
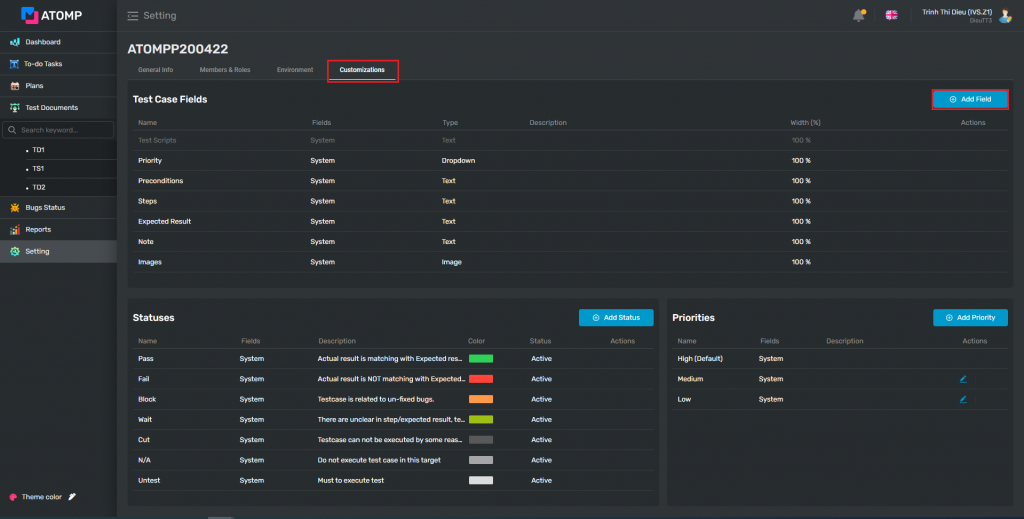
IV. Customizations
1. Test Case Field
➢ Add Test Case Fields
Step 1: On Setting, click on Customizations tab
Step 2: Click on [Add Field] button => popup Add Custom Fields will be displayed.
Step 3: Input valid data into Name text box.
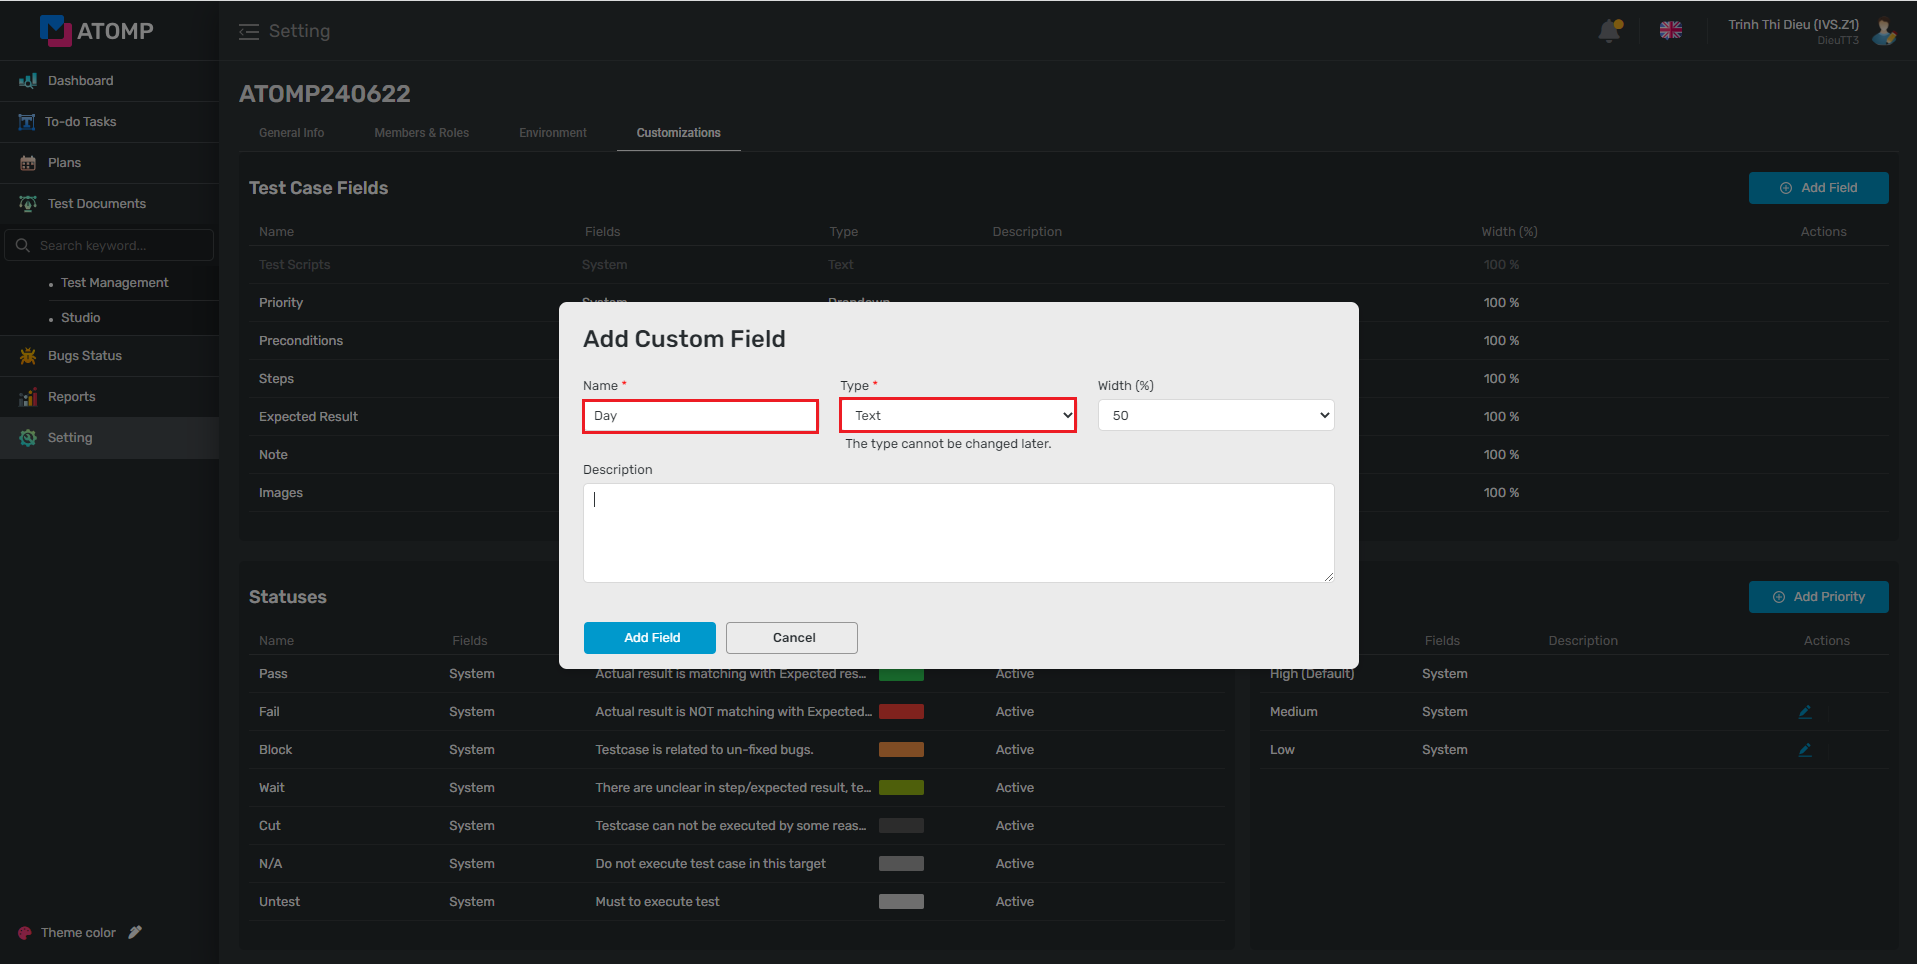
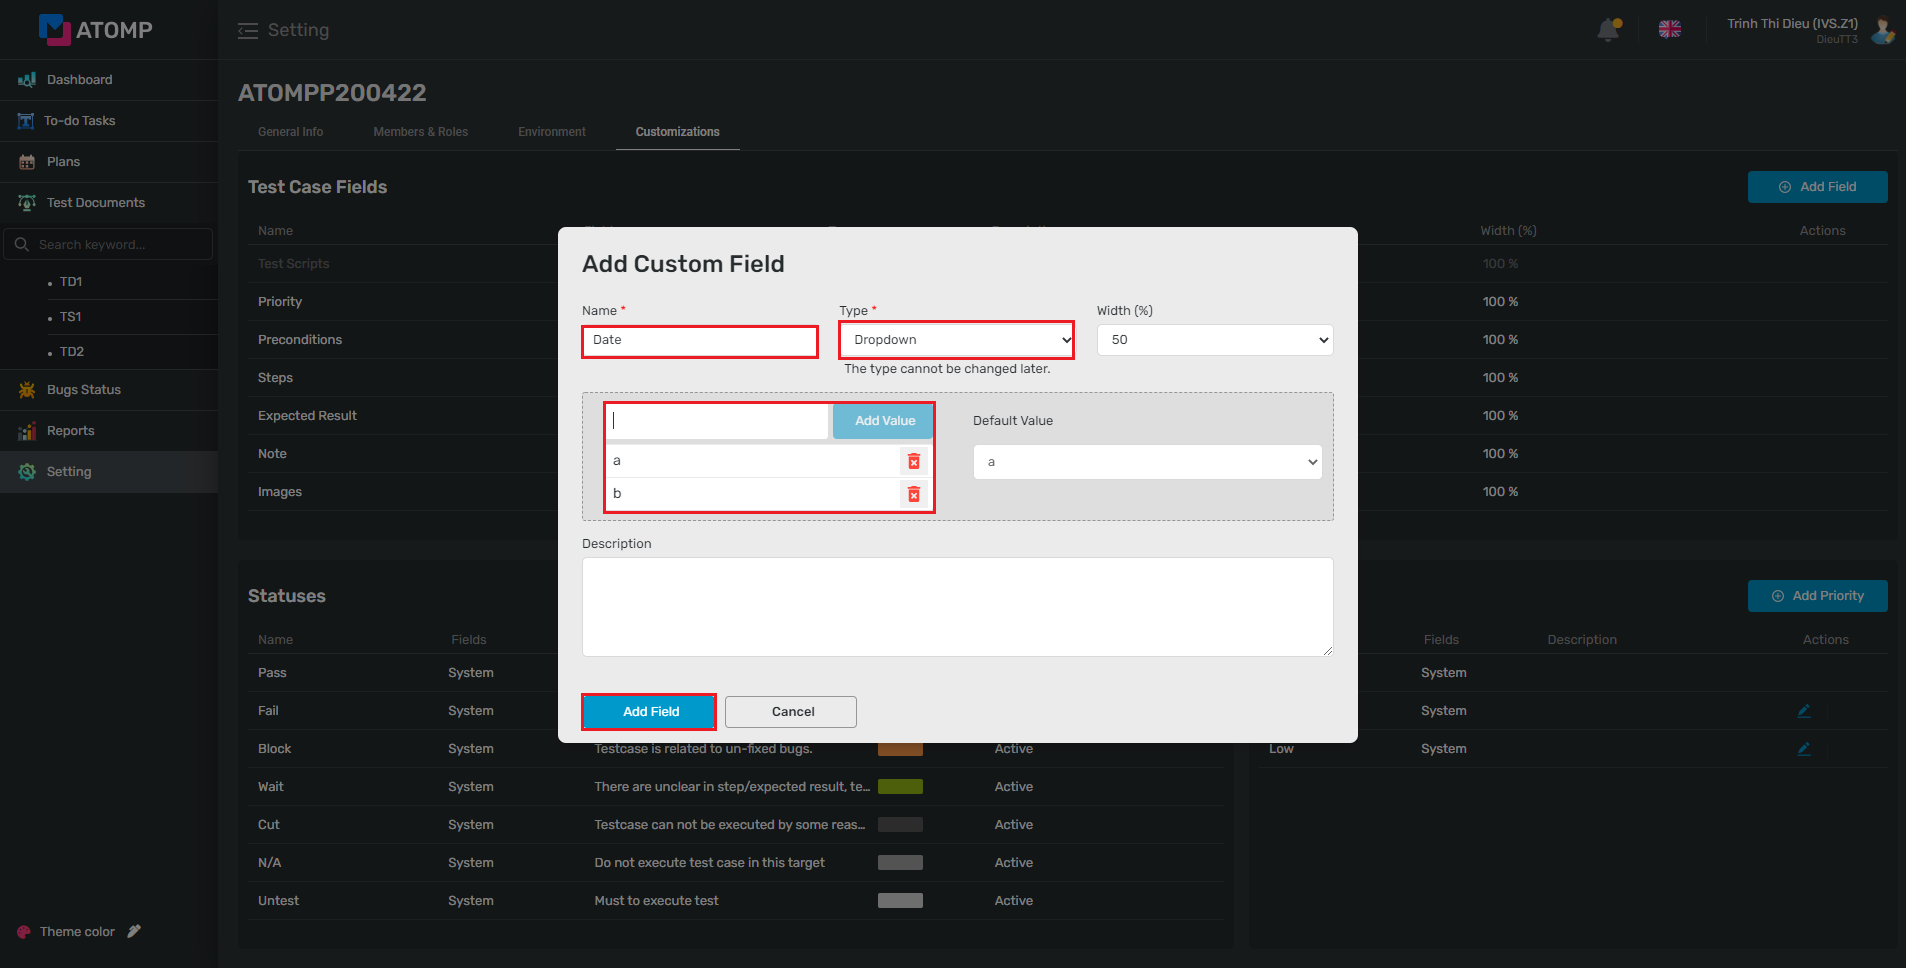
Step 4: Select the type of test case field by clicking on the icon dropdown at Type field. There are 2 values: Text and Dropdown.
- If you select the type as Text, please do these steps (3), (5), (9), (10).

- If you select the type as Dropdown, please do these steps (3), (5), (6), (7), (8), (9), (10).
Step 5: Select the width (%) of custom field by clicking on the icon dropdown at Width (%) field.
Step 6: Input value for custom field dropdown list. User can enter one or more values following this format: “name1” or “name1, name2, name3”. (name must be unique). The number of values is not limited.
Step 7: Click on [Add Value] button => list of values will be displayed at the list box area.
Step 8: Click on icon dropdown at Default Value field to set the default value
Step 9: Input description for the custom field. This is an optional field.
Step 10: Click on [Add Field] button.
⇨ Custom fields when added successfully will be displayed as below:

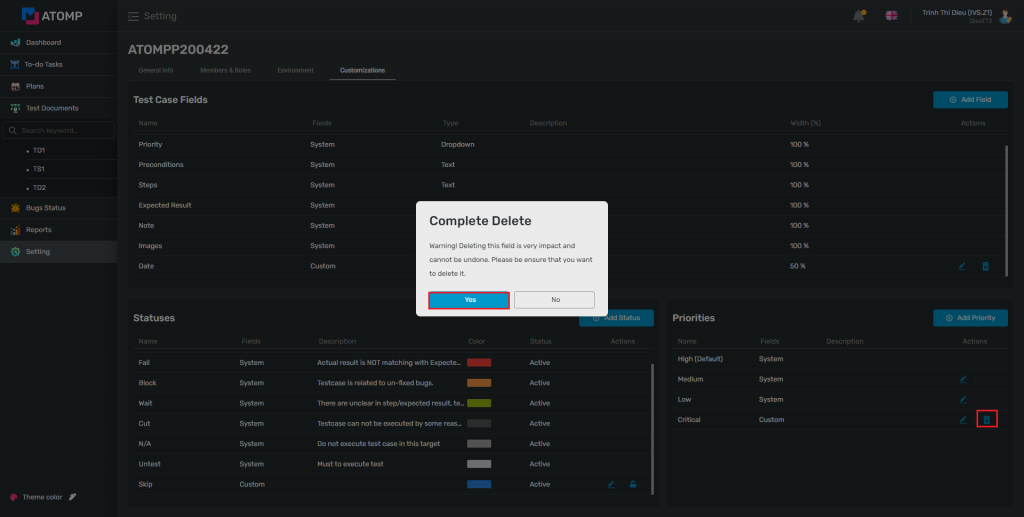
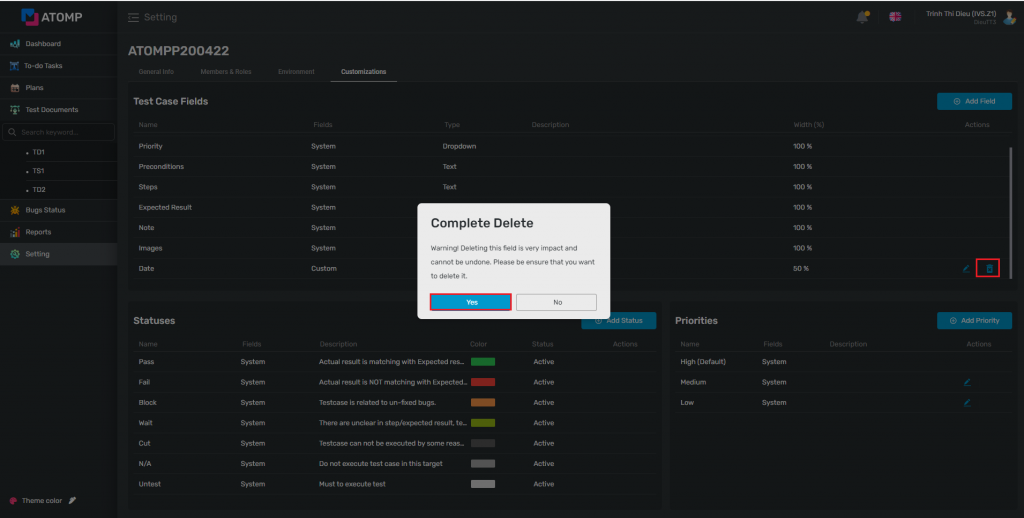
➢ Delete Test Case Fields
User can delete existing test case field, by following these steps:
Step 1: Click on icon  at the same line of the Test Case Fields that you want to delete.
Step 2: Click on [Yes] button on the Complete Delete popup => custom field will be deleted.
➢ Edit Test Case Fields: To edit existing custom field, please
Step 1: Click on the icon  at the same line of the custom field which you want to edit => popup Edit custom field will be displayed.
Step 2: Inside Edit Custom Field popup, user can edit Name, Width (%) and Description fields. Other fields are unmodifiable.
Besides, user can activate/inactivate custom field by checking/unchecking on checkbox “This field is active”.
Step 3: Click on [Update field] button.

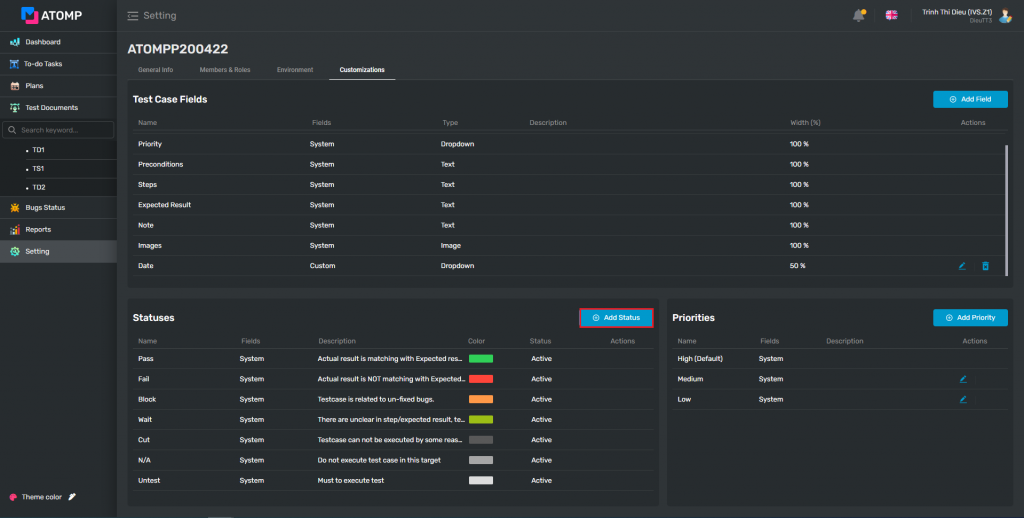
2. Statuses
➢ Add statuses
To make your project more manageable, you can add statuses (a maximum of 8 statuses) by following these steps bellow:
Step 1: On Setting, click on Customizations tab.
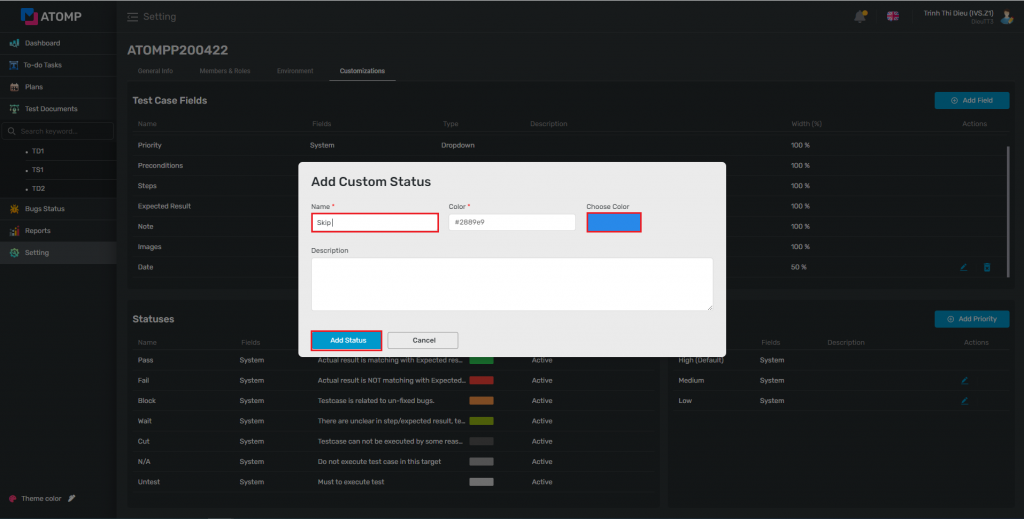
Step 2: Click on [Add Status] button => Popup Add Custom Status will be displayed.
Step 3: Input valid data into the Name text box, then choose Color.
Step 4: Click on [Add Status] button.
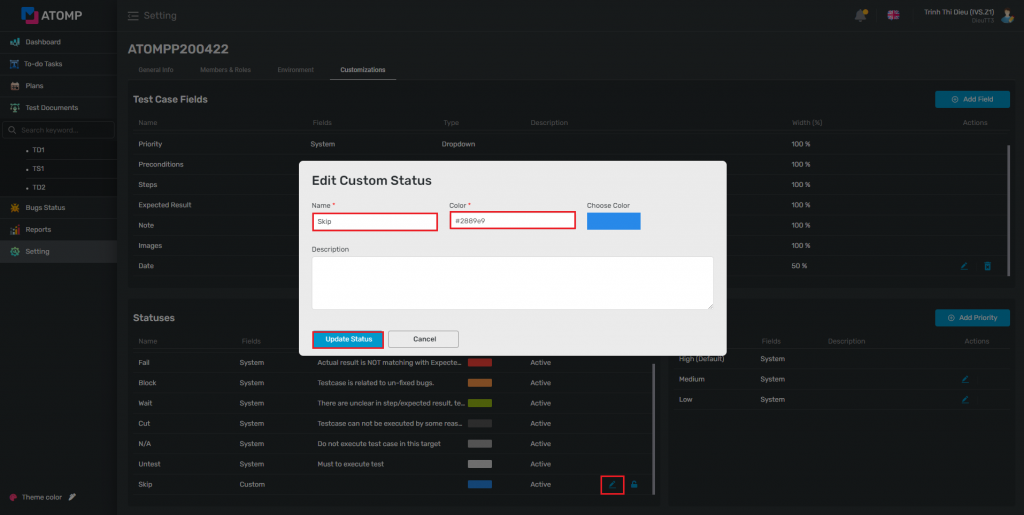
➢ Edit Statuses
User can edit an existing Custom Status, by following these steps:
Step 1: Click on the icon  at the same line of the Custom Status which you want to edit => popup Edit custom status will be displayed.
Step 2: Inside the Edit Custom Status popup, user can edit Name, Color and Description fields.
Step 3: Click on [Update Status] button.
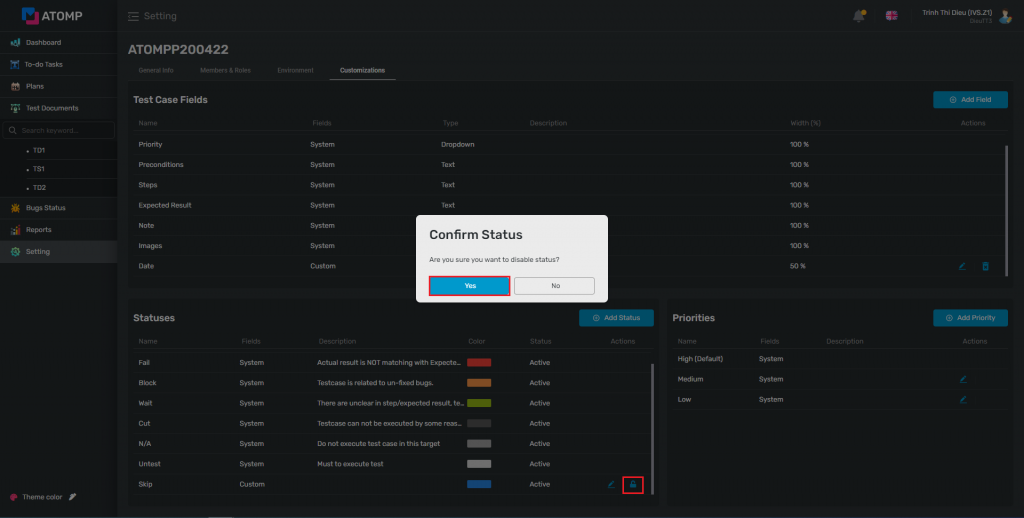
➢ Inactive/Active status
User can Activate/Inactivate custom field by following these steps bellow:
Step 1: Click on the icon  or
or  at the same line of the Custom Status which you want to Activate/Inactivate => confirmation popup “Are you sure you want enable/disable status” will be displayed.
Step 2: Click on button [Yes] or [No] to fulfill your expectation.
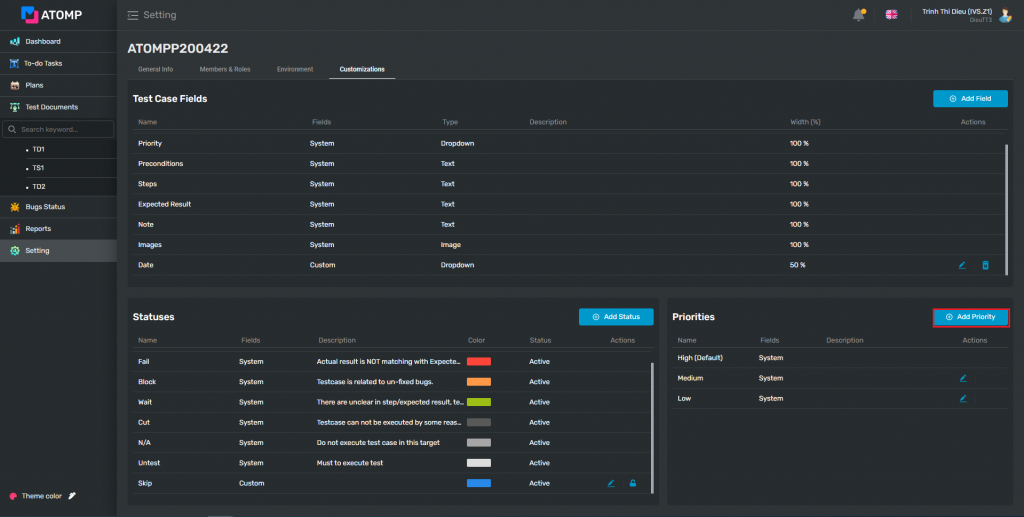
3. Priority
➢ Add Priority
To manage the priorities of all test cases in a project, you can add a priority for each test case by following these steps bellow:
Step 1: On Setting, click on “Customizations” tab.
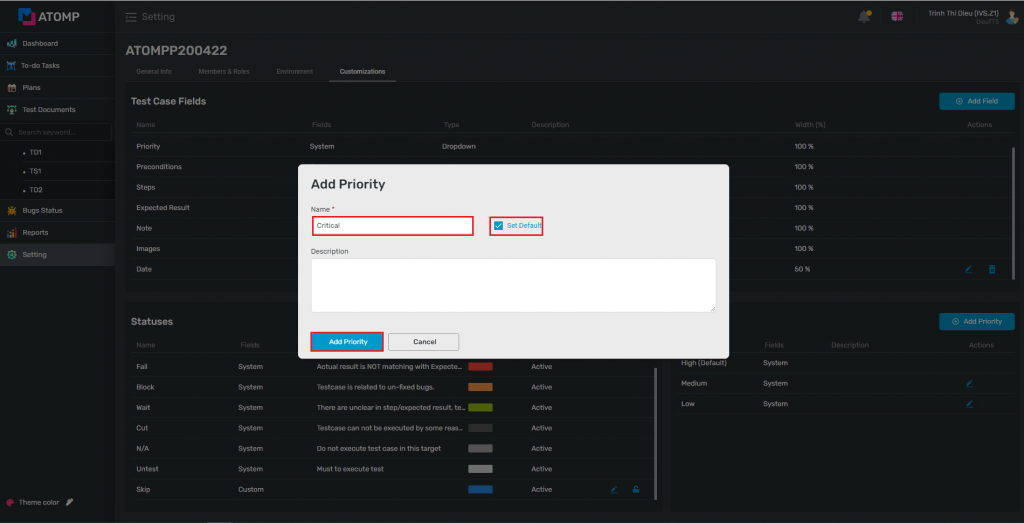
Step 2: Click on [Add Priority] button => popup Add Priority will be displayed.
Step 3: Input valid data into the Name text box.
Step 4: Check or Uncheck on check box “Set default”.
Step 5: Click on [Add Priority] button.
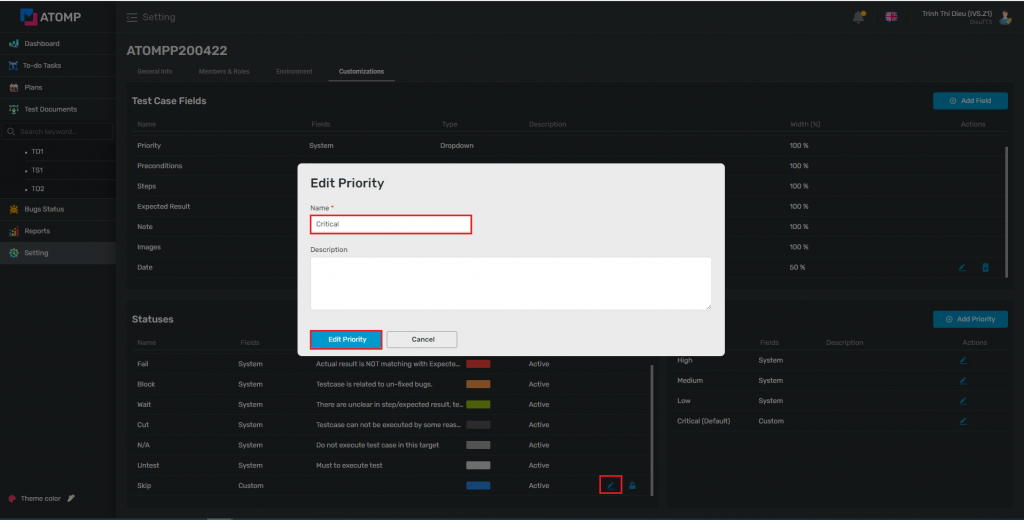
➢ Edit Priority
Users can edit an existing Priority, by following these steps:
Step 1: Click on the icon at the same line of the Priority which you want to edit => popup Edit Priority will be displayed.
Step 2: Inside Edit Priority popup, user can edit Name and Description
Besides, user can change default status by checking/unchecking on checkbox “Set default”.
Step 3: Click on [Edit Priority] button.
➢ Delete Priority
Note: If the priority is currently set as default or the priority is system priority, users can’t delete it
Otherwise, users can delete a custom priority, by following these steps:
Step 1: Click on icon at the same line of the Custom Priority that users want to delete.
Step 2: Click on [Yes] button on the Complete Delete popup => custom priority will be deleted.