[Precondition]
- Login successfully into https://my-learning.w3schools.com/
- Home screen is displayed.
[Steps]
- Click button [Explore all] in In Progress section.
- Click Learn HTML.
[Expectation]
2. Check text “HTML is the standard markup language for web pages. Use it to structure the content on your own website.”
Create Test precondition
Login to http://Tester4.0.atomp.io/ -> Select project -> Click Manage Test Precondition -> Click Create with ATOMP Studio.
- With Android device
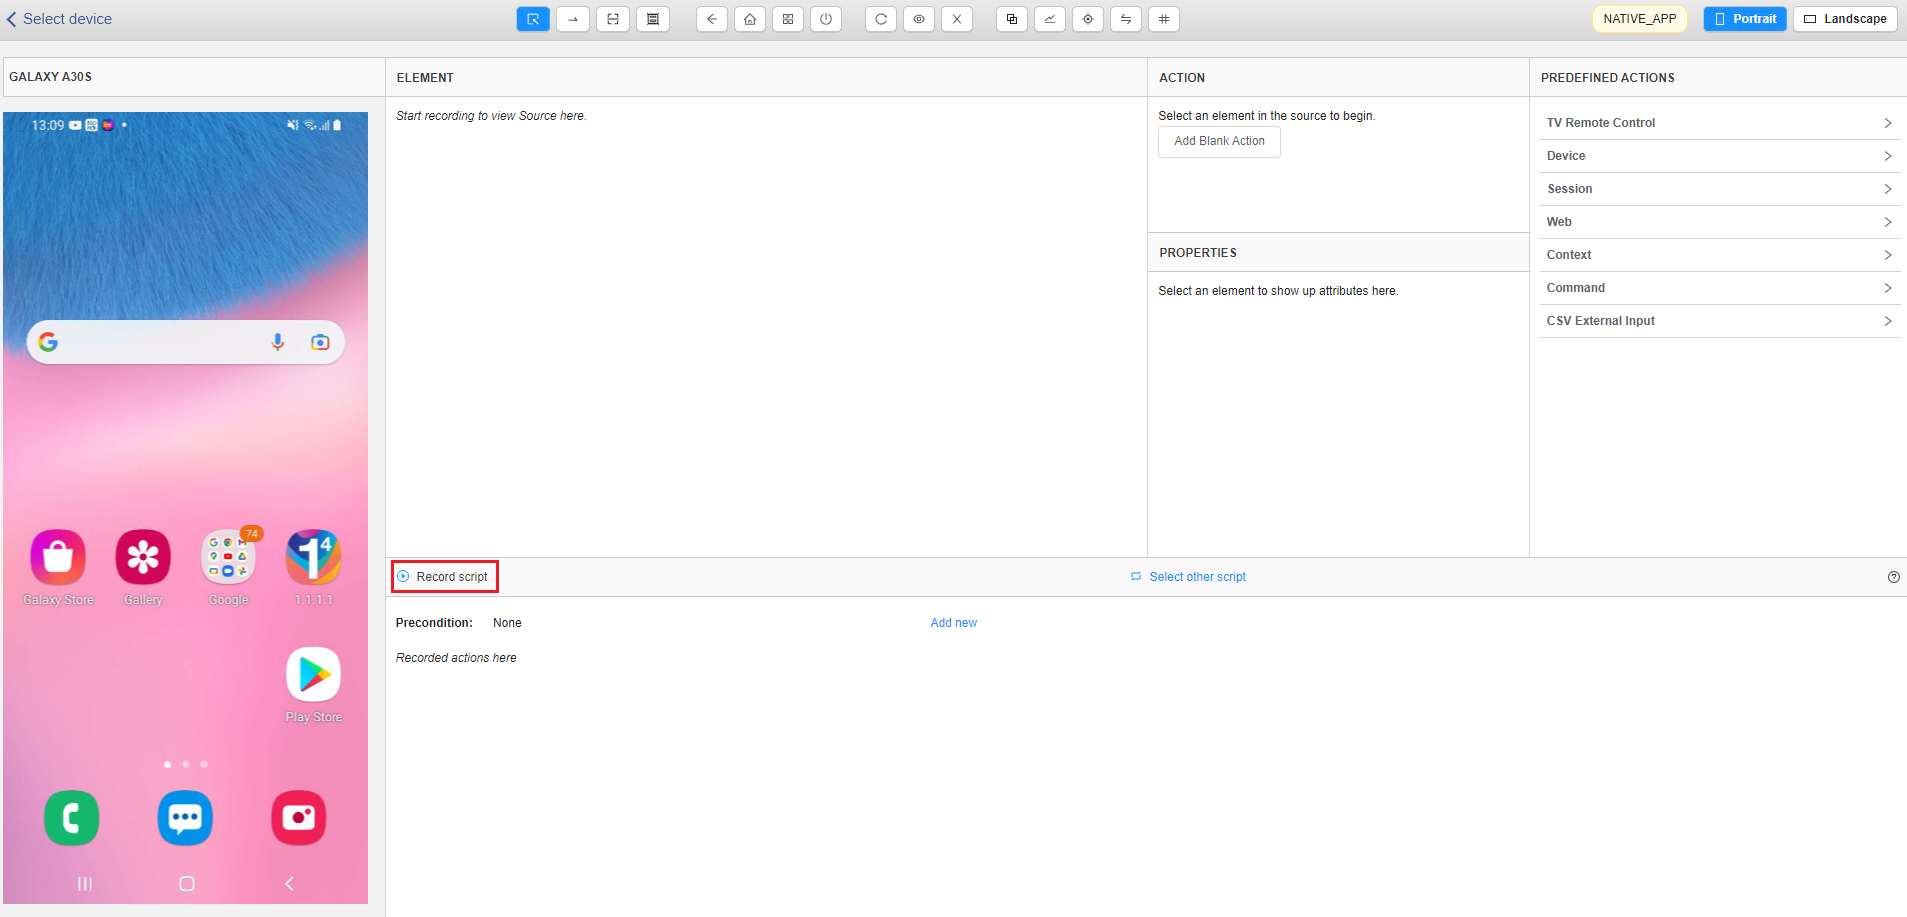
On “Select device” Screen, select “NATIVE_APP”, then select Android device.
Next, users click on the [Record script] button to switch to the recording mode to create steps for the precondition.
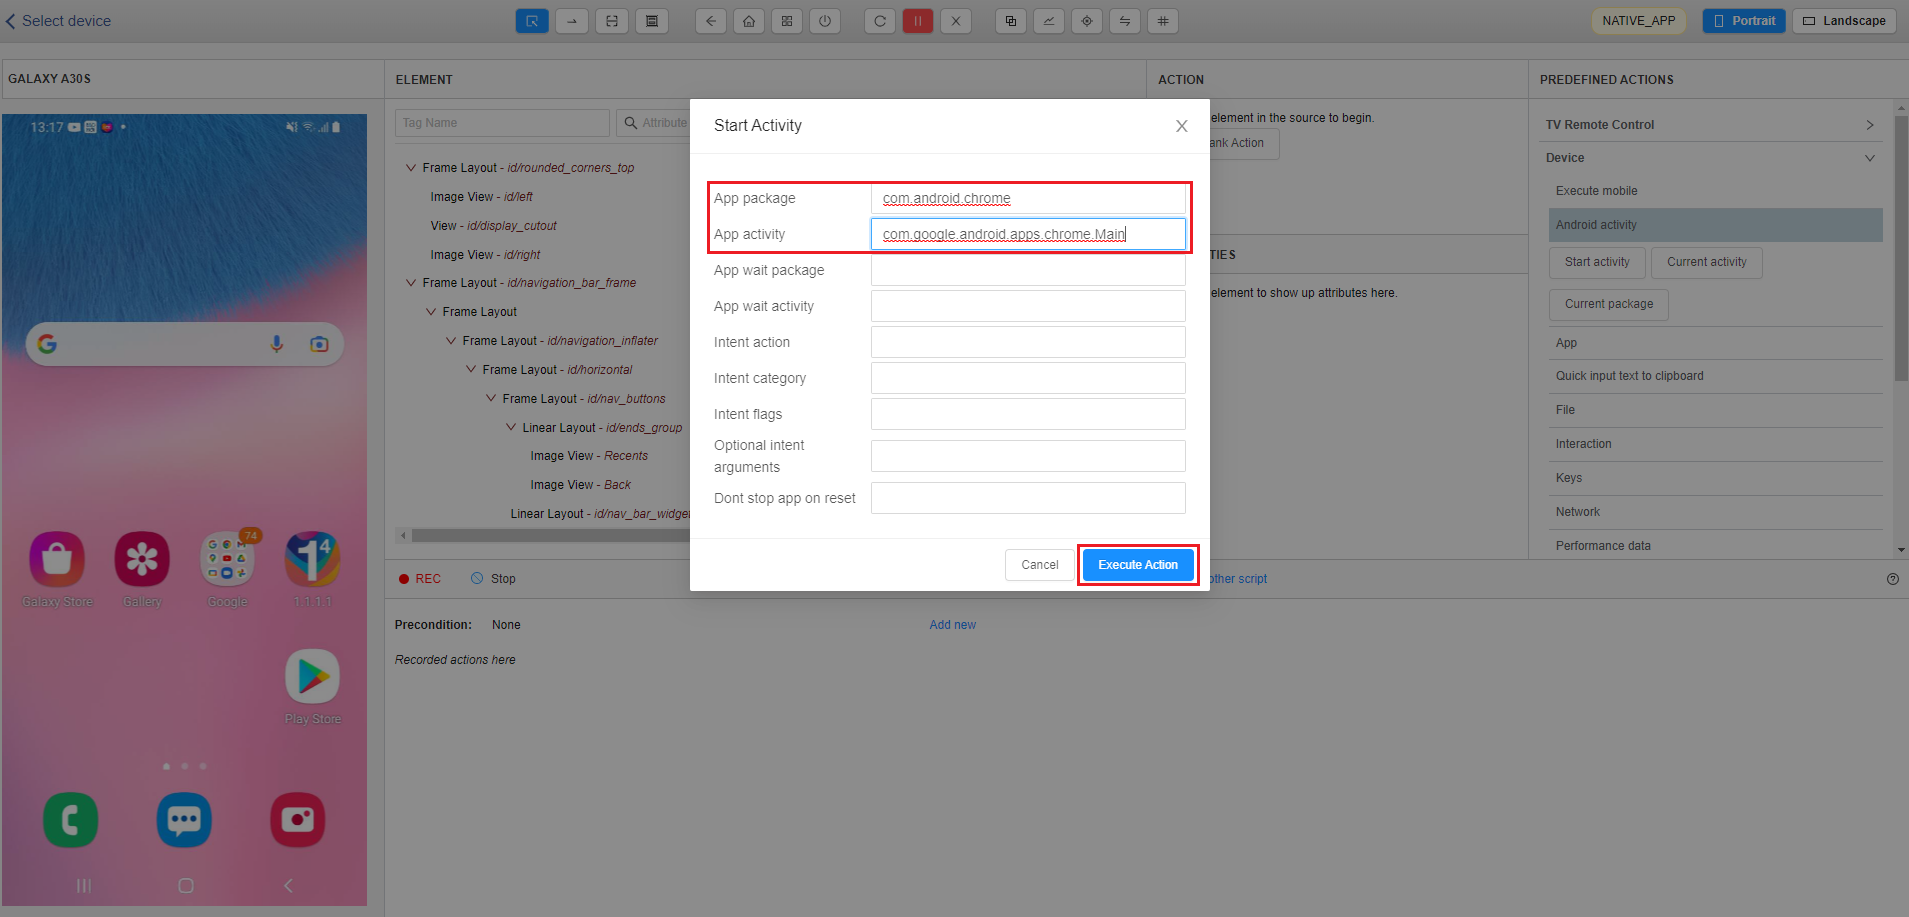
To switch to WEB_VIEW, firstly users will start Chrome by clicking on Device -> Android Activity -> Start Activity -> Popup [Start Activity] is displayed. Users will input App Package and App Activity then click on [Execute Action] button.
- App package: “com.android.chrome”
- App activity: “com.google.android.apps.chrome.Main”

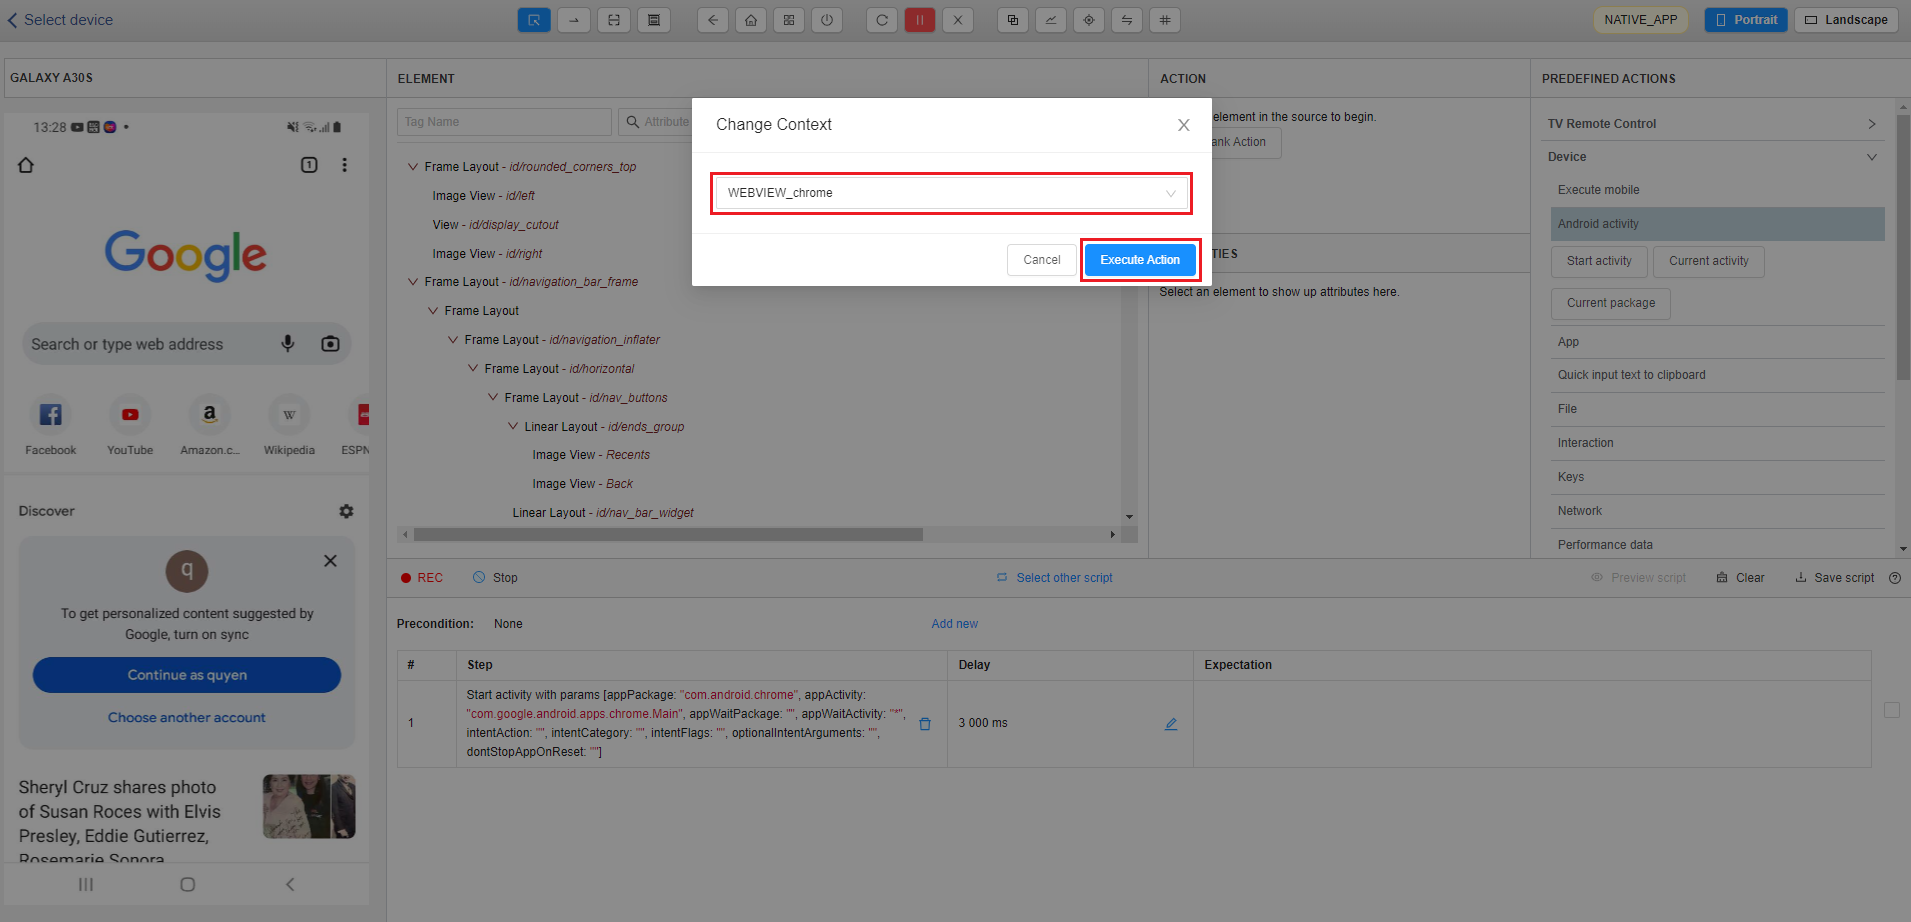
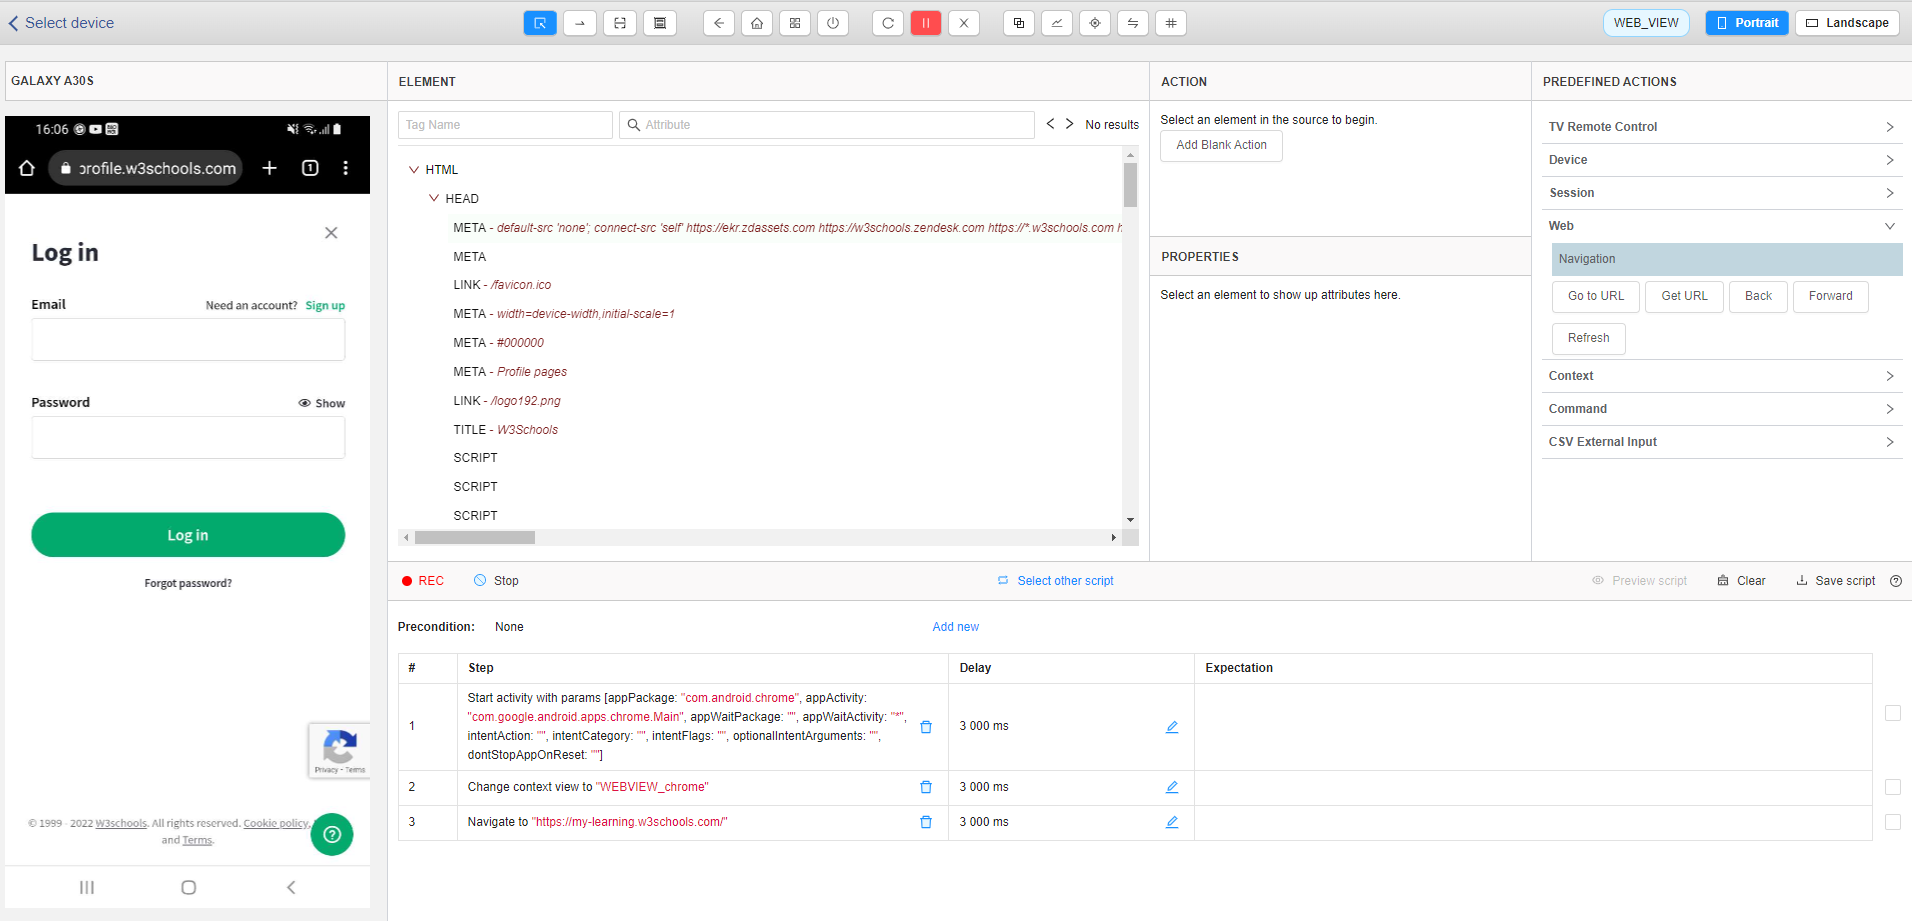
After opening Chrome, the users switch to WEB_VIEW by clicking item “Change Context” on Studio screen -> Popup Change Context is displayed -> Users click on Web_VIEW item to change.

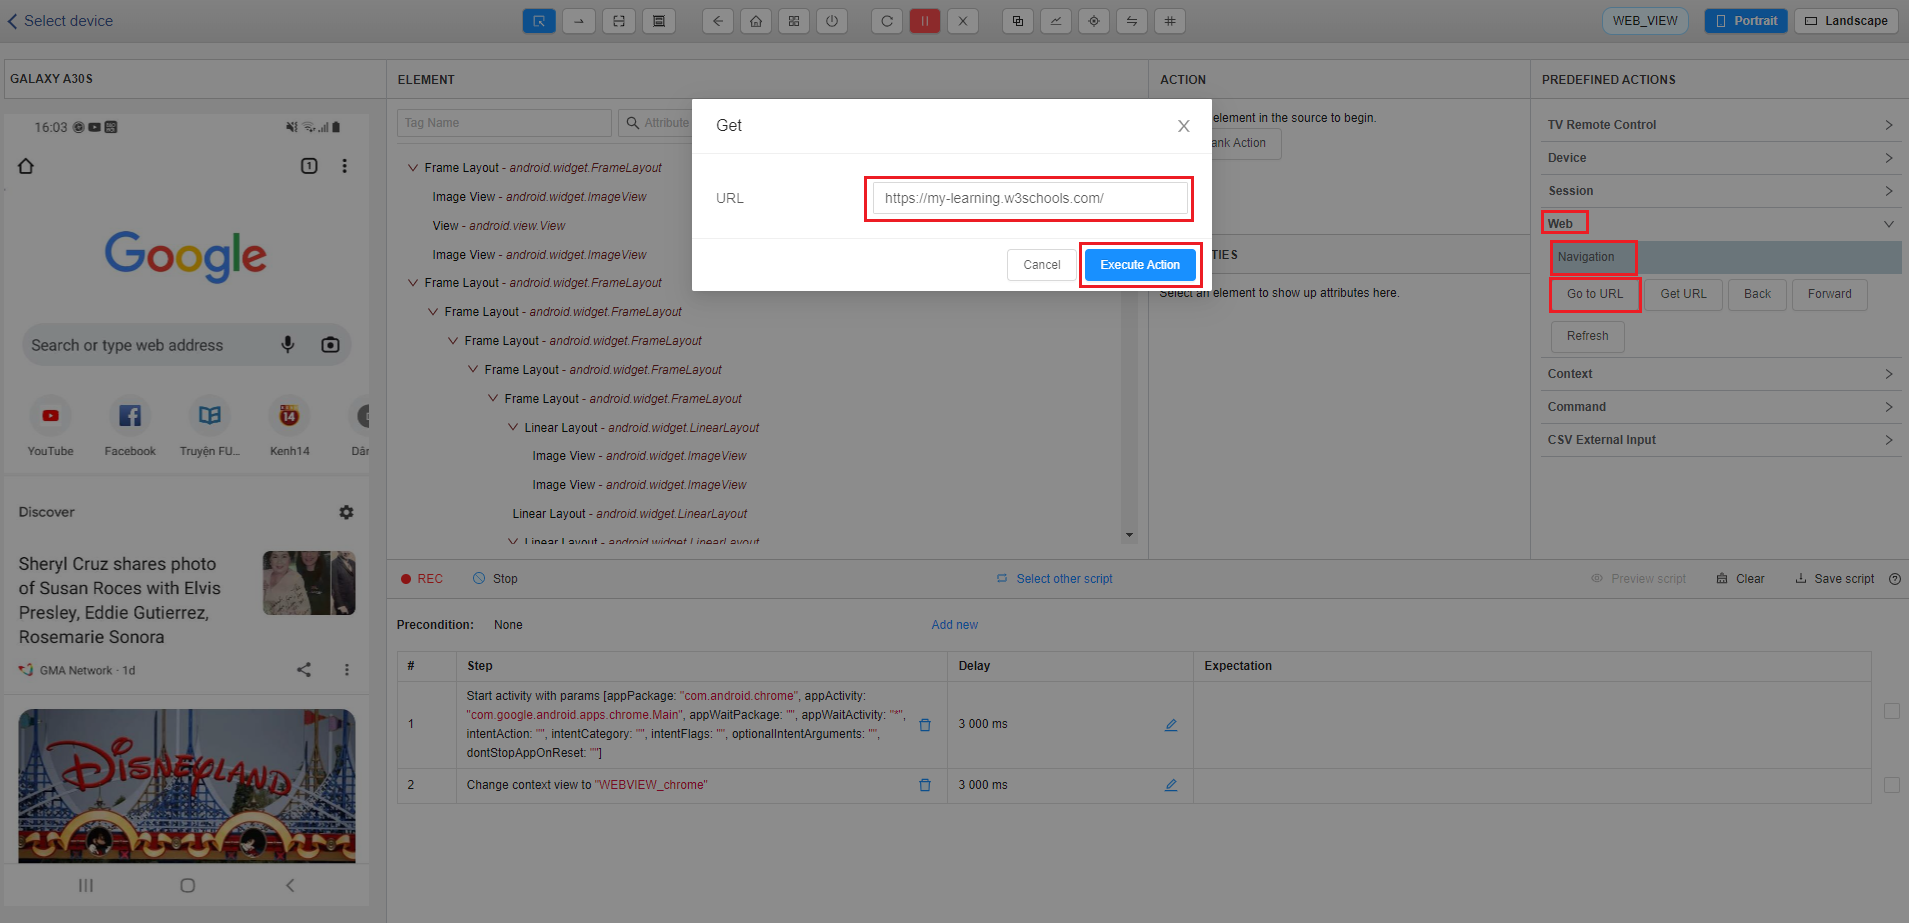
To open URL which users need to test by clicking on Web -> Navigation -> Go to URL -> Popup Go to URL is displayed. Users must input URL to open URL which users need to test then click on [Execute action] button. The web https://my-learning.w3schools.com/ will be opened on Chrome.
- With device iOS
On the Select device screen, in the “Please select app setting” dropdown list, users select WEB_VIEW. After selecting the test type as WEB_VIEW then users select the corresponding device -> Studio screen will be displayed with Safari opened on the streaming screen.

On the Studio screen, users can open URL to test by clicking on WEB -> Navigation -> Go to URL on the right side of the menu -> Popup Get URL is displayed -> Users input URL on the textbox then click on [Execute Action] button (To save the opening URL step, the users must record before).
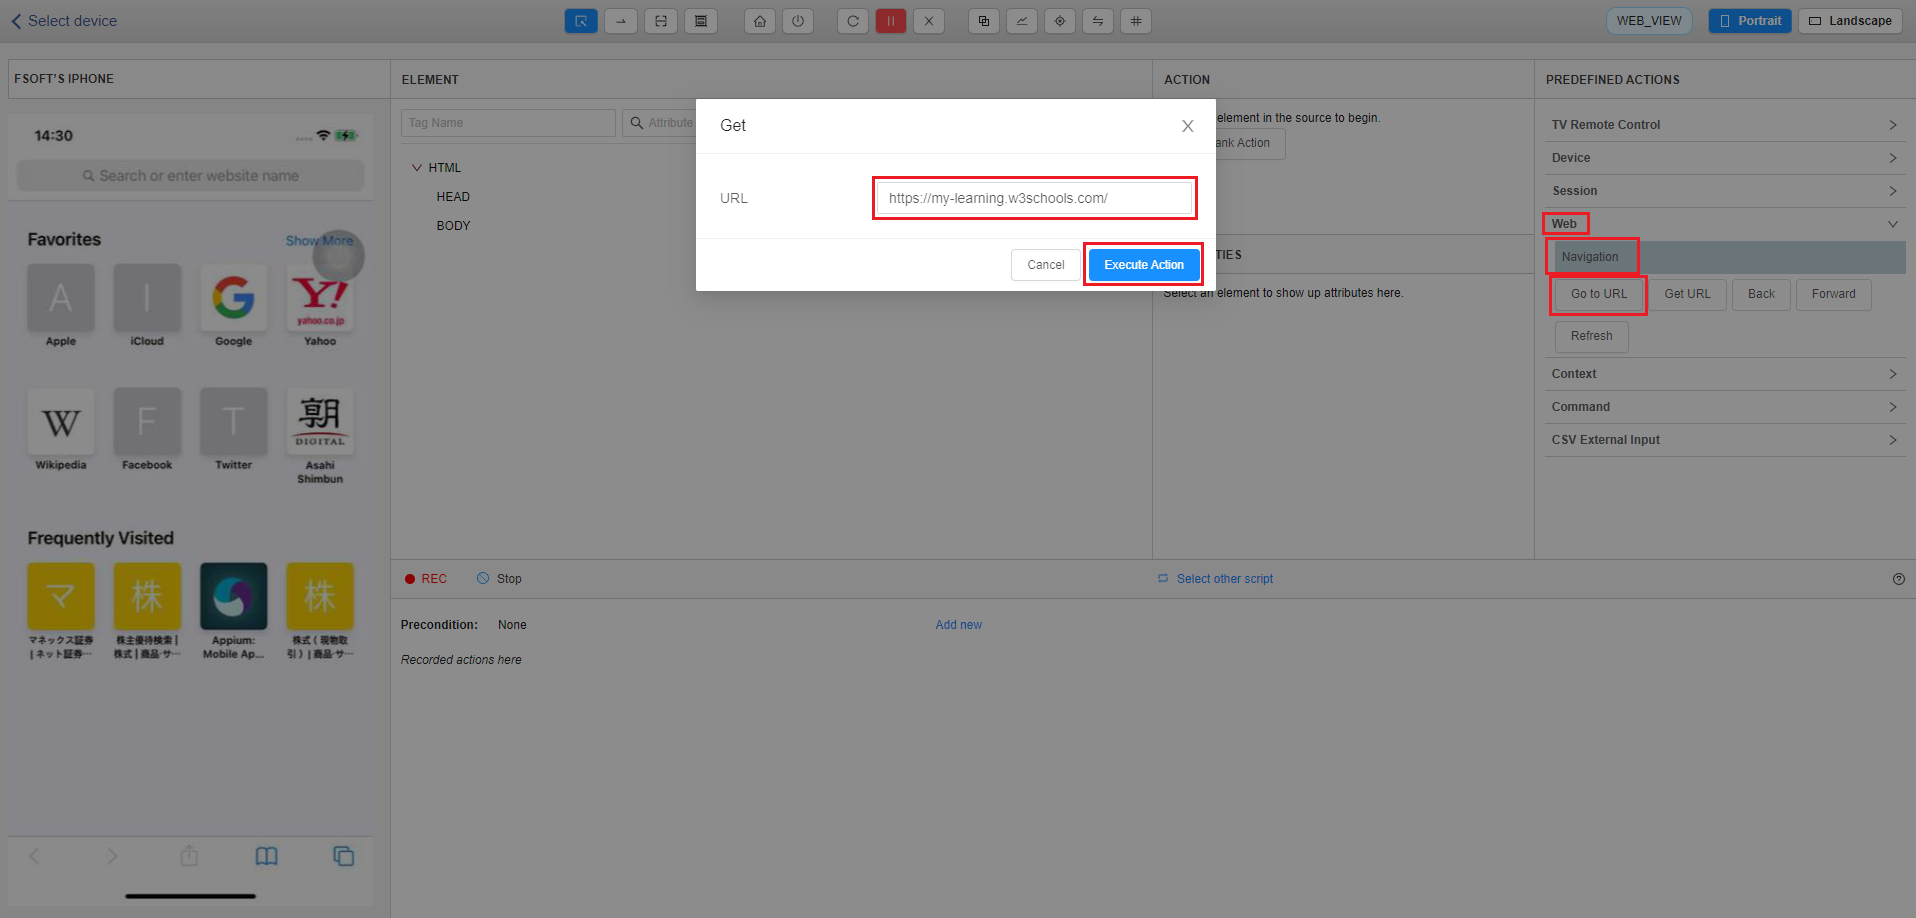
Then the web https://my-learning.w3schools.com/ will be displayed on the streaming screen.

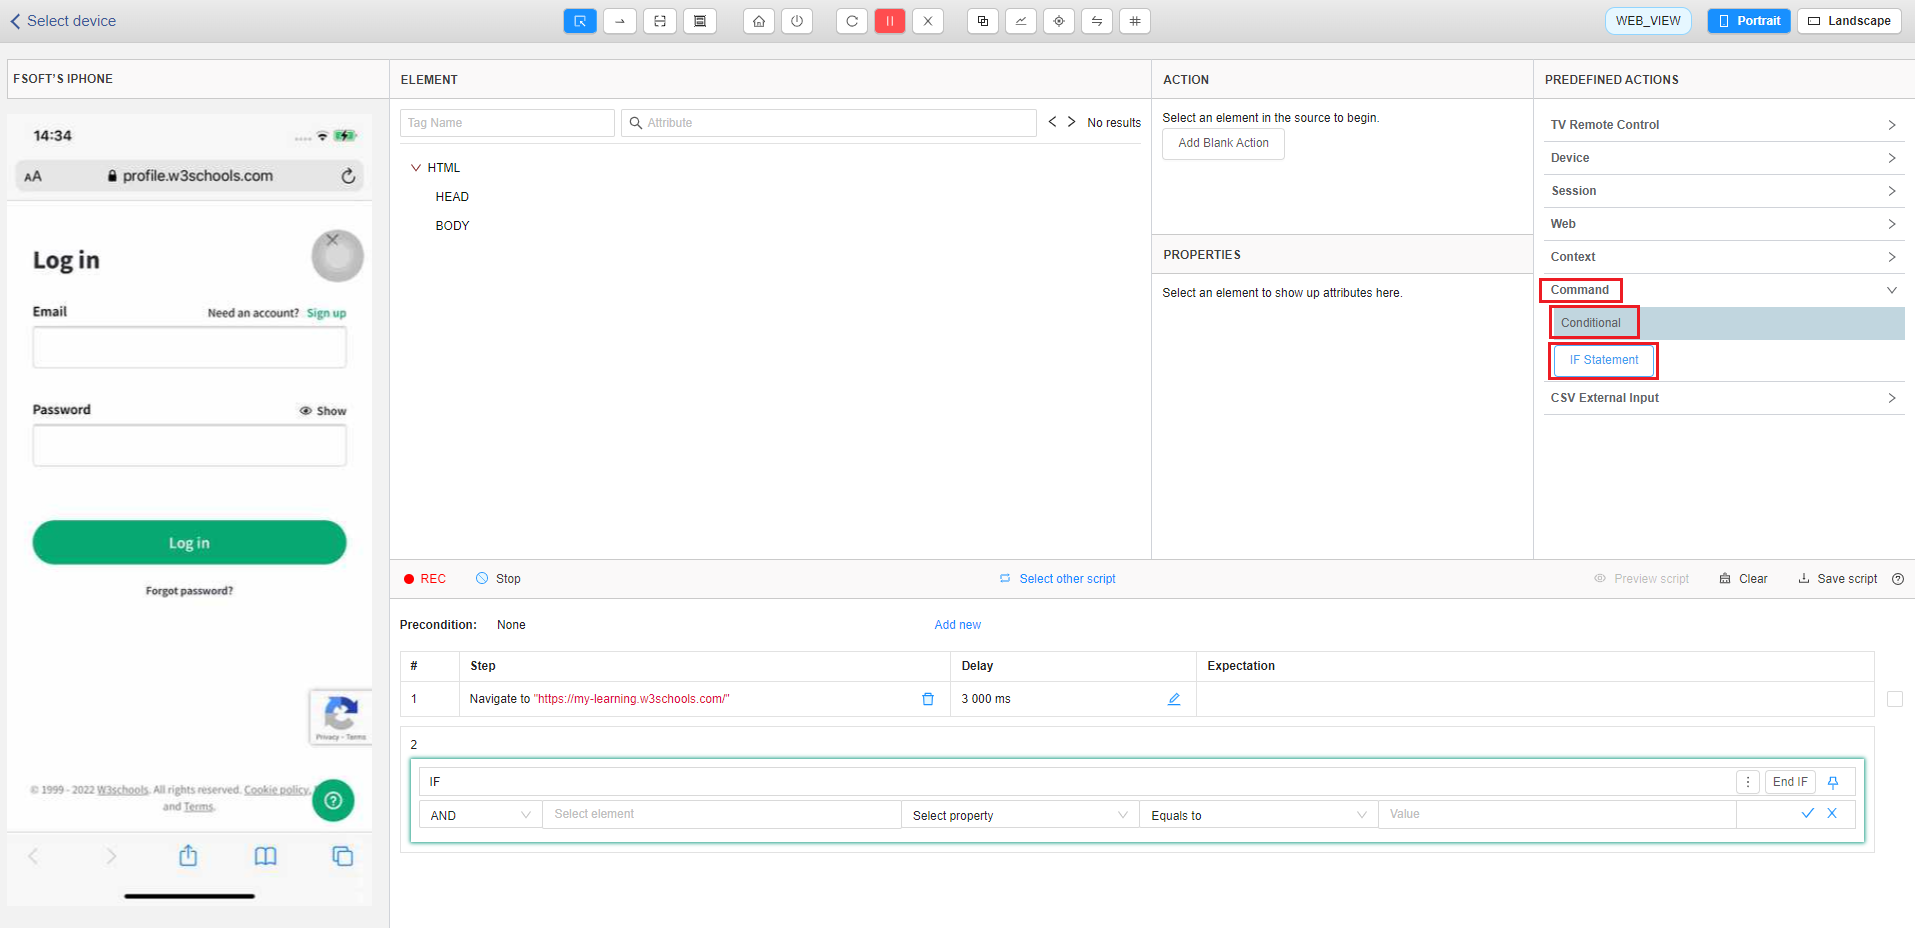
When opening the website, there will be 2 cases:
- The user has not logged in to the website.
- The user has logged in to the website.
To cover all cases, users must use conditional statements to create precondition. To create a conditional statement, the users click on Command in the section Predefined actions, then click Conditional -> IF statement. The If block will be displayed in the step section.
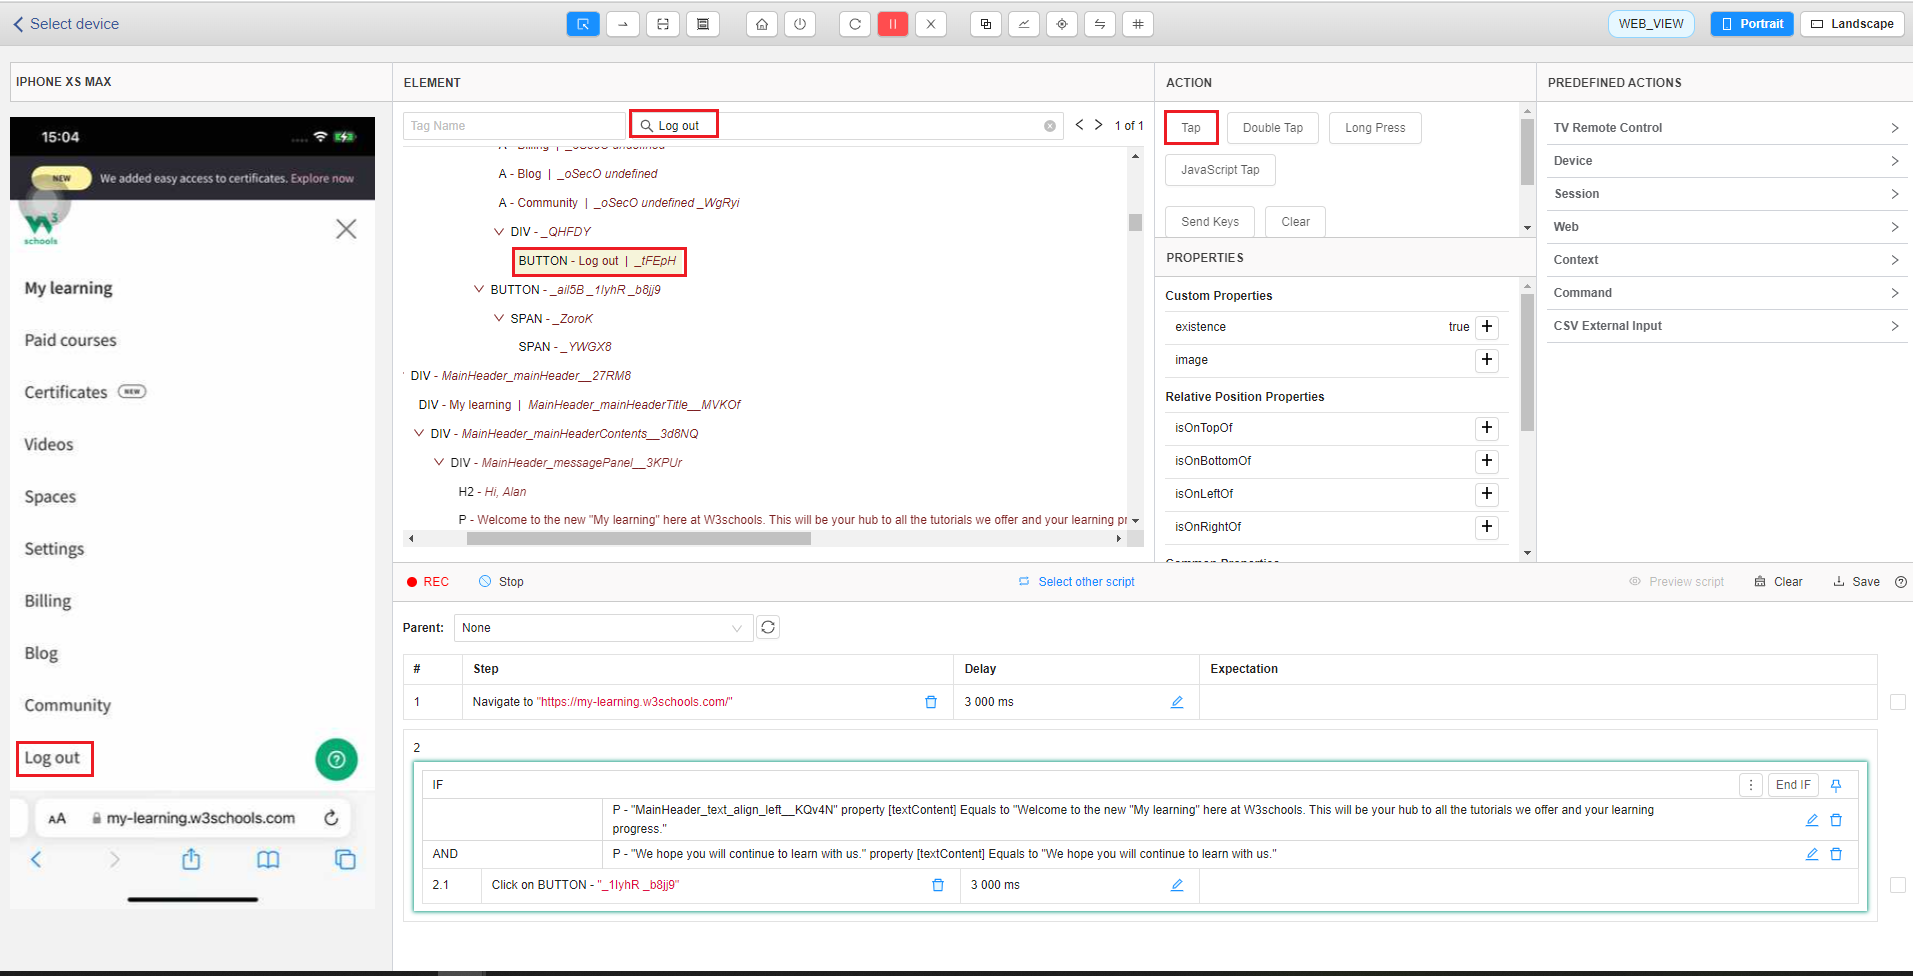
To confirm being on the Home screen after login we define the text [Welcome to the new “My Learning” program at W3schools. This will be your hub for all the tutorials we offer and your learning progress.] and text [We hope you will continue to learn with us.] are displayed.
Select the element text [Welcome to the new “My Learning” program at W3schools. This will be your hub for all the tutorials we offer and your learning progress.] in the source code, select Property as textContent, now in the value section will automatically select the value, you need confirm whether value is correct, click on the tick icon to finish creating the condition.
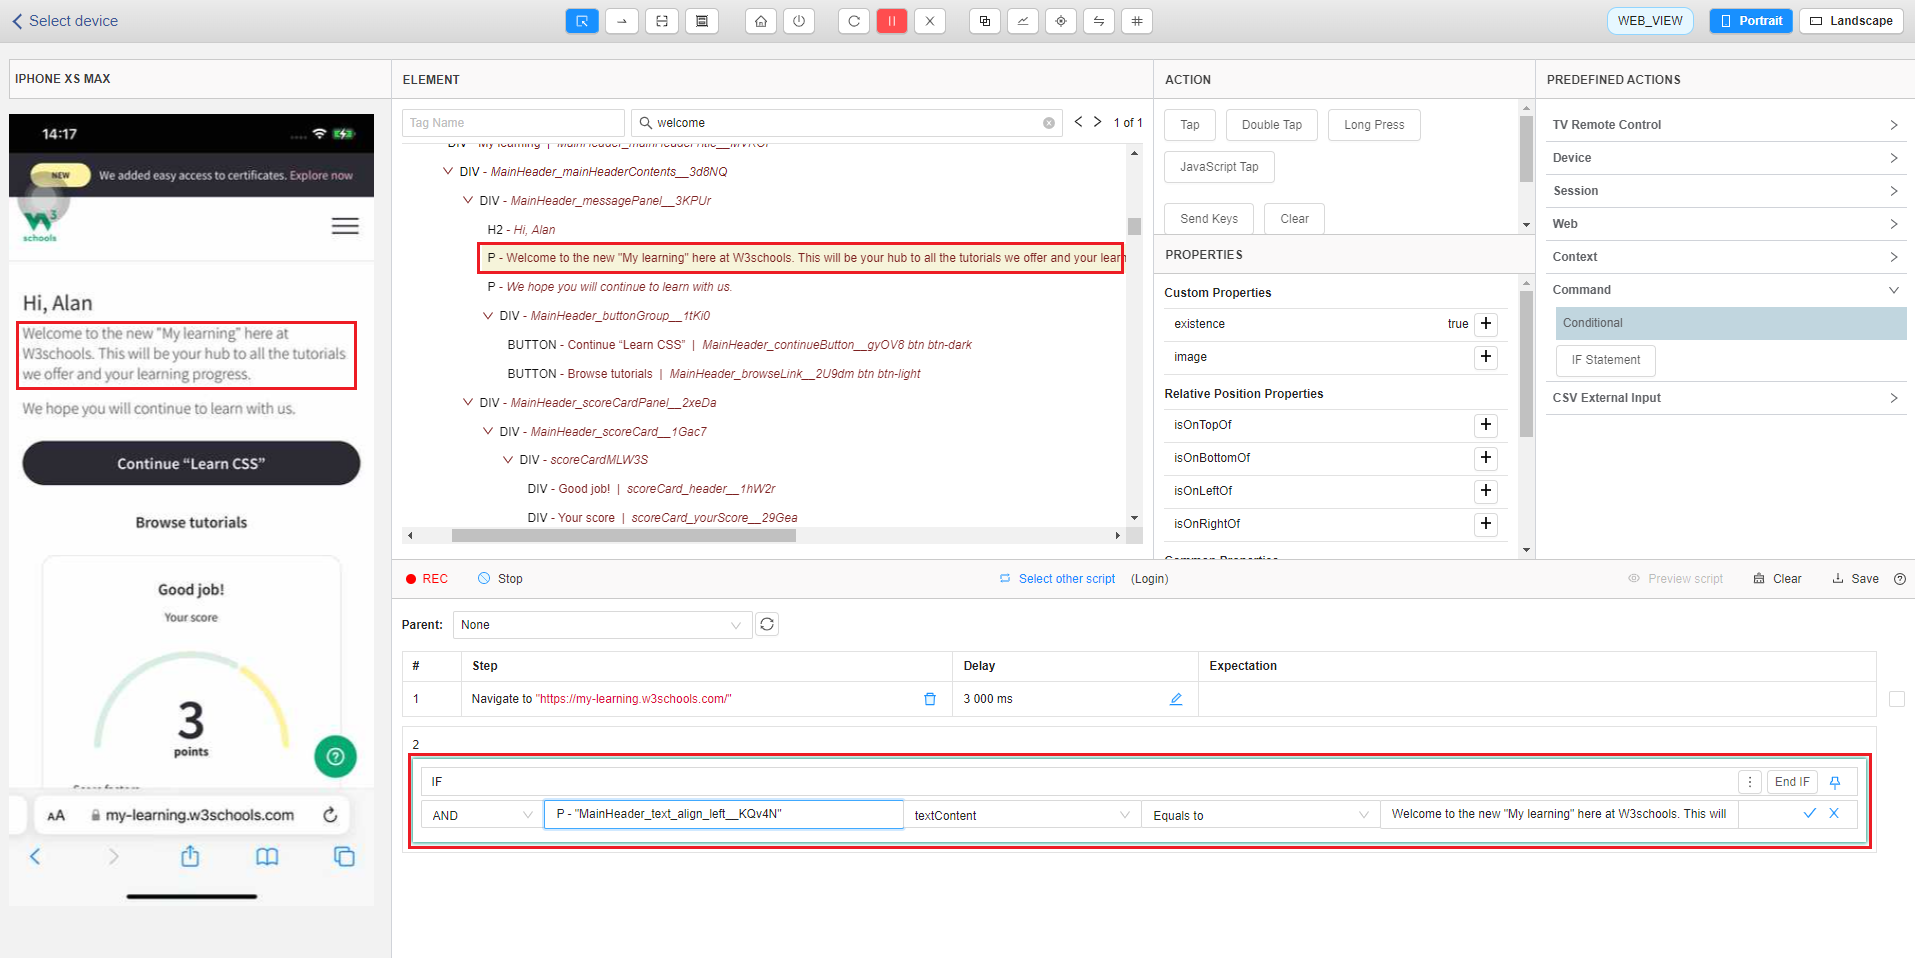
Select conditions to confirm element text [We hope you will continue to learn with us.] is displayed, similarly select the property and select the tick to complete.

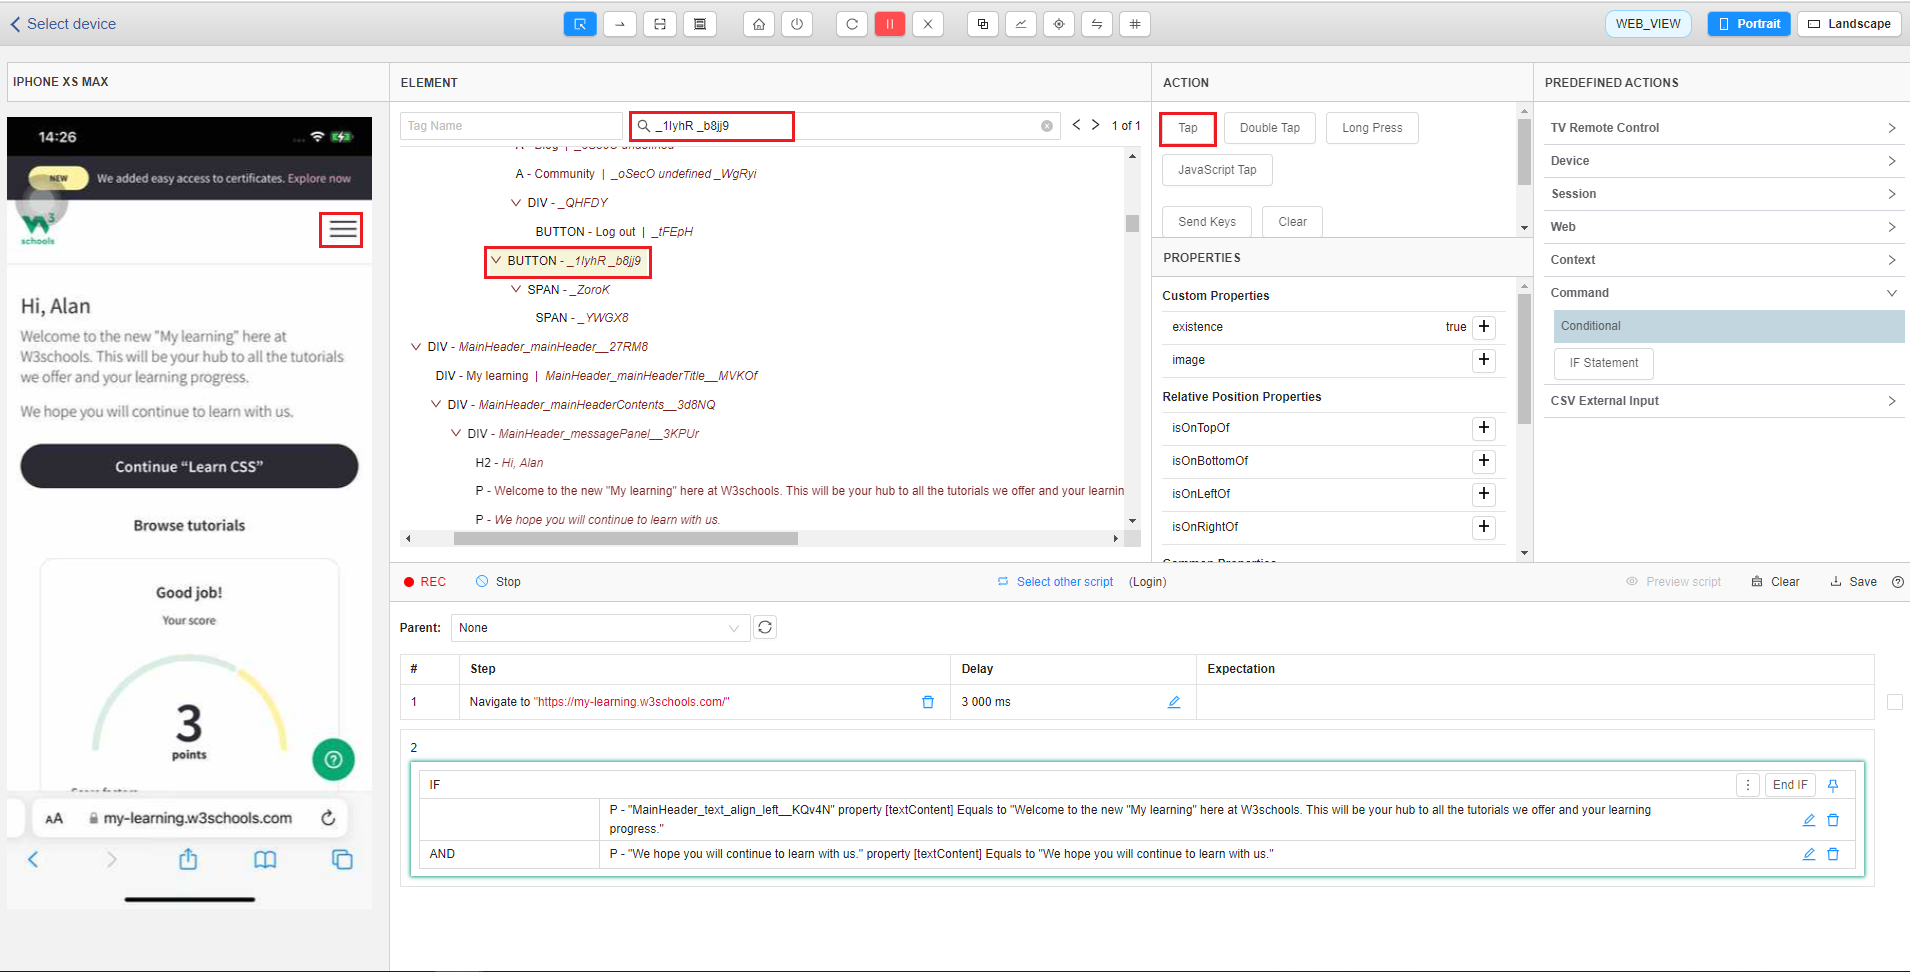
To logout, you select element  then click on Log out button.
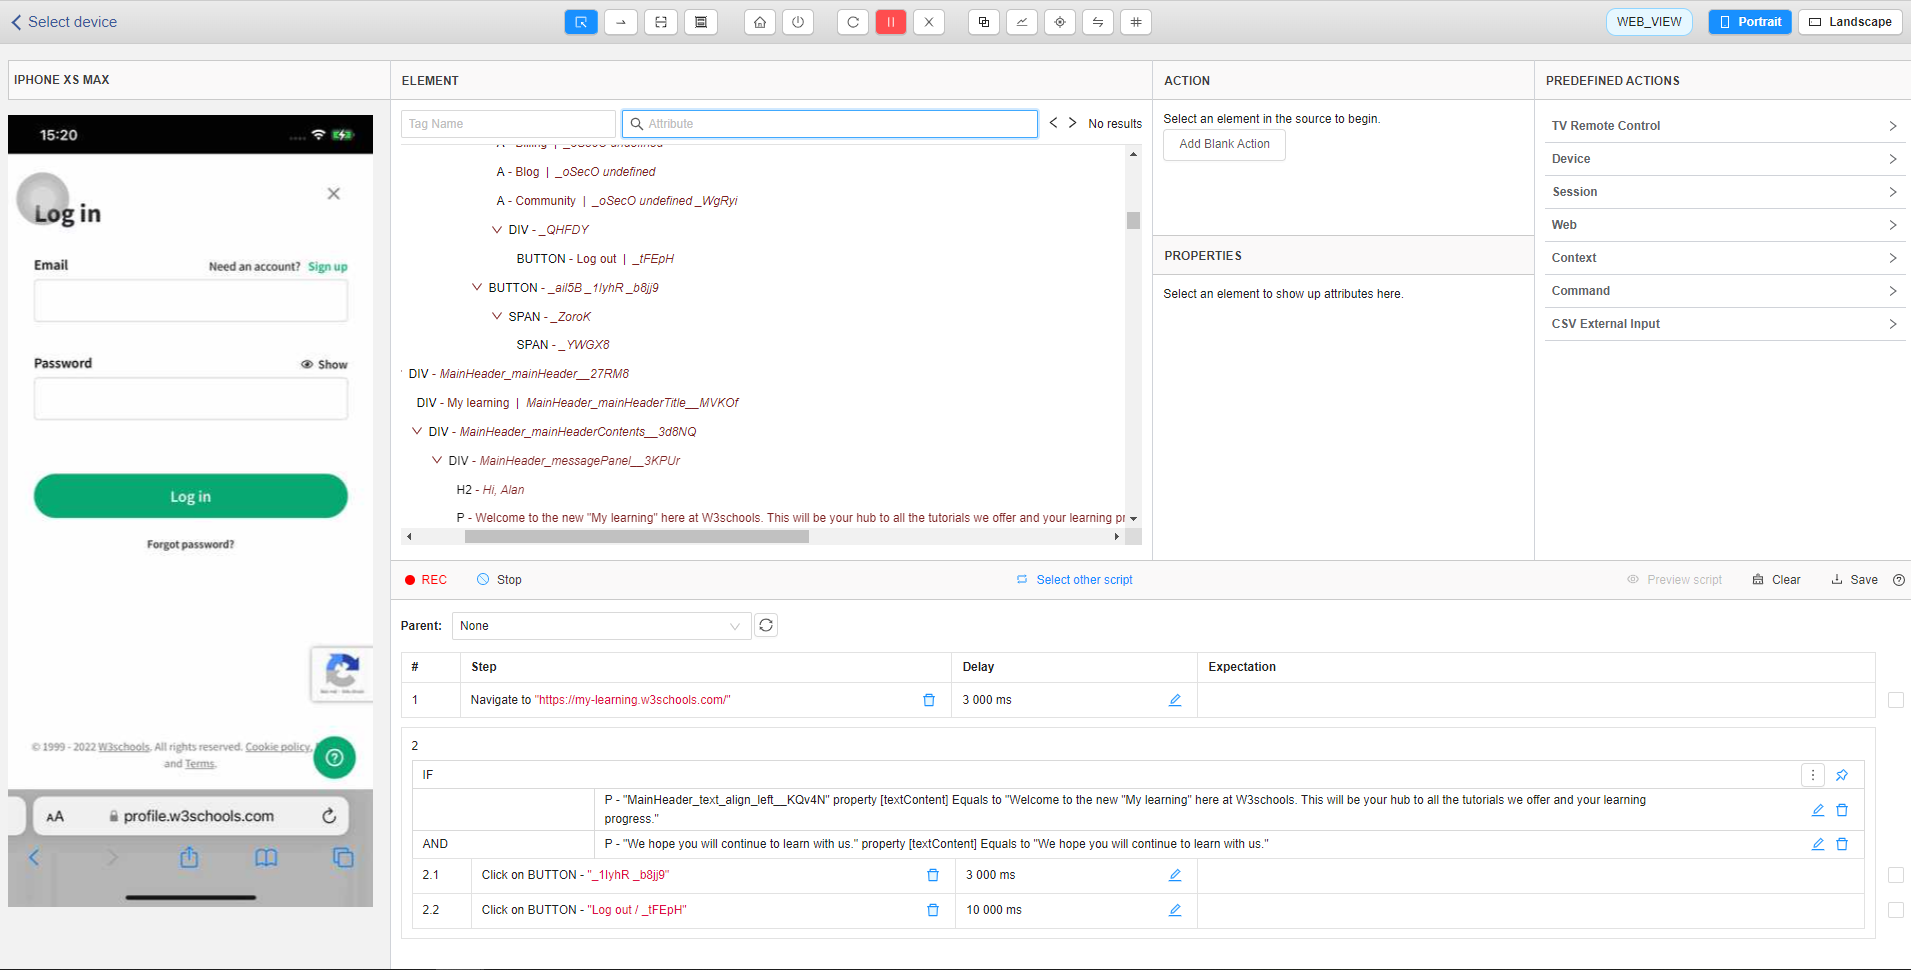
When creating test scripts with WEB_VIEW, the streaming screen will not highlight the element like when creating test scripts with NATIVE_APP. However, users can find the element in the source code or inspect the website then search for the source in Studio.
Method 1: Input text into textbox Attribute to find element
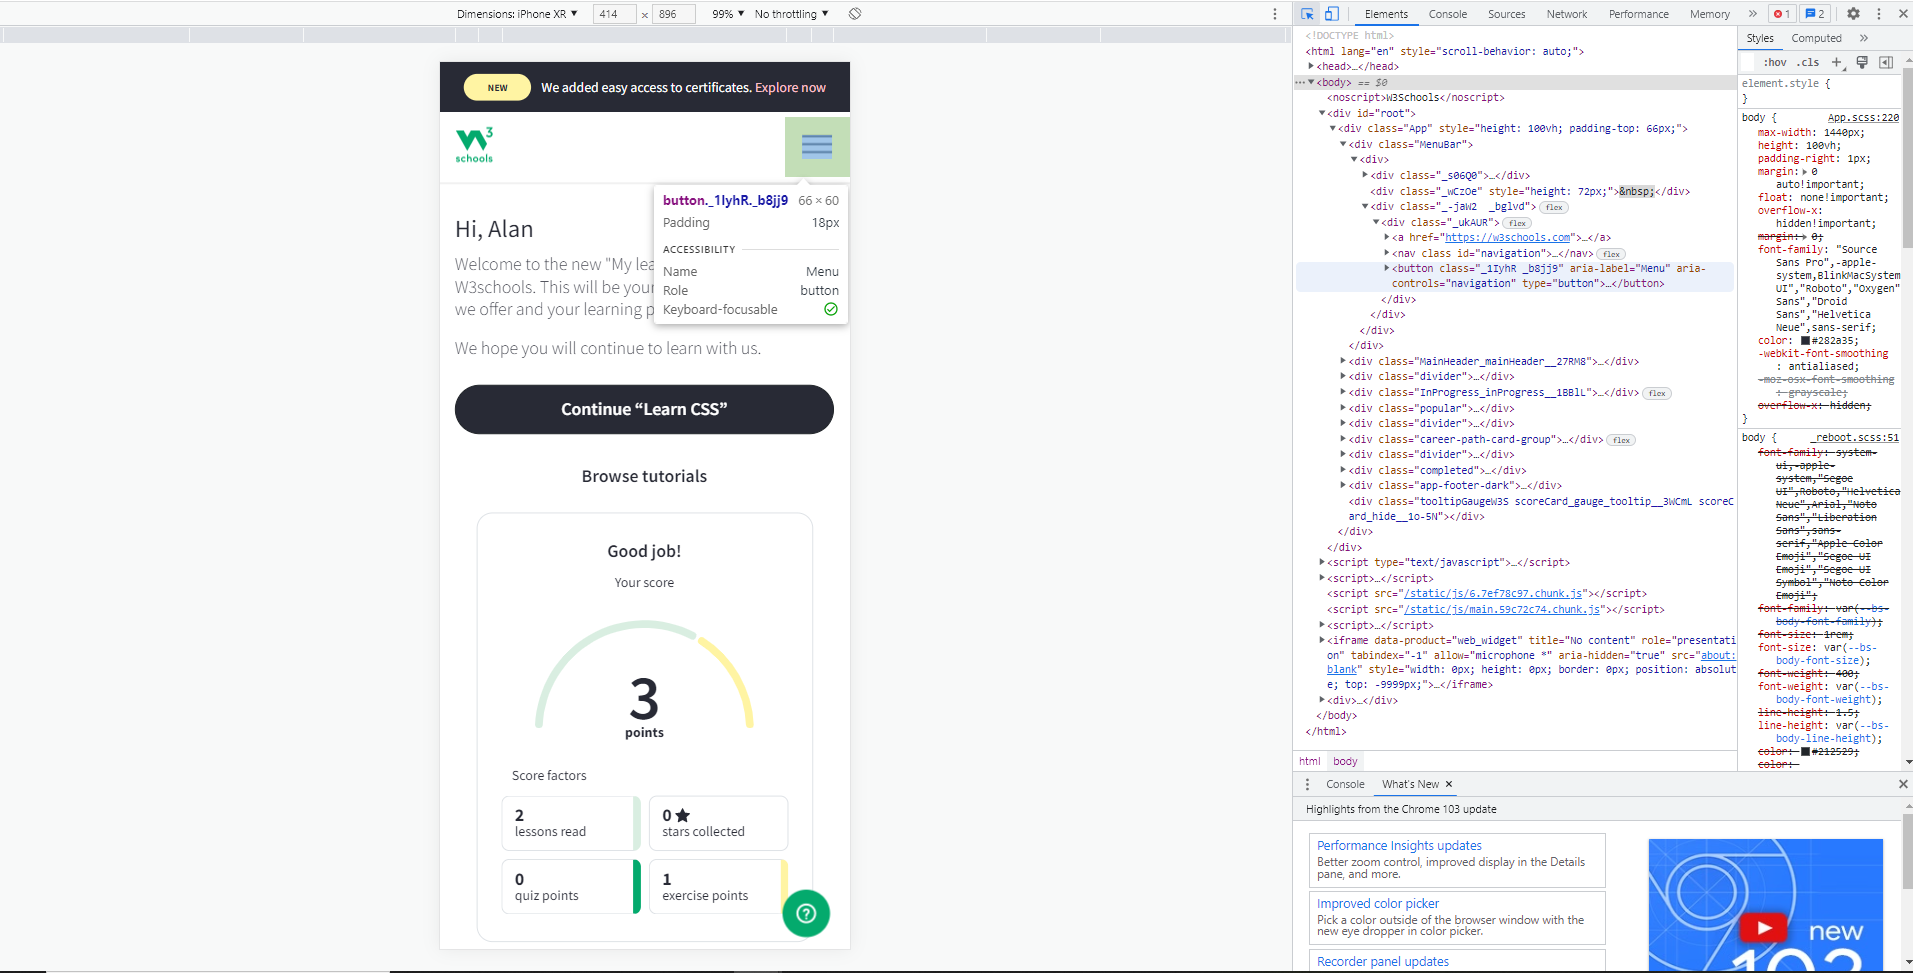
Method 2: Inspect on the tested web then users copy the ID or xpath of the element which you want to click, then paste this element into textbox Attribute to find element. This element will be highlighted.
After you find element of icon on the source code, you will click on Tap action to execute clicking step.
After performing the above actions, the step will be recorded as shown.
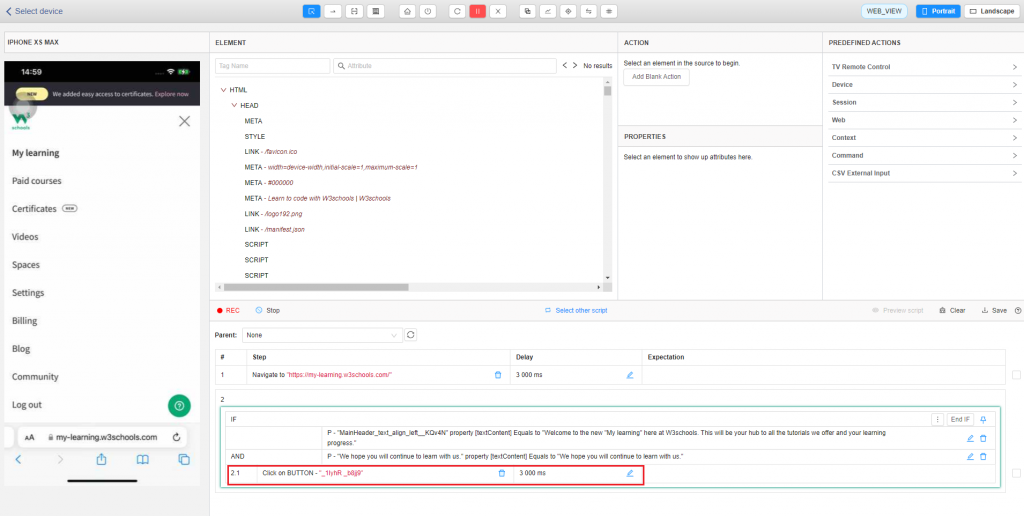
The [Log out] button is displayed, the users find the Logout element then click on the Tap action.
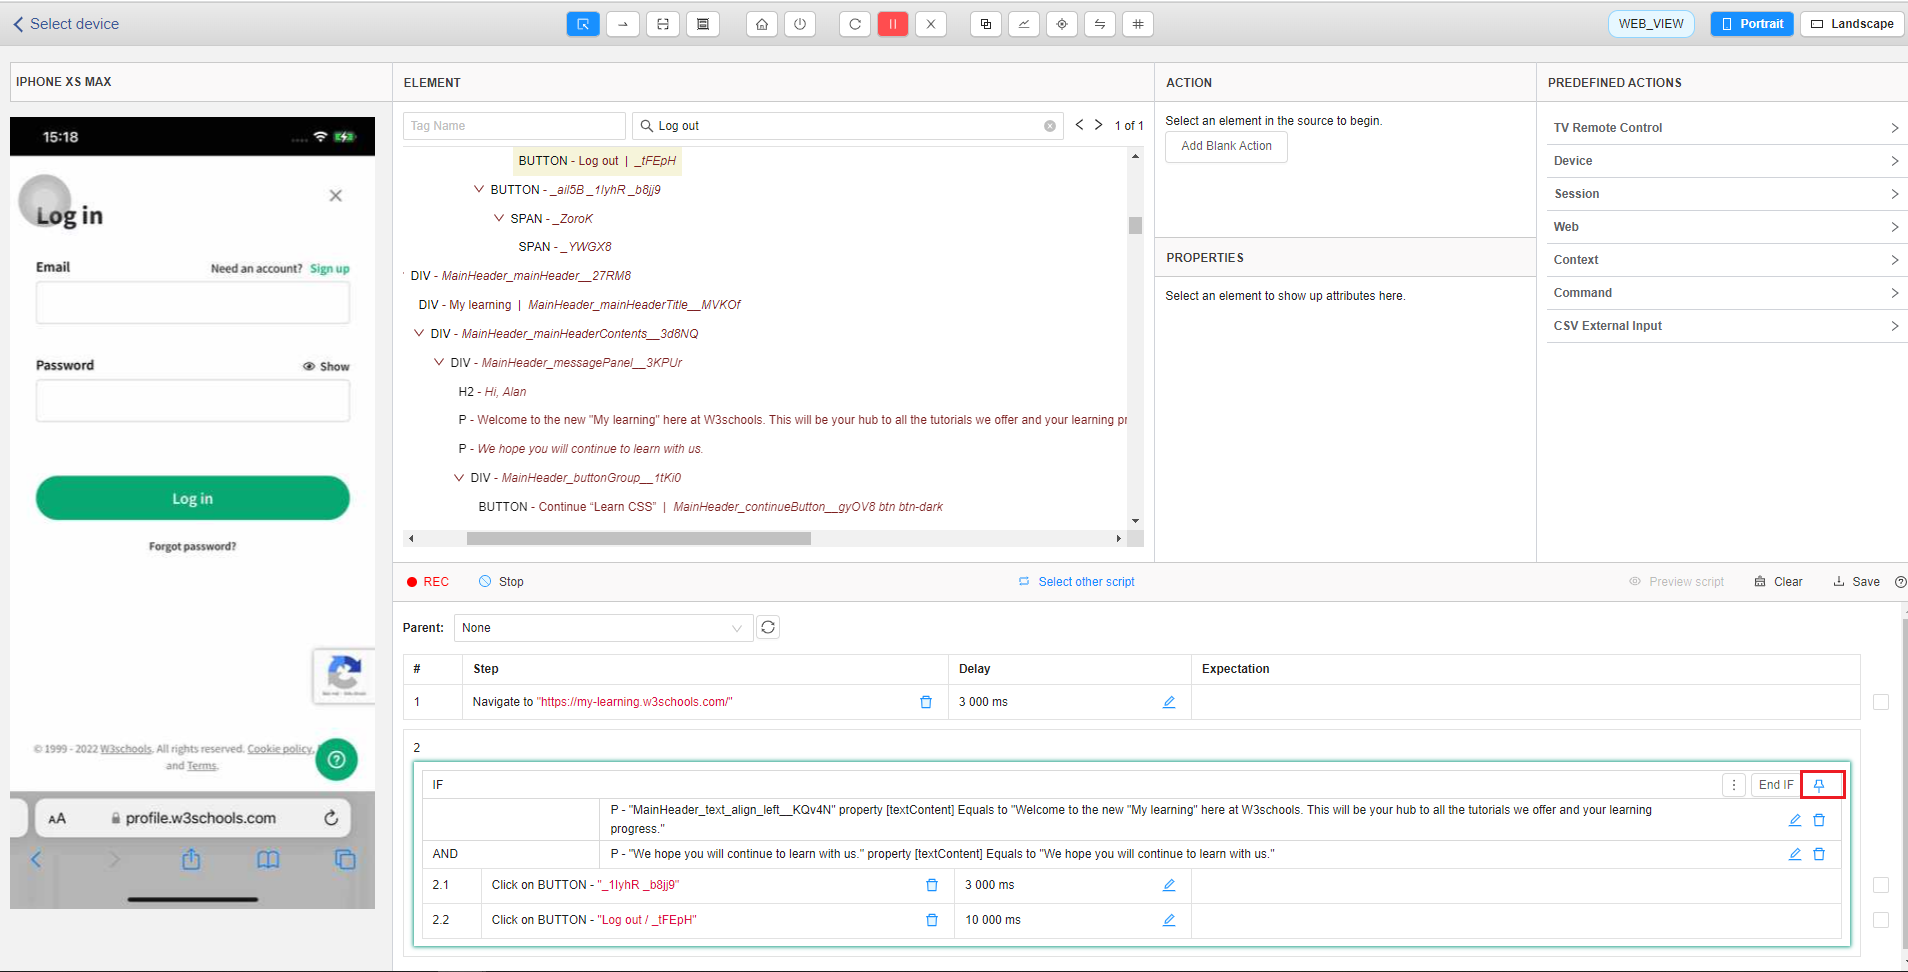
Because the delay of the Log out step takes a long time to execute, it will increase the time compared to the default time. Users click edit icon to edit delay time.

After completing the IF block, you select the icon  so that the operation of next step will be recorded outside the IF block.
After logging out of the website, the login screen will be displayed.
To enter text into the textbox, select the textbox and select the Send keys action. Pop up Send keys will be displayed, you will enter the text needed to enter into the textbox and then click button Send keys.

You perform the same with the Password box.
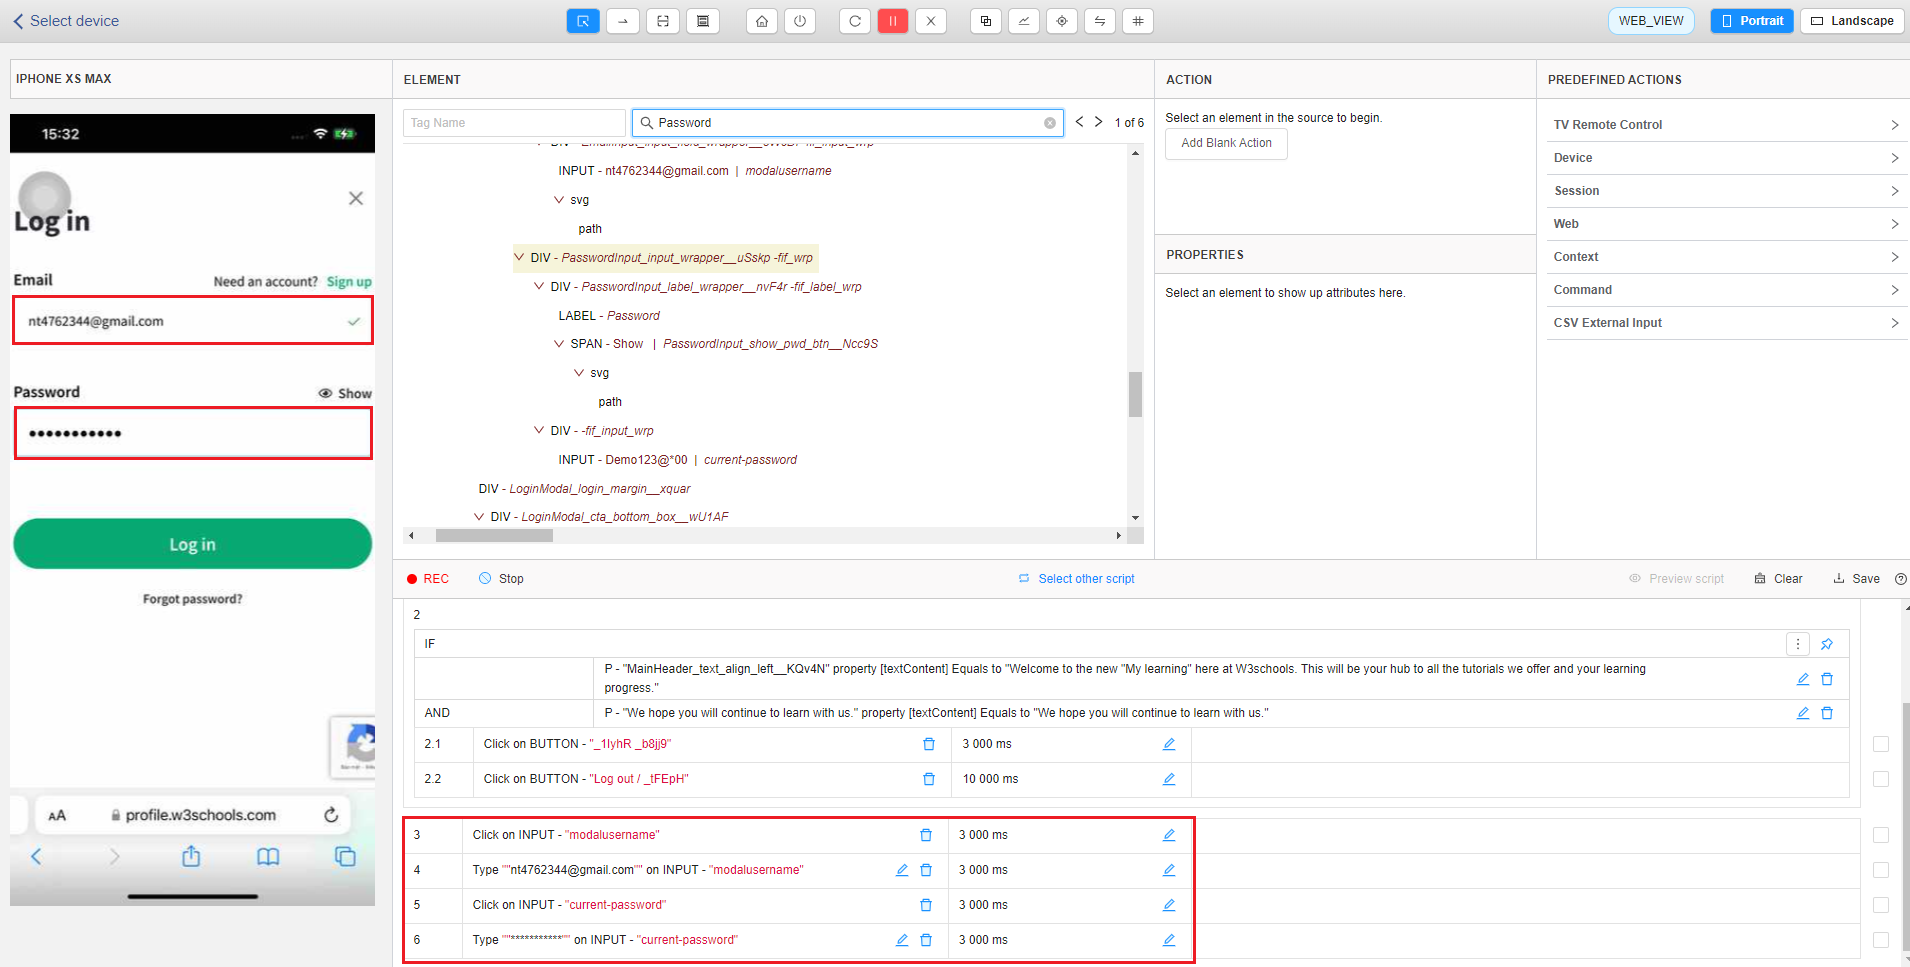
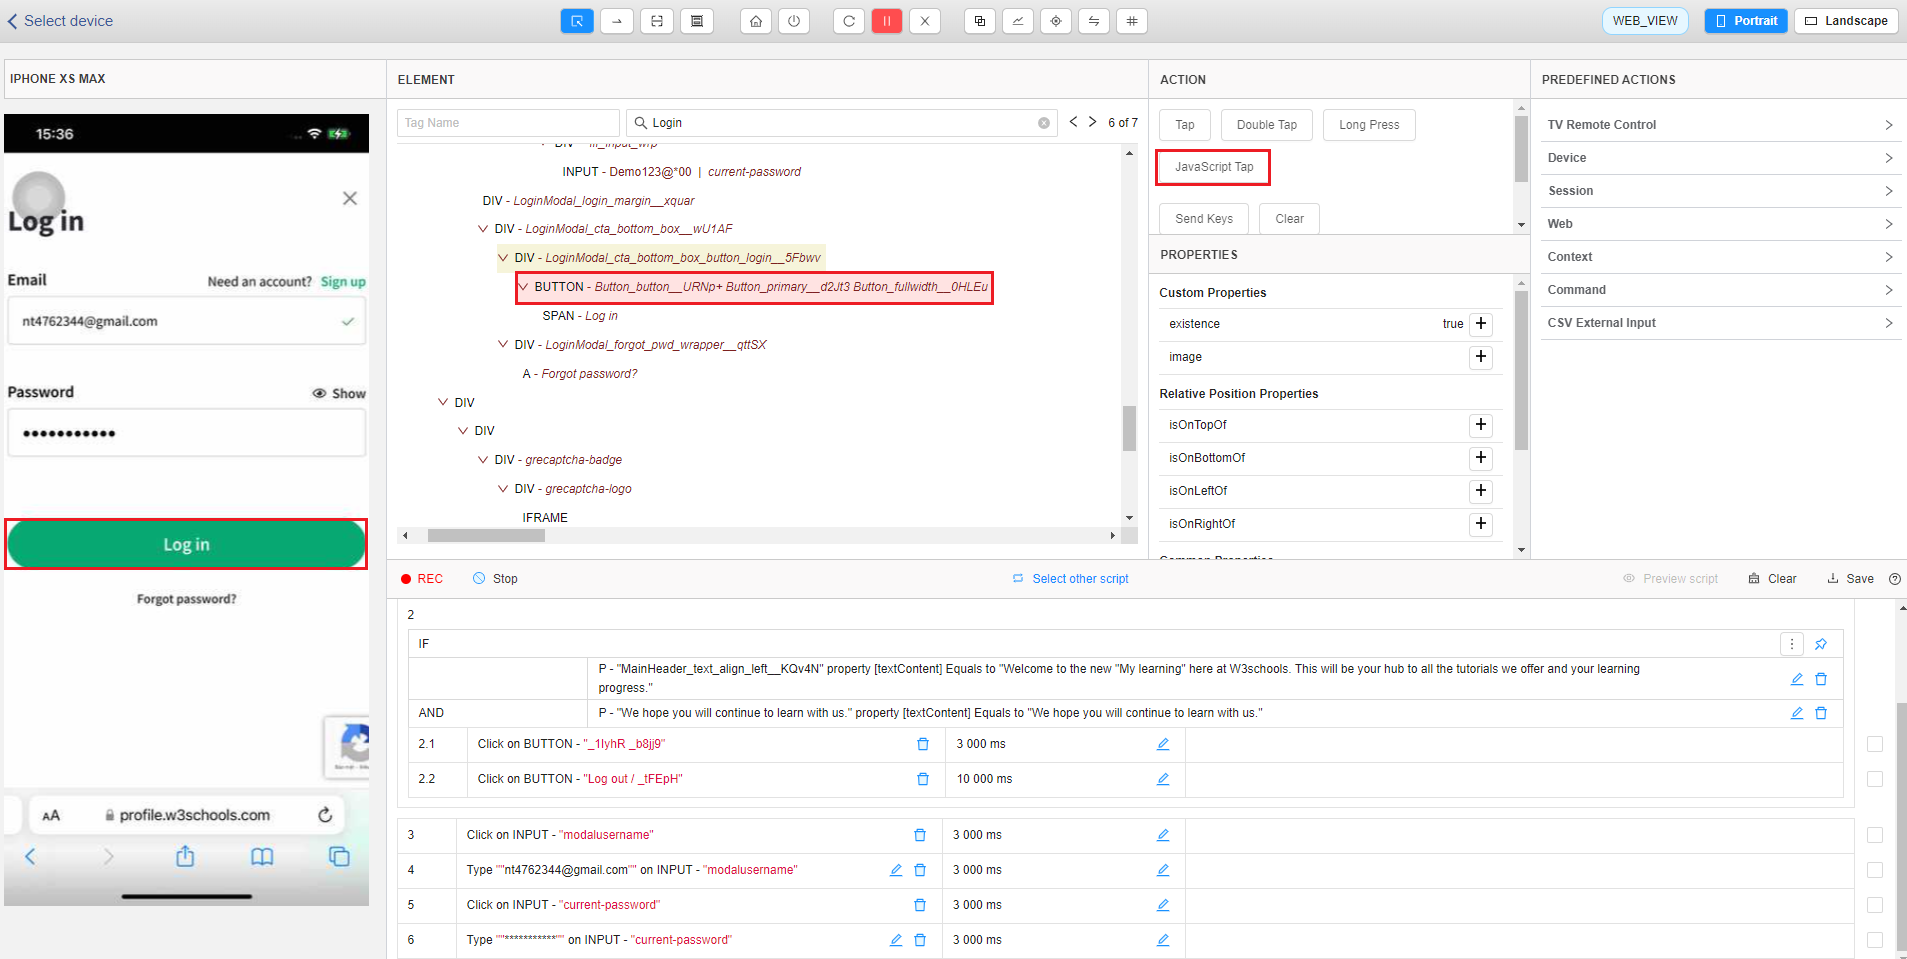
After that, the users select the Login button on the Source code then click [Javascript Tap] action to perform the clicking step. The Login step also needs increasing the delay time.
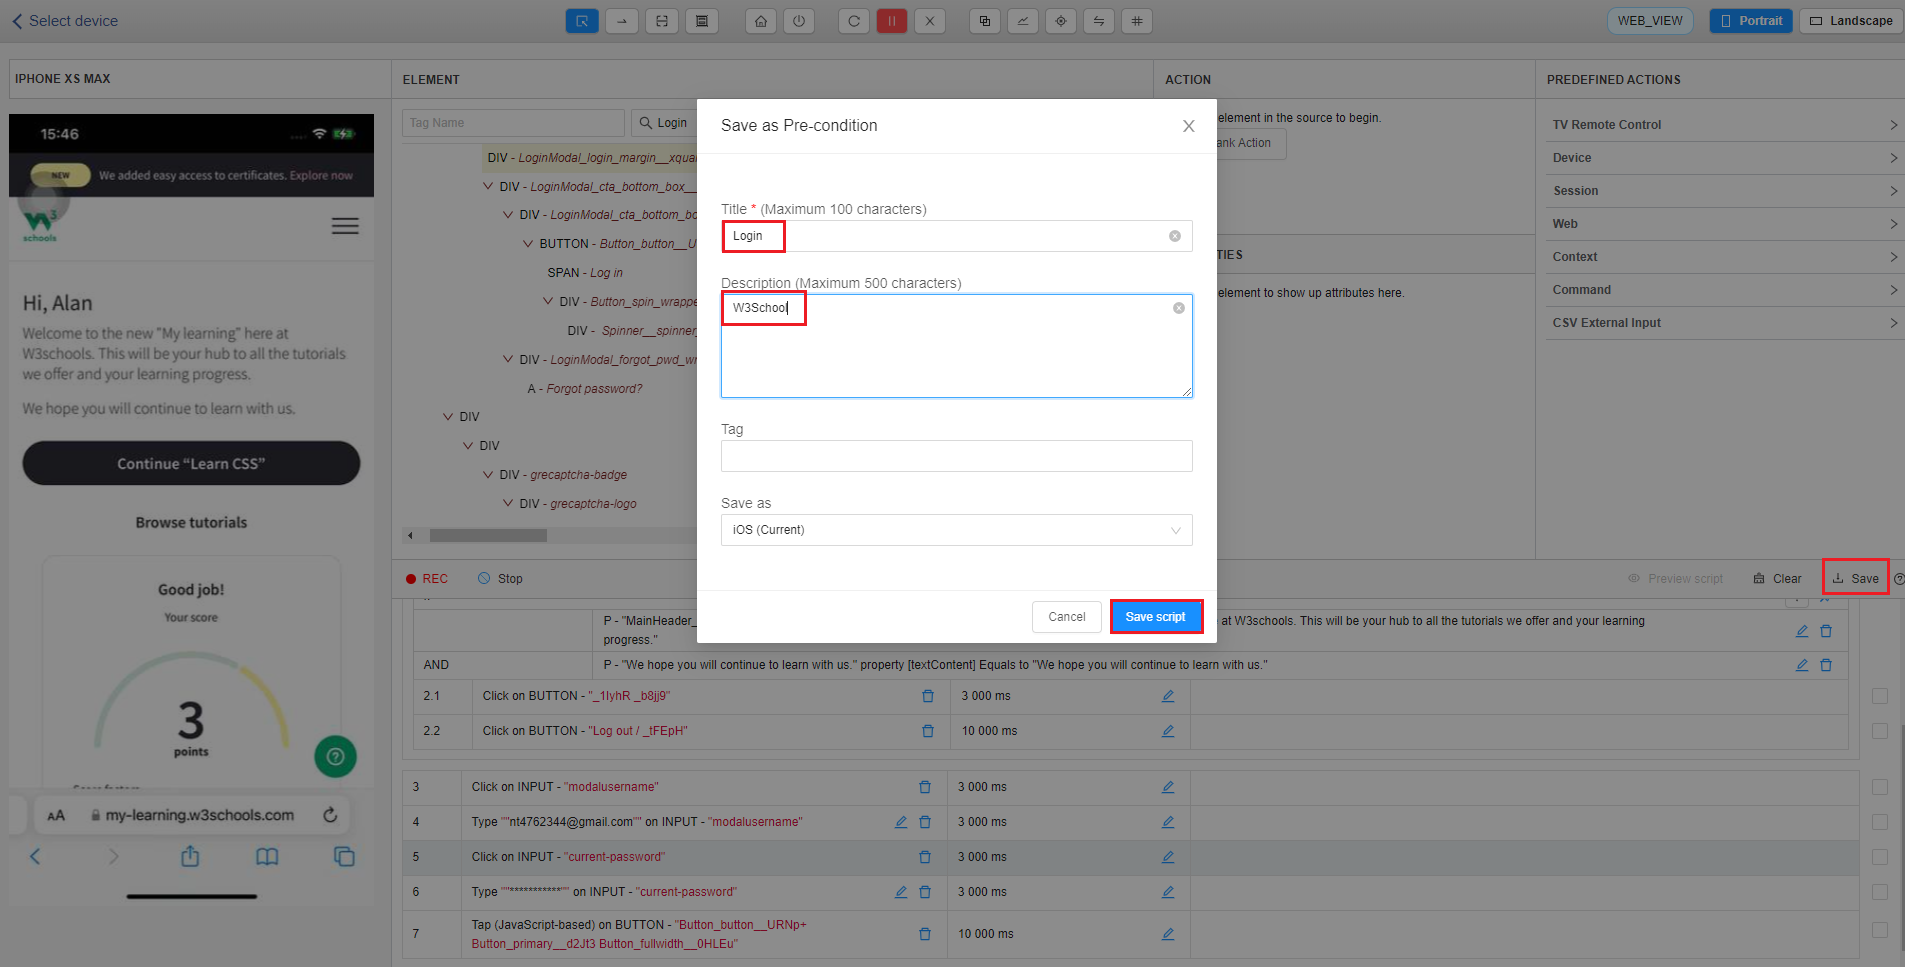
After finishing this precondition and you want to save, please select the Save button, then enter the title, description and click [Save script] button. Test Precondition has been saved, the successful popup will be displayed.
After creating precondition, the users will create a test script.
Create Test script
The steps for creating test scripts are similar to creating test preconditions.
Go back to Tester 4.0. select Manage Test Script tab -> Click Create Test Script with ATOMP Studio button and select device.
➢ Add precondition
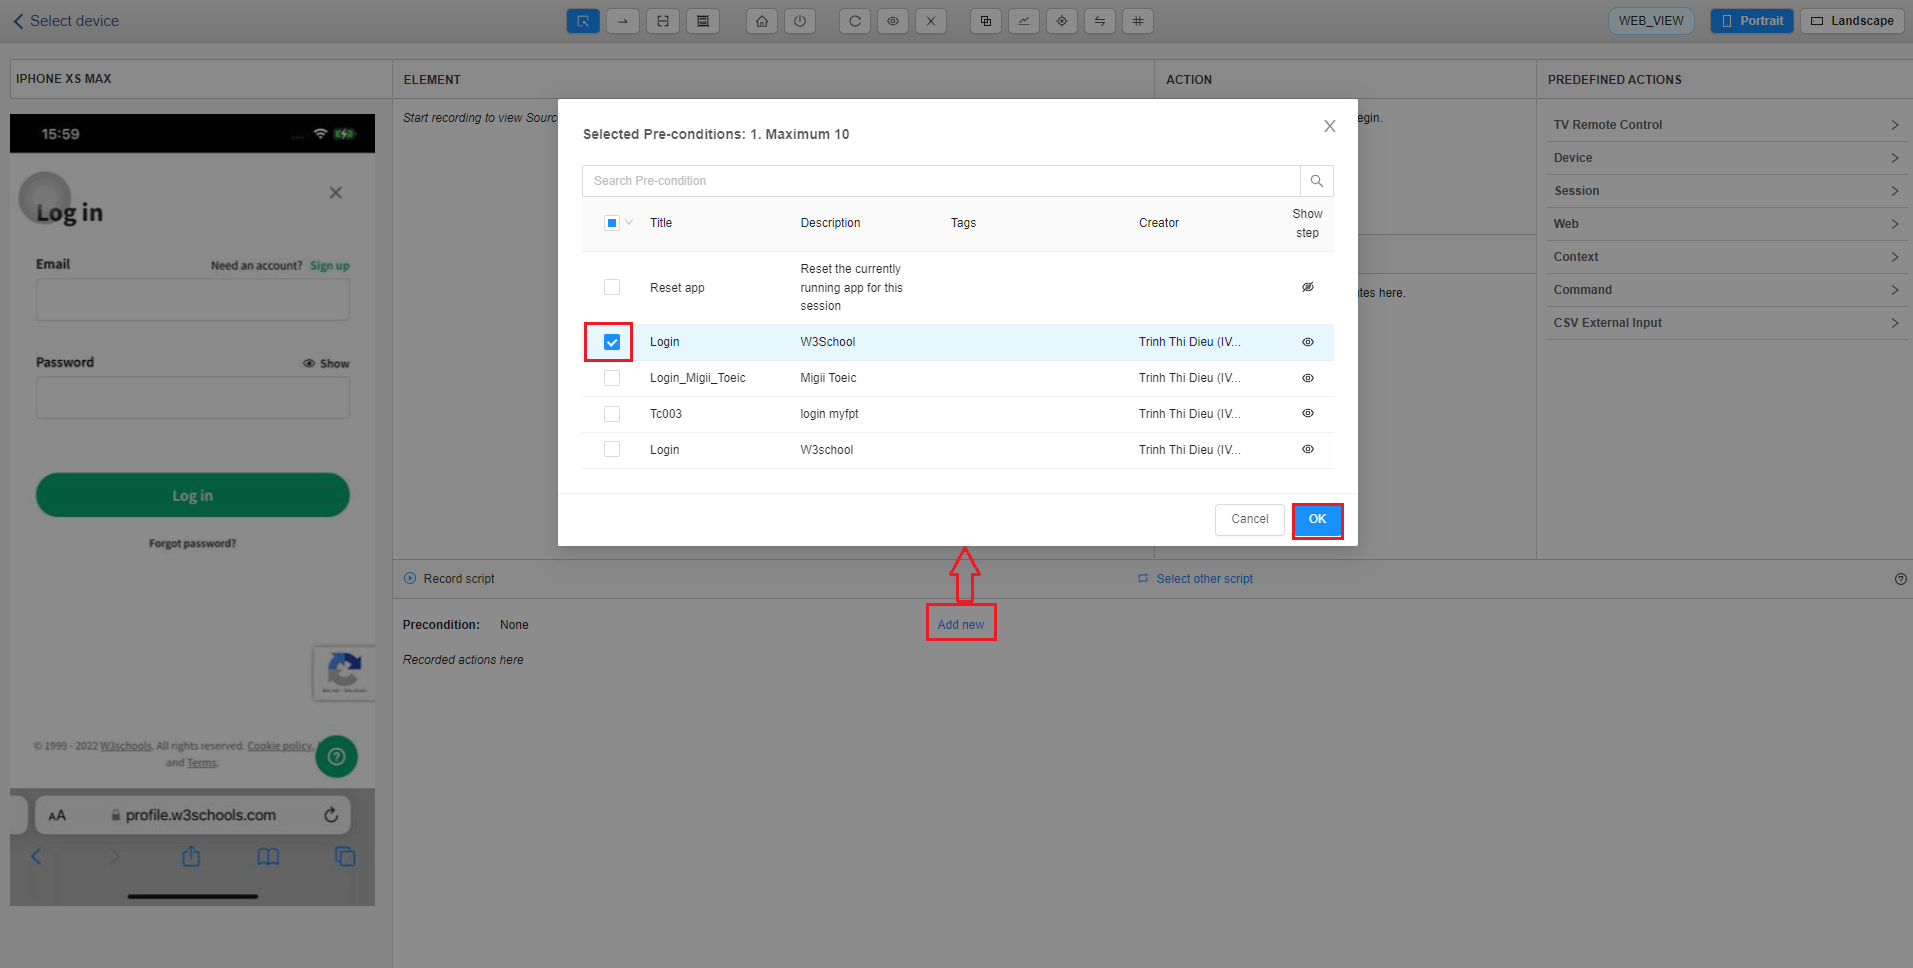
On the scripting screen, you will be able to select precondition to add precondition which saves time with test scripts with same precondition. For example, the Login test case just created is a precondition that can be reused with many different scripts.
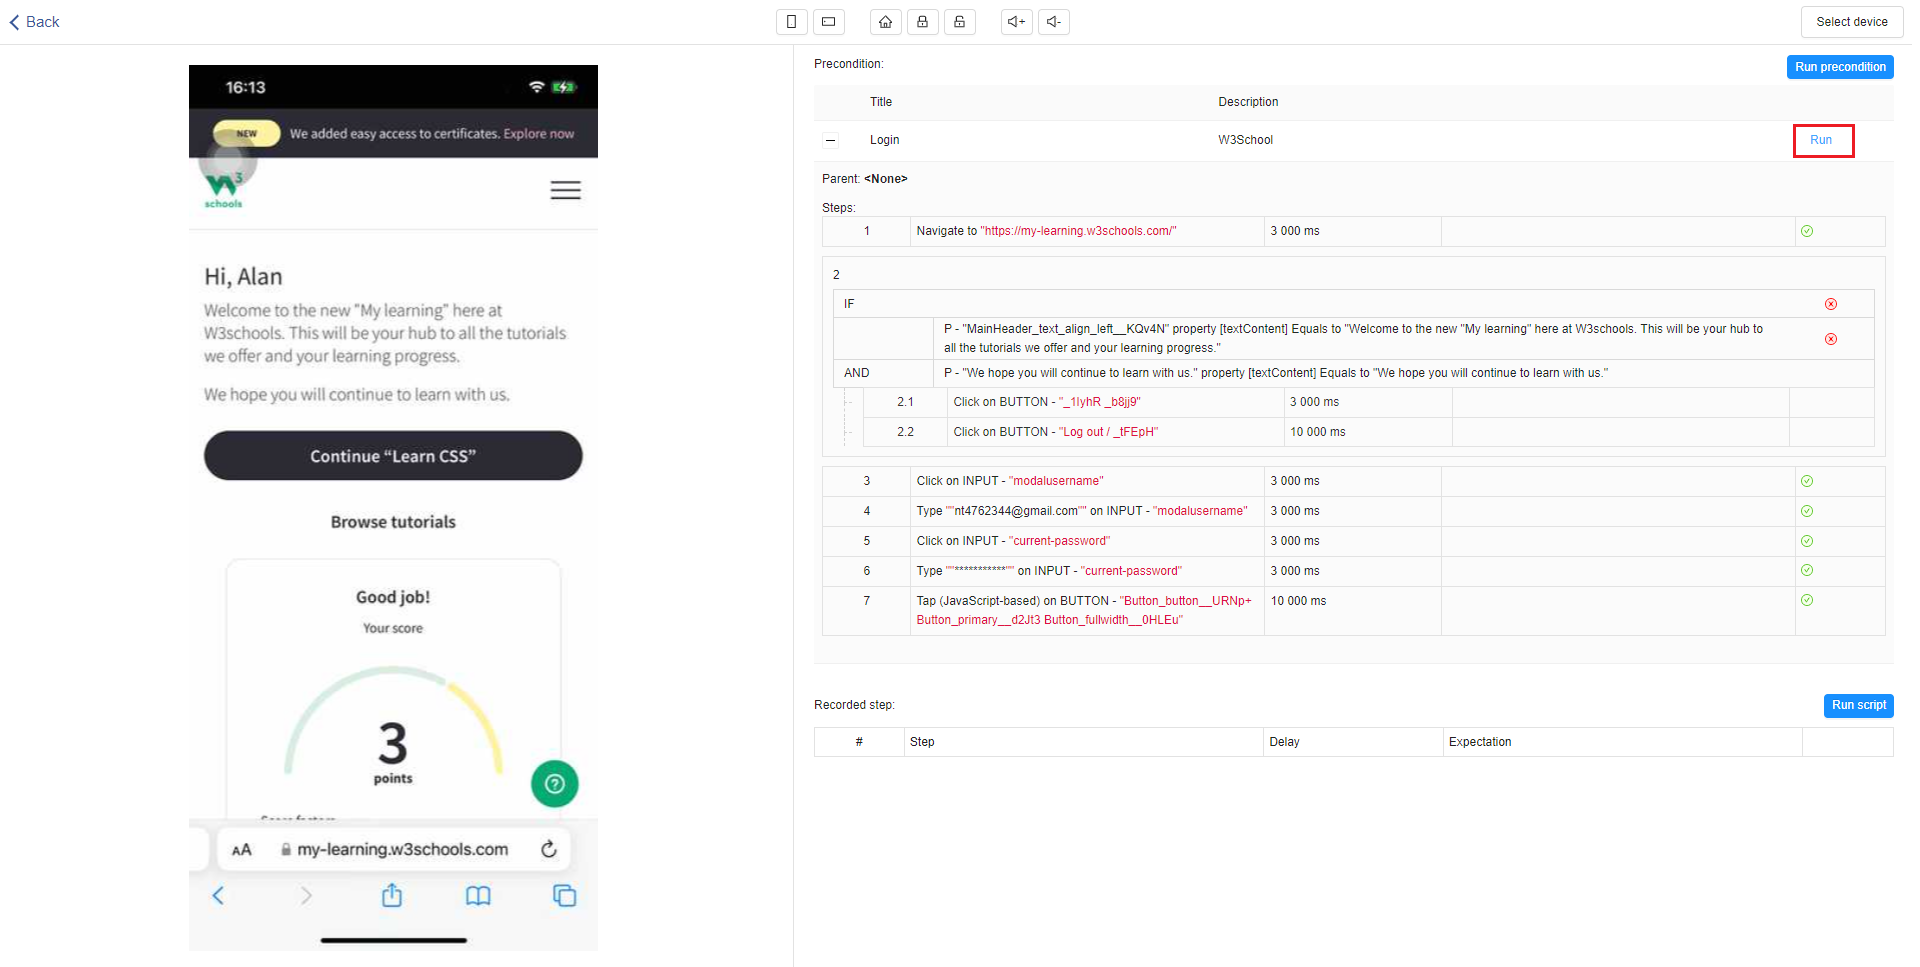
After adding the precondition, the precondition will help you open the desired screen to perform step 1, so you need to preview this precondition. After finishing the preview test precondition, the users need to return to the test script creation screen. To preview script, you must click on the [Stop] button to finish recording the test script. Then you can preview the created script from any available device by clicking on the [Preview script] button.

From this screen, users can preview the script from another device by clicking on the [Select device] button => Select device screen will be displayed. (The selected device for creating the script will be selected as default for preview) -> After selecting device, click the [Run] button to start previewing the script.
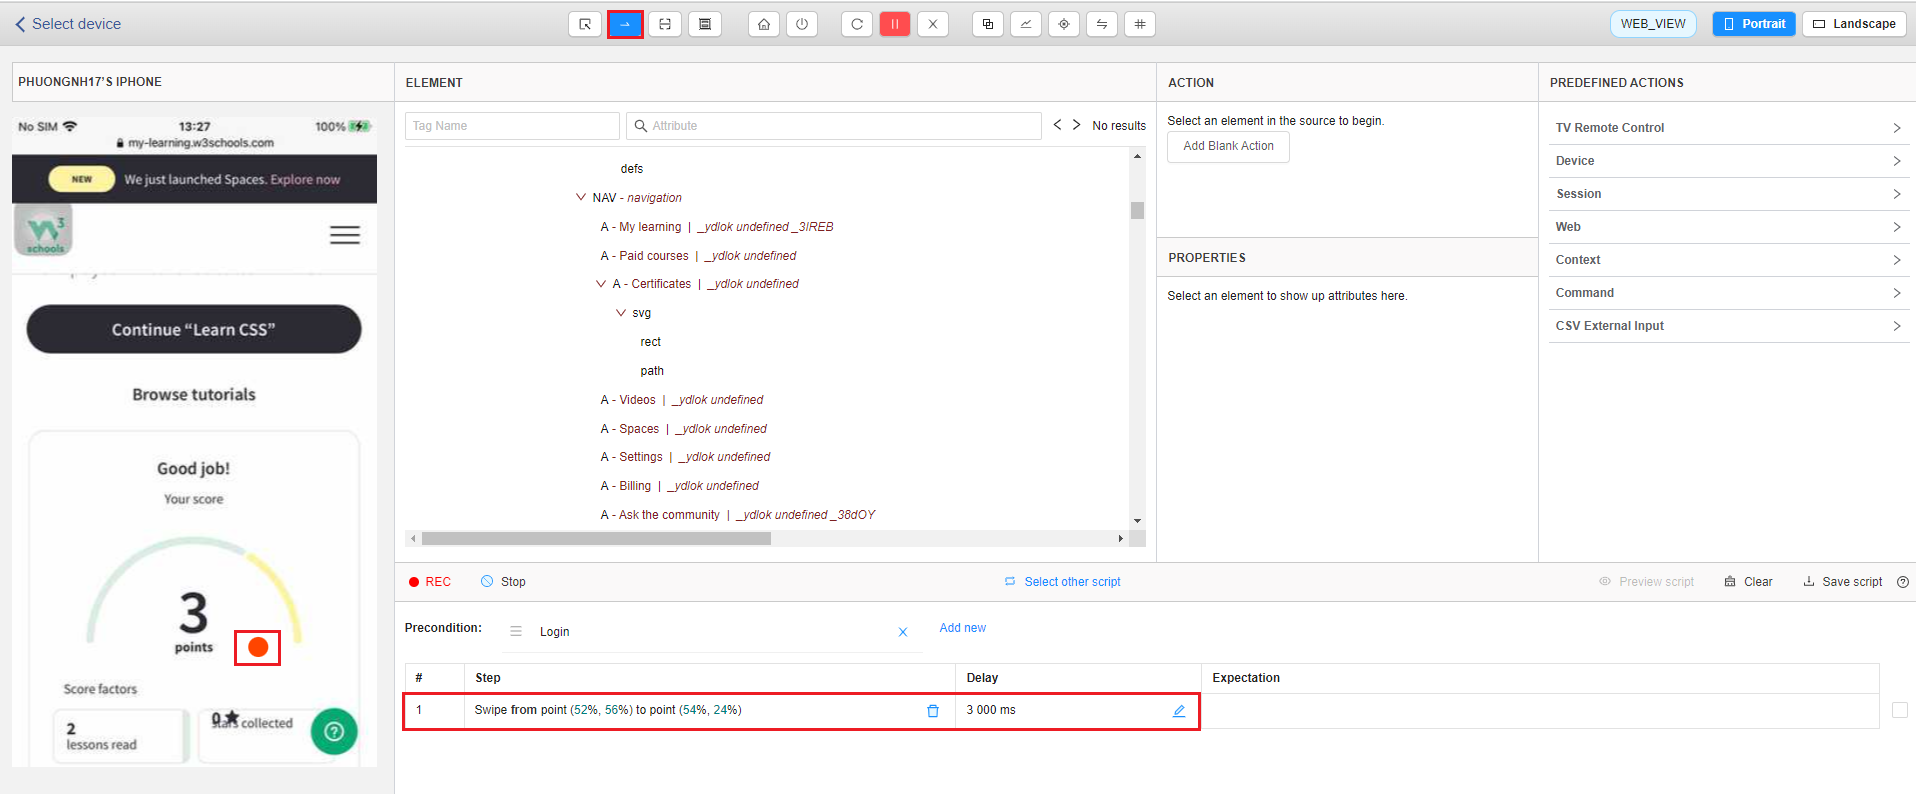
Before creating test script, select [Record script] button.
You need scroll down to display the in Progress item. You select the swipe button on the tool bar at the top of the screen to scroll the streaming screen. Select 2 points in the middle of the screen to scroll.
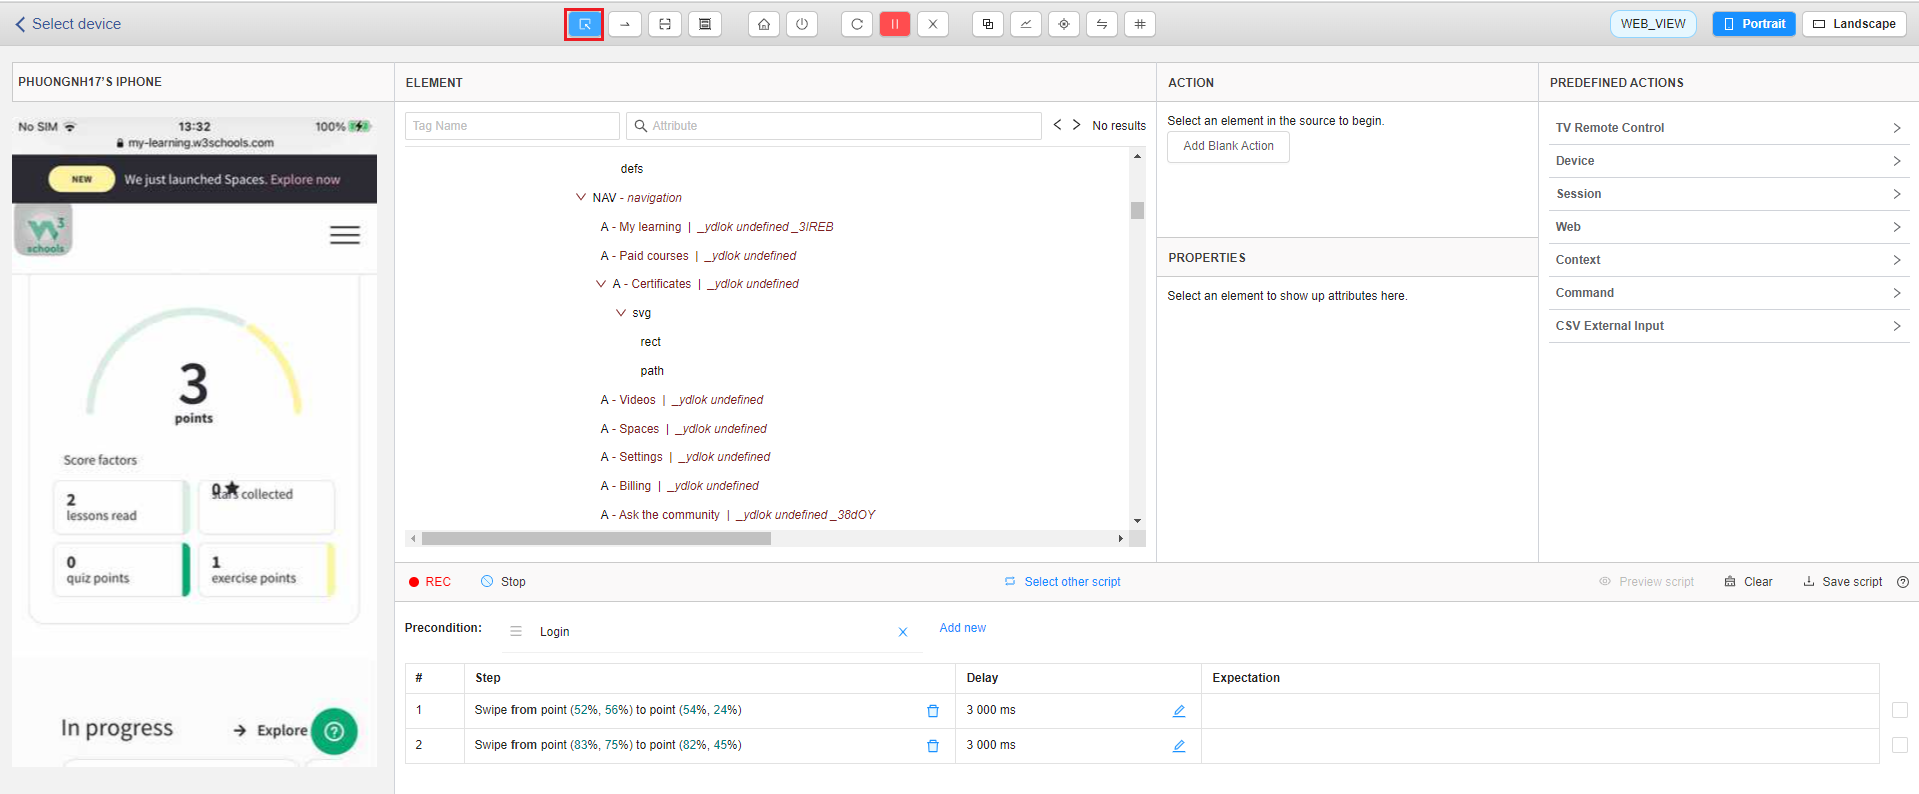
After displaying the explore all button, you need to select the select element button on the top toolbar again.
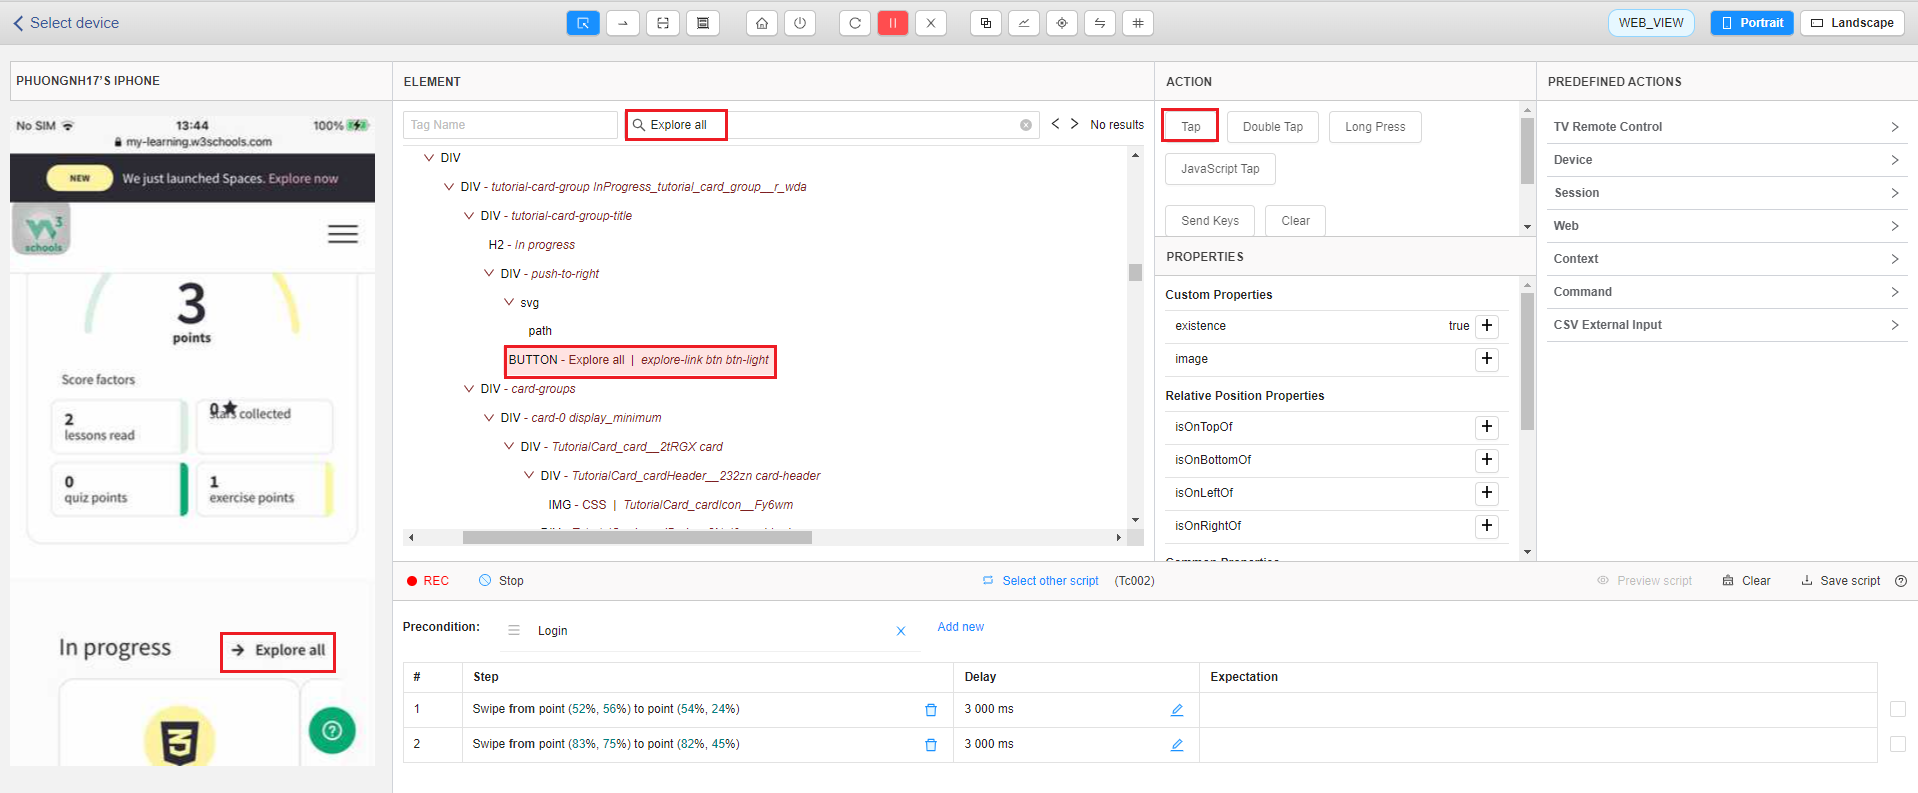
Search Explore all on the Attribute textbox. Button Explore all will be highlighted, you select that element and choose Tap action.
Select the Learn HTML element in the source code then select the Tap action.

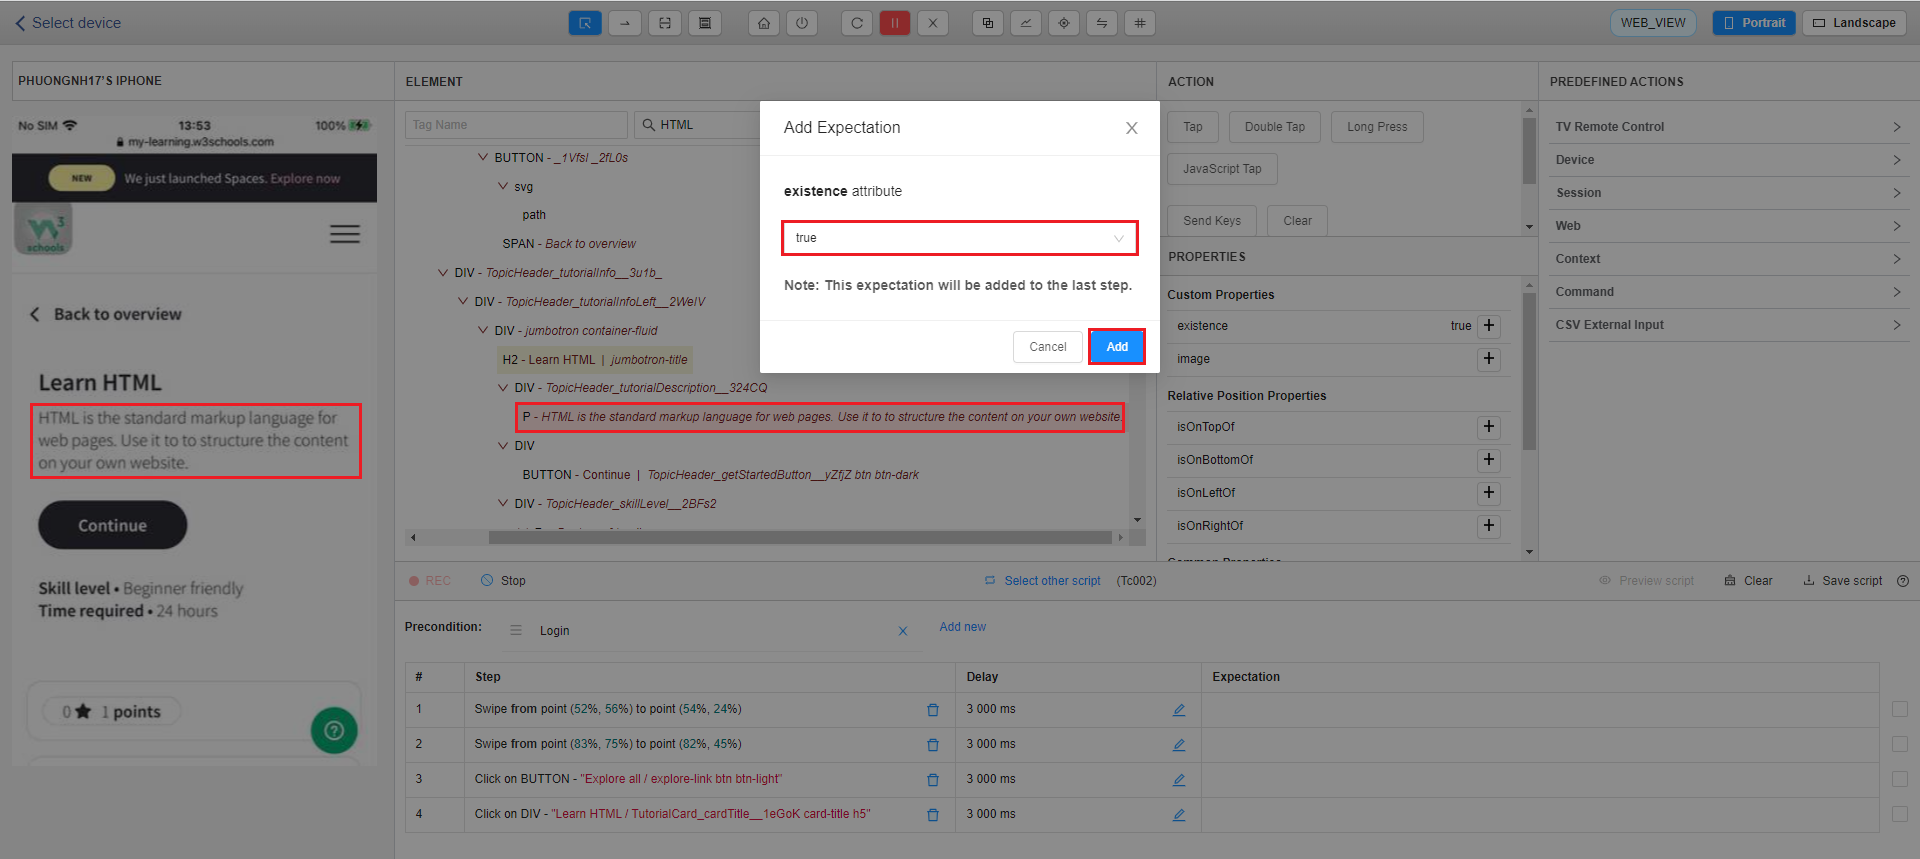
To create an expectation in order to check text “HTML is the standard markup language for web pages. Use it to structure the content on your own website.” is displayed, you find and click the P – HTML is the standard markup language for web pages. Use it to structure the content on your own website. element on the source code and then selects the + sign next to existence in Custom Properties. Then Pop up Add Expectation will be displayed then click the Add button. Expectation will be displayed.